
I LOVE LOVE LOVE MAC brushes. I can’t get enough of them, and I always find a reason to justify getting just one more brush. And just ’cause I can, here’s the list of all of the MAC brushes I’m jonesing for!
So … what’s on your brush lust list?
Makeup and Beauty Blog | Makeup Reviews, Swatches and How-To Makeup![]()
A beauty blog blooming with fresh makeup reviews, swatches and beauty tips from your friendly neighborhood beauty addict
I LOVE LOVE LOVE MAC brushes. I can’t get enough of them, and I always find a reason to justify getting just one more brush. And just ’cause I can, here’s the list of all of the MAC brushes I’m jonesing for!
So … what’s on your brush lust list?
 Product: MAC Select Moisturecover concealer in NW 25
Use: To cover dark circles
Price: $15.50 for a tube
Makeup and Beauty Blog Rating: B
This weekend I finally picked up some MAC concealer, Select Moisturecover in NW 25.
Select Moisturecover is the latest addition to my concealer arsenal. I’m a concealer junkie, and currently I’m rotating Make Up Forever’s Lift Concealer in Dark Beige 2 with Biotherm’s Forget It Concealer in 30.
I decided to try using a pink-toned concealer because at the MAC seminar I attended a few weeks ago, the instructor told us that most people (even those with yellow undertones) should wear a pink-based concealer underneath their eyes. Also, in this month’s Allure there’s a brief feature on Bobbi Brown, and she suggests wearing a pink-based concealer underneath a yellow-based concealer.
I really like the color of Select Moisturecover concealer on my skin. I was afraid that the pink tones would make it look obvious, but the pink tones really seem to cancel out the dark circles. It has a good consistency — not too thick, not too thin — and I like the doe foot applicator. Plus, when I blend it in with the 252 Large Shader Brush it looks great!
However, the looking great part doesn’t seem to last long. Unlike Biotherm or Make Up Forever’s concealers, which don’t budge and can last throughout a sweaty dance class, within a few hours I Select Moisturecover starts to slip off my face. Ugh! My concealer quest continues.
The fact that I can make it work when I layer one of my other concealers over it saves this concealer from a lower rating. I plan on keeping it because I like the color so much.
If your skin isn’t as oily as mine you might really like this concealer. And if you’ve got dark circles then you might want to try a pink-toned concealer, I think it really works wonders.
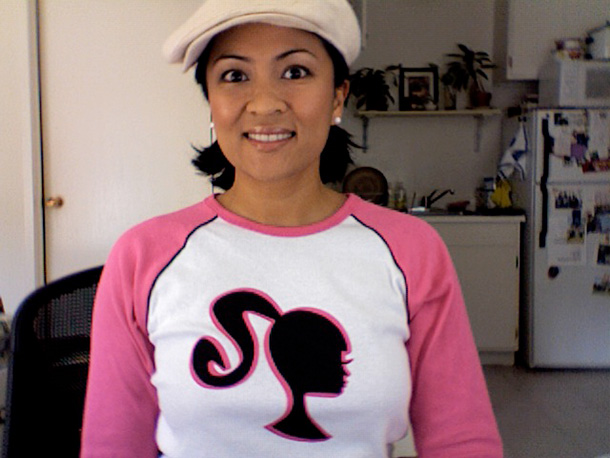
Remember that song from the 90s by En Vogue, “Never Gonna Get It”? That’s how I feel about my current Barbie Loves MAC T-Shirt situation. I was really hoping to snag one of these cute tees because they’re so cute, so pink and so my style! So when I went to the site a month ago and saw that they still had them available online I jumped on it and purchased one. A few hours later I got an e-mail from MAC saying that the shirts were on backorder, and that they’d ship me one once they had enough stock. (And ironically, the e-mail was signed by a service rep named Barbie, ha ha ha.)
This past Friday (and one month later) I got another e-mail from MAC saying they still can’t ship the shirt, and if after 30 days they can’t fulfill the order, they’ll have to cancel the order unless I write them and tell them to keep the item beyond 30 days. ARGH! I’m never gonna get this shirt!
(UPDATE: As you can see, I eventually got the shirt!!! 🙂 )
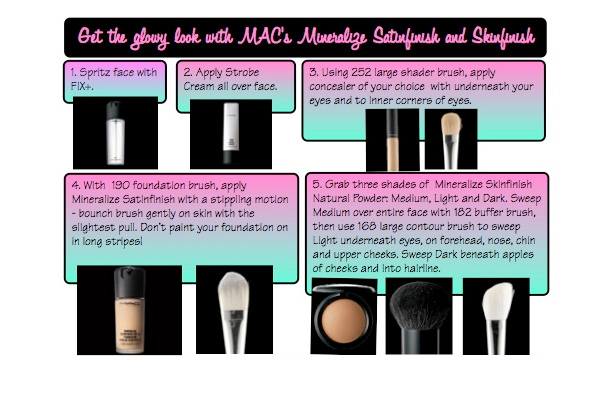
This weekend I headed over the MAC counter to try the new Mineralize Satinfinish foundation and the artist who worked on me showed me how to use the Mineralize products to get a glowy, J. Lo look. I like having the added dimension of some shimmer in comparison to a flat, matte, look, but I have pretty oily skin so I’m really picky about what shimmer products I use; otherwise, I end up looking like a greasy disco ball if there’s too much glitter. If you like the foundation and the powder consider taking these extra steps because the finished look is really pretty. It gives just enough glow without being too over the top.
Here’s a step-by-step tutorial on what she did and the products she used:
2. She then used the 190 Foundation Brush to apply Strobe Cream over my entire face. You don’t have to use the brush to apply this cream; if you don’t have one just use your fingers.
3. She then mixed Fast Response Eye Cream with Select Moisturecover concealer, and then applied the mixture with the 252 Large Shader Brush. (Although I liked the texture of concealer mixed with eye cream, I didn’t think it gave me enough under eye coverage, so if I were to repeat this look again I’d leave out dilution of the concealer.)
4. She then pumped some Mineralize Satinfinish SPF 15 Foundation onto a Petri dish. (MAC artists sometimes use Petri dishes because the glass doesn’t transfer bacteria. You can pump the foundation onto the back of your hand, just make sure you either wash them really well or use Purell before putting products like foundation — or any other product – on the back of your hands to avoid transferring bacteria onto your face.) She then used the 190 Foundation Brush to apply Mineralize Satinfinish with a stippling motion onto my face. To stipple, you take the brush (hold it towards the end, like a chopstick) and bounce it gently on your skin and give it the slightest pull. Whatever you do, don’t paint your foundation on in long stripes.
5. She then grabbed three shades of Mineralize Skinfinish Natural Powder: Medium, Light and Dark. She applied Medium over my entire face with the 182 Buffer Brush. She then applied Light with the 168 Large Contour Brush to highlight underneath my eyes, across the forehead, down the nose, on the chin and then across the tops of my cheeks. With the same brush, she then contoured my cheeks by applying the Dark shade underneath the apples of my cheeks and up into the hairline.
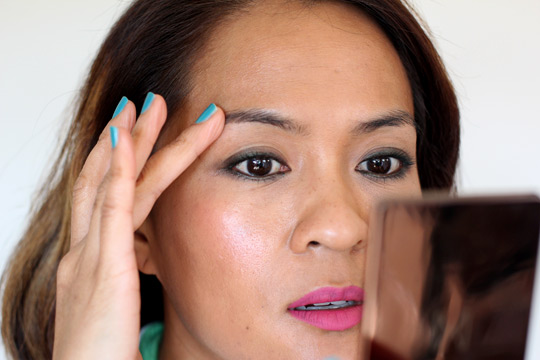
Voila! You’ve got the glowy look! Watch out, J. Lo! 🙂
Here’s the last of the tips and tricks from my technique binder.

More handy dandy tips from the Barbie Loves MAC Seminar!
Your friendly neighborhood beauty addict,
Karen
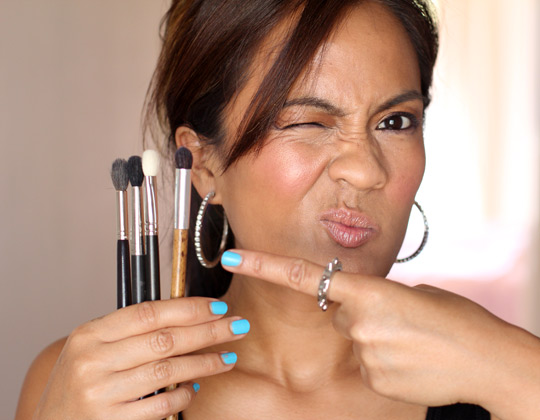
I’m getting so much mileage from the Barbie Loves MAC Seminar I went to a few weeks ago. I finally rifled through the technique folder they gave us and found some cool tips and tricks pages. Here are the best tips from the page for brushes:
When choosing brushes consider the following…
Your friendly neighborhood beauty addict,
Karen
 Product: MAC 182 Buffer Brush
Use: For application of loose powder, pressed powder and pigment
Price: $45.00
Makeup and Beauty Blog Rating: B+
I know, I know — $45 for one stinkin’ brush? For $45 dollars at the MAC counter you can get 3 eye shadows, or 3 Lipglasses or even 15 pencil sharpeners! If you wear powder every day, then consider investing in this brush. Save your pennies, wait until you get a gift card, or even ask a friend who is a MAC artist buy one for you and then pay her/him back, because this brush will become a staple in your collection.
I was lucky enough to get the 182 Buffer Brush as a Christmas gift from my beautiful and talented sister-in-law, who is a MAC makeup artist. The brush has a short, fat handle and a full dome made out of goat hair bristles.
And who knew that goat hair could feel so soft? The 182 bristles feel silky and dense, and when you apply product the brush feels like velvet on your skin. You can use this brush to apply loose powder, pressed powder and pigments, and I’ve found it to be pretty much a fool-proof brush. Even if I mistakenly overload it with powder, as long as I dilute the powder (by either tapping the brush or blowing off the excess) the 182 gives smooth, even application.
I use the 182 Buffer Brush with MAC Select Sheer Loose Powder in NC 30, MAC Couture Sheer Mystery Pressed Powder in Dark and MAC Blot Pressed Powder in Medium Dark.
If I use Select Sheer Loose Powder, I open up the powder jar, tap some powder onto the lid, gently dip the 182 brush into the powder on the lid, and either tap brush handle on the side of the powder jar or blow on the brush to dilute excess powder.
If I use it with Couture Sheer Mystery Pressed Powder or Blot Pressed Powder, I gently swirl the 182 in the compact, and then tap the handle or blow off the excess powder.
I like powder to look light and sheer, so I use a light touch as I apply the powdered 182 brush to my face in a circular, buffing motion.
If it weren’t for the steep price I’d give this brush an A. Plus, if you keep your brushes in a brush roll, you may have to store the 182 in a separate cosmetic case when you travel because of the short handle.