• Skip to main content
  • Skip to primary sidebar

Makeup and Beauty Blog | Makeup Reviews, Swatches and How-To MakeupMakeup and Beauty Blog | Makeup Reviews, Swatches and How-To Makeup

A beauty blog blooming with fresh makeup reviews, swatches and beauty tips from your friendly neighborhood beauty addict

  • Home
  • About
    • About
    • Contact
    • FAQ (Frequently Asked Questions)
    • Advertising & Media
  • Categories
    • Product Reviews
    • Makeup
    • Skincare & Fragrance
    • Style & Fashion
    • Hair
    • Nails
    • Tips & Tutorials
    • Just for Fun
  • Brands
  • Store

MAC Cosmetics

MAC Brooke Candy for Fall 2015

August 25th, 2015 by Karen 15 Comments

Now, if you’re me, your first reaction to finding out about the new MAC Brooke Candy collection might have been, “Who the heck is Brooke Candy?” (I had to Google her.) I gotta hand it to MAC, because following their limited edition collaborations has been a good education in cutting-edge pop culture. My playlists are ever-expanding with new artists and performers.

I still have to listen to some of Brooke’s beats, but she seems kinda edgy…kinda raunchy, but raunchy can be hella entertaining sometimes (i.e. Lil’ Kim).

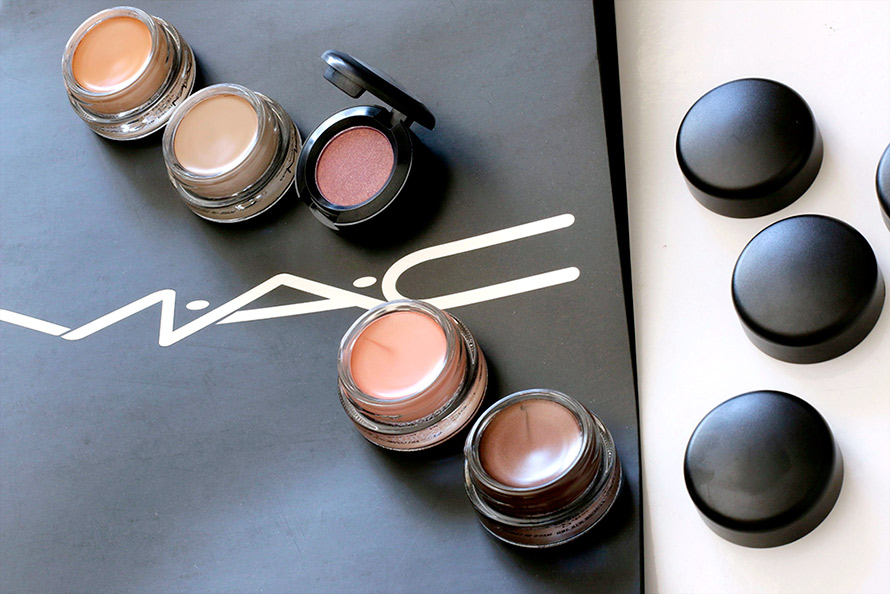
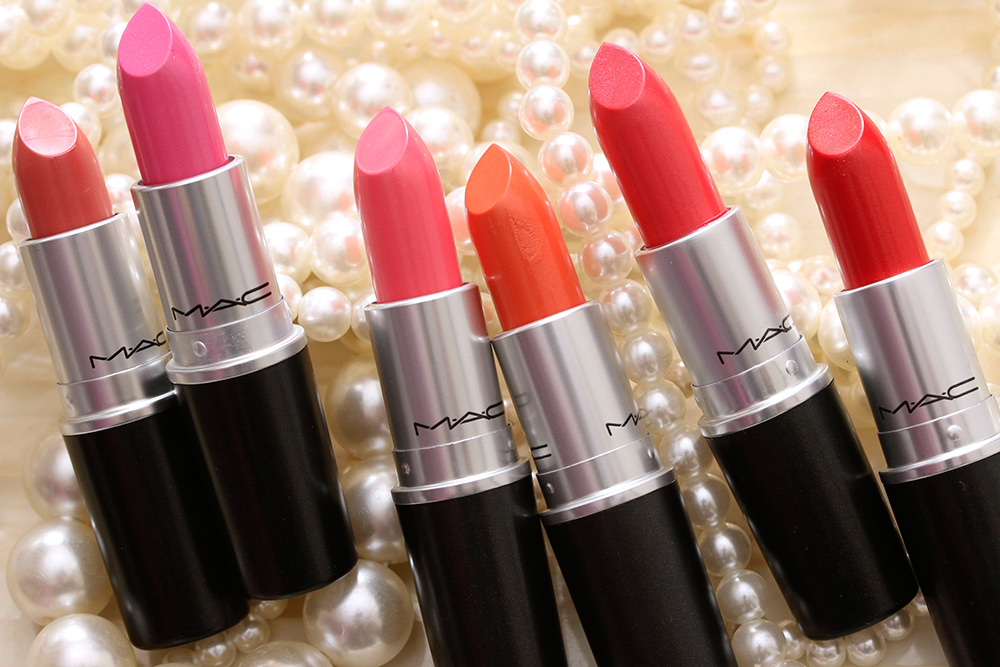
The new three-piece limited edition MAC Brooke Candy mini release arrives exclusively on the MAC website August 27, and since there are only three products, there’s not a lot to it — just two lipsticks and a liquid eye liner.

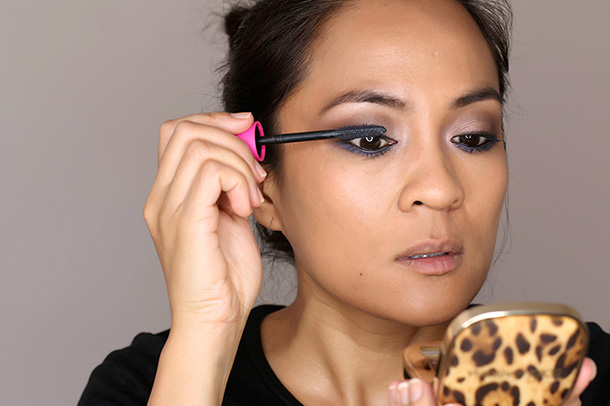
The lipsticks have an interesting formula called Amplified Cream, which is a little creamier and shinier than the regular Amplifieds, which I love, but the liquid eye liner, Boot Black, hmm… Of all the MAC liquid liner options, it’s my least favorite. Sucks that I can never get a crisp line with it, and it makes me feel like a 3-year-old trying to do liquid liner, or like liquid liner was put on this earth to torture me (“Liquid liner is your enemy, not your friend!”).

But I digress…

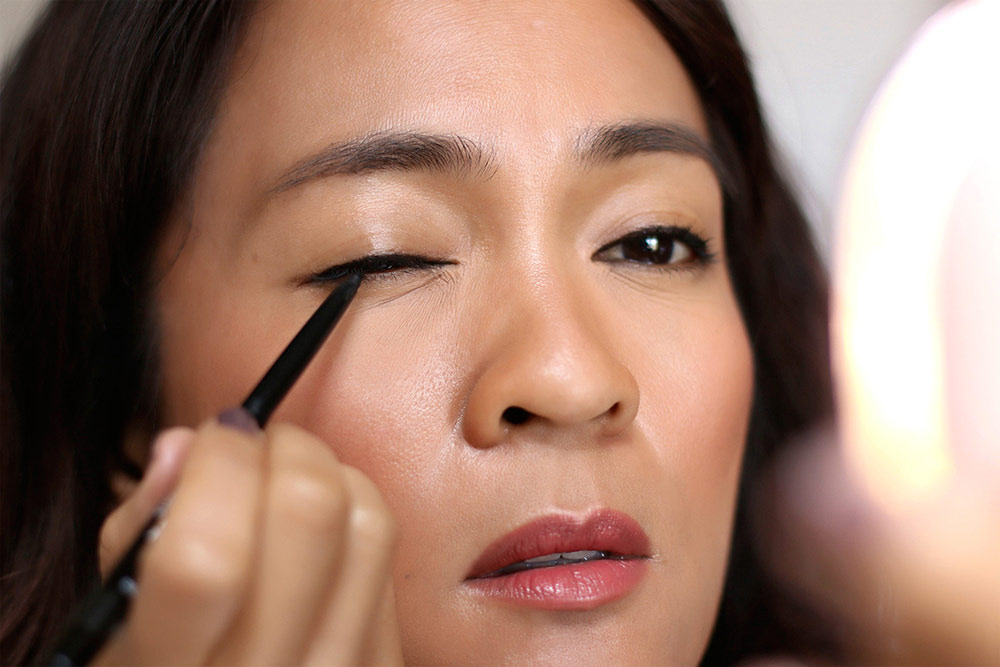
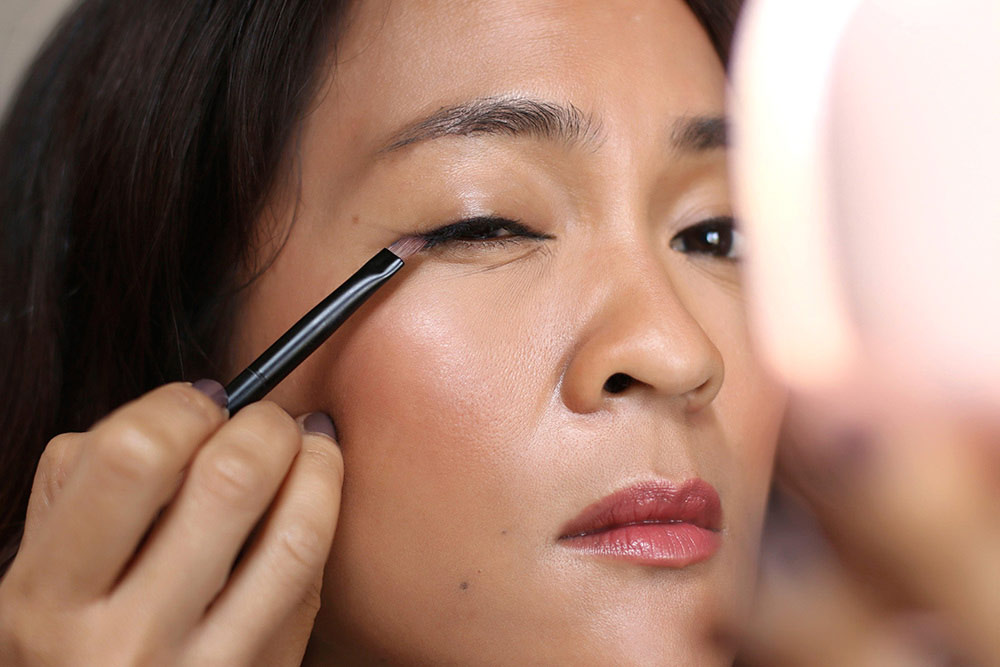
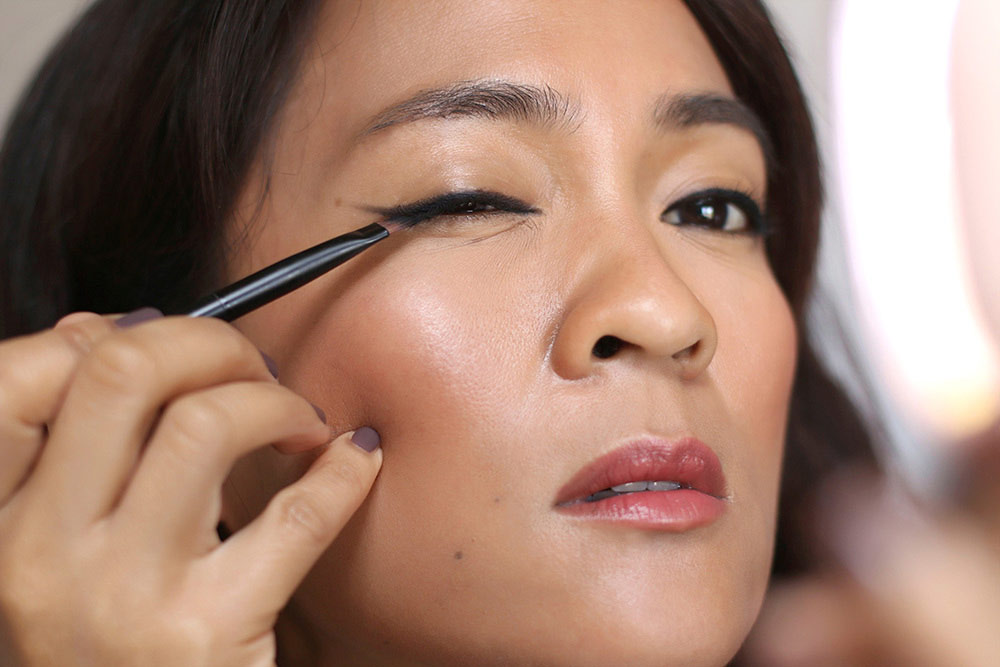
Let’s start the video! 🙂

mac brooke candy
MAC Brooke Candy packaging…

mac brooke candy
From the left: Which Witch, Mind Control and Boot Black

[Continue reading…]

There are 15 comments on this post. Leave yours.

Categories: Collections, Lips, MAC Makeup, Video

MAC Viva Glam Miley Cyrus II and Trend Forecast Spring 2016

August 20th, 2015 by Karen 8 Comments

MAC Viva Glam Miley Cyrus II Lipstick is very red — warm orangey red — which I don’t quite understand because MAC calls it bright orange, but ya know…I like the color, so I’m not gonna split hairs. 🙂

Sadly, my well of Miley Cyrus fun fact trivia does not run deep… I think she was dating or engaged to a Hemsworth, wasn’t she? The one who played Gale in The Hunger Games?

I dunno…

I do know that she’s the latest MAC Viva Glam spokesperson and has a new Viva Glam Lipstick and Lipglass coming out next month, which I keep wanting to call Miley Cyrus Deux, because sometimes I go French when there is absolutely no need to do so…

Here’s a video look at them, along with MAC Spring Trend Forecast 2016. Just press “play” to begin.

mac viva glam miley cyrus ii
MAC Viva Glam Miley Cyrus II Lipstick ($17) and Lipglass ($15)

mac trend forecast spring 2016
MAC Trend Forecast Spring 16/Eye ($40) on the left and Studio Eye Gloss in Money Honey ($22) on the right

[Continue reading…]

There are 8 comments on this post. Leave yours.

Categories: Collections, MAC Makeup, Video

MAC Pearlglide Intense Eyeliner: Have You Felt the Pearlglide Power?

August 13th, 2015 by Karen 17 Comments


mac pearlglide eyeliner
Four of the seven MAC Pearlglide Intense Eye Liners ($16.50 each)

Metaphorically speaking, the MAC Pearlglide Intense Eye Liners, which are members of the MAC permanent line and available now in seven $16.50 shades, have pure pearlglide power. They’re pigmented eye pencils with a smooth, creamy formula that contains a touch of glittery sparkle, and because of that, I don’t wear them on my water lines (because of the glitter), but I do love ’em on my lash lines.

Have you played with these before?

The smooth, smudgy formula glides across the skin like a gel liner, then sets in about three minutes, after which time it doesn’t budge for up to 12 hours.

I use these all the time as part of my layering stack for winged liner, where I start by applying a layer of one of the Pearglides first, then add a coordinating powder eyeshadow on top, then a gel or liquid liner on top of that. Even from the bottom of the stack, a little of the glitter still shows through, so you get a subtle sparkling effect!

(They also look incredible smudged out along the lower lash lines.)

mac pearlglide eyeliner
The MAC Pearlglide Intense Eye Liners from the left in Black Swan, Lord It Up, Petrol Blue and Designer Purple
mac pearlglide
And from the left in Black Swan, Lord It Up, Petrol Blue and Designer Purple

Check ’em out one of these days if you haven’t before. They’re permanent, so they’re always available online and at MAC stores and counters.

Your friendly neighborhood beauty addict,

Karen

There are 17 comments on this post. Leave yours.

Categories: Daily Photo

Restocking Old MAC Faves

August 12th, 2015 by Karen 17 Comments

mac paint pot and trax
From the left: MAC Paint Pot in Layin’ Low, Paint Pot in Camel Coat, Eye Shadow in Trax, Paint Pot in Perky and Paint Pot in Constructivist

Doesn’t it seem like the MAC Paint Pots dry out in bunches?

Or does it just seem that way to me? There I’ll be, doopdadoo, going about my business, when I’ll open one of ’em to find it dried out, and then it’s like all of a sudden the rest of them are dried out too!

I dunno. It’s weird…

On the subject of MAC Paint Pots, here are some of my old-school faves I’ve recently restocked…

  • MAC Paint Pot in Layin’ Low (remember this from Fafi?)
  • MAC Paint Pot in Camel Coat
  • MAC Paint Pot in Perky (another Fafi shout-out!)
  • MAC Paint Pot in Constructivist (looks amaze with MAC Costa Riche or Teddy liner)
  • MAC Eye Shadow in Trax

Mostly, I use the Paint Pots as eyeshadow bases, but some of the shades, like Constructivist and Camel Coat, I love, love, LOVE as single washes of color on the lids and lower lash lines. Then just line your eyes with black liner, add mascara and boom! — you’re ready to party with your cat.

Or do whatever else you need to do. 🙂

Oh, and Trax? So old school, man. It was one of the very first MAC eyeshadows I ever bought (so this was about a quadrillion years ago). It’s a golden bronzy purple that — I swear! — looks amaze with Powersurge liner.

mac paint pot and trax
MAC Paint Pot in Perky (left) and Paint Pot in Constructivist (right)
mac paint pot and trax
MAC Paint Pot in Layin’ Low, Paint Pot in Camel Coat and Eye Shadow in Trax

mac paint pot and trax

Swatches from the left of the MAC Paint Pots in Layin Low, Camel Coat, Perky and Constructivist; Eye Shadow in Trax
Swatches from the left: Paint Pots in Layin’ Low, Camel Coat, Perky and Constructivist; MAC Eye Shadow in Trax

Have you restocked any of your makeup faves lately?

Your friendly neighborhood beauty addict,

Karen

There are 17 comments on this post. Leave yours.

Categories: Daily Beauty

Easy Winged Eyeliner for Beginners

August 10th, 2015 by Karen 24 Comments

how to winged eyeliner

OK, straight up, by “easy winged eyeliner,” I mean easy in reference to being able to successfully draw the shape and angle you want, and not easy in terms of being able to do the whole thing in 30 seconds (it will probably take longer than that). This method here involves four steps, but they really are easy, and at the end of them you’ll have perfectly placed wings.

Now, we all know someone who can perfectly apply winged eyeliner in a single glorious swoop, but I’m totally not that girl. To get my winged liner the way I like it, I have to apply it in layers and steps.

It’s all about the layers. 😉

If you’ve ever struggled to draw your wings just right, or if you can only do it with an obscene amount of Herculean effort and concentration, this method of layering will help you place your lines and wings exactly where you want ’em. Pretty soon you’ll have winged liner like a BOSS!

What you’ll need…

  • A black pencil eyeliner
  • An angled eyeshadow brush
  • A black powder eyeshadow
  • A gel or liquid eyeliner
  • Q-tips

1. Line your upper lash line (you can also do your water line, but it’s optional)

easy how to winged eyeliner beginners

I tightlined my eyes first, because I always tightline, but it’s completely optional. What we’re gonna do now is line our upper lash line, so grab a black pencil eyeliner with a sharp tip (or sharpen a dull one), and line the upper lash line on one of your eyes with it. The sharp tip just makes it easier to be precise than a dull or blunt tip does.

Try to keep your line as thin and as close to your lash line as possible. Don’t worry at this stage if your line isn’t as thick and voluminous as you’d like, or if the edge is a little wonky or jagged, because we’ll rectify that sitch in a second. Repeat on your other eye.

easy how to winged eyeliner beginners

2. Smooth the edge of the line and start building the shape of your wing

easy how to winged eyeliner beginners

To smooth the edge of the line and start building the shape of your wing, take a clean angled eyeshadow brush, and run it gently along the edge of the line you drew in step one (note: I do each step on each eye along the way to keep them symmetrical). Start at the inner corner and move out. When you get to the outer corner, drag the brush out a bit to create a faint outline of a wing using the remaining product on your brush.

To get both eyes symmetrical, it helps me to look straight into a mirror with both eyes open while I’m working.

If you find that your wings aren’t even, don’t panic! Use a Q-tip to tweak and adjust them.

easy-cat-eye-pictureAs for the angle of your wings, it’s up to you, but I think it helps to visualize an invisible line that extends up and out from the outer corner of your lower lash line. Just follow the angle of your lower lash line up and out.

Totally optional and up to your own personal preference, though. I usually like to flatten my wings out a bit (so not as steep), because it appears to elongate the eye, and I like that effect. Play around a bit until you find an angle that works for you.

3. Thicken the line and wing

easy how to winged eyeliner beginners
[Continue reading…]

There are 24 comments on this post. Leave yours.

Categories: Eyes, Makeup, Makeup Tips/How To

5 Ways to Make Your Eyes Look Bigger

August 4th, 2015 by Karen 29 Comments

How to make your eyes look bigger

#makeupgoals — to make my eyes look SO big that even good-natured, wide-eyed anime characters start talking mad smack…with jealously, of course!

TURBO THE GLITTERY RAINBOW PEGASUS: “Did you see Karen’s eyes today? GURL, I don’t even know. I like big eyes, but hers are HUGE.”

CHICI THE COTTON CANDY KITTY: “I know, right!? I mean, where does she get off making her eyes look bigger than ours? We’re professional anime characters, for crying out loud! We’re supposed to freakin’ dominate that doe-eyed sh*t!”

Haha! Craziness…

It’s true, though.

Making my eyes look as large as possible is one of my top makeup priorities, because I feel like I look spunkier, younger (at least that’s the idea) and generally more alert and awake when my eyes appear bigger.

It’s all an illusion, of course, but illusions can be cool, and this one is easy to create. 🙂

Here are five things you can do on their own (or together) to make your eyes look bigger.

1. “Tightline” your upper water line

how to make your eyes look bigger
Chanel Stylo Yeux Waterproof Eyeliner in 88 Noir Intense

Darkening your upper water line by placing a dark eyeliner along the base of, and between, your lashes, also known as “tightlining,” makes the line look thicker, which appears to lift, brighten and enlarge your eyes.

The key is to really get down there with liner (waterproof works best for me) as close as possible to the base of your lashes. Just run it along your upper water lines, really getting in between the lashes at the roots, and repeat until you’re happy with the line.

2. Curl your lashes

how to make your eyes look bigger

If your lashes naturally stick out straight or point slightly downward, they might cast a slight shadow under your eyes, which can make them look a little smaller (my lashes do this!). If this happens to you, steal your cat’s favorite lash curler. 🙂

But seriously, curled, lifted lashes don’t cast the same annoying shadow under your eyes, and they draw attention up, up and away!

Curled lashes can also appear to sort of fold over on themselves, which can make your lash lines look thicker, which also enhances the whole “tightlining” effect.

3. Apply mascara to your top AND bottom lashes

How to make your eyes look bigger

By darkening, thickening and lengthening lashes, especially curled lashes, mascara can also make your eyes look bigger.

To really maximize the doe-eyed effect, look for a mascara that lengthens AND thickens, especially at the roots, and apply it to both your upper and lower lashes.
[Continue reading…]

There are 29 comments on this post. Leave yours.

Categories: Eyes, Makeup Tips/How To

MAC Cremesheen + Pearl Collection Lipstick Swatches: Part 2

August 4th, 2015 by Karen 18 Comments

mac cremesheen pearl lipsticks
MAC Cremesheen + Pearl collection Cremesheen Lipsticks

Rise and shine, pal o’ mine! Today for breakfast we’re having MAC on wheat toast with Nutella. 🙂

We have a delicious part deux post purée of six $16.50 MAC Cremesheen + Pearl collection Cremesheen Lipstick swatches to complete the 10-piece set we started last month (for reference, I’m an NC42).

All of them have been added to the MAC permanent line, so they won’t be going anywhere, and they’re available now at MAC stores, counters and online.

Of these, Koi Coral is the one I’ve been wearing the most. I friggin’ love it layered under pink and coral glosses (my favorite combo involves Urban Decay Streak Gloss).

mac cremesheen pearl lipsticks
MAC Cremesheen Lipsticks from the left in Koi Coral, Star Magnolia, Little Buddha, Tokyo Tizzy, Pretty Boy and Sweet Sakura
mac koi coral
MAC Cremesheen Lipstick in Koi Coral

mac sweet sakura
MAC Cremesheen Lipstick in Sweet Sakura

[Continue reading…]

There are 18 comments on this post. Leave yours.

Categories: Lips, MAC Makeup, Makeup

5 Things I’ve Been Loving Lately

August 3rd, 2015 by Karen 31 Comments

bkr bottle

1. bkr 500-ml Water Bottle in “Holiday” ($35)

bkr bottle

I love, love, LOVE this 500-ml bkr bottle my friend Marisol got me for my birthday. It’s half the size of the full liter-sized bkr bottle I got for myself earlier this year, and for some reason, I guess because it’s much easier to carry around, when I carry it instead of the bigger bottle I end up drinking more water.

Both of them are made of the same solid, sturdy glass and have super cushiony rubberized sleeves to fully protect them (and they’re available in literally dozens of colors). Unlike my bigger one-liter flamingo-colored bkr bottle, “Minty” (that’s what I’ve named her) fits into my purse and the cup holder in my car, so she’s become my to-go bkr, while the bigger bkr mostly stays on my desk.

2. Chanel Les Beiges All-In-One Healthy Glow Fluid Broad Spectrum SPF 15 Sunscreen ($45, available in six shades)

chanel les beiges

Yargh! — so obsessed.

I’ve been wearing this awesome tinted moisturizer a lot lately instead of full-coverage foundation, like when my family visited last week and also on my girls’ trip to Napa, because I can use it really fast!

It has a semi-matte, natural-looking finish, medium coverage, and it does lots of very lovely pore blurring (#yaaaas). The shade I use is called 40, by the way, but it’s also available in five other shades, all with a very light floral fragrance.

3. Trader Joe’s Cocoa Almond Spread ($3.99 for a 13-ounce jar)

trader joes cocoa almond spread

Nutella is still my number one hazelnut spread because I think it’s smoother and more hazel-nutty, but to its credit, TJ’s “faux Nutella” is also pretty damn tasty!

It’s their Cocoa Almond Spread (but it also has hazelnut in it), and it’s been totally hitting the spot. I grabbed a bottle at TJ’s last Saturday because I didn’t want to drive all the way across town to Target just to get a jar of Nutella…because sometimes a girl just really, really, REALLY needs to have some Nutella (or something like it) on toast.

I may or may not have already finished half the jar…
[Continue reading…]

There are 31 comments on this post. Leave yours.

Categories: Chanel, Just For Fun, Makeup

  • « Go to Previous Page
  • Go to page 1
  • Interim pages omitted …
  • Go to page 52
  • Go to page 53
  • Go to page 54
  • Go to page 55
  • Go to page 56
  • Interim pages omitted …
  • Go to page 125
  • Go to Next Page »

Primary Sidebar

Welcome to Makeup and Beauty Blog

Welcome to Makeup and Beauty Blog! My name is Karen, and I’m a freelance writer obsessed with makeup.

Makeup and Beauty Blog features daily product reviews, makeup tips and beauty news — like an interactive version of a monthly print magazine, except with occasional pictures of my cat.

Recent Posts

Sundays With Tabs the Cat, Makeup and Beauty Blog Mascot, Vol. 878

Makeup and Beauty Blog Monday Poll, Vol. 894

Makeup and Beauty Blog Monday Poll, Vol. 893

Makeup and Beauty Blog Monday Poll, Vol. 892

Makeup and Beauty Blog Monday Poll, Vol. 891

/* real people should not fill this in and expect good things – do not remove this or risk form bot signups */

Social

  • Facebook
  • Instagram
  • Pinterest
  • Twitter
  • YouTube

Featured Posts

Sundays With Tabs the Cat, Makeup and Beauty Blog Mascot, Vol. 771

Lady Unicorn

Weird Things I Like to Do

brows fill out beforehand

Before You Pluck or Wax Your Brows, You Must Do This

current bare skin status

What’s One Thing That Drastically Changed Your Skin for the Better?

Copyright © 2025 Makeup and Beauty Blog. Get in touch.