• Skip to main content
  • Skip to primary sidebar

Makeup and Beauty Blog | Makeup Reviews, Swatches and How-To MakeupMakeup and Beauty Blog | Makeup Reviews, Swatches and How-To Makeup

A beauty blog blooming with fresh makeup reviews, swatches and beauty tips from your friendly neighborhood beauty addict

  • Home
  • About
    • About
    • Contact
    • FAQ (Frequently Asked Questions)
    • Advertising & Media
  • Categories
    • Product Reviews
    • Makeup
    • Skincare & Fragrance
    • Style & Fashion
    • Hair
    • Nails
    • Tips & Tutorials
    • Just for Fun
  • Brands
  • Store

Beauty Tips

How to Make Your Loose Powder Last

June 4th, 2009 by Karen 41 Comments

loose-powder-with-brush

No matter how hard I try, I’m awful when it comes to controlling how much product I use with my loose powder jars.

It’s not like I’m devoid of muscle control, or like I’m shakin’ the jars like a Polaroid picture.

I don’t know, but every time I gently shake a jar to load the sifter tray, mayhem ensues; powder gets everywhere, and I’m sent down the same product-wastin’ path…

The wastefulness starts with the excess of powder in the tray. It’s why my brush gets overloaded with powder, which I end up blowing off or tapping away when I go to dilute the brush before application.

A lot product gets wasted in the process, and that makes me kind of cranky. 🙁

Makeup McGyver!

I finally found a way to doctor those jars of loose powder to cut back on waste.

It’s a cheap and easy trick that takes less than three minutes to do, and it makes it easier to control the amount of powder that feeds through those built-in sifters, consequently reducing the amount of product that gets lost to the wind.

What you’ll need

benefit-one-hot-minute-sexy-in-seconds-tutorial-1

  • A jar of loose powder (the kind that comes with a sifter)
  • Scotch Tape
  • Q-Tips

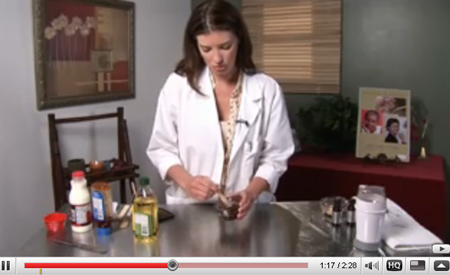
Step by step, oh baby…

benefit-one-hot-minute-sexy-in-seconds-tutorial-2

First, create a clean surface for the tape by removing the powder from the holes in the sifter area with a Q-tip.

benefit-one-hot-minute-sexy-in-seconds-tutorial-3

Next, grab a small piece of tape from the dispenser; place it on top of a few of the holes in the sifter.
[Continue reading…]

There are 41 comments on this post. Leave yours.

Categories: Beauty Tips, Makeup Tips/How To, Makeup Tools, News

Band-Aid Friction Block Stick Makes Flip-Flops More Comfortable

May 26th, 2009 by Karen 44 Comments

052609-band-aid-friction-block-stick

Locals in Hawaii wear flip-flops everywhere, even to work! It may be written into the State Constitution 🙂 — that all citizens of Hawaii are legally required to wear flip-flops.

But wearing them comfortably can take some getting used to…

After a few days hauling my cookies around the island in flip-flops, my dogs started to bark. The pair of striped blue and green Roxy slippers I’d brought along for the trip may have been cute, but they weren’t substitutes for a comfy pair of walking shoes.

I started developing blisters and raw skin wherever the flip-flop straps rubbed against my toes and feet.

With shoes and sandals, I usually apply a Band-Aid or Moleskin to cover the sore spots, but I wanted a less obvious alternative to use with flip-flops. Who wants to see a ratty Band-Aid hanging on by a thread, ya know?

Enter Band-Aid Friction Block Stick ($8), aka a minor miracle for tow-up feet.

How does it work?

052609-band-aid-friction-block

Band-Aid Friction Block Stick is a solid stick shaped like a mini-deodorant. It’s pocket-sized, fitting into the palm of my hand, and reduces friction caused wherever footwear makes contact with your skin.

It dries to form a clear, smooth barrier — kinda like an invisible Band-Aid.

I busted out the stick I’d brought along for the trip when my flip-flops rubbed my skin raw.

It dries quickly and works for hours, through miles of walking in hot, humid, sandy conditions, and even worked when my feet were sweatin’ like Whitney and Bobby Brown.

And it works in more ways than advertised, too. Before surfing, I applied it to my inner thighs and forearms — places that usually get rubbed raw by the board. It worked just as well as Vaseline but without the greasy mess.
[Continue reading…]

There are 44 comments on this post. Leave yours.

Categories: Beauty Tips, Drugstore Beauty Finds, Product Reviews, Skin Care

How to Wear Glasses to Look Sexy: Because They Already Know You’re Smart!

May 25th, 2009 by Karen 35 Comments

Today Aisha gives us a few tips on how to wear eye makeup with glasses.

How to wear makeup with glasses

Okay ladies, let’s start this post with a short quiz for those of you who wear glasses:

QUIZ: If you wear glasses…

  1. Would ripping a contact lens before something like your best friend’s wedding trigger a minor panic attack due to the thought that you might have to wear your glasses to the wedding instead?
  2. Do you secretly wish you could look as cool (and therefore be as cool) as Tina Fey in glasses?
  3. Does your collection of eyeshadows look more colorful than a bag of Skittles?

If you answered yes to … well, ANY of the above questions, you’ve come to the right place. With some creativity, your awesome eyeshadow collection and a few rules of thumb, you, too, can look as spectacularly sexy in spectacles as Jennifer Garner did in Alias.

Before I show you some evening looks, here are 10 basic tips for wearing glasses with makeup.

10 beauty tips for girls who wear glasses

  1. Your eyebrows frame your eyes when you wear glasses, so keep them well groomed.
  2. Under-eye circles are more noticeable beneath glasses, so good concealer is a must.
  3. Cream and waterproof eyeshadows are less likely to flake onto your glasses than loose powders or pressed eyeshadows. If one type creases, try another. The likelihood of creasing often varies from one person to another.
  4. Shimmer CAN be worn under glasses.
  5. Keep trying on your glasses during makeup application to see if the look needs adjusting.
  6. Curling your eyelashes may prevent them from touching the inside of your lenses.
  7. If you’re blind without your glasses, a pair of these Magnifier Specs may help with application.
  8. Wear sunglasses to protect your eyes and to reduce squinting, which can cause fine lines to appear around the outer eye area.
  9. When choosing a frame, spend the extra money for a quality anti-reflective coating and high index polycarbonate lenses.
  10. Keep your lenses clean and fog-free with lens cleaner and a soft cloth.

Look One: Dramatic false lashes

Now that you have some basic guidelines, here are a few dramatic evening looks to spark your creativity!

1_photo_q

My first model, Q, has a simple dark frame — nothing too overpowering. She’s wearing a light but vivid pearly color, strong black eyeliner and mascara, dark brows, and a dark, shimmery, glossy lip color. She also has dramatic false eyelashes on her lower eye line.

2_photo_q

First, I applied Hourglass Oxygen Foundation Powder No. 3 and then used Shu Uemura Cover Crayon as concealer and eyeshadow base.

Next, I applied MAC Naked Lunch (a pearly light peach) all over the lid before applying Shu Uemura Cream Eye Shadow in P Light Green (a pearly lime green) to the lower part of the lid and inner corner of her eye.

I think a synthetic brush works best for blending this cream shadow.

The top semi-hardened layer of the eyeshadow in the pot should be wiped off prior to each use. Here, I used MAC Cloudbound (pearly ivory) to highlight.

Finally, I blended the upper area and curled the upper eyelashes, applying Fresh Supernova Mascara to the ones on top.

2a_q_lash

I used a nail clipper to trim the four end sections of a set of Darkness false eyelashes in style X-up6 in Black. Darkness can be found in some beauty supply stores and is available online, but the styles vary among sellers. Other inexpensive false eyelash brands will work just as well; that’s what experimentation is for. 🙂

Since I used an eyelash intended for an upper lid, I removed the sticky residue from the band with makeup remover.
[Continue reading…]

There are 35 comments on this post. Leave yours.

Categories: Beauty Tips, Makeup Tips/How To Keywords: guest post

21 MORE Skin Care Tips

May 23rd, 2009 by Karen 18 Comments

21 MORE Skin Care Tips

Here at my in-law’s, *everybody* falls asleep by 9. I’m a night owl by nature, so I’ve been staying up after they’ve all gone to bed, watching MTV shows on my laptop in the dark.

Last night I watched an episode of True Life that featured young people dealing with severe acne. It chronicled their journeys through various acne treatments and the emotional trauma caused by bad acne.

The show got me thinking about how appearance can affect self-esteem.

I remember going through a terrible bout with acne on my cheeks and forehead at age 19. It undermined my confidence and left me so emotionally sensitive that I’d cry whenever my mom or a close friend would even bring it up.

My skin eventually improved (it was Accutane that finally worked), but I’ll never forget the way I felt over that trying time in my life.

Because knowledge is power, I’m always looking for new skin care tips. Here are 21 more tips to go with the ones I posted last week.

I hope you find them as handy as I did. 🙂

If you enjoyed this post, you may also like…

  • 21 Skin Care Tips
  • 21 Makeup Tutorials
  • 101 Wedding Makeup Looks
  • 101 Hairstyle Tutorials
  • 10 Fantastic Smokey Eye Tutorials
  1. Flawless Looking Skin: In this awesome video, YouTube member kandee describes how she cares for her skin, her favorite tips and product recommendations.
  2. flawless

  3. Aubrey’s Skin Care Routine: YouTube member Aubrey lists the products she uses to get her gorgeous, glowing skin.
  4. skinroutine

  5. What is Laser Skin Resurfacing? Wonder what a laser peel is? This article answers some of the most important questions.
  6. laser

  7. How to Exfoliate the Nose: It’s a tough area to work around, but the tips in this video can help.
  8. nose

  9. Substitute with Soy Milk: Having trouble with acne flareups? A simple switch from dairy to soy milk may help, and here’s why.
  10. soy

  11. What to Eat for Glowing Skin: To steal a quote from 30 Rock, one of my favorite TV shows, “Tracy, science is what we make it.” LOL! Not quite, but this post does have some scientific answers to why certain foods can help to heal and brighten a dull or damaged complexion.
  12. What to eat for glowing skin
    [Continue reading…]

There are 18 comments on this post. Leave yours.

Categories: Beauty Tips, Skin Care

What to Do When – Ohnoes! – Your Pressed Powder Ends Up as Plain ‘Ole Powder

May 21st, 2009 by Karen 20 Comments

Today Rae of theNotice shows how to rescue a broken pan of pressed powder from the brink!

Pressed powder repair

Hi there, ladies! It’s Rae from theNotice. I just wanted to take a moment to say “thanks!” to Karen for letting me guest blog. Makeup and Beauty Blog is definitely one of my favourites, so this is pretty much the best. thing. ever.

Okay. Moment’s over!

It’s happened to us all: you go traveling, or you move, or you take a compact with you on your way out the door. When you open up your traincase or cosmetic bag, there’s a thin film of powder everywhere, and then you just know — one of your pressed powders broke in transit, and it’s completely unusable in its current state.

But it’s not the end of the world, because this is a problem that’s easily fixed! Seriously, folks. It’s easier than making toast to fix a hungry stomach or tempting children with candy or Jell-O.

What you’ll need

  • Alcohol (no, not vodka. You want cleaning alcohol! I’m using isopropyl.)
  • A steady hand to pour it, or an eyedropper
  • Lots of tissue and/or Q-tips

We start our endeavor with one of the Smashbox Brow Tech duos from my makeup kit (this one’s Blonde). The powder portion had completely broken in transit — crumbles and chunks everywhere!

You know how when you get to the bottom of your Special K Cinnamon Pecan, there’s just… dregs? Well, it was like that. And for all of you who don’t obsessively eat that stuff, just check out the photo below (and add the cereal to your shopping list, because it’s like heaven. But in cereal form. And edible).

1-mess

So because this was a duo, I started by scraping off the top layer of the wax with a clean cosmetic spatula and using an eyedropper to moisten the powder half with alcohol.

Use a damp towel or Q-tip to clean up around the edges a little, but it doesn’t have to be perfect — trust me, it’s easier to clean it up at the end, when more doesn’t tip out every time you move the pot!

For the wax, I just wiped off the top with a tissue after scraping, and it was pretty much good to go. But for the powder (or for a single pan) it’s a little harder. To fix this one, you have to keep putting in alcohol until it turns into pudding. I know. SO much harder, right? Oh, my god! I can’t do this! It’s too difficult!

…aaaand I’ll pretend you recognize the sarcasm in my, erm, font.

2-clean

Anyhow, that’s really all you need to do! Once it’s mushy, all you have to do is let it dry (the stronger the alcohol, the faster it’ll be ready for the next step). Because this was a half-pan, re-pressing was a little harder. But for a normal 26mm MAC shadow pan, all you have to do is wait until it’s just barely damp, put a paper towel or handkerchief on top, stack a couple quarters on that, and apply pressure!

SHAZAM! Just like that, you’ve got a like-new pan again — clean up the edges, let it dry overnight before closing it, and you’re ready to face the day. If you have a half-pan like mine, and not a full circle, just press it with your fingers. The result won’t look new, but unless you’ve found a way to get a half-quarter, it’s the best you can do!

TIP: if you’re pressing something large — like a foundation, powder or blush — the bottoms of glasses work wonderfully instead of quarters!

6-finished

One last thing, though. The pans in this were a little loose (if by “a little loose” you mean “totally not connected with the pot anymore”), which I’m thinking was the reason for their demise. So I took ’em out with tweezers, applied a couple drops of Krazy Glue, put them back in, and after about 10 seconds, they were secure again!

4-set

5-set

For loose pans, plain ‘ole Krazy is a lifesaver. It’s my number-four beauty tool, preceeded only by my Tweezerman tweezers, lash curler, and Q-tips. Just please don’t use it as cosmetic glue, alright? 🙂

krazy-glue

Is it just me, or did this turn into a lesson about how you shouldn’t blog while hungry, instead of one about re-pressing broken powders?

This post was written by Rae, the beautiful brains behind theNotice. Beauty blogger, student and makeup enthusiast, Rae can’t remember a time when she didn’t love makeup.

There are 20 comments on this post. Leave yours.

Categories: Beauty Tips, Makeup Tips/How To Keywords: guest post

21 Skin Care Tips

May 16th, 2009 by Karen 16 Comments

21 Skin Care Tips

Like our stomachs, our skin doesn’t always work the same way every day. Sometimes it gets a little fussy and doesn’t want to behave.

Skin care is one of those things I didn’t really take seriously until my late twenties. I WISH I’d started paying more attention to it sooner, but c’est la vie!

To help with a wide variety of skin situations (I’ve faced my share of them), here’s a list of 21 skin care tips.

If you enjoyed this post, you may also like…

  • 21 Makeup Tutorials
  • Yet ANOTHER 21 Makeup Tutorials
  • 101 Wedding Makeup Looks
  • 101 Hairstyle Tutorials
  • 10 Fantastic Smokey Eye Tutorials
  1. Hydrate for Healthy, Glowing Skin: You have heard it hundreds or thousands of times before, but that’s because it’s true. The best thing you can do for your skin is to drink plenty of water. Here are a couple quick ways to make water easier to remember.
  2. woman_drinking_water

  3. Microdermabrasion for Softer Skin: It costs MUCH less than a facelift and doesn’t have the same risks. Many women are turning to microdermabrasion to reduce fine lines and wrinkles.
  4. microdermabrasion-3

  5. Removing Stretch Marks: Pregnancy isn’t the only cause of stretch marks. They’re also caused by regular wait gain/loss, exercise and injury, and here are some ways to remove them.
  6. stretchmarklady

  7. How to Make Homemade Facial Scrubs: With this great video you’ll play mad beauty scientist and learn how to make your own professional spa facial scrub at home.
  8. spa

  9. How to Treat Acne: Here, a licensed esthetician explains a complete skin care regimen to deal with acne — covering topical treatments, masks and nutrition. Very informative!
  10. acne

  11. How to Have Clean Pores: Here’s a fun little tidbit — you can’t actually shrink your pores, but cleaning them can make them appear smaller.
  12. treat-large-pores
    [Continue reading…]

There are 16 comments on this post. Leave yours.

Categories: Beauty Tips, Skin Care

Fun with DailyMakeover.com

May 9th, 2009 by Karen 6 Comments

DailyMakeover.com

Have you ever used an online makeover tool before? I’ve used a few of them, where you upload a picture of yourself and fit it with virtual hairstyles and different colors of makeup.

The thing is, they’ve always seemed more toys than tools, with very few colors to choose from and a paint-by-numbers feel.

DailyMakeover.com’s Makeover Studio is the first online makeover service I’d actually call a real tool.

Fun AND useful

What makes it more than just a toy?

For starters, DM has a huge selection of makeup colors to choose from, and they’re based on actual products, so you’re not just choosing a random shade of beige blush or pink lipstick and swiping it over your picture with the mouse. You’re choosing from among actual brand name products and colors and setting the colors down precisely where they’re supposed to go on your face.

Second, you have an amazing amount of control over everything, from the way each hairstyle hugs the contours of your face to the angle you use to apply eyeliner.

If it is a toy … then it’s a toy meant for women who are serious about (having fun with) makeup and beauty. 🙂

Test using actual products available in stores right now

Today I wanted to see what I might look like with a different hairstyle, so I pulled up DailyMakeover.com.

You can use the makeover tool for free, but with the free trial you’re limited to uploading a single picture of yourself. That, and you only get access to a pretty small group of hairstyles, accessories (like earrings) and brands of makeup.

The free selection is still broad enough to try quite a few different looks, but with one of DM’s premium All-Access memberships you get access to literally thousands of hairstyles and makeup — we’re talking current makeup collections in stores now — and can upload an unlimited number of pictures.

The All-Access membership costs $14.95 for 3 months or $29.95 per year.

Using the Makeover Studio

The DailyMakeover Makeover Studio tool

  1. Overview of the features and a comparison between the free membership and the All-Access membership
  2. How to upload a picture of yourself (and what constitutes a good self-portrait)
  3. Library of demo portraits you can use in place of a picture of yourself

I grabbed my digital camera, opened the drapes to allow in as much sunlight as possible and took a picture of myself with my hair pulled back in a ponytail.

The site says the best pics are full-frontal portraits with uncomplicated backgrounds, where you’re not standing directly in front of something like a painting or bookshelf. You want a picture taken in good natural lighting, too, for accurate makeup colors.

DailyMakeover - setting up your photo

After uploading my picture, the tool guided me through some simple steps to define the shape of my eyes, lips and face.

I even thought this part was cool (seems very high tech)…

DailyMakeover - setting up your photo
[Continue reading…]

There are 6 comments on this post. Leave yours.

Categories: Beauty Tips, Just For Fun

Aquis Hair Towel: A Hair Do

May 4th, 2009 by Karen 38 Comments

aquis-microfiber-towel

While having dinner with a couple of my BFFs last month, my girl J-Money surprised me with a gift — the Aquis Microfiber Hair Towel ($18).

With the care one reserves for items of great value and importance, she looked me dead in the eyes, placed the package in my hands and said, “You’ll understand its power soon enough.”

The Aquis Hair Towel is made from a special microfiber fabric supposedly able to absorb far more water than a regular cotton towel. Awesome, because my hair retains a lot of water and takes forever to dry.

After two weeks with the Aquis, I think I understand why J-Money treated it with such reverence — the thing really works!

Normally, I wrap my hair up with a towel when I step out of the shower and leave it on for about 15 minutes before taking it off to air dry. The process takes about three hours to thoroughly dry my hair.
[Continue reading…]

There are 38 comments on this post. Leave yours.

Categories: Beauty Tips, Hair, Product Reviews

  • « Go to Previous Page
  • Go to page 1
  • Interim pages omitted …
  • Go to page 20
  • Go to page 21
  • Go to page 22
  • Go to page 23
  • Go to page 24
  • Interim pages omitted …
  • Go to page 36
  • Go to Next Page »

Primary Sidebar

Welcome to Makeup and Beauty Blog

Welcome to Makeup and Beauty Blog! My name is Karen, and I’m a freelance writer obsessed with makeup.

Makeup and Beauty Blog features daily product reviews, makeup tips and beauty news — like an interactive version of a monthly print magazine, except with occasional pictures of my cat.

Recent Posts

Sundays With Tabs the Cat, Makeup and Beauty Blog Mascot, Vol. 878

Makeup and Beauty Blog Monday Poll, Vol. 894

Makeup and Beauty Blog Monday Poll, Vol. 893

Makeup and Beauty Blog Monday Poll, Vol. 892

Makeup and Beauty Blog Monday Poll, Vol. 891

/* real people should not fill this in and expect good things – do not remove this or risk form bot signups */

Social

  • Facebook
  • Instagram
  • Pinterest
  • Twitter
  • YouTube

Featured Posts

Sundays With Tabs the Cat, Makeup and Beauty Blog Mascot, Vol. 771

Lady Unicorn

Weird Things I Like to Do

brows fill out beforehand

Before You Pluck or Wax Your Brows, You Must Do This

current bare skin status

What’s One Thing That Drastically Changed Your Skin for the Better?

Copyright © 2025 Makeup and Beauty Blog. Get in touch.