• Skip to main content
  • Skip to primary sidebar

Makeup and Beauty Blog | Makeup Reviews, Swatches and How-To MakeupMakeup and Beauty Blog | Makeup Reviews, Swatches and How-To Makeup

A beauty blog blooming with fresh makeup reviews, swatches and beauty tips from your friendly neighborhood beauty addict

  • Home
  • About
    • About
    • Contact
    • FAQ (Frequently Asked Questions)
    • Advertising & Media
  • Categories
    • Product Reviews
    • Makeup
    • Skincare & Fragrance
    • Style & Fashion
    • Hair
    • Nails
    • Tips & Tutorials
    • Just for Fun
  • Brands
  • Store

Eyes

Easy Makeup Look Idea: Olive Eyeliner, Warm Brown Eyeshadow and Matte Fuchsia Lipstick

January 30th, 2020 by Karen 25 Comments

mac all fired up
Someone turns four this March! (No, not me.)

Some mornings are for blending six shadows on your lids, and other mornings are not.

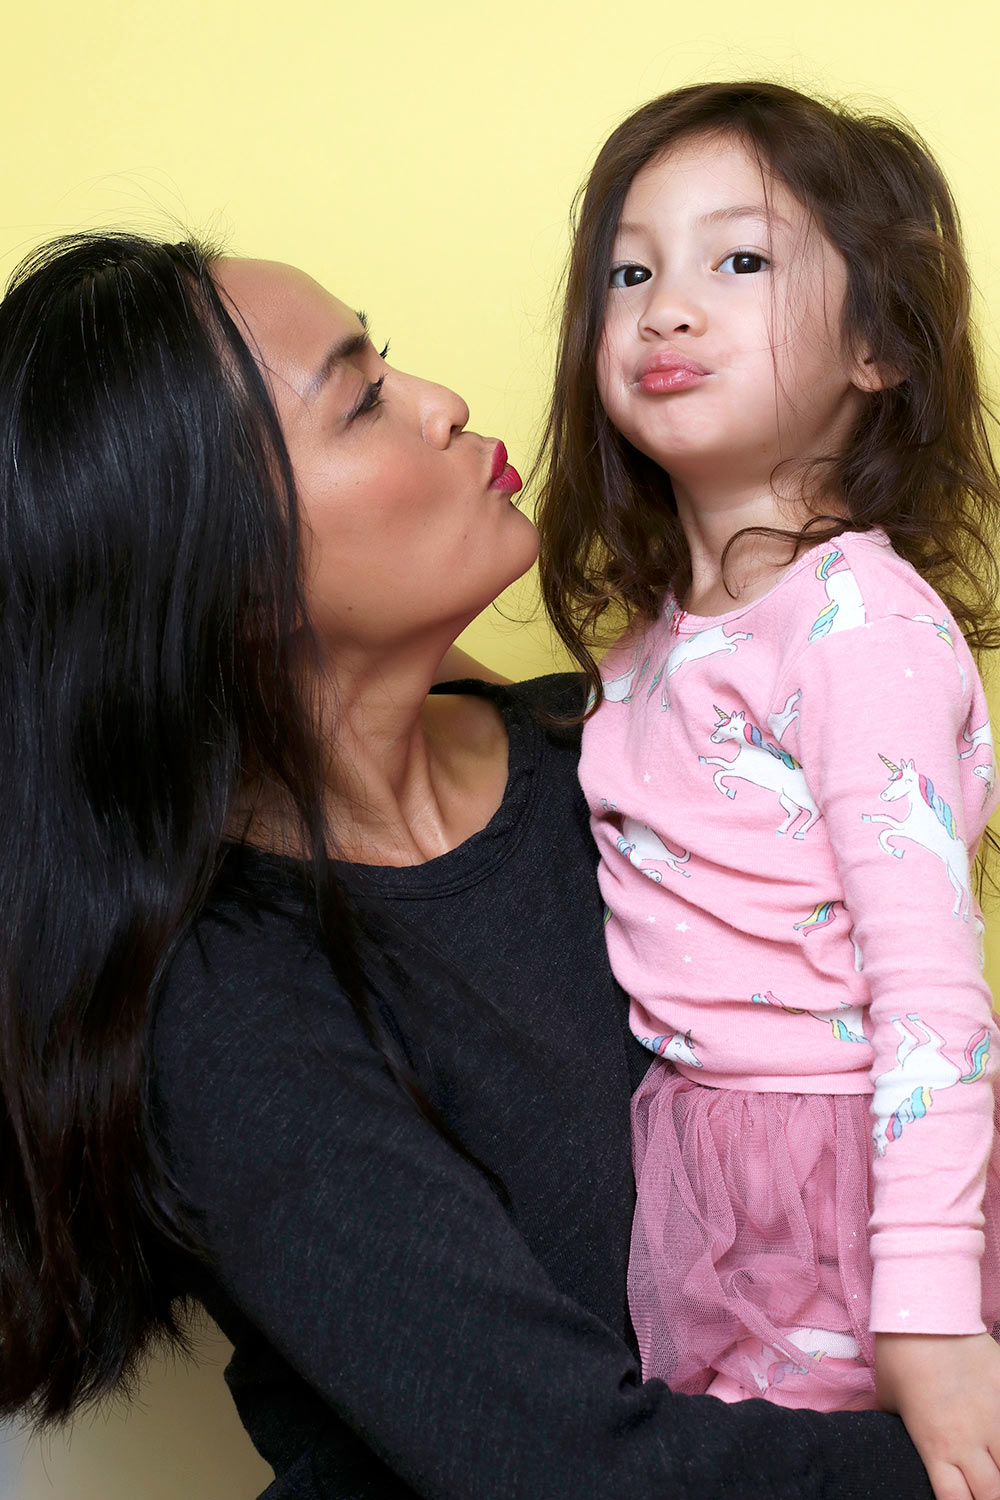
Those are the mornings made for large quantities of coffee…and for cuddles…and for easy makeup.

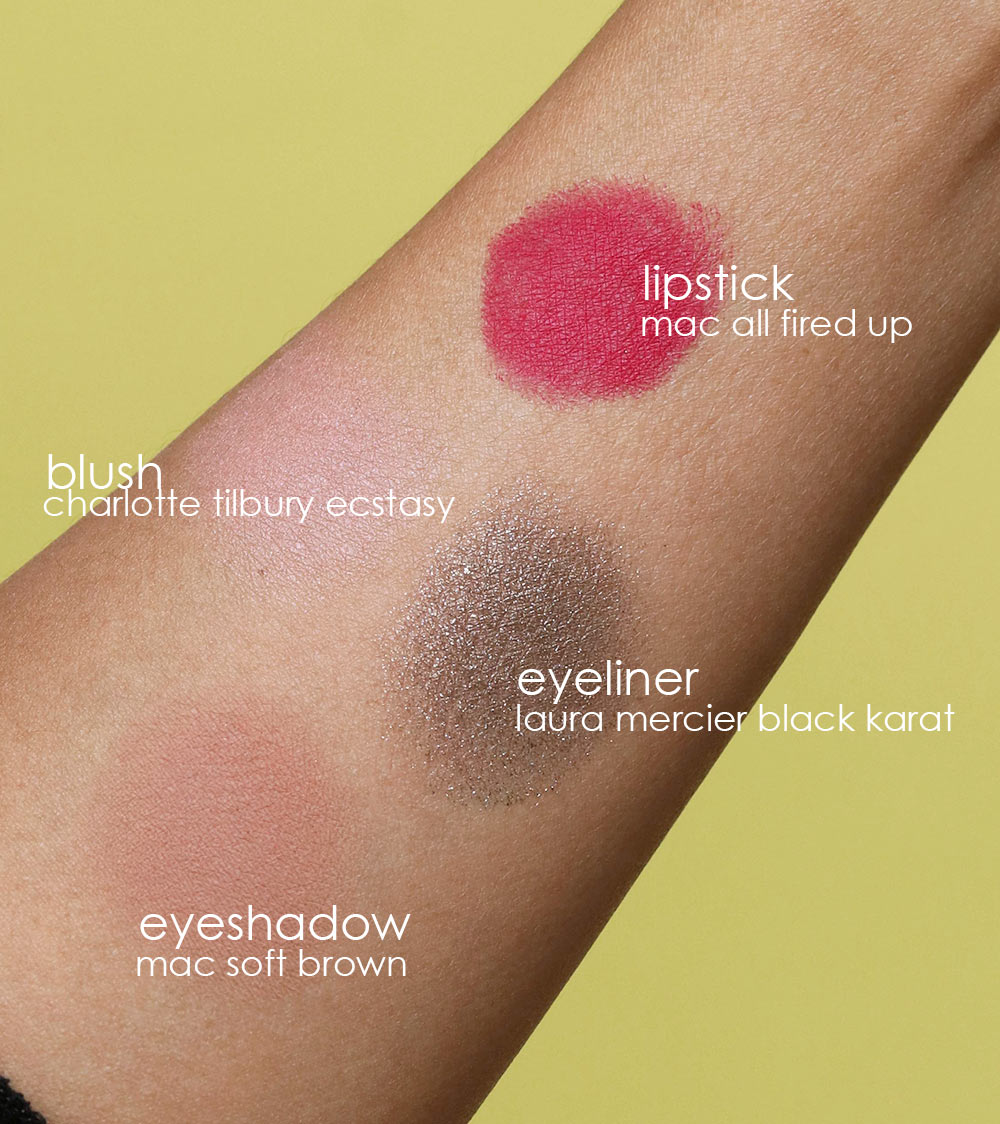
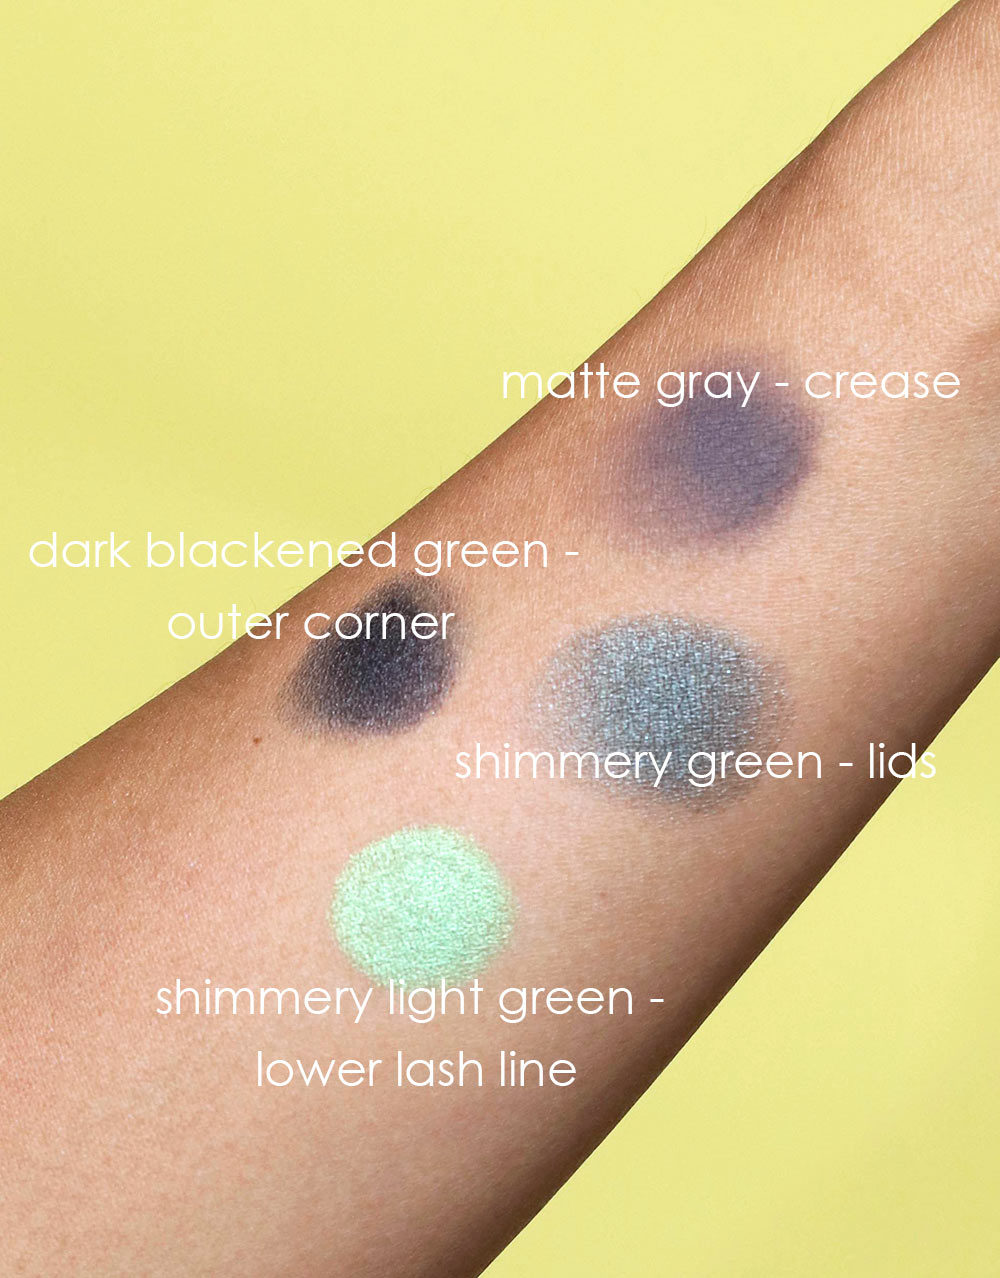
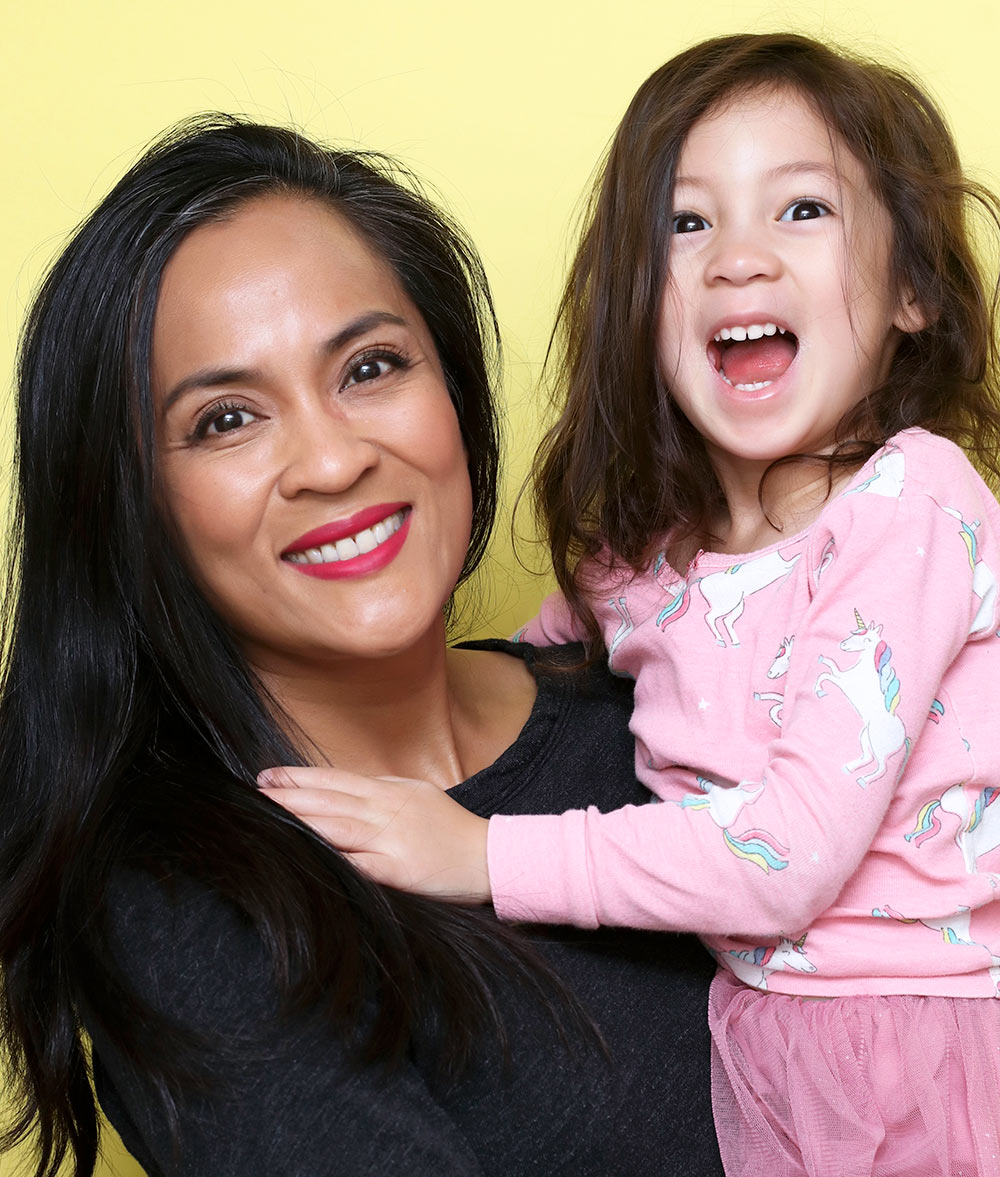
Initially, when I set out to do this post, I planned to wear smokey, olive eye makeup on my lids to go with the bright fuchsia matte lipstick (All Fired Up — a MAC *must*), but Connor needed extra baby love in the morning, so that plan went out the window. *Poof!*

She’s just shy of four, and some days she’s big enough to handle ALL HER BUSINESS AND THEN SOME (“I’m a big girl, mama, and I can do it myself!”), but other days, like this one, she needs some extra hugs and songs, and I’m happy to oblige her. So, no blending of six shadows on this day for this mama, LOL!

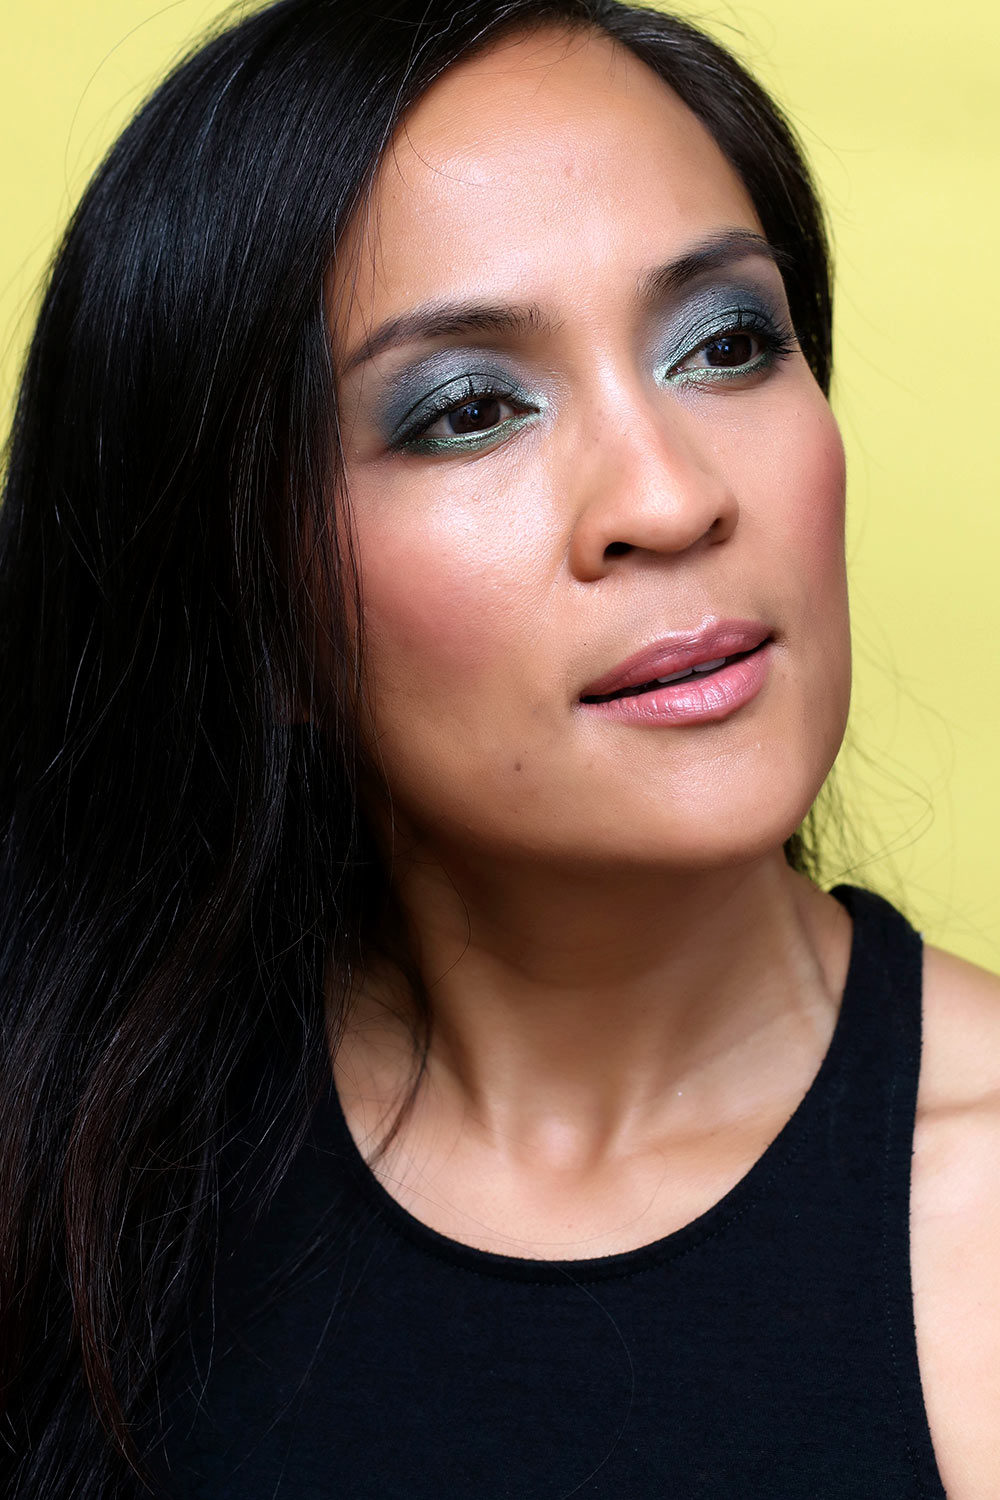
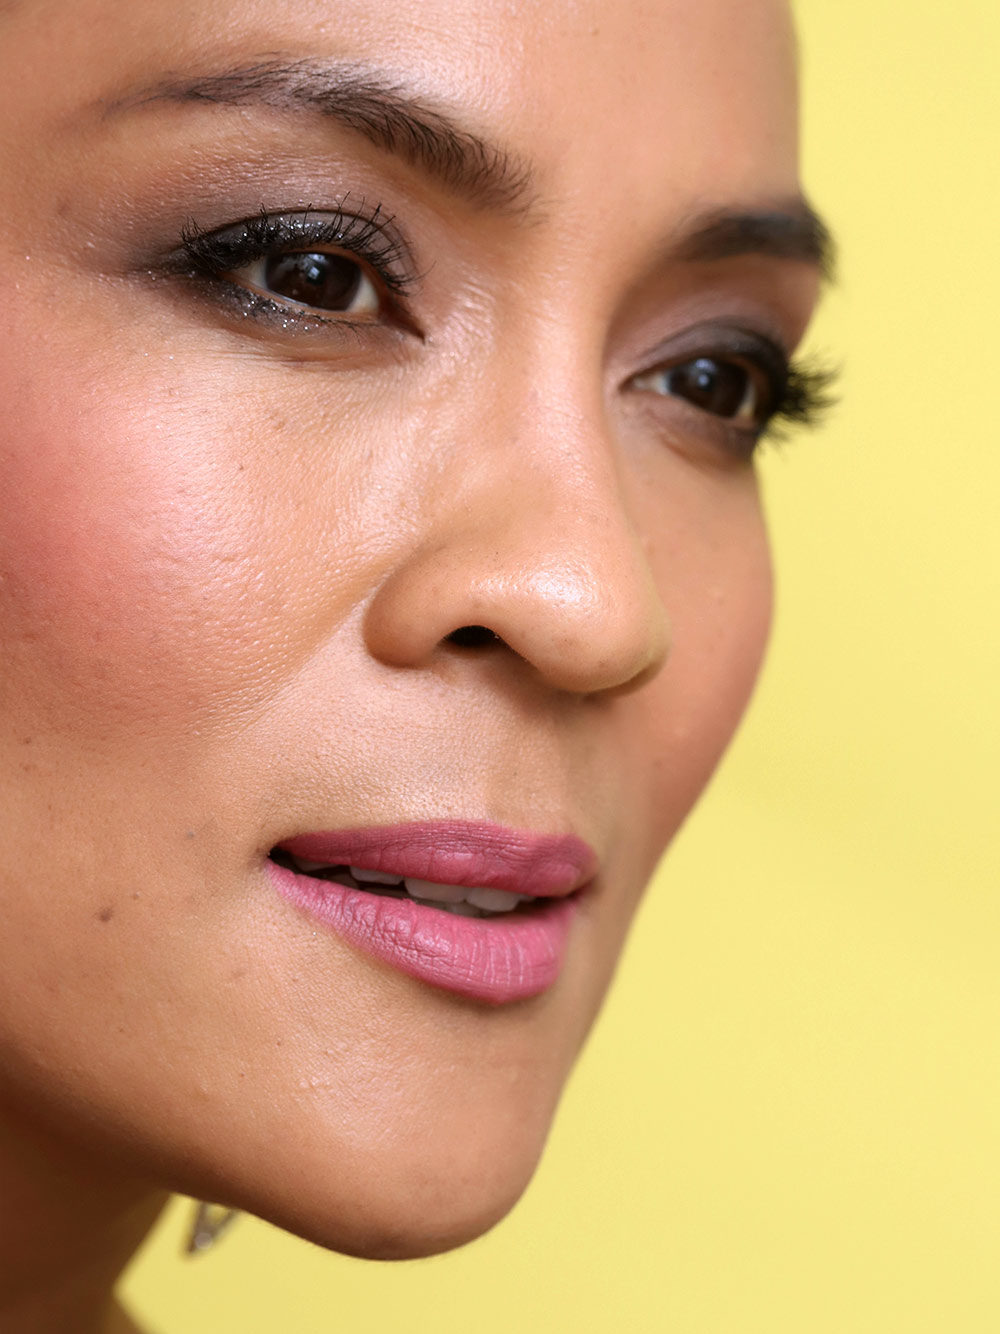
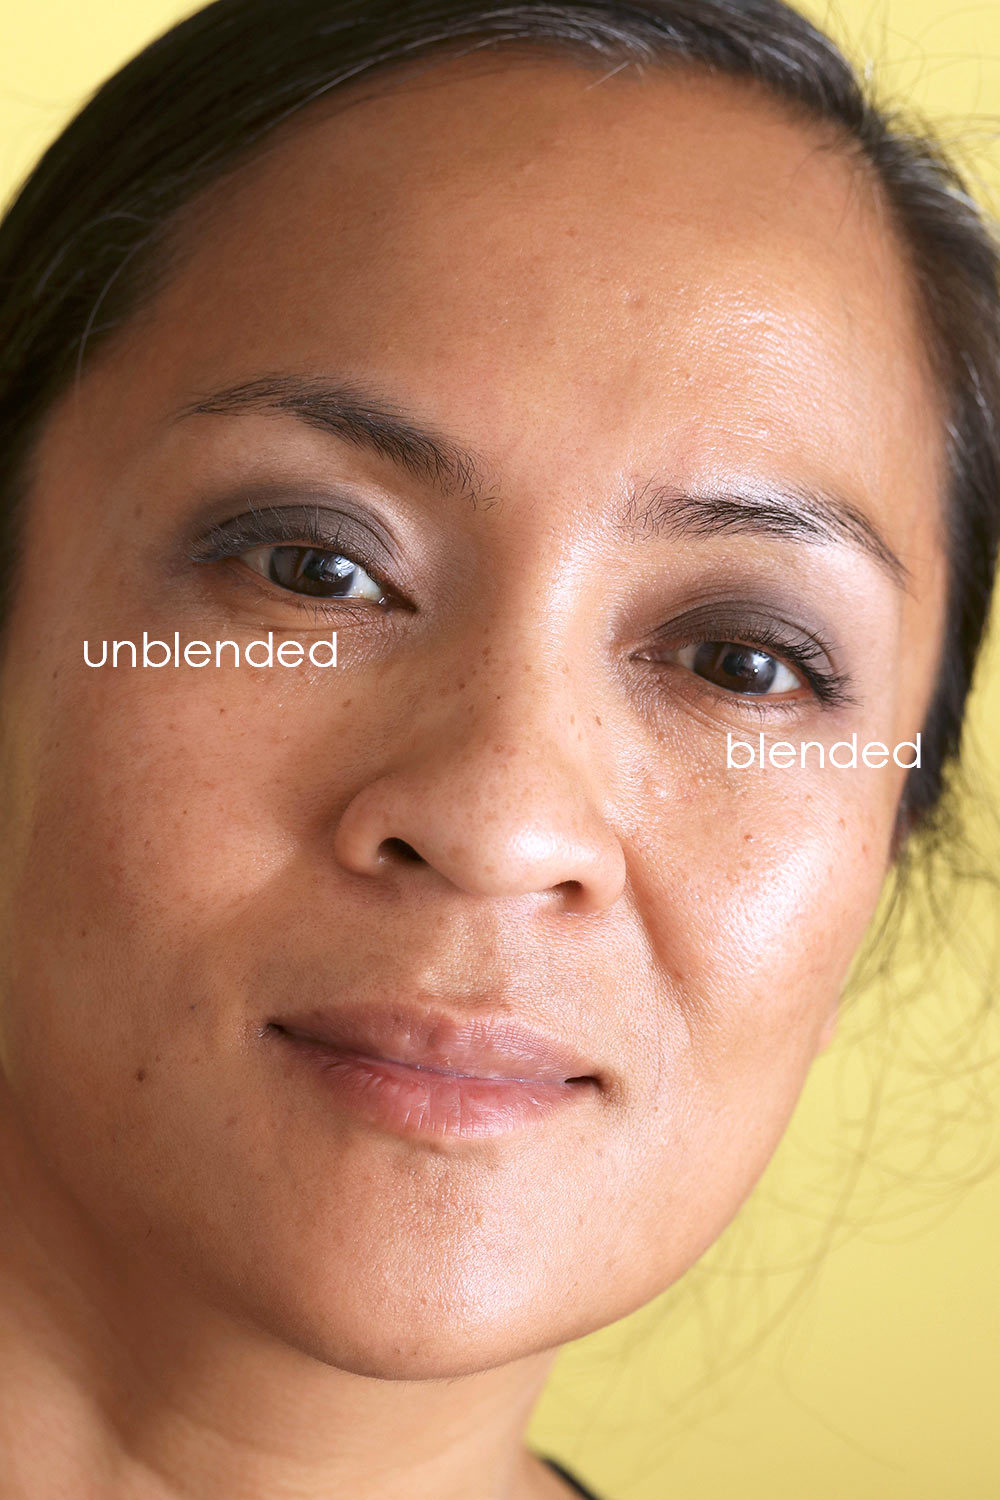
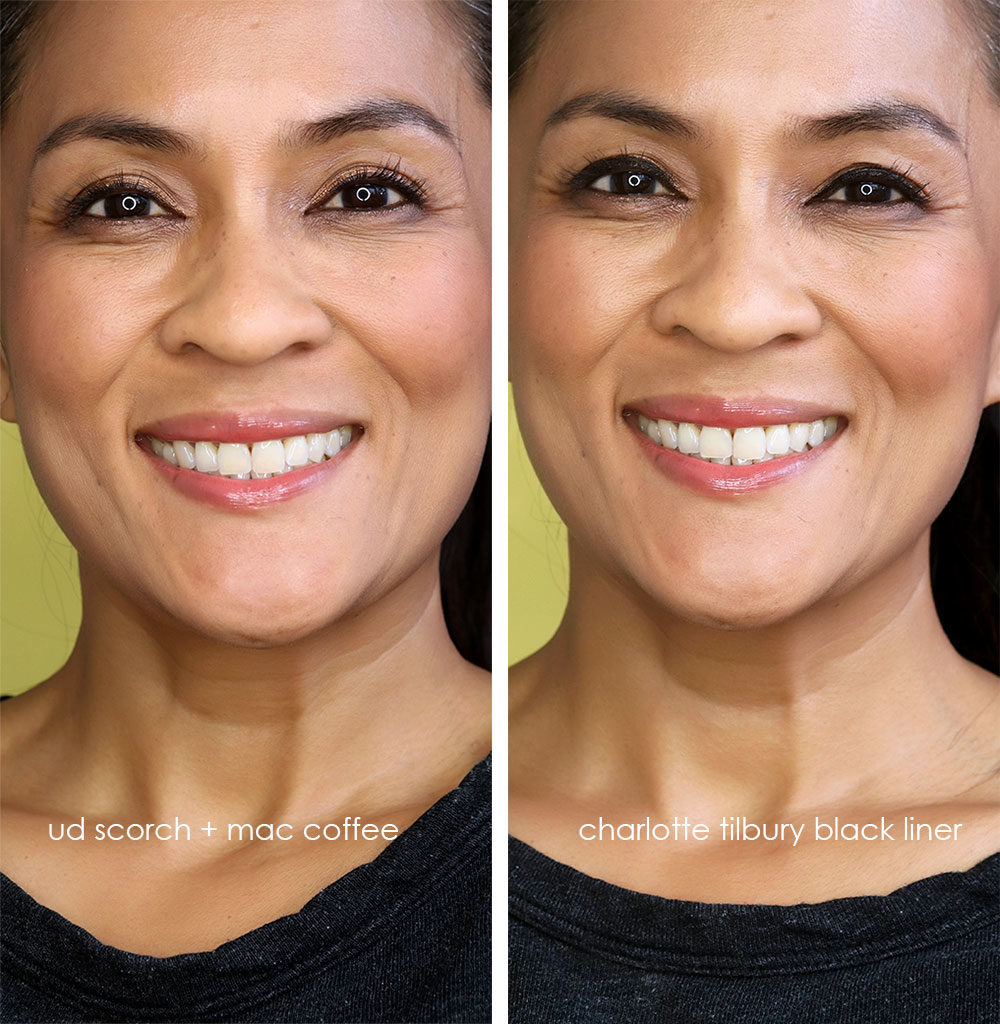
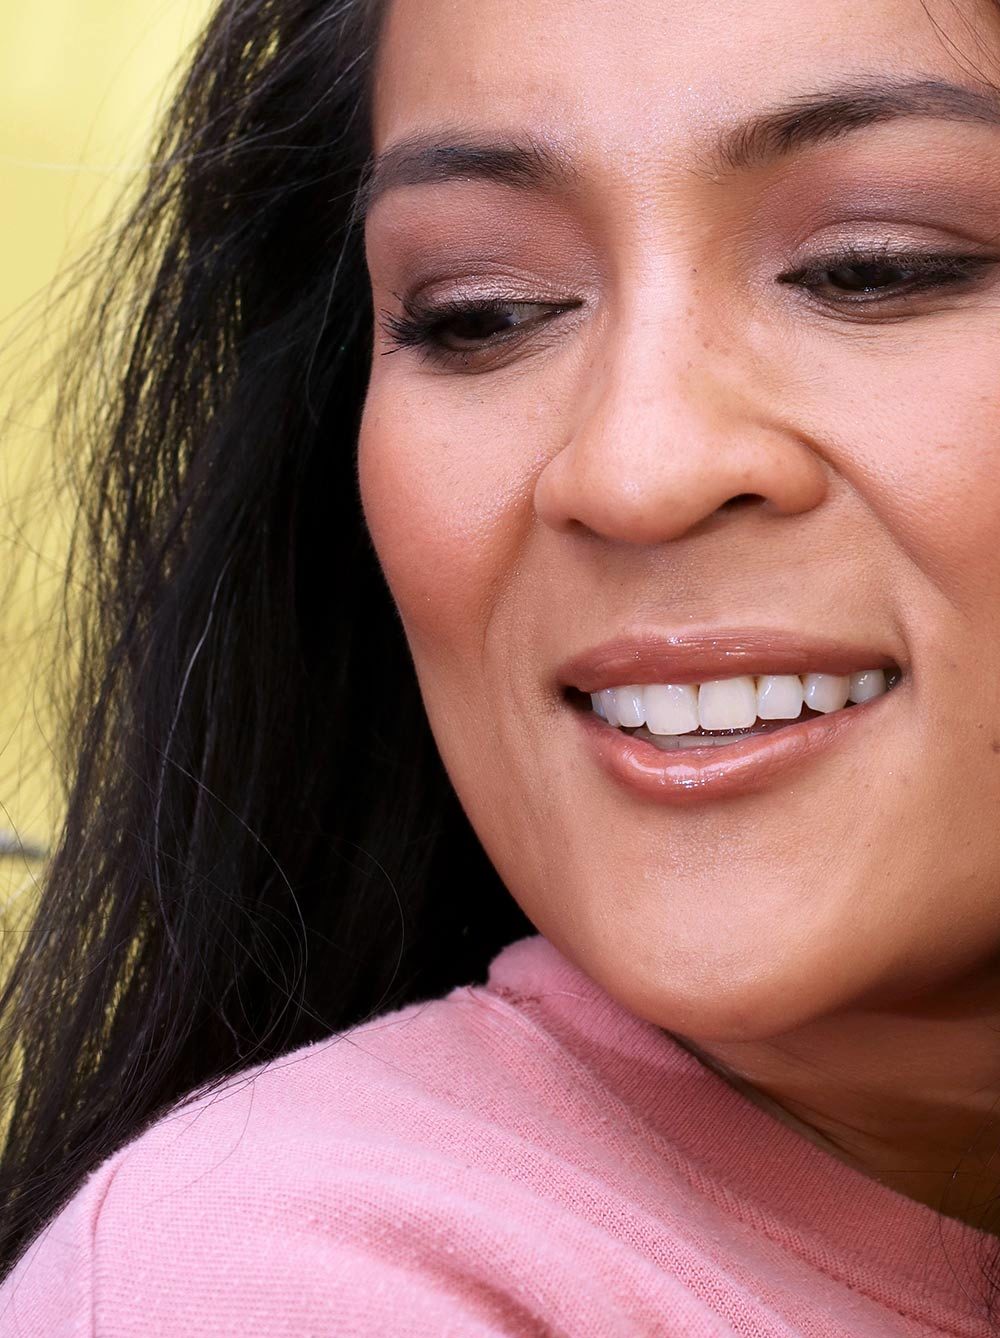
Instead, I went with a hazy olive eyeliner (gotta love how forgiving blurred edges are), a wash o’ warm brown eyeshadow, and a matte fuchsia lipstick.

Yeah, it’s streamlined and totally unfussy, but I still like it a lot. The bold lip and the flash of shimmer in the liner give it some interesting elements.

mac all fired up
Sassypants
mac all fired up
All Fired Up is from the MAC Retromatte Lipstick family, so it has a flat matte finish and feels lightweight on lips.
mac all fired up swatch
My skin tone is MAC NC42.

mac all fired up
[Continue reading…]

There are 25 comments on this post. Leave yours.

Categories: Charlotte Tilbury, Eyes, Laura Mercier, Lips, MAC Makeup, Makeup, Makeup Tips/How To

Greens and Grays

January 29th, 2020 by Karen 18 Comments

greens and grays urban decay on the run
Greens and grays

Raise your paw if you ever get stuck in color combo ruts.

I FEEL YOU!

So, lately I’ve been trying to wear color combos that I normally wouldn’t think to pair together, but it’s hard to break out of old habits, man. Like with this green and gray look. I naturally want to wear greens with warm brown, so it was a little challenging to go against my nature and swap the brown for gray.

I ended up liking how it turned out, though, so yay for makeup experiments! I’m getting a springtime vibe from it… Only 51 days till winter is over.

There’s a ton of sh*t happening on the lids, I know. It’s A LOT of color. I started with a mid-toned matte gray in the crease, then blended a shimmery green on the lids and lower lash lines, finishing with a darker blackened green on the outer corner and a bright light green on the lower waterline (I think it pops against the darker colors). And lots of mascara, of course.

greens and grays urban decay on the run

greens and grays urban decay on the run
Key eye colors

Makeup worn in this look

Eyes: NARS Eyeshadow Primer in Medium (all over lids), Viseart Netural Matte Palette (matte gray shade in crease), UD Born to Run Palette (green is Wanderlust and Big Sky mixed together and applied with a wet brush to lid and lower lash line); the dark greenish blackened gray in the outer corner is Jet, Drift and Radio mixed together), Urban Decay liner in Freak (lower lash and water lines), IT Cosmetics Superhero Mascara (lashes), MAC Brun and Omega (brows)

Cheeks: Clinique Cupid Blush, MAC Hush (highlighter), Hourglass Radiant Bronze Light (bronzer)

Base: MAC Next to Nothing Face Colour in Medium Plus and MAC Studio Fix Soft Matte Foundation Stick in NC42 (foundation), Estee Lauder 24H Concealer in Medium Deep Warm (concealer), MAC Mineralize Skinfinish Natural in Medium Golden (powder)

Lips: Estee Lauder Raw Sugar Lipstick topped with Hourglass Horizon Lipgloss

Coywolf’s snow story

When I dropped off the Coywolf at school one day this week, I couldn’t help but notice some new artwork on the classroom wall. Last week the kids all got to take turns dressing up in an Olaf snowman costume and discussing snow, and the teacher took pics. I had one of those, “This is definitely my child” moments when I found Connor’s…

I like the part where she talks about ice cubes on her head, ha ha ha!

Your friendly neighborhood beauty addict,

Karen

There are 18 comments on this post. Leave yours.

Categories: Eyes, MAC Makeup, Makeup, Makeup Tips/How To, NARS, Urban Decay

Smokey Eyes, Smudged Sparkly Eyeliner, and Why Clean Tapered Blending Brushes Are Your BFF

January 23rd, 2020 by Karen 18 Comments

smokey eyes sparkly lashlines
Back in my happy place!

Can I get a whoop-whoop from all my kindred spirits out there? — the makeup lovers who love rubbing freshly washed air-dried brushes ever-so-gently across their face, and love the fresh scent of those baby soft bristles? (Side note: If this describes you, I bet you also like sticking your face in clean laundry when it comes out of the dryer, too!)

clean brushes
So fresh, so clean

The reason you’re staring at this bevy of brushes is because I built a big-@ss pile of dirty brushes I’d been needing to wash since — gulp! — before Thanksgiving. Weeks ago, I tucked them away in a corner of my office and kinda forgot.

WHOOPS!

Well, I washed them yesterday because the bakery has been closed this week. Apparently, no one comes in this time of year because many people are still on their New Year’s diets, but folks start to fall off the wagon toward the end of January.

So…I finally had time to wash this big-@ss pile of brushes, and I also had time to do the makeup love of my life: SMOKEY EYES.

smokey eyes sparkly lashlines
I even put on falsies (I have a couple bundles on the outer corners).
smokey eyes sparkly lashlines
Subtle sparkle on the lash lines

A few things…

I always forget what a difference clean tapered blending brushes can make. Just in case you don’t know what I’m talking about, this is what they look like:

tapered blending brush clean
It’s handy to have a few around.

Whenever I’m doing smokey looks, clean tapered blending brushes are very, very handy… At the very least, I like to keep two or three on deck. Having bristles that don’t have any eyeshadow on them is key because the clean brush hairs pick up/remove excess eyeshadow while also softening any hard edges, so everything looks that much smoother and more seamless.

Another thing? You’ll want to use the lightest touch while blending, and avoid pressing so hard that the bristles splay out (this just presses the powder into your pores, which makes it harder to sheer out your shadow). All you want is the very tip to lightly touch your lid.

smokey eyes tapered blending light touch
Please don’t smash your brush head into your crease.
smokey eyes sparkly lashlines unblended blneded
You know those pics of yourself online where you look crazy? YUP.

Last, but not least, always keep a clean tapered brush around for a last blending pass at the end. After you’ve done everything — base, blush, lips, the whole schebang — lightly blend your eyeshadow one last time, both on top of the lids and along the edges of the shadow to finalize the shape of your eye makeup.

It makes all the difference!

Makeup worn in this look

[Continue reading…]

There are 18 comments on this post. Leave yours.

Categories: Chanel, Eyes, Face of the Day (FOTD), Kevyn Aucoin, Lips, MAC Makeup, Makeup, Makeup Tips/How To, NARS, PYT Beauty

Product Spotlight: Pixi Eye Reflection Shadow Palette in Natural Beauty

January 22nd, 2020 by Karen 4 Comments

pixi natural beauty palette review 2
I’m lovin’ this eye palette by Pixi.

I came to realize the Pixi Natural Beauty palette was money — MO-NAAAY (a.k.a. awesome) – at Costco last weekend when I caught a glimpse of my eye makeup in the store’s harsh overhead lighting and was, like, “Dang! Did Sir John just spend two hours on me? Why do my eyes look so good? What sorcery is happening!?”

pixi natural beauty palette review 2
Eye Reflection Shadow Palette in Natural Beauty, $24.99

Here’s why this palette stands out.

It contains a bevy of cool-toned matte browns for carving out deeper-set eyes, smoking out your lids, filling in your brows, or lining your lash lines. For these tasks and more, this flexible neutral got ‘chu, boo-boo.

The secret sauce is the pigment. There’s not a milligram too little or too much. Coupled with the soft, easily scoot-able formula, and blending becomes beyond easy. You can make a lot of mistakes along the way with this one, and you can correct them very quickly because the colors are easy to sheer, so whatever you end up with, your lids look good.

And they look good all day long, too. Yes, the shadows stay put!

The smattering of shiny golds, beiges and bronzes is an added bonus. Press a shade or two on your lids for a quick hit of glitter, or apply with a wet brush along your lash line to open cramped lids.

I love this palette for days when I want something easy, breezy.

pixi natural beauty palette review 2
The lip is MAC Retro Matte Lipstick in Back in Vogue, by the way.

If you like to do simple everyday neutral/nude looks, or if you use and love palettes like Tartlette in Bloom or Estée Lauder Defiant Nude, this palette is in the same wheelhouse.

I do have to point out one thing, though. The eyeshadow powder formula tends to kick up a lot of grains, so just be sure to tap off your brush first. It’s not a big deal for me, but if you’re a stickler for that kind of thing, you might want to pass.

You can find it at Target for $24 or online.

Your friendly neighborhood beauty addict,

Karen

There are 4 comments on this post. Leave yours.

Categories: Eyes, Makeup, Palettes, Pixi, Product Reviews

Throwback Thursdays: Bright Blue Inner Corners and Ice Skating!

January 16th, 2020 by Karen 9 Comments

mac tilt inner corner

I got all the nostalgic feels with this late ’90s-inspired look with bright blue inner corners (thanks, MAC Tilt). Was anybody else obsessed with blazingly bright inner corner highlights way back when? I most certainly was. I usually rocked MAC Vex around the tear ducts. (Side note: normally accompanied by a frosty brow bone and HELLA SKINNY brows, OMG!)

I felt like revisiting old-school inner corner highlights with this look because I saw a character wearing something similar on a show I just started watching on Netflix called Spinning Out.

It’s a drama about some Olympic hopeful ice skaters (January Jones of Mad Men fame is in it), and if you start watching it, just FYI, 1) there’s more drama than actual skating, and 2) you won’t be able to look away, because something over-the-top happens to the characters every five minutes. It’s not Melrose Place in the ’90s caliber bat-sh*t cray, but it’s pretty close.

Anywho…like I was saying, one of the main characters wore a similar look with a shimmery blue inner corner highlight to a skating competition. I, on the other hand, wore it around the house to do laundry. 🙂 I did keep it on when I left to pick up Connor at preschool, but I buffed down the blue quite a bit to make it more wearable and less in-your-face.

mac tilt inner corner

The pencil brush is your friend.

It had been a while since I wore such a bold statement inner corner, and doing so reminded me that a pencil brush is your friend, especially when you’re placing shadow in a tight space like the inner corner.

Sure, you could easily press some shadow there with your finger — and that’s something I do all the time with shimmery peaches, beiges and pinks for a soft highlight — but if you want concentrated, intense color, grab a pencil brush.

I like to start by applying the shadow around the inner corner with the pencil brush. Then I wet the brush head with a setting spray, dip it back into the same eyeshadow (don’t forget to tap off the excess), and apply the just around the tear duct to intensify the color and shimmer and create a subtle gradient.

Then, I take another pencil brush and soften out the edges.

I think this effect looks super cool with many different colors — blue, green, light purple, even pink!
[Continue reading…]

There are 9 comments on this post. Leave yours.

Categories: Eyes, MAC Makeup, Makeup, Makeup Tips/How To

Aubergine Eyes and Berry Lips

January 7th, 2020 by Karen 14 Comments

aubergine eyes berry lips
I did my eye makeup with just an eyeliner.

Your fun fact for the day about eggplant: While commonly thought of as a vegetable in cooking circles, eggplant (also known as aubergine), is technically a fruit — specifically, a berry.

And now you’re ready to conquer the botany stage on your next trivia night! (Lucky you.)

I’ve got aubergine on my mind because one thing that Santa so kindly brought me for Christmas is the aubergine-colored Athleta workout top I’m wearing in these pics, so I did this combo the other day with aubergine eyes and berry lips.

aubergine eyes berry lips 2

When you want to do easy eye makeup, pencil liner is your BFF.

For the eye makeup, I used one of my favorite quickie techniques. I grabbed a long-wearing pencil eyeliner (ESUM Aubergine), applied a layer on my lids, and then buffed out the edges to mimic the effect of eyeshadow. I did this a few times to build up the color in the areas where I wanted more depth — the lash line and outer third — so that my hooded eyes would look more deeply set. Then, I lined my upper and lower waterlines and smudged the liner along my lower lash line to balance out the heaviness on the lids.

Finish with a couple coats of mascara on your lashes, and you’re done!

What you’ll need to look for in your liner

Ideally, you’ll want a liner that’s soft enough to blend with a brush, but you don’t want one that’s too smudgy, because then it’ll just move around on your bare lids and disappear. On the opposite end of the spectrum, you don’t want one that dries too quickly, because then you won’t have enough playtime to blend.

On top of all that, it also has to stick to your waterlines (and feel comfortable on there, too).

For this technique, I really the MAC Eye Kohls in Powersurge and Teddy (Costa Riche is a good one, too, but I’ve noticed that it tends to move a lot unless I set it with a powder). The Laura Mercier Kohls are excellent, too. Try the Stormy Grey shade!

aubergine eyes berry lips 2

aubergine eyes berry lips 2
Key products worn in this look: ESUM Aubergine liner, Clinique Plum Pop blush and NARS Vivien lipstick

Your friendly neighborhood beauty addict,

Karen

There are 14 comments on this post. Leave yours.

Categories: Eyes, Face of the Day (FOTD), Lips, Makeup

A Quick Eye-Opening Tip for Hooded Lids

January 3rd, 2020 by Karen 16 Comments

urban decay light liner
Clockwise from the white on the upper left: Urban Decay Yeyo, Urban Decay Scorch, Urban Decay Goldmine, Urban Decay Heartless, Esum Rose and Urban Decay Cuff

Here’s a quick tip for my ladies with hooded eyelids, because mine are getting more and more hooded every day! Here’s what you can do to make your eyes and your lid real estate look a little larger.

You’ll need two things…

  1. A slightly shiny liner in a shade lighter than your natural skin tone. Mind you, it doesn’t have to be sequinned diva-caliber glittery. An essence of pearl is ideal, and apply this along your upper lash line.
  2. A darker liner with which to tightline, and a dark brown or inky black will work, but you could go with a dark purple or navy, too. Tightline your upper waterline with it, and really try to get in between the roots of your lashes.

With these two liners working together, the darker one will make it look like you’re wearing dark liner on your upper lash line (it also has the added bonus of making your lash base appear thicker, which is always a plus), and will also make that area look further away in 3D space, i.e. more recessed, while the shimmery lighter liner will catch light along your upper lash line and make it look more pronounced, completing the overall illusion of making your lid space appear larger than it is.

Pic on the left is with the lighter liner on the upper lash line and the darker line on tightline. Pic on the right is with a dark black liner on the upper lash line and waterline. See how my eyes on the left look much less hooded?

I’ve been doing this a lot lately with dark brown MAC Coffee and light, shimmery bronze Urban Decay Scorch, a combo that works well with my NC42 skin, and I think it makes my eyes look much less hooded than they do when I wear a straight-up black or brown liner on the upper lash line alone.

If you have a lighter skin tone, try a very light, shimmery peach like ESUM Dual Eye Pencil in Rose and Aubergine, and use the shimmery peach on your upper lash line and the dark purple to tightline.
[Continue reading…]

There are 16 comments on this post. Leave yours.

Categories: Eyes, Makeup, Makeup Tips/How To

Behind the Scenes at the Bakery…and a Chocolate Smoky Eye

December 26th, 2019 by Karen 11 Comments

zoeva cocoa blend and caramel melange eyeshadow palettes
Powered by chocolate cake

Since I started moonlighting as a professional (still novice!) cupcake baker last October, and have been working in the back of the house at a local bakery, I’ve been exploring ways to merge the wonderful worlds of cupcakes, and cookies, and cakes, and other kinds of baking…and also makeup.

For instance, there are ways in which cupcake and cookie baking are similar. Like, for instance, the basic process you go through to make cakes and cookies is the same. First, you pull together your dry ingredients and your wet ingredients, and then you alternate the wet the with dry.

It’s also the same things when I’m baking at for fun at home, with the biggest difference being that everything is scaled up to crazy high proportions at the bakery. Like, the other day, I baked 15 chocolate cake layers for a single day’s worth of orders! This is compared to at home, where I’ll maybe make three layers, at the most.

Working at the bakery has been really cool because I’ve been learning a lot, but I’m always kind of afraid that I’ll do something horribly wrong, like burn a big-@ss batch of 600 sugar cookies…

chocolate cakes
I baked these chocolate cakes!

Another difference between baking at home and baking at the bakery is how we perform prep tasks in piecemeal, and over the course of a few days.

At home, I’m the one who preps the ingredients, prepares the batter, bakes off the cakes or cupcakes, and decorates from start to finish.

chocolate batter
That’s *hella* chocolate batter!
You don’t even wanna know how much butter is in this big mixer right now…

But at the bakery, tasks are broken down into very specific subtask lists, so that at any point in time, one of the other bakers can pick up where another baker has left off. It’s incredibly efficient that way!

This look I’m wearing here, which I did with the Zoeva Cocoa Blend and Caramel Melange palettes, was inspired by that mega chocolate bake off I mentioned!

The Zoeva Cocoa Blend (left) and Caramel Melange (right) eyeshadow palettes

Oh, and here’s another big thing I’ve learned working at the bakery…and it’s likely incredibly obvious: people really, really, REALLY like chocolate cake.

Because we make a lot of chocolate cakes, and chocolate is considered one of the “foolproof” recipes. At the bakery, they give it to the newbies like me because, unless you’re a complete hot mess, you can’t muck it up. It’s an oil-based cake, so you just dump all of the ingredients into a container and mix them together, and you’re pretty much guaranteed to get a moist cake!

I used two food-inspired palettes by Zoeva in this chocolatey smoky eye… It turned out a bit pinker than I’d like, but you know, sometimes you get to that point and you can’t really go back, so you just go with it. LOL! 🙂

zoeva cocoa blend and caramel melange eyeshadow palettes

zoeva cocoa blend and caramel melange eyeshadow paletteszoeva cocoa blend

Your friendly neighborhood baking addict,

Karen

There are 11 comments on this post. Leave yours.

Categories: Eyes, Face of the Day (FOTD), Lips, Makeup, Makeup Tips/How To, ZOEVA

  • « Go to Previous Page
  • Go to page 1
  • Interim pages omitted …
  • Go to page 9
  • Go to page 10
  • Go to page 11
  • Go to page 12
  • Go to page 13
  • Interim pages omitted …
  • Go to page 132
  • Go to Next Page »

Primary Sidebar

Welcome to Makeup and Beauty Blog

Welcome to Makeup and Beauty Blog! My name is Karen, and I’m a freelance writer obsessed with makeup.

Makeup and Beauty Blog features daily product reviews, makeup tips and beauty news — like an interactive version of a monthly print magazine, except with occasional pictures of my cat.

Recent Posts

Sundays With Tabs the Cat, Makeup and Beauty Blog Mascot, Vol. 878

Makeup and Beauty Blog Monday Poll, Vol. 894

Makeup and Beauty Blog Monday Poll, Vol. 893

Makeup and Beauty Blog Monday Poll, Vol. 892

Makeup and Beauty Blog Monday Poll, Vol. 891

/* real people should not fill this in and expect good things – do not remove this or risk form bot signups */

Social

  • Facebook
  • Instagram
  • Pinterest
  • Twitter
  • YouTube

Featured Posts

Sundays With Tabs the Cat, Makeup and Beauty Blog Mascot, Vol. 771

Lady Unicorn

Weird Things I Like to Do

brows fill out beforehand

Before You Pluck or Wax Your Brows, You Must Do This

current bare skin status

What’s One Thing That Drastically Changed Your Skin for the Better?

Copyright © 2025 Makeup and Beauty Blog. Get in touch.