• Skip to main content
  • Skip to primary sidebar

Makeup and Beauty Blog | Makeup Reviews, Swatches and How-To MakeupMakeup and Beauty Blog | Makeup Reviews, Swatches and How-To Makeup

A beauty blog blooming with fresh makeup reviews, swatches and beauty tips from your friendly neighborhood beauty addict

  • Home
  • About
    • About
    • Contact
    • FAQ (Frequently Asked Questions)
    • Advertising & Media
  • Categories
    • Product Reviews
    • Makeup
    • Skincare & Fragrance
    • Style & Fashion
    • Hair
    • Nails
    • Tips & Tutorials
    • Just for Fun
  • Brands
  • Store

Eyes

Easy Winged Eyeliner for Beginners

August 10th, 2015 by Karen 24 Comments

how to winged eyeliner

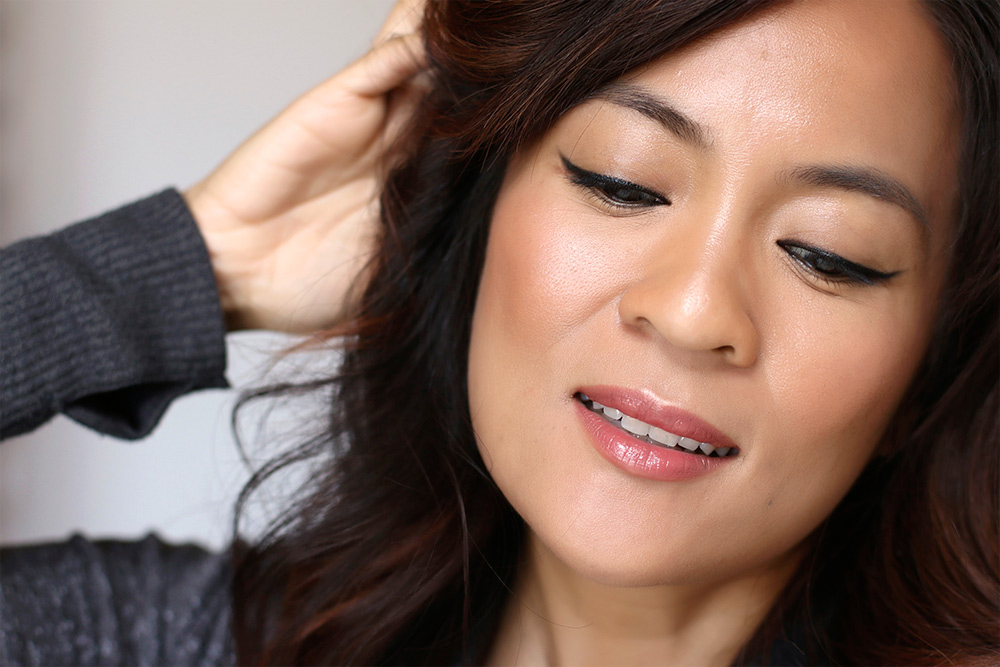
OK, straight up, by “easy winged eyeliner,” I mean easy in reference to being able to successfully draw the shape and angle you want, and not easy in terms of being able to do the whole thing in 30 seconds (it will probably take longer than that). This method here involves four steps, but they really are easy, and at the end of them you’ll have perfectly placed wings.

Now, we all know someone who can perfectly apply winged eyeliner in a single glorious swoop, but I’m totally not that girl. To get my winged liner the way I like it, I have to apply it in layers and steps.

It’s all about the layers. 😉

If you’ve ever struggled to draw your wings just right, or if you can only do it with an obscene amount of Herculean effort and concentration, this method of layering will help you place your lines and wings exactly where you want ’em. Pretty soon you’ll have winged liner like a BOSS!

What you’ll need…

  • A black pencil eyeliner
  • An angled eyeshadow brush
  • A black powder eyeshadow
  • A gel or liquid eyeliner
  • Q-tips

1. Line your upper lash line (you can also do your water line, but it’s optional)

easy how to winged eyeliner beginners

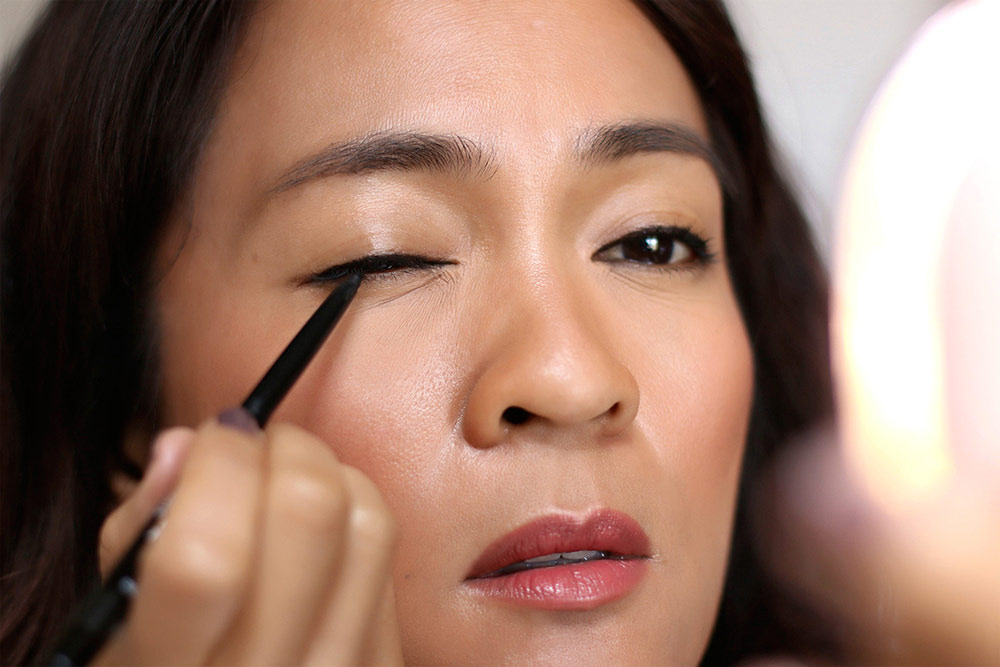
I tightlined my eyes first, because I always tightline, but it’s completely optional. What we’re gonna do now is line our upper lash line, so grab a black pencil eyeliner with a sharp tip (or sharpen a dull one), and line the upper lash line on one of your eyes with it. The sharp tip just makes it easier to be precise than a dull or blunt tip does.

Try to keep your line as thin and as close to your lash line as possible. Don’t worry at this stage if your line isn’t as thick and voluminous as you’d like, or if the edge is a little wonky or jagged, because we’ll rectify that sitch in a second. Repeat on your other eye.

easy how to winged eyeliner beginners

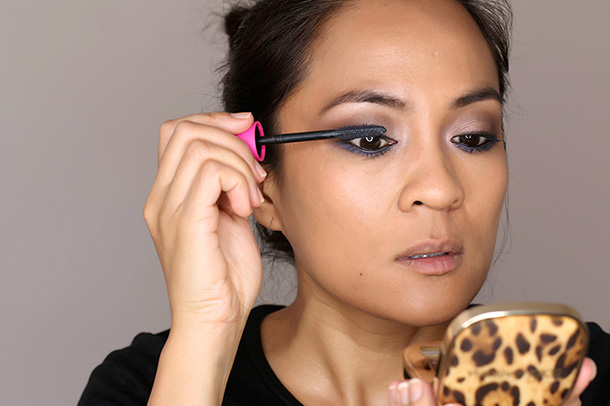
2. Smooth the edge of the line and start building the shape of your wing

easy how to winged eyeliner beginners

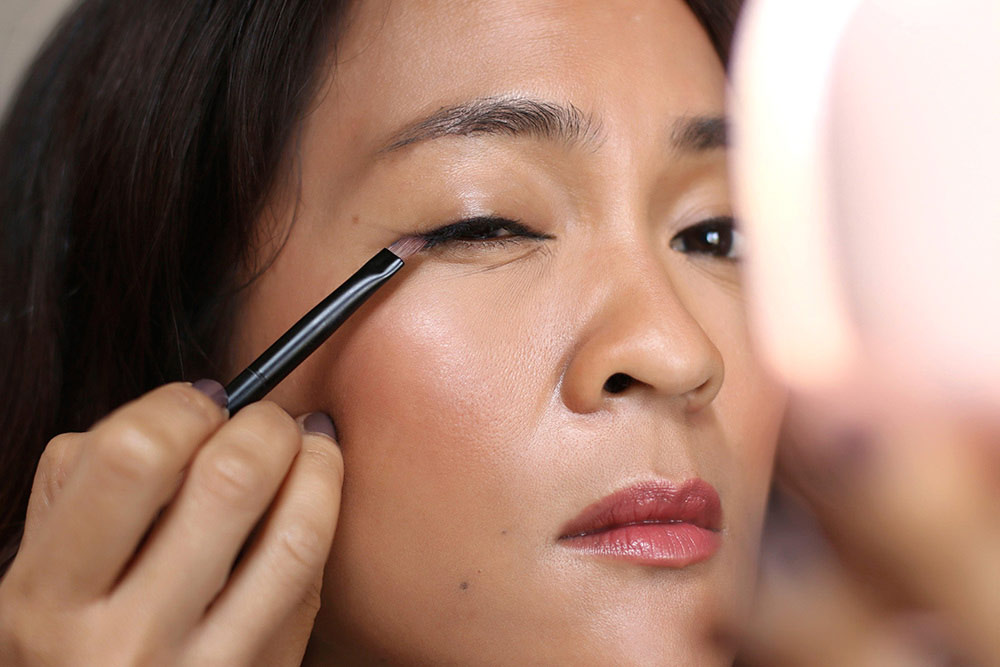
To smooth the edge of the line and start building the shape of your wing, take a clean angled eyeshadow brush, and run it gently along the edge of the line you drew in step one (note: I do each step on each eye along the way to keep them symmetrical). Start at the inner corner and move out. When you get to the outer corner, drag the brush out a bit to create a faint outline of a wing using the remaining product on your brush.

To get both eyes symmetrical, it helps me to look straight into a mirror with both eyes open while I’m working.

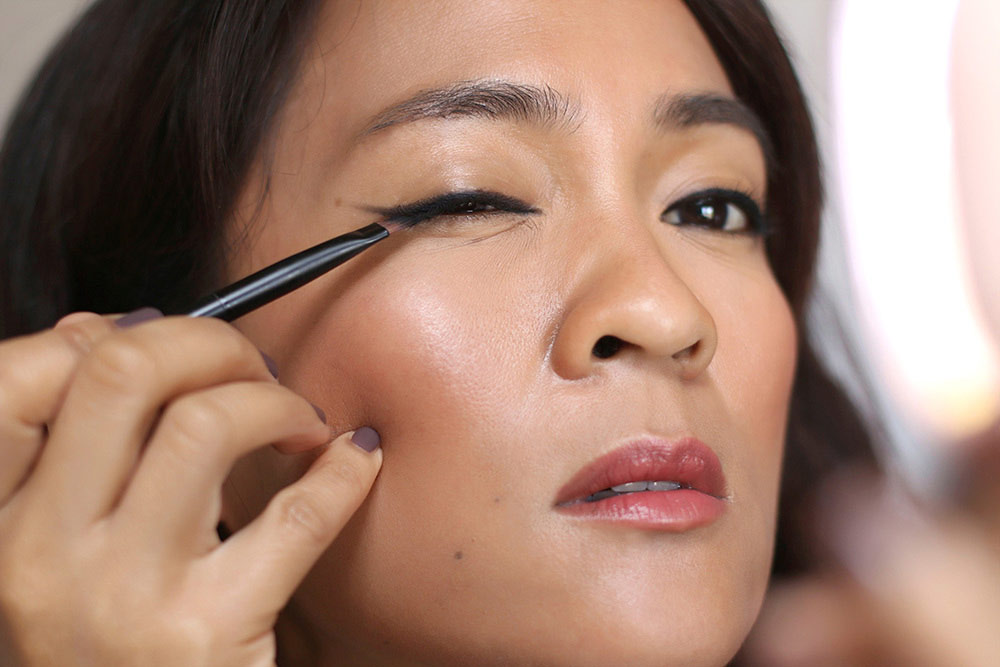
If you find that your wings aren’t even, don’t panic! Use a Q-tip to tweak and adjust them.

easy-cat-eye-pictureAs for the angle of your wings, it’s up to you, but I think it helps to visualize an invisible line that extends up and out from the outer corner of your lower lash line. Just follow the angle of your lower lash line up and out.

Totally optional and up to your own personal preference, though. I usually like to flatten my wings out a bit (so not as steep), because it appears to elongate the eye, and I like that effect. Play around a bit until you find an angle that works for you.
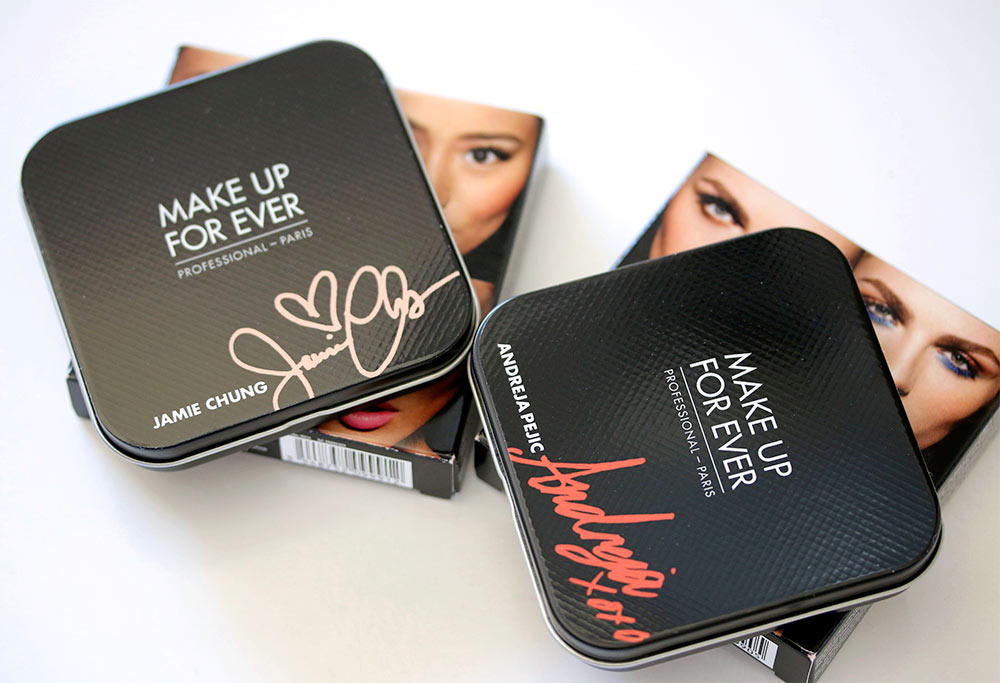
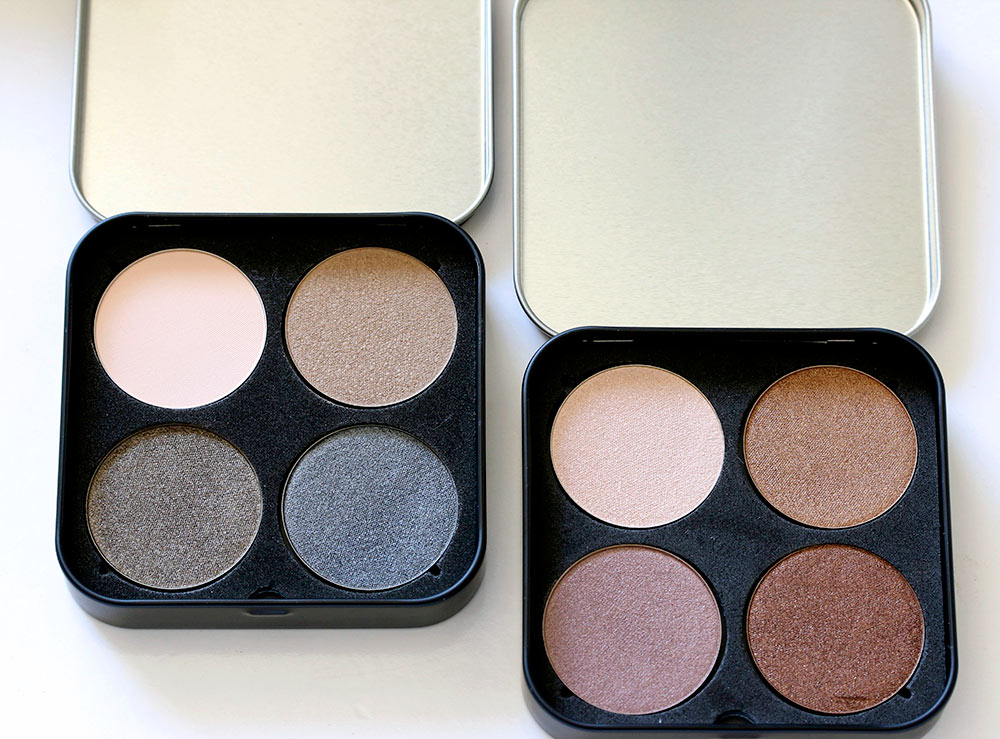
3. Thicken the line and wing

easy how to winged eyeliner beginners
[Continue reading…]

There are 24 comments on this post. Leave yours.

Categories: Eyes, Makeup, Makeup Tips/How To

How to Tightline Your Eyes

August 10th, 2015 by Karen 30 Comments

how-to-tightline

Tightlining, or “tight-lining,” despite its action-packed name, is not a new extreme sport. It doesn’t have anything to do with bungee cords, ratchet straps or zip-lining, but along with filling in my brows and curling my lashes, it’s an essential part of my everyday makeup routine.

In tightlining, you line the base of your upper lash line from below, getting down in there between the roots, and I do it EVERY. SINGLE. DAY.

Even when I’m under a severe time crunch and have to start making “tough” decisions on which and what parts of my routine I have to skip, I’ll skip bronzer, highlighter, and if I have to, I’ll even skip blush…as long as I still have time to tightline.

So how does tightlining differ from the typical ways of applying eyeliner? Well, I usually apply eyeliner from above, where I get the tip of the liner down between the roots of my lashes and along the lash line, and in tightlining, it’s the same basic process, but I come at the base of the line from beneath it, where I can really get the liner down in there between each and every lash, and it makes the lash line look nice and thick, and that makes the eyes look bigger.

Before tightlining (left) and after (right)
Before tightlining my upper water line (left) and after (right)

For tightlining, of all the different eyeliner formulas — gels, powders, kohls, liquid liners, etc. — I like black waterproof twist-up pencil liners the best, and I choose the twist-ups because the tips are usually super thin, which makes it easier to get down in between each of the lashes at the roots. I also like waterproof formulas because they last (and I LOVE Chanel’s Waterproof Eye Liner in 88 Noir Intense for this reason).

Of course, if you feel like black liners are too stark for you, you can always use another shade. Deep blackish gray, brownish black, medium-toned gray, navy or brown all work, too. Whatever darkens your lash lines and floats your boat.

Step 1: Sharpen your pencil

To start, the first thing I do is sharpen my pencil.

I know that sounds kind of “Duh, Karen!” but using a sharp tip really helps. It makes it much easier to get between those lashes at the roots.

Step 2: Placing the pencil at the base

Next, I place the tip of the pencil just beneath my lash line, pointing at an upward angle, and close the eye I’m working on so that the tip of the liner presses up against the base of the lashes.

how-to-tightline-2
[Continue reading…]

There are 30 comments on this post. Leave yours.

Categories: Eyes, Makeup, Makeup Tips/How To

Fri-Yay Makeup Fun: How to Do a Graphic Cat Eye

August 7th, 2015 by Karen 22 Comments

graphic-cat-eye-makeup

Today was the first day in the past two (or three) weeks I felt makeup motivated enough to do something more ambitious than color in the crease, color on the lids and a little in the outer corner, and I’m hoping it’ll break me outta my current eyeshadow rut (*crosses fingers*).

I call this a “graphic cat eye,” and you may or may not remember it from this Buxom Eyeshadow Bar post a while back.

graphic-cat-eye-1-final

It’s an exaggerated version of cat eye liner (aka “winged liner”) done with colorful purple eyeshadow (instead of liner), and it’s one of those makeup looks that might seem hella complicated, but it’s really not at all. The hardest parts are probably getting the wing angle and the shape of the eye symmetrical on both sides, but if you go slowly and work in layers, I’m sure you’ll be perfectly fine.

Here we go! 🙂

First, I started by curling my lashes and tightlining my upper lash line with black liner…but you can skip that if your lashes are naturally curly (lucky you!), and/or you’re just not that into tightlining (oh, and I do both eyes together at the same time to keep them symmetrical).

Next, I lined my upper lash lines and drew a wing using an angled brush and a dark plummy purple eyeshadow, but I started by sort of marking in a couple layers first with the shadow and the brush head dry to get the general shape. Then I wet the brush head, dipped it back into the eyeshadow again and went back over the line and wing to deepen the color and create a slight gradient.

The shape, angle and length of your wing, which is probably a tad messy at this point, kinda serves as a roadmap for the rest of the eye look.

graphic-cat-eye-2-final
[Continue reading…]

There are 22 comments on this post. Leave yours.

Categories: Eyes, Makeup Tips/How To

A Lazy Girl’s Eye Makeup: Color in the Crease, Color on the Lid and a Little in the Outer Corner

August 5th, 2015 by Karen 29 Comments

lazy girl's eye makeup

Holy eye makeup ruts, Batman! I’ve been in one for about a month. I just haven’t wanted to push myself, makeup-speaking, or venture out of my comfort zone.

Does this ever happen to you?

I really haven’t been experimenting with any new eye makeup techniques lately or funky eyeshadow placement, and I’m not going the extra mile, you know? — like by applying false lashes or going buck wild with my eye looks. I’ve been eye makeup lazy, also known as perfectly comfortable doing the same-o, same-o, which for me is color in the crease, color on the lid and a little in the outer corner.

“…color in the crease, color on the lid and a little in the outer corner.”

-Anonymous lazy woman

I’ll use different eyeshadows, of course, but I’ll place them on my eyes in more or less the same way.

This is the Old Faithful of eyeshadow placement positioning for me, LOL! Putting color in the crease, color on the lid and a little in the outer corner gets the job done. It appears to deepen the crease, which matters to me because mine isn’t naturally very deep (my eye shape is somewhat “hooded”), and I like my eyes to look like they’re set a little deeper.

1. A mid-toned eyeshadow in the crease

When I do this eye look, this is how I’ll start, and it’s usually with a matte or a satin brown to fake the falling of shadows and sort of make my eyes look like they’re set deeper than they actually are.
[Continue reading…]

There are 29 comments on this post. Leave yours.

Categories: Eyes, Makeup, Makeup Tips/How To

Easy Eye Makeup: Choose Similar Eyeshadow Colors for Easier Blending

August 5th, 2015 by Karen 12 Comments

paul joe cafe macchiato caramel drizzle k
Wearing Paul & Joe Cafe Macchiato 097 and Caramel Drizzle 099 on my lids

Like, no joke, I think I must be the slowest person on this earth when it comes to blending eyeshadow, because you know those really super blended eye makeup looks? — they take forever. Forever! — and by “forever” I mean between one and three hours from start to finish, especially if I do them intending to take pictures.

In other words, it takes freakin’ work, homegirl!

Sometimes I’m OK with that and all the blending and gradients, and I think it’s worth all the effort, but sometimes I’m not. Sometimes I just wanna throw a little makeup on my eyes and get on with my life already.

When that happens, especially when I also want to take pics and still want to look polished and not like I’m deliberately avoiding blending, I grab two or more similar eyeshadows in the same, or almost the same, color family, like two browns (one slightly darker than the other) or two close shades of almost the same intensity, like the warm brown I’m wearing in my crease in the top pic with a soft gold on my lids.

It’s kind of obvious, but sometimes I still forget that it’s just A LOT easier to seamlessly blend similar colors (like two similar browns) than it is to blend highly contrasting colors (like black and white) on completely opposite ends of the spectrum, so I can still create a buffed-out, blended eye look in a lot less time.
[Continue reading…]

There are 12 comments on this post. Leave yours.

Categories: Eyes, Makeup, Makeup Tips/How To

MAKE UP FOR EVER Jamie Chung and Andreja Pejić Artist Shadow Palettes

August 5th, 2015 by Karen 22 Comments

Yeah, man! I’d immediately drop the sweater I’m knitting for my cat (I’m not actually doing this, but it is on my to-do list) for the two new Make Up For Ever Jamie Chung and Andreja Pejić Artist Shadow Palettes because they’re such a great-freakin’ deal.

Would you believe that the pans in these “Be Bold. Be Unexpected. Be You.” eyeshadow palettes are actually bigger than the regular full-size singles in MUFE’s permanent line? Like really — who does that…? These days, I feel like it’s usually the opposite. So many brands are giving less product and charging more for it, so it’s rare when a line doesn’t.

Here’s a review of MUFE’s Andreja Pejić and Jamie Chung “Be Bold. Be Unexpected. Be You.” palettes, both of which are $48 and available now exclusively at sephora.com.

Press play! 🙂 C’mon, I know you wanna.

Products mentioned…

  • Make Up For Ever Be Bold. Be Unexpected. Be You. Artist Shadow Palettes in Andreja Pejić and Jamie Chung ($48 each)
  • L’Oreal Infallible Pro-Last Nailcolor in Endless Sea ($9.99)

make up for ever be bold be unexpected be you

make up for ever be bold be unexpected be you

make up for ever be bold be unexpected be you

Your friendly neighborhood beauty addict,

Karen

There are 22 comments on this post. Leave yours.

Categories: Eyes, Make Up For Ever, Makeup, Product Reviews, Video

5 Ways to Make Your Eyes Look Bigger

August 4th, 2015 by Karen 29 Comments

How to make your eyes look bigger

#makeupgoals — to make my eyes look SO big that even good-natured, wide-eyed anime characters start talking mad smack…with jealously, of course!

TURBO THE GLITTERY RAINBOW PEGASUS: “Did you see Karen’s eyes today? GURL, I don’t even know. I like big eyes, but hers are HUGE.”

CHICI THE COTTON CANDY KITTY: “I know, right!? I mean, where does she get off making her eyes look bigger than ours? We’re professional anime characters, for crying out loud! We’re supposed to freakin’ dominate that doe-eyed sh*t!”

Haha! Craziness…

It’s true, though.

Making my eyes look as large as possible is one of my top makeup priorities, because I feel like I look spunkier, younger (at least that’s the idea) and generally more alert and awake when my eyes appear bigger.

It’s all an illusion, of course, but illusions can be cool, and this one is easy to create. 🙂

Here are five things you can do on their own (or together) to make your eyes look bigger.

1. “Tightline” your upper water line

how to make your eyes look bigger
Chanel Stylo Yeux Waterproof Eyeliner in 88 Noir Intense

Darkening your upper water line by placing a dark eyeliner along the base of, and between, your lashes, also known as “tightlining,” makes the line look thicker, which appears to lift, brighten and enlarge your eyes.

The key is to really get down there with liner (waterproof works best for me) as close as possible to the base of your lashes. Just run it along your upper water lines, really getting in between the lashes at the roots, and repeat until you’re happy with the line.

2. Curl your lashes

how to make your eyes look bigger

If your lashes naturally stick out straight or point slightly downward, they might cast a slight shadow under your eyes, which can make them look a little smaller (my lashes do this!). If this happens to you, steal your cat’s favorite lash curler. 🙂

But seriously, curled, lifted lashes don’t cast the same annoying shadow under your eyes, and they draw attention up, up and away!

Curled lashes can also appear to sort of fold over on themselves, which can make your lash lines look thicker, which also enhances the whole “tightlining” effect.

3. Apply mascara to your top AND bottom lashes

How to make your eyes look bigger

By darkening, thickening and lengthening lashes, especially curled lashes, mascara can also make your eyes look bigger.

To really maximize the doe-eyed effect, look for a mascara that lengthens AND thickens, especially at the roots, and apply it to both your upper and lower lashes.
[Continue reading…]

There are 29 comments on this post. Leave yours.

Categories: Eyes, Makeup Tips/How To

The MAC Electric Cool Collection Plugs Into Maximum Color and High Voltage Frost

July 31st, 2015 by Karen 16 Comments

mac electric cool collection
The MAC Electric Cool Collection Eye Shadows ($22 each, and available now online)

mac-electric-coolThese new $22 MAC Electric Cool Eye Shadows are electric!

But no…not literally electric. You do not have to plug them in, nor will you experience a jolt if you touch one of the springy, soft pans with your finger, but wouldn’t that be weird if it actually happened?

Oddly, I can see it being a thing someday in the not-too-distant future — women paying good money to get mildly electrocuted by their eyeshadow — because, I mean, people already pay to put snail slime on their faces, so getting zapped by an eyeshadow isn’t much of a jump.

In this case, though, by “electric,” I’m referring to intense pigment and frost; in other words, a whole lotta fun. 🙂

mac electric cool collection
The MAC Electric Cool Eye Shadows from the left in Gravitational, Brilliantly Lit, Dynamo and Infra-Violet

You might remember this family of shadows from A Novel Romance last year, within which were eight Electric Cool Eye Shadows (a few of which reappear here), and I guess MAC deemed them worthy of a comeback, because they’re back in their own 16-piece limited edition collection, and it’s available now on the MAC website and coming to MAC stores and counters August 6 through September 17.

mac electric cool collection
MAC Highly Charged, Emerald Power, Switch to Blue and Black Sands

So, watt (get it?) are they?

Sorry. Couldn’t help it. 🙂

Much like Chanel’s Illusion D’Ombre cream shadows, they have a soft, springy texture, and when you press down on them, they actually bounce back! The formula isn’t quite a cream or a powder; it’s something in between.

mac electric cool collection
The MAC Electric Cool Eye Shadows from the left in In Orbit, Superwatt, Electroplate and Coil

[Continue reading…]

There are 16 comments on this post. Leave yours.

Categories: Collections, Eyes, MAC Makeup

  • « Go to Previous Page
  • Go to page 1
  • Interim pages omitted …
  • Go to page 54
  • Go to page 55
  • Go to page 56
  • Go to page 57
  • Go to page 58
  • Interim pages omitted …
  • Go to page 132
  • Go to Next Page »

Primary Sidebar

Welcome to Makeup and Beauty Blog

Welcome to Makeup and Beauty Blog! My name is Karen, and I’m a freelance writer obsessed with makeup.

Makeup and Beauty Blog features daily product reviews, makeup tips and beauty news — like an interactive version of a monthly print magazine, except with occasional pictures of my cat.

Recent Posts

Sundays With Tabs the Cat, Makeup and Beauty Blog Mascot, Vol. 878

Makeup and Beauty Blog Monday Poll, Vol. 894

Makeup and Beauty Blog Monday Poll, Vol. 893

Makeup and Beauty Blog Monday Poll, Vol. 892

Makeup and Beauty Blog Monday Poll, Vol. 891

/* real people should not fill this in and expect good things – do not remove this or risk form bot signups */

Social

  • Facebook
  • Instagram
  • Pinterest
  • Twitter
  • YouTube

Featured Posts

Sundays With Tabs the Cat, Makeup and Beauty Blog Mascot, Vol. 771

Lady Unicorn

Weird Things I Like to Do

brows fill out beforehand

Before You Pluck or Wax Your Brows, You Must Do This

current bare skin status

What’s One Thing That Drastically Changed Your Skin for the Better?

Copyright © 2025 Makeup and Beauty Blog. Get in touch.