• Skip to main content
  • Skip to primary sidebar

Makeup and Beauty Blog | Makeup Reviews, Swatches and How-To MakeupMakeup and Beauty Blog | Makeup Reviews, Swatches and How-To Makeup

A beauty blog blooming with fresh makeup reviews, swatches and beauty tips from your friendly neighborhood beauty addict

  • Home
  • About
    • About
    • Contact
    • FAQ (Frequently Asked Questions)
    • Advertising & Media
  • Categories
    • Product Reviews
    • Makeup
    • Skincare & Fragrance
    • Style & Fashion
    • Hair
    • Nails
    • Tips & Tutorials
    • Just for Fun
  • Brands
  • Store

Face of the Day (FOTD)

My Friday FOTD With the NARS Under Cover Summer 2016 Collection

April 29th, 2016 by Adia Goss 33 Comments

NARS under cover summer 2016
Going bold with NARS Deep End on my lids and lower lash line

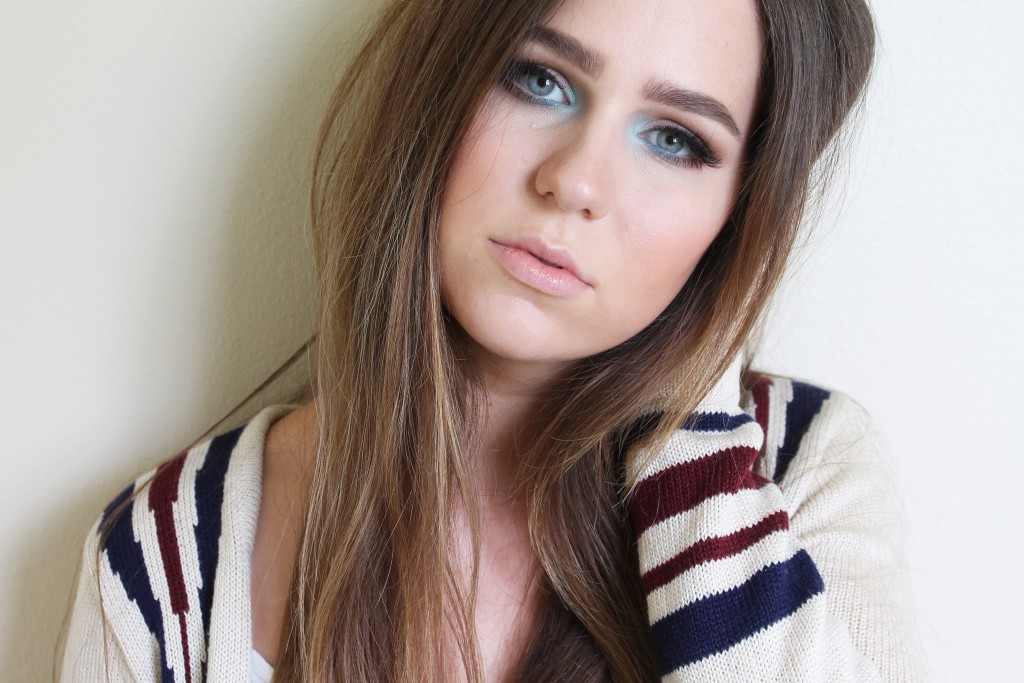
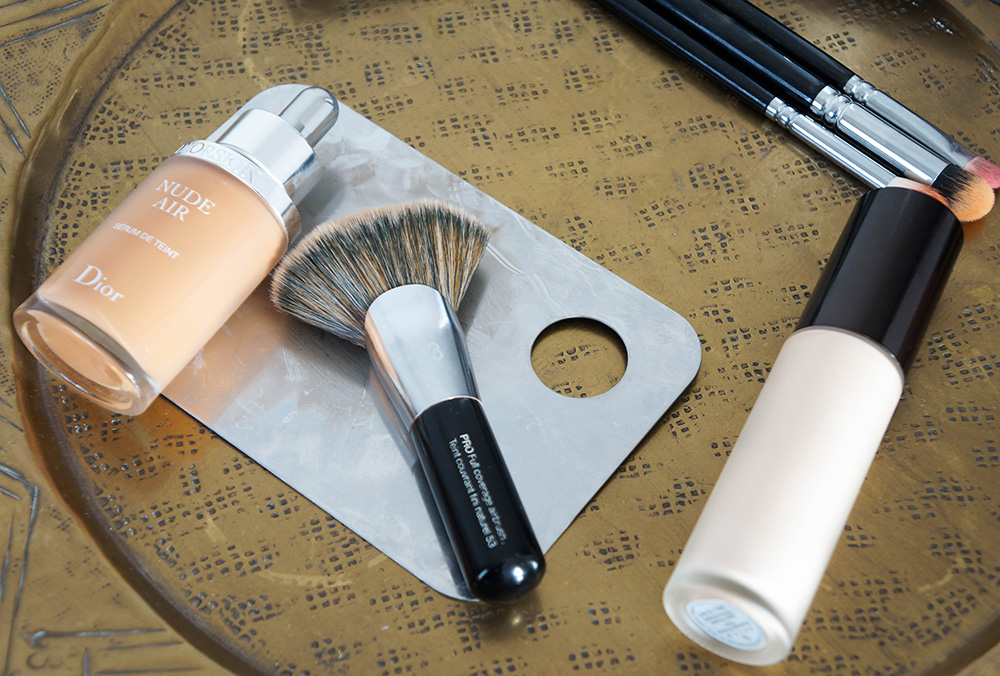
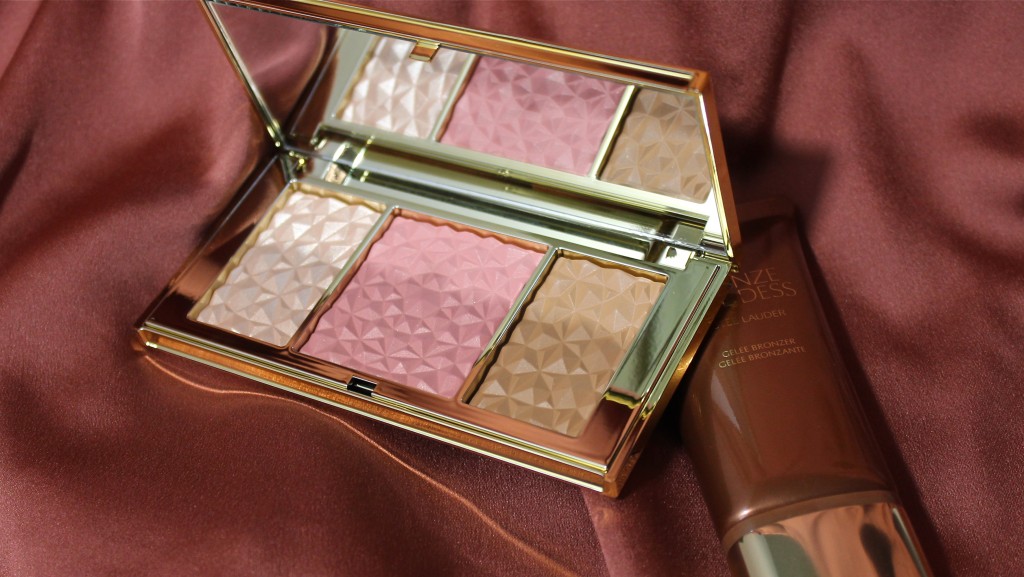
I think everything from the NARS Summer 2016 Under Cover Collection — from the Lip Covers to the Dual-Intensity Blushes and the Dual-Intensity Eyeshadows — is A-M-A-Z-I-N-G! I love how cohesive the overall collection is and how they included shades for neutral looks and bold looks, too. The makeup look I was wearing in my review of the eyeshadows was something closer to my normal neutral makeup looks, so I thought I’d try a bolder look outside my comfort zone today.

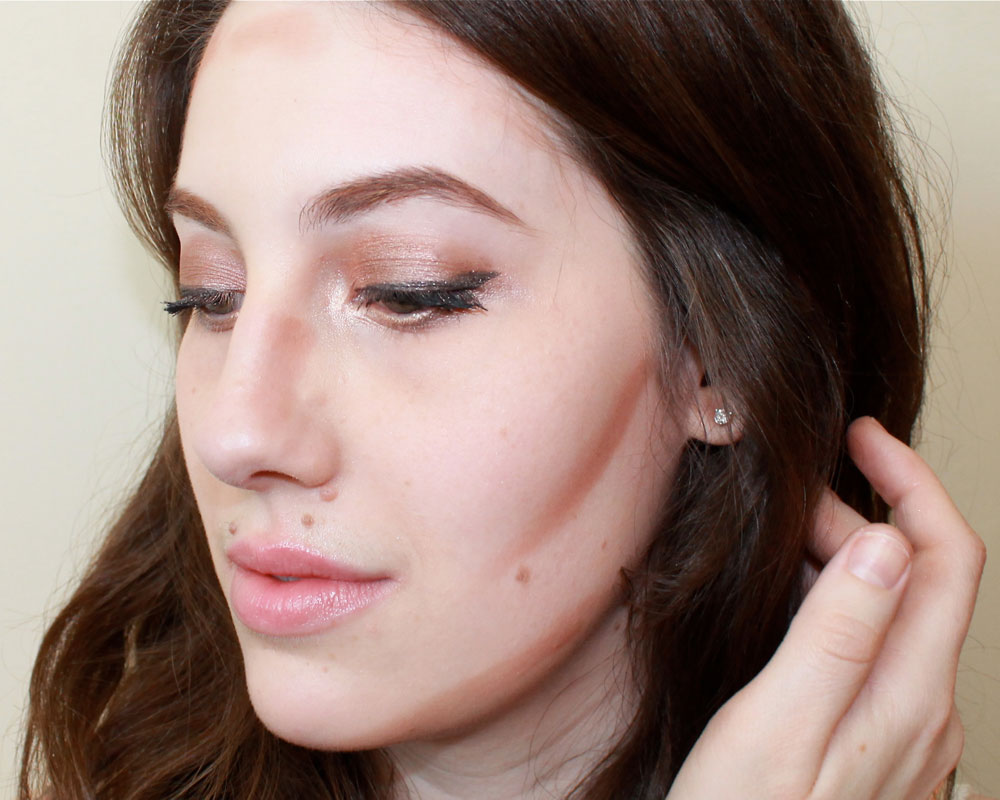
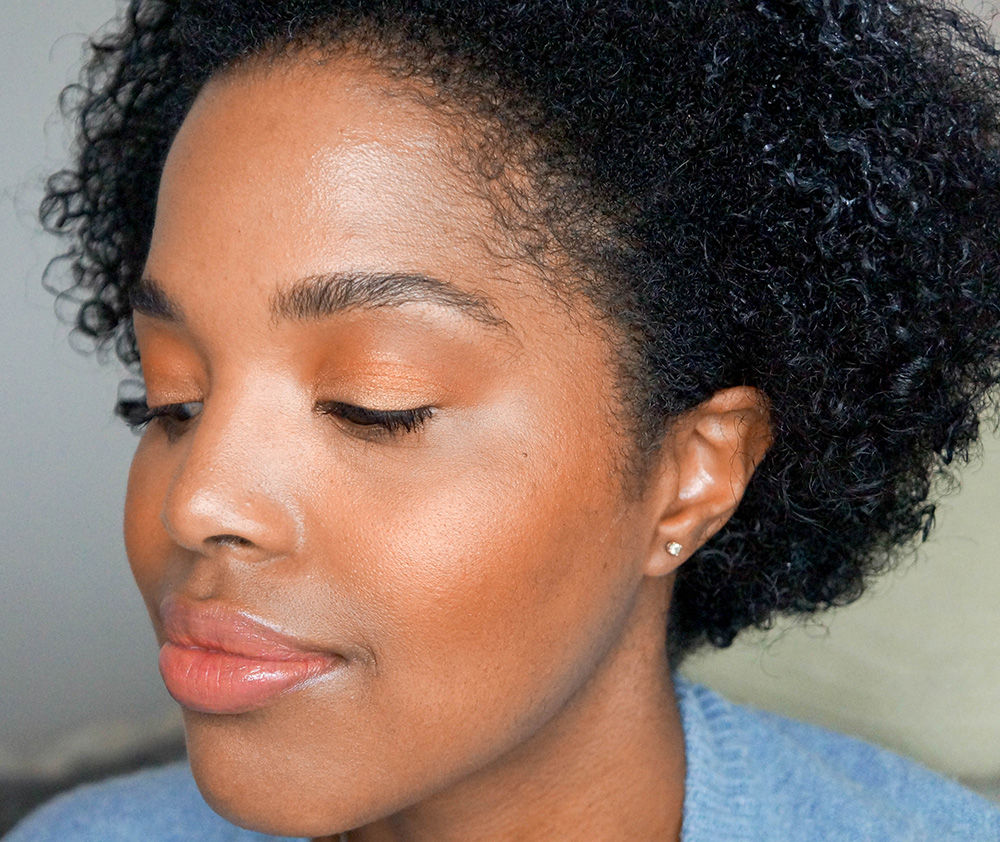
This look was actually really easy, but I think it definitely makes a statement. 

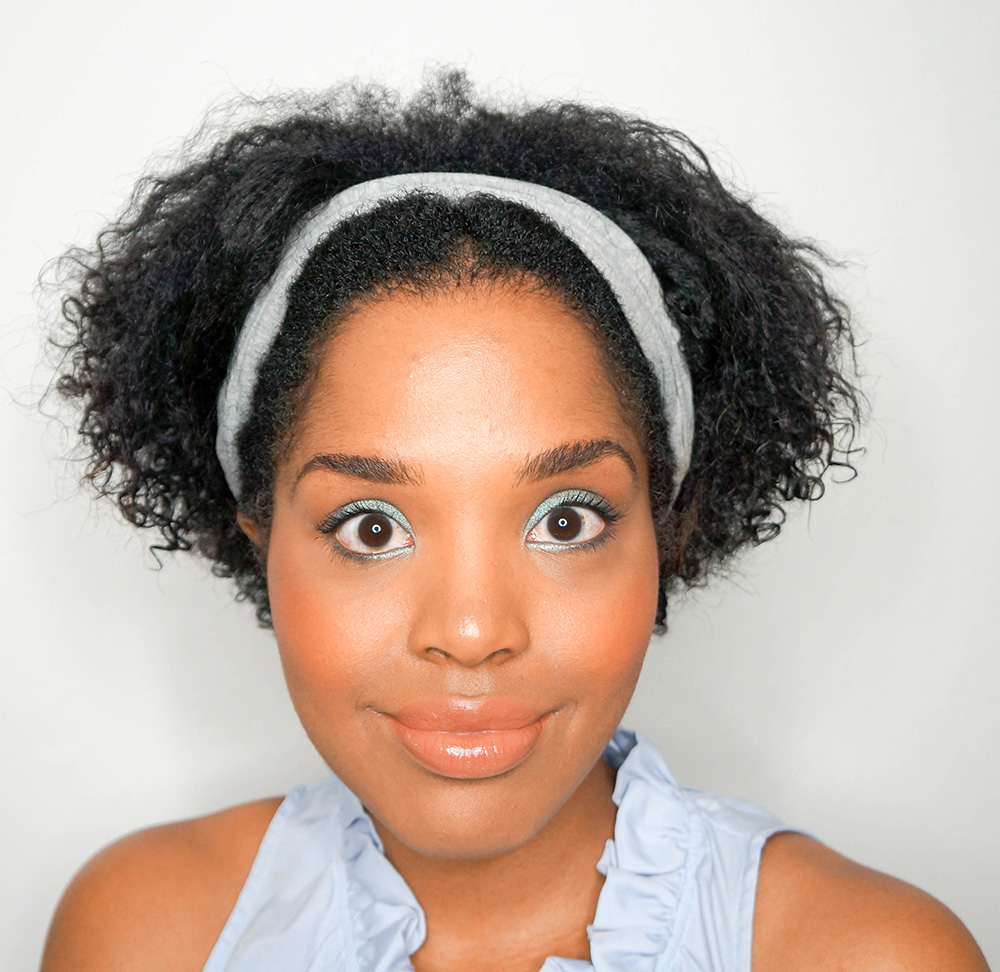
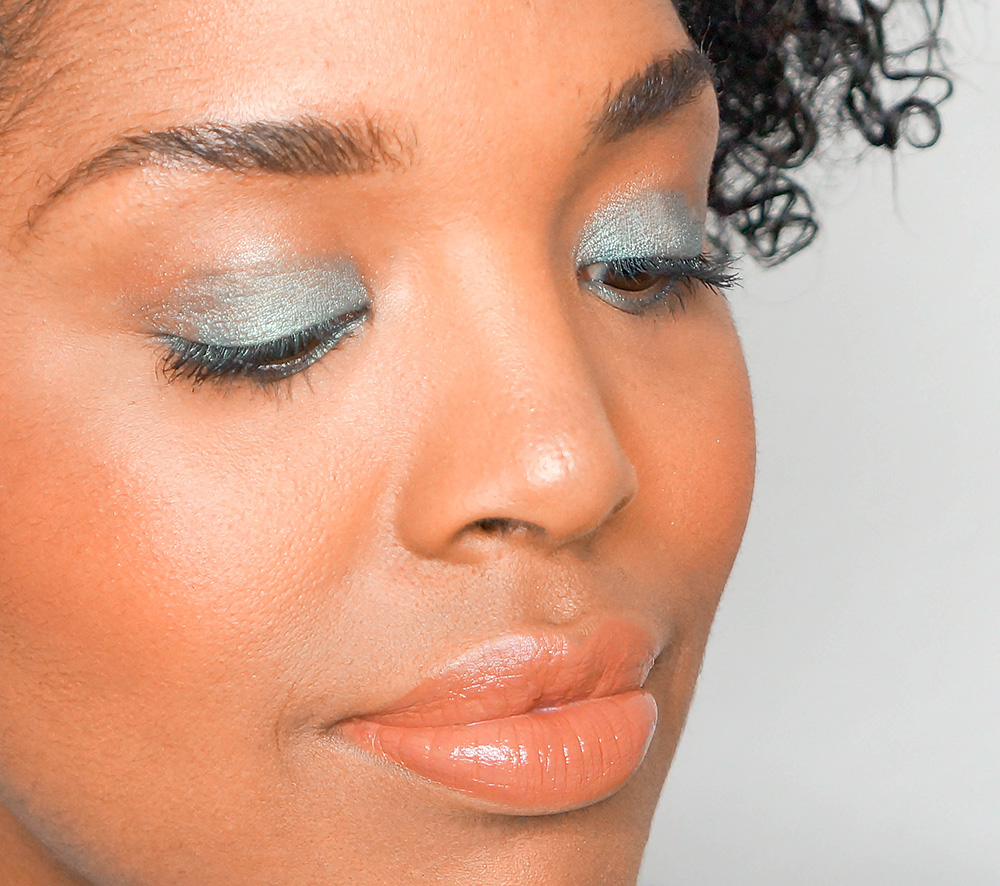
First I dampened my brush before applying Deep End all over my lids to intensify the color, and I also used a damp brush to apply Deep End all along my lower lash line. Then, to blend this out, I used a fluffy crease brush to lightly dust Tan Lines into my crease. If I’d wanted to do a smokey look, I could have applied this damp as well, but I just wanted to blend out Deep End, so I applied it dry.

nars under cover summer 2016
Closeup of my all-NARS FOTD

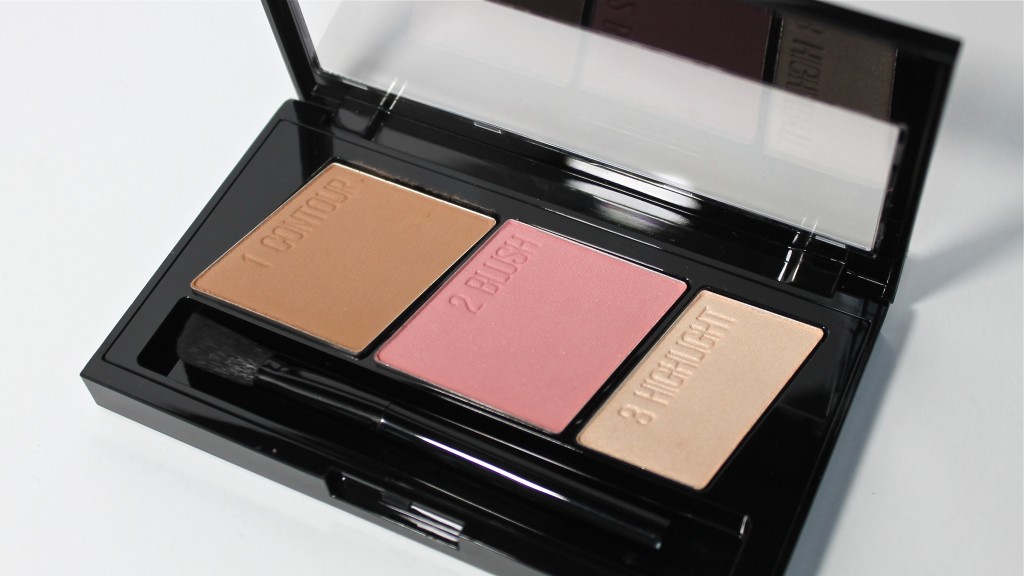
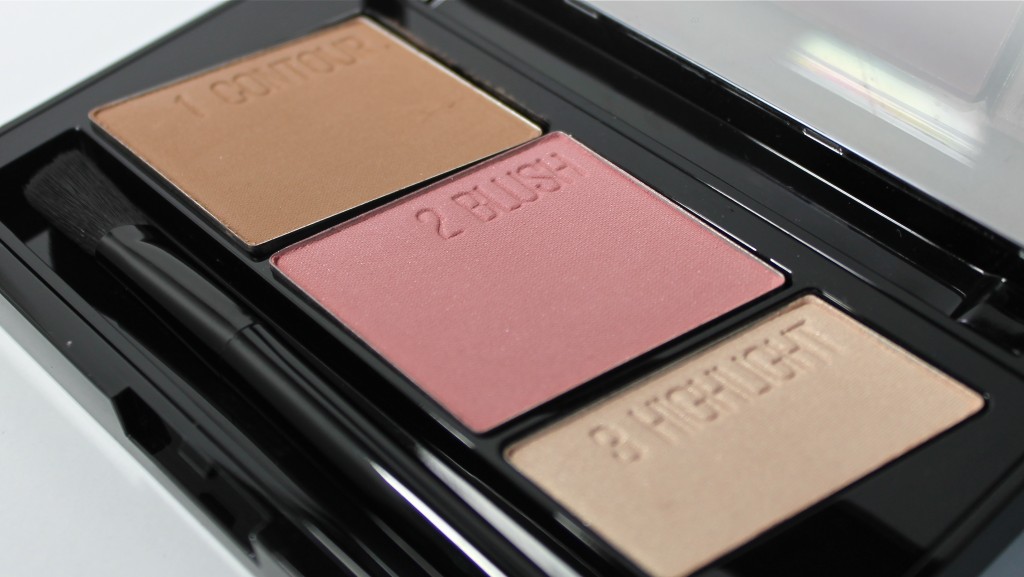
For my blush, I used the right side of the Liberation Dual-Intensity Blush, a really pretty terra-cotta shade. It’s a great everyday blush for me, and I love how there’s a slight sheen it.

I didn’t use any highlighter (which is sooo rare for me because I LOVE, LOVE highlighter), but I still had a soft glow from the blush. I was super impressed that this didn’t look flat on me at all.

nars under cover summer 2016
Totally ready for summer!

[Continue reading…]

There are 33 comments on this post. Leave yours.

Categories: Face of the Day (FOTD), Guest Post, Makeup, NARS Keywords: NARS Summer 2016

Music Festival Inspired Makeup Tutorial With a Pop of Blue

April 27th, 2016 by Jen Clark 26 Comments

Warm bronze eye shadow with a pop of blue

My social media feeds have been blowing up with cute photos and snapchats of really cool, trendy people at music festivals, so I decided I would (try to) channel my inner cool person and came up with this makeup look I’d wear if I were to go to said festivals.

I love this look so much! I can’t wait to wear it this summer. I think it makes a huge impact, but it’s totally easy to do. And you can customize it if you want to. You could switch out the bronze-y shades for taupes and the blues for some lavender.

Mmm, that would be gorgeous!

I’m using the Too Faced Semi Sweet Chocolate Bar Palette and the Pixi Mesmerizing Mineral Palette in Aquamarine Dream.

Yes, I know the Too Faced Palette has a blue shade in it, but I’ve been dying to try out the Pixi palette. The colors make my heart pitter patter.

The Too Faced Semi Sweet Chocolate Bar Palette, $49
Pixi Mesmerizing Mineral Palette in Aquamarine Dream
Pixi Mesmerizing Mineral Palette in Aquamarine Dream, $12

I wanted a really warm crease, so I put “peanut butter” (an almost orange matte brown) from the Too Faced palette in the crease and just above it. By using a really soft, fluffy brush and taking your sweet time blending, you’ll get that diffused look we all aim for.

Too Faced "peanut butter" in the crease
Too Faced “peanut butter” in the crease

[Continue reading…]

There are 26 comments on this post. Leave yours.

Categories: Face of the Day (FOTD), Guest Post, Makeup, Makeup Tips/How To, NYX, Pixi, Too Faced

Charlotte Tilbury Magic Foundation: Hallelujah for This Hocus Pocus!

April 26th, 2016 by Jessica Revitte 31 Comments

Charlotte Tilbury Magic Foundation
The spell has been cast! Wearing Charlotte Tilbury Magic Foundation in Shade 2 Fair ($44)

I’ve long been enamored with Charlotte Tilbury. The UK-based makeup artist exudes old Hollywood glamour, and her personally designed makeup collection is to die for.

Burgundy and rose gold packaging, names that evoked cosmetic legends and breathtaking hues… For months I agonized over what to buy. Did I want to test a shadow palette first? What about a lipstick? And why was the gorgeous Lucy in the Sky With Diamonds gloss already sold out? Each time I thought I’d made a decision, my mind was promptly changed by another more beautiful item.

But, as I’ve mentioned several times, my head can always be turned by a good foundation, and turned, it was, when a buzz built into a roar over the new Charlotte Tilbury Magic Foundation.

The care a brand takes in formulating and marketing a base product says a lot to me. Foundations and concealers are often overlooked in favor of more exciting, colorful products like eye shadow, blush and lipstick, so when a foundation, of all things, generates this kind of fuss, I knew I had to have it.

Charlotte Tilbury Magic Foundation in Shade 2
Charlotte Tilbury Magic Foundation in Shade 2 Fair ($44)

While not quite as costly as some high-end foundations, Magic Foundation is no less luxurious at $44 per fluid ounce, but despite the price, it’s hard to resist the allure when this is how Charlotte describes this bewitchment in a bottle…

“My Magic Foundation is a miracle in a bottle that transforms skin for all ages, skin tones and skin types. I have worked with laboratories for five years to create a “hyper-intelligent” formula that gives full-coverage yet feels completely weightless, with all the anti-aging and protective benefits of a luxury skin cream. It conceals imperfections, glides on like a dream, and literally feels like a second skin. Whether your skin needs just a bit of perfecting, or you struggle with a frustrating issue like acne, melasma or rosacea, my Magic Foundation will give you a perfect looking skin day, every day!”

— charlottetilbury.com

Given the buzz, I bet you’re wondering what to expect.

Magic Foundation promises a laundry list of beauty advantages, like universality (regardless of age, skin type, or condition), weightlessness, anti-aging benefits, imperfection concealment, glide-on texture — the list goes on!

And if those weren’t enough, Charlotte’s YouTube page also features several tutorials of the makeup artist concealing a variety of skin concerns with Magic Foundation alone. It’s hard not to feel like a moth to a flame with that promise and potential!

I’ve said before that I’m a tinted moisturizer girl, but even though Magic Foundation provides full coverage…it doesn’t feel like full coverage, so I’m going to say what many makeup lovers have already said before: this literally feels like my skin alone.

I have some dry areas on my face, and Magic Foundation doesn’t cling. Even after a long day, Magic Foundation doesn’t need to be touched up. I often wear several concealers, but when applied and set right, Magic Foundation conceals everything for me. It’s like an eerily perfect boyfriend… You keep searching for something wrong, but he’s always bringing you flowers and grande lattes!

Charlotte Tilbury Magic Foundation
Charlotte Tilbury Magic Foundation in Shade 2 Fair

[Continue reading…]

There are 31 comments on this post. Leave yours.

Categories: Charlotte Tilbury, Face, Face of the Day (FOTD), Guest Post, Makeup

Unsung Makeup Heroes: Maybelline Baby Lips Dr. Rescue Medicated Balm

April 22nd, 2016 by Jessica Revitte 22 Comments

Maybelline-Baby-Lips-Dr-Rescue
Rescuing my lips with Maybelline Baby Lips Dr. Rescue in 40 Pink Me Up

The long-running Unsung Heroes series here on Makeup and Beauty Blog features some of our all-time favorite permanent collection products.

I’ve got dry lips.

Like, Sonoran Desert dry.

Many have tried to figure out why, I assure you, and many have failed. Between the overall dryness of my skin, to its tendency to eczema and how my lips aggravatingly seem to need to really get in the mood for our six-month winter here in the arctic tundra that is Fond du Lac, Wisconsin, my lips are wrinkled and peeling for way more of the year than I’d like.

I’ve gone through favorite lip balms like Taylor Swift goes through boyfriends. (Too soon? Sorry, T, just shake it off.)

I repeatedly feel like I’ve found “the one” and love it for weeks — months, even — and go through a whole slew of backups only to see my lips eventually reject the formula seemingly out of the freaking blue. It drives me nuts. What I don’t do is write songs about it… Maybe Taylor can help me with that?

Anyway, when Maybelline released their main Baby Lips line a few years ago, I tried one of the original tinted formulation balms and wasn’t that impressed. It looked great, but because of my lips, it felt like the balm itself was just sitting on top of my dry lips, rather than sinking in and really making a difference.

So I gave them a pass until I noticed a new product in the Baby Lips fam called Baby Lips Dr. Rescue, which I spotted while getting some much needed “mommy alone time” running errands. I grabbed the clear balm and applied it immediately in the car.

*queue angels singing*

It felt INCREDIBLE.

Maybelline Baby Lips Dr. Rescue
Maybelline Baby Lips Dr. Rescue on display

[Continue reading…]

There are 22 comments on this post. Leave yours.

Categories: Drugstore Beauty Finds, Face of the Day (FOTD), Guest Post, Lips, Maybelline, Unsung Heroes

Blur the Line Between Drugstore and High End with Maybelline’s Master Contour Kits

April 19th, 2016 by Jessica Revitte 23 Comments

Maybelline Master Contour Kit in Light to Medium 10
Mid-application of Maybelline’s Master Contour Kit in Light to Medium 10

I seriously love me some Maybelline. The first palettes I gravitated to as a tween makeup lover were Maybelline, and, as an adult makeup lover, the brand continues to be, by far, the most purchased affordable makeup in my collection. At their price point, I often find their quality to be unrivaled — finely milled powders, fabulous cream shadows that apply like By Terry’s Ombre Blackstars and long-lasting pigment for days.

First time I saw the new Master Contour Palette in Light to Medium 10, which goes for $12.99 (available in Medium to Deep 20, as well), I was immediately reminded of Estée Lauder’s 2016 Bronze Goddess Summer Glow Multi Palette, which retails for over four times as much!

Comprised of a contour shade, a coordinating classic pink blush and a champagne highlighter, this gem poses as an excellent and wallet-friendly substitute to some similar, considerably more expensive summer 2016 releases.

Maybelline Master Contour Kit
Maybelline Master Contour Kit in Light to Medium 10
Maybelline Master Contour Kit
Maybelline Master Contour Kit in Light to Medium 10

[Continue reading…]

There are 23 comments on this post. Leave yours.

Categories: Drugstore Beauty Finds, Face, Face of the Day (FOTD), Guest Post, Makeup, Maybelline

My Foundation Routine (A Collaboration With Marcella)

April 18th, 2016 by Adia Goss 23 Comments

foundation routine

When it comes to applying my foundation, I’ve had a bit of trial and error over the years. When I first started wearing foundation, I just used my fingers. That was back when the heaviest base I’d wear was a super sheer tinted moisturizer, so anything more than my hands seemed like overkill. Then I played around with flat synthetic foundation brushes but couldn’t avoid a streaky finish.  My foundation game really stepped up when I started using the Real Techniques buffing brush.

I got it last year, and it changed my life. I don’t even know what I was doing before I started using it, and I swore I’d found “the one.”  

But then the makeup sponge hit the scene, and once I tried the Real Techniques makeup sponge…wow. I put down that buffing brush and haven’t used it a single time since. The makeup sponge was PERFECT. I got a flawless finish and, once again, swore I’d never use anything else.

And I didn’t…for about a month.

But when I started using the Diorskin Nude Air Healthy Glow Serum Foundation (that I wore in this post and reviewed in this post), the makeup sponge didn’t quite work. The Dior foundation was just as thin as the L’oreal one I’ve been using lately, but for some reason, the makeup sponge just didn’t produce the finish I was looking for.

I tried the Real Techniques buffing brush, but I couldn’t get a great finish with that either. Since I’d recently gotten a set of Zoeva brushes, I also tried the Silk Finish brush that came in the Luxe Complete Set, and it worked better, but I felt like it took too much work to blend everything in.

Enter the Sephora Collection #53 brush, which turned out to be PERFECT. It’s a wide, flat brush, so it covers a lot of surface area pretty quickly.

foundation brush
Sephora Collection #53 Pro Full Coverage Airbrush.

I love that it only takes a few swipes to cover my face, and it applies my foundation with no streaks. I’d bought it last summer, but for some reason (probably something newer caught my eye), I used it like crazy for about a month, then put it aside.

This just reminded me that sometimes there’s a bit of trial and error in makeup… One tool may work perfectly with one foundation but be totally wrong with another. So, now when someone asks why I have so many makeup brushes, I’ll have an answer ready! 🙂

foundation routine

Because Marcella described her foundation routine earlier today, here’s how I apply my foundation:

  1. Prime my face. To be totally honest, I don’t always apply a separate primer, although I 100% believe that it can make my makeup look better, longer. I’m just lazy and/or in a hurry most mornings. Plus, I’ve been using the new Giorgio Armani UV Skin Primer SPF 50 lately (which I LOVE). When I have the time, I really like to add the Becca Backlight Priming Filter before my foundation. It has a lightly glowy finish, but it’s not over the top (a similar effect to the MAC Strobe Cream).
  2. Mist my makeup brush. I used my Glossier Soothing Face Mist because I am obsessed with rosewater, but a makeup primer or setting spray, or even water will work. I think misting my makeup brush helps it spread my foundation easier.
  3. Apply my foundation starting at my nose and blending out. I just use a couple of drops of the Diorskin Nude Air Healthy Glow Serum Foundation.
  4. I set this foundation using shade ND020 from the Zoeva Nude Spectrum Blush Palette.  Like I mentioned in my first impressions video, since this blush is close to my skin color, it totally works as a setting powder!
  5. After applying blush and highlighter, spray the Glossier Soothing Face Mist all over my face. I’m obsessed with facial mists, and spraying them on my face feels so luxurious!

*A note about this foundation: I really like it but had a couple of hiccups before I finally got it to work for me. I initially bought shade 5 (which I was wearing in this post), and when I first wore it at the store, it looked fine. But wearing it out and about during the day, it felt too orange. I actually think this foundation may oxidize slightly, so that’s something to keep in mind if you’re interested in it. So, I exchanged it for shade 4, which I felt was too light at first, but when I asked my brother if my foundation was too light, he was like, “You’re wearing makeup?” (LOL…men!). And, looking at these pictures, it looks fine. The finish is very natural. I was expecting a more glowy finish due to the name, but it’s really a satin finish, which makes sense given that it’s called “healthy glow”. I like that it’s so lightweight, and considering that I only need 3-4 drops to cover my face, this 1-oz. bottle will last a very long time.

foundation routine

[Continue reading…]

There are 23 comments on this post. Leave yours.

Categories: Face, Face of the Day (FOTD), Guest Post, Makeup Tips/How To

Nail Understated Poolside Elegance With the Estée Lauder Bronze Goddess Collection for Summer 2016

April 13th, 2016 by Jessica Revitte 17 Comments

Estee Lauder Bronze Goddess Summer 2016
Wearing Estée Lauder Gelée Bronzer under my foundation, Summer Glow Multi-Palette on eyes and cheeks, and Lip and Cheek Summer Glow in Peach Glow on lips and cheeks.

For a makeup lover like myself, there is no more exciting sign of ☀ summer’s impending arrival than the annual appearance of Estée Lauder’s glowing, beachy Bronze Goddess collection and its effortlessly radiant sunlit nudes and bold brights.

This year’s release, which ranges from bonzing gels and powder bronzers to shadow palettes, fragrances and highlighters, has some seriously vintage poolside vibes, and I am loving it! ☺

Throw on your shimmering body oil, floppy hat and vintage sunglasses, and let’s take a look at some of the collection’s sumptuous summer treasures.

Estée Lauder Bronze Goddess 2016
Estée Lauder Bronze Goddess 2016 Gelée Bronzer, Summer Glow Multi-Palette, and Lip and Cheek Summer Glow in Fuchsia Lights, Peach Glow

For me and many of the makeup lovers I know, it’s the highlight and bronzing palettes launched with the Bronze Goddess collections that set our hearts aflutter.

The classicly chic Summer Glow Multi-Palette ($50) comes in a tortoise-shell box and houses a soft pink illuminator, a rosy hued blush and an approachable bronzer. Although it was surely designed with faces in mind, it’s worth noting that the shades also work wonders on eyes as well (particularly the highlighter and bronzer). What a way to tie your look together when you’re in a hurry. ☺

The Gelée Bronzer ($32) has an interesting formula that reminds me of Hard Candy Cheeky Tint in Surfer Babe, except that Surfer Babe applies a transparent wash of iced tea color, while Gelée Bronzer deposits a highly pigmented shade a bit more like a liquified form of a powder bronzer.

Emollient and easy to blend, this bronzer gives you a long “working time” before it sets, but BEWARE! A little goes a long way, which you can see in these swatches.

I prefer to use products like Gelée Bronzer under my foundation to allow the slightest glow to show through; this in turn neutralizes some of the orangey-ness that often accompanies pigmented liquid bronzers.

Estée Lauder Bronze Goddess 2016
Bronze Goddess Gelée Bronzer and Summer Glow Multi-Palette

[Continue reading…]

There are 17 comments on this post. Leave yours.

Categories: Collections, Estee Lauder, Face, Face of the Day (FOTD), Guest Post, Makeup

Look Perfect Naked With Urban Decay Naked Skin One & Done Hybrid Complexion Perfector

April 11th, 2016 by Jessica Revitte 35 Comments

Urban Decay One & Done Hybrid Complexion Perfectors (SPF 20)

In the summer I’m all about light, dewy coverage.

I know, I know, I work in an office…but when I’m not stuck sitting at my desk, and I’m out somewhere actually having fun in the sun ☀ and the warm weather, it’s nice to not feel weighed down by a heavy base product, and even though I’m a fair-skinned SPF freak, it’s always a relief knowing that my foundation, BB cream or tinted moisturizer are also there to add a little extra oomph where sun protection is concerned.

Urban Decay recently released the most beach bag-friendly base product a girl could want, an oil-free formulation with SPF20 that’s meant to even out your overall complexion and blur imperfections while keeping you looking natural and fresh, and it’s called Naked Skin One & Done Hybrid Complexion Perfector (I dare you to say that one five times fast!).

Available in 6 shades for $34 each, it’s ideal for speedy makeup application or touch-ups on the go after a day at the beach or an afternoon by the pool.

UD’s official description says it all…

“We’re not exactly what you call low-maintenance when it comes to beauty (and we’re not ashamed to admit it). But we’re more than happy to take a shortcut or two — as long as it doesn’t look like we did. THIS is one of those times. Naked Skin One & Done Hybrid Complexion Perfector combines all the benefits of skin treatment and protection with the coverage of a sheer foundation. This multitasking cream is the best of both worlds”

Urban Decay One and Done Hybrid Complexion Perfector
Wearing Urban Decay One & Done Hybrid Complexion Perfector in Light
Urban Decay One and Done Hybrid Complexion Perfector
Urban Decay One & Done Hybrid Complexion Perfectors in Light, Medium Light, Medium, Medium Deep, Dark and Deep

[Continue reading…]

There are 35 comments on this post. Leave yours.

Categories: Face, Face of the Day (FOTD), Guest Post, Makeup, Product Reviews, Urban Decay

  • « Go to Previous Page
  • Go to page 1
  • Interim pages omitted …
  • Go to page 22
  • Go to page 23
  • Go to page 24
  • Go to page 25
  • Go to page 26
  • Interim pages omitted …
  • Go to page 61
  • Go to Next Page »

Primary Sidebar

Welcome to Makeup and Beauty Blog

Welcome to Makeup and Beauty Blog! My name is Karen, and I’m a freelance writer obsessed with makeup.

Makeup and Beauty Blog features daily product reviews, makeup tips and beauty news — like an interactive version of a monthly print magazine, except with occasional pictures of my cat.

Recent Posts

Sundays With Tabs the Cat, Makeup and Beauty Blog Mascot, Vol. 878

Makeup and Beauty Blog Monday Poll, Vol. 894

Makeup and Beauty Blog Monday Poll, Vol. 893

Makeup and Beauty Blog Monday Poll, Vol. 892

Makeup and Beauty Blog Monday Poll, Vol. 891

/* real people should not fill this in and expect good things – do not remove this or risk form bot signups */

Social

  • Facebook
  • Instagram
  • Pinterest
  • Twitter
  • YouTube

Featured Posts

Sundays With Tabs the Cat, Makeup and Beauty Blog Mascot, Vol. 771

Lady Unicorn

Weird Things I Like to Do

brows fill out beforehand

Before You Pluck or Wax Your Brows, You Must Do This

current bare skin status

What’s One Thing That Drastically Changed Your Skin for the Better?

Copyright © 2025 Makeup and Beauty Blog. Get in touch.