• Skip to main content
  • Skip to primary sidebar

Makeup and Beauty Blog | Makeup Reviews, Swatches and How-To MakeupMakeup and Beauty Blog | Makeup Reviews, Swatches and How-To Makeup

A beauty blog blooming with fresh makeup reviews, swatches and beauty tips from your friendly neighborhood beauty addict

  • Home
  • About
    • About
    • Contact
    • FAQ (Frequently Asked Questions)
    • Advertising & Media
  • Categories
    • Product Reviews
    • Makeup
    • Skincare & Fragrance
    • Style & Fashion
    • Hair
    • Nails
    • Tips & Tutorials
    • Just for Fun
  • Brands
  • Store

Kahina

Glittery Green Gradient Wings: A Quick and Easy Holiday Makeup Look

December 11th, 2019 by Karen 16 Comments

urban decay stage dive mainline

Current dilemmas du jour?

  1. What to do with the five pounds of lemons Rosie’s former foster mom gave me (she has a tree in her yard that produces a RIDICULOUS amount of lemons).
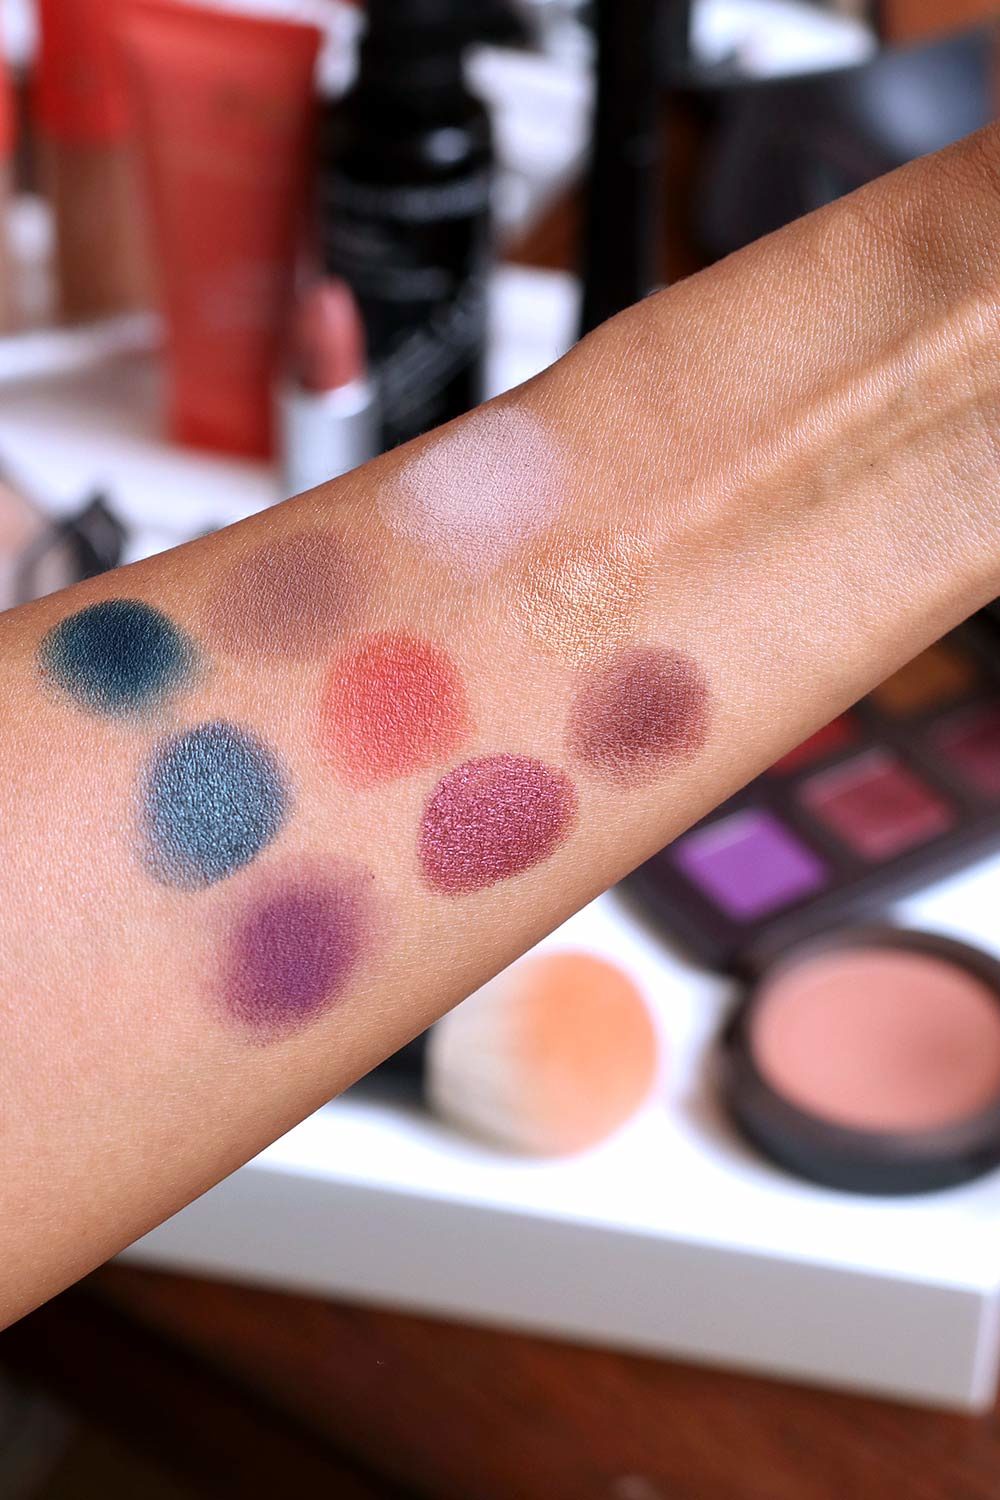
  2. What’s some festive and colorful holiday makeup that won’t take me till Valentine’s Day to finish? (I’m only half-kidding.)

As of yet, I still have no clue what to do with the lemons (ugh, lemon bars and lemonade? Maybe some kind of lemon marinade?), I figured out a trick to flying through different colorful looks.

And here it is…

Play with your winged liner. THERE ARE SO MANY WAYS!

Like with this look here with glittery green gradient wings. It was surprisingly quick and easy to do.

The step-by-step

  1. Start by drawing your winged liner with a dark green matte liner as the base (I used Urban Decay Mainline). Be as subtle or dramatic as you like.
  2. Then, for a bright shimmer POP, layer a bright green glitter in the center (I’m wearing Urban Decay Stage Dive) on your lash line.
  3. Lastly, to create a color gradient, dip an angled brush into a black eyeshadow (MAC Carbon for life!), and pat that on top of the outer portion of your wing.

Green goes well with warm browns and peaches, which is what I’m wearing on my lids, lips on these cheeks in this look. If you want to be more adventurous, however, pink would be a playful complementary color… I’m just sayin’. 🙂

urban decay mainline side

urban decay stage dive front

Your friendly neighborhood beauty addict,

Karen

There are 16 comments on this post. Leave yours.

Categories: Chantecaille, COVERGIRL, Eyes, Kahina, Lips, MAC Makeup, Makeup, Makeup Tips/How To, Revlon, Urban Decay

3 Tips for Wearing Red Eyeshadow (and a 20-Minute Makeup Look)

November 6th, 2019 by Karen 18 Comments

viseart libertine
I may or may not be in my pajamas, FYI.

Fall-inspired look, TAKE TWO.

I think this one’s a little closer in terms of vibe to the Thanksgiving baking accouterments I found at Michael’s the other day… More fall, and less summer, with shimmery reddish copper lids, bronze cheeks and nude-beige lips.

I wore it to the bakery the other day… The bakery in my kitchen, THAT IS! Had this on while trying to work out the pumpkin/pecan cupcake situation (yes, this is a thing I’m working on). In a nutshell, I think I found a good balance between a spicy pumpkin cupcake, and brown sugar pecans, but that’s a story for another time…

As for this look, here are some things you may find helpful when wearing reddish copper eyeshadow, or really any shadows with red tones:

1. Full-coverage foundations make a HUGE difference

You know me; I like to wear as little as possible in terms of base products, but whenever I try to do minimal foundation/concealer that incorporates any sort of copper, coppery red or red eyeshadow, I look tired, messy and juuuuust not right. Babe, if you’ve got anything remotely red happening on your lids, then go for full-coverage foundation. A full-coverage base balances with the red eyeshadow’s POW! very nicely, methinks.

2. Tightline with a black liner

You need something like a black liner to add a visible “break” or barrier between your red eyeshadow and the whites of your eyes; otherwise, it can look kinda “off.” If black seems too harsh for you, try a dark brown.

3. Do your eye makeup first

Why? Because you want absolutely NO red underneath your lower lash line, and you’ll want to completely remove it before doing your base. Then, after you clean up, apply a concealer. I’m usually team “Skip the Under-Eye Concealer,” but in this case, I’m thoroughly on board, because, again, it can look weird if you skip it.

viseart libertine
Oh, hai, fall makeup!
viseart libertine
Spending time with one of my blush faves, MAC Gingerly
viseart libertine
Makeup I’m wearing in this look!

viseart libertine
I’m wearing the coppery red (in the middle) mixed with the golden bronze.

[Continue reading…]

There are 18 comments on this post. Leave yours.

Categories: Eyes, Face of the Day (FOTD), Juvia's Place, Kahina, Lips, MAC Makeup, Makeup, Makeup Tips/How To

Primary Sidebar

Welcome to Makeup and Beauty Blog

Welcome to Makeup and Beauty Blog! My name is Karen, and I’m a freelance writer obsessed with makeup.

Makeup and Beauty Blog features daily product reviews, makeup tips and beauty news — like an interactive version of a monthly print magazine, except with occasional pictures of my cat.

Recent Posts

Sundays With Tabs the Cat, Makeup and Beauty Blog Mascot, Vol. 878

Makeup and Beauty Blog Monday Poll, Vol. 894

Makeup and Beauty Blog Monday Poll, Vol. 893

Makeup and Beauty Blog Monday Poll, Vol. 892

Makeup and Beauty Blog Monday Poll, Vol. 891

/* real people should not fill this in and expect good things – do not remove this or risk form bot signups */

Social

  • Facebook
  • Instagram
  • Pinterest
  • Twitter
  • YouTube

Featured Posts

Sundays With Tabs the Cat, Makeup and Beauty Blog Mascot, Vol. 771

Lady Unicorn

Weird Things I Like to Do

brows fill out beforehand

Before You Pluck or Wax Your Brows, You Must Do This

current bare skin status

What’s One Thing That Drastically Changed Your Skin for the Better?

Copyright © 2025 Makeup and Beauty Blog. Get in touch.