• Skip to main content
  • Skip to primary sidebar

Makeup and Beauty Blog | Makeup Reviews, Swatches and How-To MakeupMakeup and Beauty Blog | Makeup Reviews, Swatches and How-To Makeup

A beauty blog blooming with fresh makeup reviews, swatches and beauty tips from your friendly neighborhood beauty addict

  • Home
  • About
    • About
    • Contact
    • FAQ (Frequently Asked Questions)
    • Advertising & Media
  • Categories
    • Product Reviews
    • Makeup
    • Skincare & Fragrance
    • Style & Fashion
    • Hair
    • Nails
    • Tips & Tutorials
    • Just for Fun
  • Brands
  • Store

Makeup Tips/How To

How To Use the MAC Prep + Prime Highlighters To Look Well Rested (Even When You’re Not)

December 5th, 2013 by Karen 25 Comments

DUDE. Ever have one of those mornings when you look in the mirror and the first thing that pops into your head is, “Dayummmm, Gina! I look hella tired”?

Or something to that effect?

Well, that’s me. Every. Single. Day.

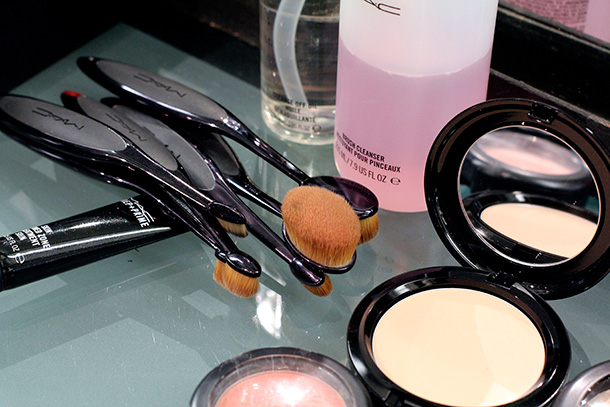
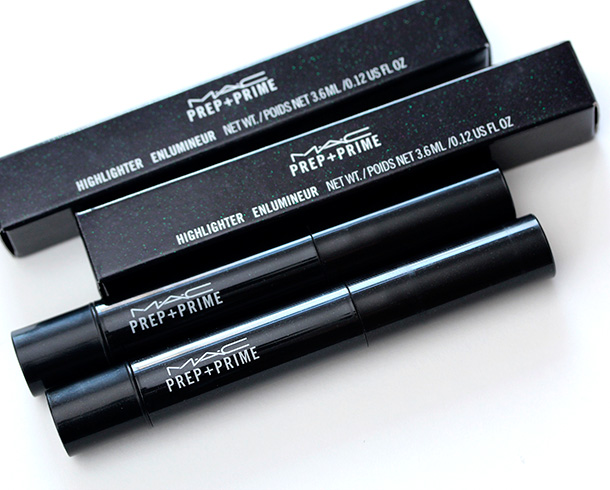
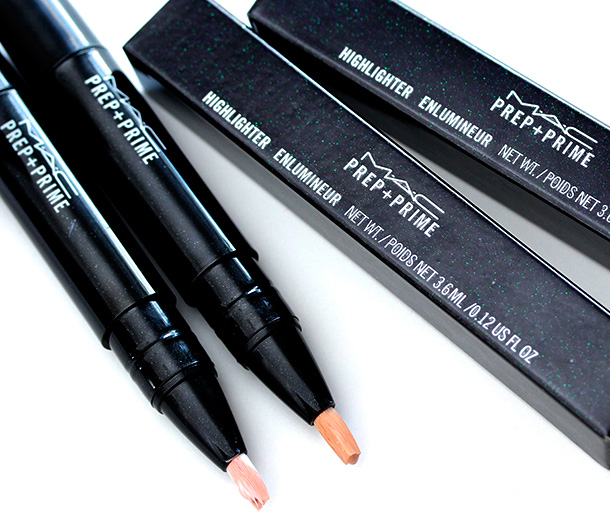
Earlier this week, in my ongoing good fight effort to change that, I picked up a couple of MAC Prep + Prime Highlighters, hoping they’d help me look better rested.

Incidentally…these were part of a larger stress shopping-related haul, but that’s a story for another time, LOL!

Where was I…? Ah! Yes, because I’m a curious kitty, I popped by the MAC counter today to learn how to use them properly (seems like that would be important, right?) and wanted to share what I learned with you.

Products mentioned in the video…

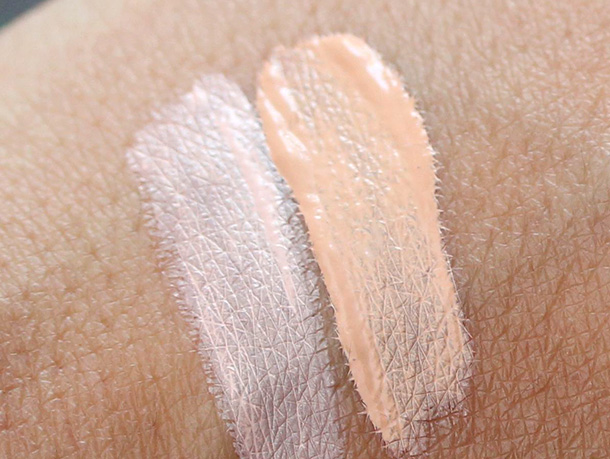
  • MAC Prep + Prime Highlighter in Bright Forecast ($25)
  • MAC Prep + Prime Highlighter in Radiant Rose ($25)
  • MAC Eye Kohl in Costa Riche ($16)

MAC Prep + Prime Highlighters in Radiant Rose and Bright Forecast
MAC Prep + Prime Highlighters in Radiant Rose and Bright Forecast, $25 each

MAC Prep + Prime Highlighters in Radiant Rose (a light seashell pink) on the left and Bright Forecast (a mid-tone peachy coral) on the right

Swatches of MAC Prep + Prime Highlighters in Radiant Rose (left) and Bright Forecast (right)
Radiant Rose (left) and Bright Forecast (right)

I hope these tips help you, too. They’re tailor-made for my fellow members of the Sisters of Perpetual Exhaustion. 🙂 Keep fighting the good fight, homegirls!

Your friendly neighborhood beauty addict,

Karen

There are 25 comments on this post. Leave yours.

Categories: MAC Makeup, Makeup Tips/How To, Video

Holiday Makeup Hacks: Single Products To Show Your Holiday Spirit

December 4th, 2013 by Karen 41 Comments

Happy holidays, my friend! Let’s see… I’ve got a Christmas tree in the living room (Still waiting for Tabs to knock it down; it’s an annual ritual.), half a box of Trader Joe’s Dark Chocolate Stars in the cupboard and holiday music playing in the background. I’m feeling festive, to say the least. 🙂

The other day I was thinking about easy ways to add that holiday feeling into my makeup looks without going all out — or, as I like to call them, holiday makeup hacks.

Whether you’re going to get your tree, hitting the mall to do some holiday shopping or just spending time at home with friends or family, adding any one (or combination) of these products into your regular makeup routine is an easy way to show your festive flair.

And what’s really great is these are all long-wearing, so you can pop one on and not have to worry about touching up for hours.

The products in the video…

  • NARS Eye Paint in Tatar ($25)
  • MAC RiRi Hearts MAC Holiday Lipstick in Pleasure Bomb ($16.50; launches tomorrow on maccosmetics.com)
  • L’Oreal Le Matte Lipsticks ($8; these are a little hard to find online, but check your favorite drugstore because they’re great)
  • Urban Decay Heavy Metal Glitter Liner in Midnight Cowboy ($19)

Uh…I’m still getting used to being in front of the camera and figuring out little technical things about lighting and what to do with my hands when I’m talking and that I should have used another hair clip…

Please pardon my nervousness. I dunno… It’s like I see that little red record light go on, and a switch goes off in my brain that instantly turns me into a complete and total nut, but whatevs! I’ll just keep working on it, and hopefully, eventually, I’ll feel less like of a freak show, haha.

Thank you again for watching!

Your friendly neighborhood beauty addict,

Karen

There are 41 comments on this post. Leave yours.

Categories: Makeup Tips/How To, Video

MAC Pro Store Must-Have Makeup Recommendations

November 28th, 2013 by Karen 18 Comments

You do not have to be a professional makeup artist or card-carrying beauty fanatic to visit a MAC Pro Store.

In fact, unlike da cloob, they won’t card you at the door. The stores are open to the public, and you should totally visit. They’re called Pro stores because they carry a range of MAC products made to meet the needs of makeup professionals (but non-pros can also buy them).

Next time you make it out to San Francisco, try to stop by the MAC Pro Store at 1833 Union Street, but be warned — plan ahead if you bring your significant other (and they aren’t big on makeup). Charge their smartphone ahead of time (or have them bring a good book), because you’ll probably want to stay in the store for hours — HOURS!

I kid you not.

A view of the inside of the MAC Pro Store on Union Street in San Francisco
A peek inside the MAC Pro Store on Union Street in San Francisco…

The big draw — well, at least for me — is the sheer quantity of products! According to MAC Senior Artist Victor Cembellin, they carry more than 300 in the store. On top of that, the SF store is the only MAC Pro Store serving the entire Pacific Northwest.

MAC Pro Lip and Concealer Palettes
MAC Pro Lipstick and concealer palettes

Sure, you can order MAC Pro products now online, but it’s such a different experience in the store. The makeup artists who work there are a goldmine of tips and tricks.

MAC Pro Lip and Concealer Palettes
The Lip and Concealer Palettes…

While I was at the SF store this week to learn how to use the new Masterclass Brushes, Victor also shared a couple of his must-have MAC Pro products and why you need them in your makeup bag. (Note to self: pick up a jar of Platinum Metal Pigment, ASAP!)

MAC Pro Lipmix and Platinum Metal Pigment
MAC Lipmixes

[Continue reading…]

There are 18 comments on this post. Leave yours.

Categories: MAC Makeup, Makeup Tips/How To, Video

How To Use the MAC Masterclass Brushes: Tips From MAC Senior Artist Victor Cembellin

November 26th, 2013 by Karen 45 Comments

There’s been a lot of mystery surrounding the new MAC Masterclass Brushes. Heck, even Tabs didn’t know what to make of them the first time he laid eyes on the funky black handles (which kind of look like toothbrushes).

MAC Masterclass Brushes
MAC Masterclass Brushes from the left: Oval 6 Brush (two on the far left), Oval 3 Brush (two in the center) and Linear 1 (two on the far right)

I was curious, too, so yesterday I went to the source — the MAC Pro Store in San Francisco — and got some great tips from MAC Senior Artist Victor Cembellin.

Karen with Senior MAC Artist Victor Cembellin
With Senior MAC Artist Victor Cembellin (I’m wearing three-inch heels here, and I still look short, LOL!)

If you like makeup and you’re not already following Victor online, get on that! He’s really nice, and he posts lots of fun and interesting behind-the-scenes MAC tweets and pics on his Twitter, Instagram and Facebook.

Anywho, Victor walked me through the different ways you can use the new Oval No. 6, Oval No. 3 and Linear 1 MAC Masterclass Brushes.

So far there are just three brushes in the new line, but as you can probably tell by the numbered names…it’s a safe bet we’ll see more. Hopefully, because I think they’re great.

MAC Masterclass Brushes
Another shot of the MAC Masterclass Brushes

The video has a lot more detail, but in a nutshell…

  • One big difference — I mean, other than their unusual appearance — between these new brushes and traditional makeup brushes is how they’re used. They’re designed for less tapping and stippling, and more gliding, skimming, pushing and pulling across the skin. Think of your brush as a figure skater gliding along your skin.
  • Each of the brushes can be used in different ways, and you can even use them to go from cream products to powders.
  • The largest brush in the three-piece collection, Oval 6 ($42), can be used to apply foundation, tinted moisturizer, face powder, blush, highlighter and contour colors (probably among other things).
  • Oval 3 ($32), the medium-sized one, works great for applying concealer to the under-eye area, eye cream all over the eyes and eyeshadows in the contour.
  • The smallest brush, Liner 1 ($25), can be used for blending out eyeliner pencils (for a smudgy look) and applying eyeshadow, especially along the lash lines. In a pinch, you could even use it to fill in your brows.
  • But what if you’re new to makeup? Can beginners use these brushes? Absolutely! Victor thinks so, too, and he talks about that in the video.

There’s way more tips and product recommendations from Victor in the vid, and here all links to all of the products mentioned.

MAC Masterclass Brush video products
The MAC products used in the video

Here are prices and links…

  • MAC Oval 6 Brush ($42)
  • MAC Oval 3 Brush ($32)
  • MAC Linear 1 Brush ($25)
  • MAC Prep + Prime Skin Refined Zone ($21)
  • MAC Mineralize Skinfinish Natural in Medium Deep ($30)
  • Blushbaby Blush ($21)
  • Style Blush ($21)
  • Prep + Prime BB Beauty Balm Compact SPF 30 ($30)
  • Bamboo Eye Shadow ($15)
  • Blooz Eye Kohl ($16)
  • Parfait Amour Eye Shadow ($15)

[Continue reading…]

There are 45 comments on this post. Leave yours.

Categories: MAC Makeup, Makeup Tips/How To, Makeup Tools, Video

Fall Favorites: The Makeup I’ve Been Using and Loving This Fall

November 19th, 2013 by Karen 61 Comments

OK, so I know I’m talking waaaay too fast in this video and I’m super stiff (like a robot version of myself, haha!), but I was very nervous.

I assure you — this is not an android stunt double. It’s me, Karen. It’s just that it’s been ages since I filmed one of these, so please forgive me for rambling and staring off into space like a crazy person.

With that said…I actually enjoyed doing it, so I might do more vids in the future.

Anywho, fall faves! Here are prices and links for the products I mention in the video…

  • YSL Touche Eclat Radiant Touch ($40)
  • Clarins Be Long Mascara ($25)
  • NARS Radiant Creamy Concealer ($28)
  • NARS One Night Stand Cheek Palette ($65)
  • MAC Stroke of Midnight Eyes: Warm Eye Kit ($39.50)
  • Urban Decay Revolution Lipstick in Naked ($22)
  • Guerlain Maxi Shine Gloss d’Enfer in 400 Gold Tchlack ($30)
  • Guerlain Protective Base Coat ($23)
  • Guerlain Le Top Coat Gel ($23)
  • Marc Reagan’s Twitter, @MarcRegan (He’s a Makeup Artist and Manager of Artistry for Bobbi Brown)

Your friendly neighborhood beauty addict (no, not the robot version),

Karen

There are 61 comments on this post. Leave yours.

Categories: Makeup Tips/How To, Video

Do You Have Any Wear-Time Boosting Tips To Help Your Makeup Last Longer?

November 8th, 2013 by Karen 18 Comments

Hey, what’s that over there?

I never would’ve guessed that one of the truest ways to test the longevity of my makeup would be during a massage, as drool slowly works it way down the side my chin, and my cheeks and face are smushed into that toilet seat-shaped contraption thing at the end of the massage table.

You know, that thing they have you put your head into when you lie down on your tummy so they can work on your back. It’s very strange… I always close my eyes to block out the weirdness.

Anywho, after my last deep-tissue massage, when I left the room and met up with my friend Jen in the ladies’ lounge, Jen looked really surprised.

Jen: Wow, how was your massage?

Me: Good! She tenderized me like Rocky on a side of beef.

Jen: I can’t believe your makeup stayed put.

Me: It did? Cool.

Jen: You must have tricks.

Me: Not really, but there are a bunch of different things you can do. It just depends on how much time you want to invest in the process.

1. Spritz and spray, the makeup way

Urban Decay All Nighter Long-Lasting Makeup Setting Spray
That’s my jam!

Perfect for low-maintenance ladies, a makeup setting spray is one of the quickest, easiest ways to help your makeup last longer. My favorite one — like, literally, I’m almost never without it — is Urban Decay’s $29 All Nighter.

Basically, it sets your makeup so it lasts longer and won’t scoot around throughout the day.

It’s just a spray, so there’s not much to it. Hold the bottle about an arm’s length away from your face and spritz. I use it after I finish my makeup but before mascara.

I mean, you could use it after your mascara, and I’ve seen girls do that, but I always do mine before, thanks to the advice of a Sephora makeup artist buddy of mine named Chelsea. That way, you don’t risk your mascara running due to having wet lashes.

2. It’s prime time, baby!

Starting with a face primer also helps boost your wear time. Just apply it before your foundation and concealer.

It doesn’t take much. I use a bit all over my face, let it sink in for a minute or two, then take a tissue and dab it lightly to remove any excess. Then I continue with my regular routine.

I wear primer, oh, every day, mainly because I really think it makes my skin look smoother in pics, but it also has the side effect of making other products last longer. I use this one form MAC that I love called Prep + Prime Natural Radiance, which is so good for dry skin, and it doesn’t give me breakouts!

But there are plenty of other good ones out there.

If you can’t decide, or you want to do some research, stop by a Sephora, Nordstrom or any beauty counter that gives samples. That way, you can try some first to see which ones work best for you and your skin and makeup routines. You want something that will layer well with the products you’re currently using.

[Continue reading…]

There are 18 comments on this post. Leave yours.

Categories: Just For Fun, Makeup Tips/How To

Ask MBB: What’s Your Favorite Foundation for Pictures?

November 7th, 2013 by Karen 29 Comments

I was wondering what is your favorite foundation to wear when you are taking pictures?

–Jeannie Tran

Hey Jeannie,

Wow! I’ve actually been getting asked this a lot lately (YAY!), so it must have something to do with the changes I’ve made to my foundation routine.

The whole shebang’s kind of involved so, uh, maybe the best way to handle this is to just go step-by-step.

1. MAC Prep + Prime Natural Radiance Base Visage

My first step — the product I use as a primer all over my skin — has been a staple of my makeup bag for a really long time. I never, ever skip this step when I’m going to be taking pics and have any say in the matter because I sincerely see a difference between when I do and I don’t.

It just makes whatever foundation I’m wearing look…better, and more natural, and mellows out my pores.

There are so many different face primers out there. I’ve tried a bunch, but one’s my favorite. I think I’m on my third of fourth bottle now. I love it that much.

I love how the formula feels — like a face lotion, and not like a regular primer just sitting on top of the skin, like the kind that have a lot of silicone. It’s also moisturizing, but it doesn’t give me breakouts, which is great, especially this time of year when my skin gets dry.

2. MAC Face and Body Foundation

mac face and body foundation application tips

LOVE! I’ve written a few posts about MAC Face and Body Foundation (I use shade C5) because I absolutely love it. Long story short: it’s lightweight, more like a tinted moisturizer than anything else, but you can layer it to build up the coverage. I love that it doesn’t look obvious or heavy in pics (you see it used on a lot on movie sets), once it dries, it won’t budge.

Seriously, I’ve worn this out and about on 16-hour days, and it’s never caked, streaked or gotten funky.

It does have a dewy, slightly shiny finish, which I actually like for everyday wear, but for pics, which is what we’re talking about here, I set it with a powder to tone down the shine.

3. NARS Radiant Concealer

NARS Radiant Creamy Concealer Pictures

This is one of the more recent adjustments I’ve made to my routine. I had been using Bobbi Brown Stick Foundation wherever I needed more coverage, but I ran out a while back and grabbed NARS Pure Radiant Concealer on a whim.

I wear the shade “Biscuit.” I dab a little on the areas where I want more coverage — usually my cheeks, around my nose, around my mouth and along my jaw line. Then I buff it into the Face & Body with a skunk brush.
[Continue reading…]

There are 29 comments on this post. Leave yours.

Categories: Just For Fun, Makeup Tips/How To

Ask MBB: How Can I Blend a Better Smokey Eye, and What Brushes Should I Use?

October 29th, 2013 by Karen 43 Comments

“You do such a fantastic smokey eye… Mine needs so much work.

I think part of my problem is just not having the right tools to blend with (brush recommendations would be appreciated!)… I love how, in your looks, the colours seem to flow together seamlessly. I also know NOTHING about eyeshadow bases beyond eyeshadow primer (I’m such a noob), so any tips on that would also be super helpful!”

–Jess

Hi Jess,

I’m on it! OK, so it really helps to have a good blending brush — scratch that. A good, clean blending brush, because even a good brush with a lot of gunk in the bristles will just scoot the shadows around your lids, instead of blending the colors together seamlessly.

I have a couple of favorites I love and use all the time, like the mighty MAC 217 and 224.

The 217’s brush head is a little denser and smaller than the 224’s, so I prefer it for blended eye looks with more distinct transitions between the color gradients or when I’m working with hard-to-blend eyeshadows.

Laura Mercier Artist's Palette 2013
For this look with the new Laura Mercier Artist’s Palette for Eyes, I blended it with the MAC 217.

And when I want smoother color gradients and a smokey effect that looks really blown out, I grab the 224, which has a fluffier, wider head.

Basically, when I don’t have to be terribly precise, I go for the 224.

Too Faced A Few of My Favorite Things
Blowing it out with the Too Faced My Favorite Things Palette and the MAC 224…

Between the 217 and 224, you really can’t go wrong with either one.

Too Faced also has a tapered blending brush similar to the MAC 224 that I like. It’s a little thinner than the 224 and great for guys/gals with small lids. It’s available in their $39 Shadow Brushes Essential 3-Piece Set, which also comes with a flat shadow brush and a small smudger brush. The whole kit is top-notch, come to think of it.

[Continue reading…]

There are 43 comments on this post. Leave yours.

Categories: Makeup Tips/How To

  • « Go to Previous Page
  • Go to page 1
  • Interim pages omitted …
  • Go to page 44
  • Go to page 45
  • Go to page 46
  • Go to page 47
  • Go to page 48
  • Interim pages omitted …
  • Go to page 93
  • Go to Next Page »

Primary Sidebar

Welcome to Makeup and Beauty Blog

Welcome to Makeup and Beauty Blog! My name is Karen, and I’m a freelance writer obsessed with makeup.

Makeup and Beauty Blog features daily product reviews, makeup tips and beauty news — like an interactive version of a monthly print magazine, except with occasional pictures of my cat.

Recent Posts

Sundays With Tabs the Cat, Makeup and Beauty Blog Mascot, Vol. 878

Makeup and Beauty Blog Monday Poll, Vol. 894

Makeup and Beauty Blog Monday Poll, Vol. 893

Makeup and Beauty Blog Monday Poll, Vol. 892

Makeup and Beauty Blog Monday Poll, Vol. 891

/* real people should not fill this in and expect good things – do not remove this or risk form bot signups */

Social

  • Facebook
  • Instagram
  • Pinterest
  • Twitter
  • YouTube

Featured Posts

Sundays With Tabs the Cat, Makeup and Beauty Blog Mascot, Vol. 771

Lady Unicorn

Weird Things I Like to Do

brows fill out beforehand

Before You Pluck or Wax Your Brows, You Must Do This

current bare skin status

What’s One Thing That Drastically Changed Your Skin for the Better?

Copyright © 2025 Makeup and Beauty Blog. Get in touch.