• Skip to main content
  • Skip to primary sidebar

Makeup and Beauty Blog | Makeup Reviews, Swatches and How-To MakeupMakeup and Beauty Blog | Makeup Reviews, Swatches and How-To Makeup

A beauty blog blooming with fresh makeup reviews, swatches and beauty tips from your friendly neighborhood beauty addict

  • Home
  • About
    • About
    • Contact
    • FAQ (Frequently Asked Questions)
    • Advertising & Media
  • Categories
    • Product Reviews
    • Makeup
    • Skincare & Fragrance
    • Style & Fashion
    • Hair
    • Nails
    • Tips & Tutorials
    • Just for Fun
  • Brands
  • Store

Makeup Tools

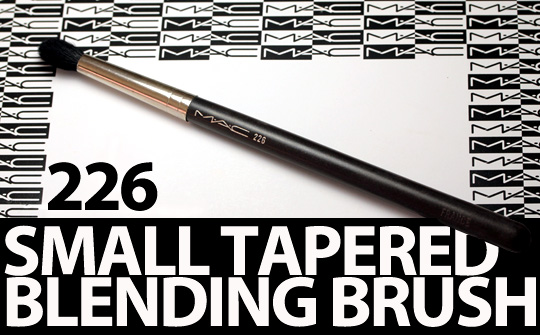
MAC Me Over with the 226 Small Tapered Blending Brush

July 16th, 2011 by Karen 19 Comments

MAC 226 Small Tapered Blending Brush

To: MAC CosmeticsI look forward to the day MAC does us a solid by finally adding the beyond awesome MAC 226 Small Tapered Blending Brush ($24.50) to their permanent eye brush lineup, but until then I guess these periodic appearances will just have to do.

To say the 226, which makes one of its periodic limited appearances next month in the MAC Me Over Fall 2011 Collection, is just one of my favorite MAC brushes of all time would be like saying New York is a nice little town. I’ve actually had nightmares about losing it, no joke. It’s fan-frickin’-tastic for applying color into the crease, and I love it so much that it always comes with me whenever I travel. I literally never leave home without it, LOL!

Basically, the 226 is like a thinner, pointier version of the famed MAC 224, which many MACaholics adore for applying color into the crease. I love it, too, especially for applying under-eye concealer and for blending out harsh lines, but when it comes to crease work, I prefer the shorter bristles of the 226.

The 224’s larger, fluffier brush head covers a wider area than the 226 does, depositing more shadow than I need on my lids. The 226’s shorter bristles and more compact brush head, on the other hand, not only fit the size and shape of my crease area better than the 224, but I don’t think its bristles splay out as much, and therefore give me more control over the eyeshadows I apply.
[Continue reading…]

There are 19 comments on this post. Leave yours.

Categories: MAC Makeup, Makeup Tools, Product Reviews Keywords: mac

Makeup Magic at Home with the Temptu AIRbrush Makeup System

April 23rd, 2011 by Karen 15 Comments

Sam

Written by Sam

Welcome to Makeup 2.0. The future is now! Upgrade your makeup point of view with the subject of today’s guest post from Sam.

The Temptu AIRbrush Makeup System

How often do you glance at a magazine photo spread and enviously draw your fingers over the page? No one’s skin can be that perfect, you think, studying the model’s face. It’s like the pores have all been airbrushed away!

What is the Temptu?

Now you can have pro-caliber post-production skin, and you can get it from the comfort of your own home. Skin nirvana is just a Temptu away. With their AIRbrush Makeup System, you’ll be staring at yourself in the mirror, wondering if you’re seeing something real, or a cruel trick of light.

The Temptu AIRbrush Makeup System ($225) is available exclusively through Sephora or Temptu’s own website (I prefer to deal with the brand itself).

Dealing directly with the company

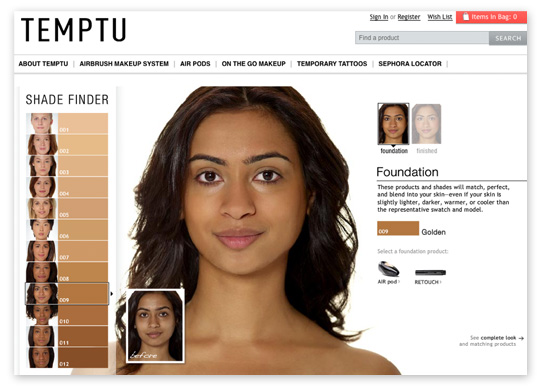
Using the company’s Shade Finder tool, you can upload a picture of yourself (don’t forget to smile!) and list your current brand of foundation, as well as the shade you use. Within a day or two, you’ll receive an email recommending the Temptu foundation, blush, and highlighter shades ($55 for two foundation AIRpods; $30 for each blush; $35 for highlighters) they believe you should try.

Temptu Shade Finder

One reason I prefer to deal with Temptu directly is that I’ve never had much luck with Sephora’s shade matcher girls. I’m not sure whether to attribute it to the lighting in the stores (shows every blemish, rough spot and acne scar I have), or to something else, but whenever I try to match my foundation in Sephora, I end up walking out of the store with a shade that’s either too light or too dark.

Temptu’s online tool, however, picked the shades I would have chosen for myself, and their online color representations look spot-on.

With Temptu’s “Build-a-Bundle Starter Set,” rather than purchasing the system, the foundation duo, the blush, and the highlighter separately at MSRP, you can bundle your shades (hopefully the ones you were matched to) from three drop-down menus, and they’ll combine them for you to the tune of a $50 savings.

The packaging

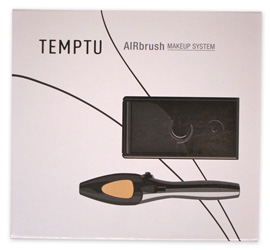
Temptu AIRbrush Makeup System PackagingIf you’re a packaging nerd like I am, I think you’ll be impressed. The system itself is housed in a magnetic closure box, and nestled in a fitted plastic container that rests over the other components: air-hose, power source, instructional DVD, and warranty. Glossy minimalism at its best.
The DVD wasn’t what I expected, and I think the printed instructions are much more useful overall. Airbrushing and applying makeup with a brush or sponge are totally different beasts, and the DVD isn’t much more than pretty cinematography. Sure, it’s well laid out, but the model has nearly perfect skin already. Fine for a fashion spread or a virtual look book, but for real people like us who want to learn how to conceal a blemish or dark under-eyes, I recommend reading the manual or looking up a YouTube video posted by a consumer instead.

The airbrush that comes with the Starter Set is the same one that comes with the Temptu air professional compressor, sans the battery pack. Instead, a rubber muffler is glued to the underside (thank goodness, as this thing produces a rather loud rumbling noise when turned on) of this model. If you had hoped to purchase a battery for it, quash them now. This version must be used near a power source. That said, the power cord is rather long.

The proprietary gun rests inside a stand above the machine, and its beautiful! That is, until you pick it up. The shiny, brushed-metal-esque plastic attracts fingerprints like mad. Not that that affects its performance in the slightest, but if you have issues with that type of thing, be prepared to keep a microfiber cloth nearby at all times.

Using the system

To begin using the system, take the rubber hose, and push one end into the hole underneath the PSI regulator (that knob with the white ring around it on one side), and the do the same with the other end and the gun. Next, take your first AIRpod (I assume you’ll be using the foundation one first), and remove the black cap on one end. Inside this cap is a little tool, held back by a piece of sticky tape. I needed a pair of tweezers to remove it, so be prepared. Take this tool, and poke it in and out of the red-rimmed hole on the now exposed end of the AIRpod (this is where the gun will connect to the product). Make sure to also remove the tape from the other end of the AIRpod as well (I learned this the hard way… So much product wasted!)

Temptu AIRbrush Makeup System Compressor

Now, here comes the tricky part. Hold down the small button on the side of the gun (this is extremely important), and slide the AIRpod in until you hear it click. You won’t know if it worked or not for another few seconds. ..

Push the button on top of the machine, and aim the gun at the back of your hand (you should be holding the gun like you would a large pencil or pen). You should feel a cool, gentle blast of air. With one finger, pull back the lever on the top of the gun itself. If it seems to kind of click instead of move smoothly, the AIRpod didn’t latch properly, and no product will come out. In this case, you’ll have to remove the AIRpod and reinsert it (I once had to do this four times to get it to work).

A gripe

And this is where one of my major gripes with the system comes in. It’s nearly impossible to get those little devils off! You’re meant to hold down that button on the side of the gun (make sure the machine is turned off for this) and simply slide the AIRpod right off. Nope. It’s a struggle. I often have to work it so hard that the hose pops off. I’ve tried wiggling it back and forth, pulling straight back, wrapping it in a towel and pulling… And if you have any sort of slippery material (lotion, etc.) on your hands, forget it. I think

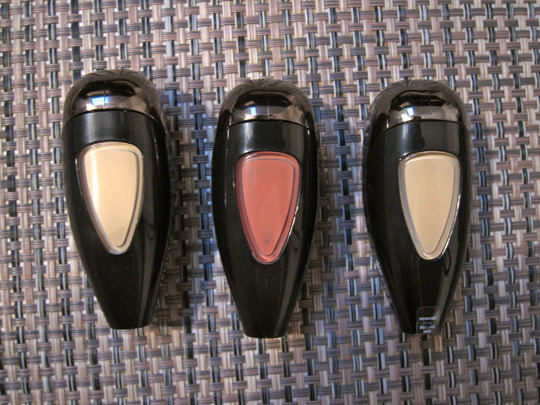
Temptu AIRpods
Temptu AIRpods in Ivory, Pale Pink, and Champagne

Inside one of the Temptu AIRpods
Inside one of the AIRpods

I’ve honestly spent more time trying to remove these things (either to reinsert them to get them to latch, or to switch products) than actually applying what was in them! I get that they need a tight seal to work, but there definitely needs to be an easy-release tab or something.

Actually using the brush

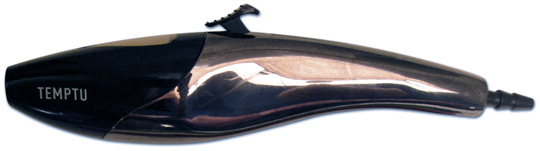
The Temptu AIRbrush Makeup System Brush

Assuming, though, that the lever did move smoothly, you should see some product start to slowly build up on your hand. That’s good. Release the lever, and move it toward your face. The brush has a continuous airflow, so you’ll feel air being pushed from it even when you aren’t distributing product. Adjust the machine’s PSI regulator for whichever product you’re currently using (I prefer the middle to the high position for foundation; the middle to low setting for blush, highlighter, and concealing).
[Continue reading…]

There are 15 comments on this post. Leave yours.

Categories: Guest Post, Makeup Tips/How To, Makeup Tools Keywords: guest post

How Much Can You Fit in the New Urban Decay Quinceañera Makeup Bag?

April 17th, 2011 by Karen 78 Comments

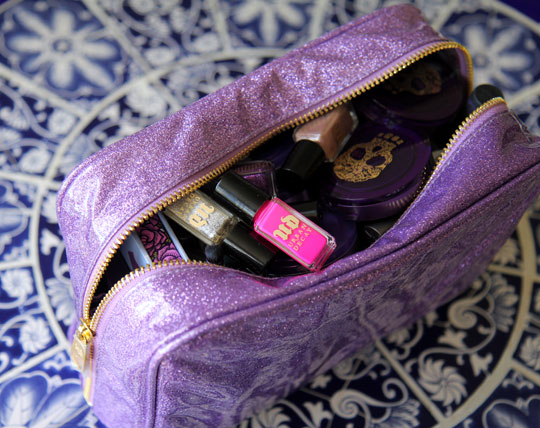
The new Urban Decay Quinceañera Makeup Bag ($26, available now at Sephora stores and online) isn’t exactly helping me master how to pack light.

But who cares?! It’s party time! — a sweet 15 of sorts, aka a quinceañera — and Urban Decay is bringing the fun.

They released the limited edition bag to celebrate their 15th birthday, bedecking it with purple and sparkles, and like any good birthday it comes with a surprise: it holds a TON of stuff!

Just how much stuff? Well…

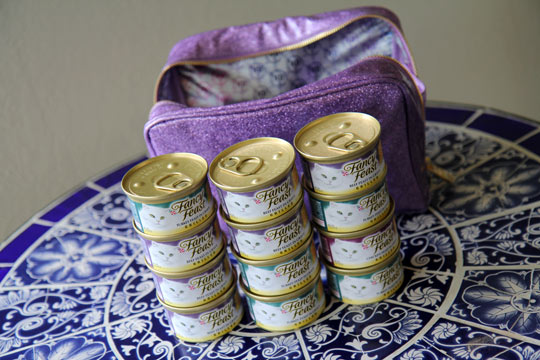
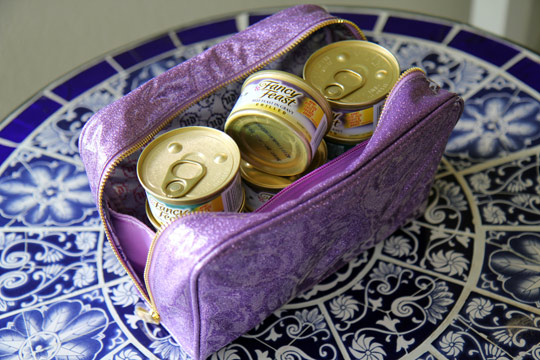
12 cans of cat food

urban decay quinceanera makeup bag

urban decay quinceanera makeup bag

Or…

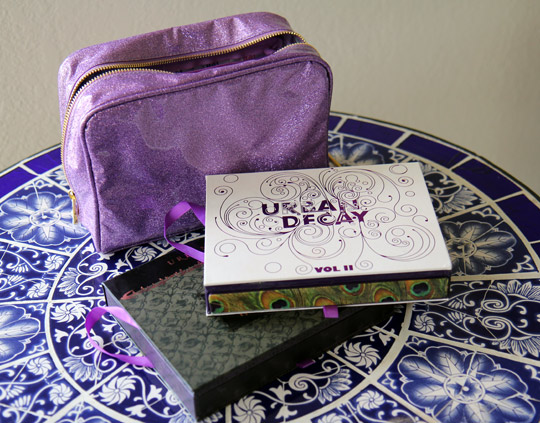
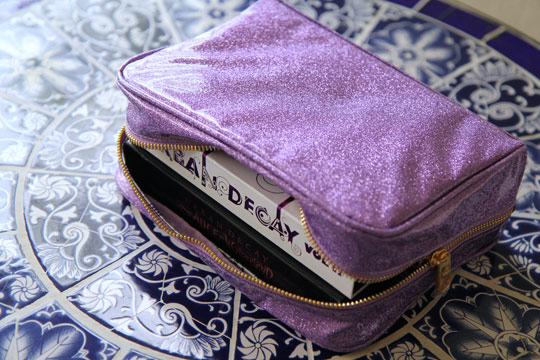
Two Urban Decay Blockbuster Eyeshadow Palettes

urban decay quinceanera makeup bag

urban decay quinceanera makeup bag

Or…

39 pieces of Urban Decay makeup

urban decay quinceanera makeup bag

Or…

6 body butters and 1 body wash

urban decay quinceanera makeup bag
[Continue reading…]

There are 78 comments on this post. Leave yours.

Categories: Makeup, Makeup Tools Keywords: urban decay

Becca Professional Brush Soap Is the Best Makeup Brush Cleanser I’ve Ever Used: Bar None

April 7th, 2011 by Karen 50 Comments

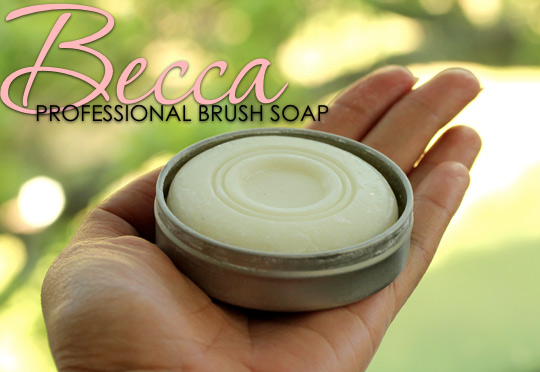
becca professional brush soap

When it comes to some tasks, time ceases to exist in a measurable way. For all intents and purposes, these tasks have neither a beginning nor an end. They simply last forever…

Brushing cat hair from my clothes (Tabs sheds like cray-cray!), scraping the last bits of Nutella from a mostly (but never entirely) empty jar, groping around the house for misplaced eyeglasses, washing makeup brushes…

That last one, in particular, is the bane of my existence. Because I paint my mug a lot, and sometimes a few times a day, I leave dozens of dirty brushes in my wake.

I was going through a $12 bottle of MAC Brush Cleanser every couple of months until the day I tried Aussie Opposites Attract. It worked as well as the MAC cleaner yet cost just $3.

I love saving scrilla (who doesn’t?), but Becca’s $15 Professional Brush Soap has me reconsidering that. After using it for the past two weeks, dayum! — makeup cleansing greatness.

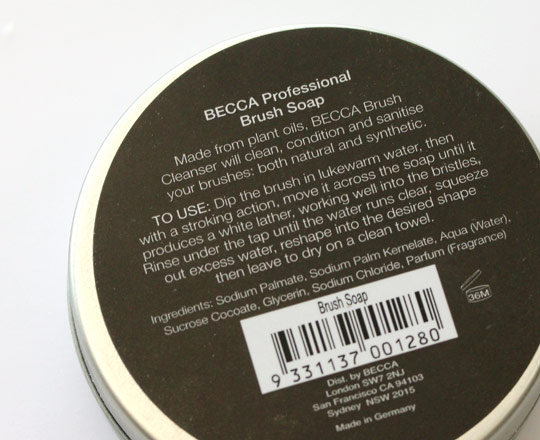
It does the deed in the blink of an eye! Becca uses plant oils to craft this solid soap. It works on both natural and synthetic fibers, cutting through powders and creams quicker than…something really quick! It’s like soap with a rapier wit, LOL! Even the toughest stuff — dried foundation, concealer and cream shadow — falls away in a flash. With this, I’m able to clean all of my brushes in half the time it takes me when I use MAC Brush Cleanser or shampoo.

becca professional brush soap
[Continue reading…]

There are 50 comments on this post. Leave yours.

Categories: Makeup Tools, Product Reviews Keywords: becca

The Sonia Kashuk Brush Couture Limited Edition Flat Top Blush/Powder Brush Is Dressed for Success

March 18th, 2011 by Karen 26 Comments

Sonia Kashuk Brush Couture Flat Top Multipurpose Blush Powder Brush

Oh, just gazing at this brush makes me happy. 🙂 Isn’t the tile print on Sonia Kashuk’s new Sonia Kashuk Brush Couture Flat Top Multipurpose Blush/Powder Brush ($11) adorable? It’s going to look so cute sitting on my vanity.

But good looks aren’t the only thing this limited edition brush has going for it. It also flawlessly applies loose powders, bronzers, and cream and powder blushes, too, just like Sonia’s legendary Synthetic Flat Top Brush. The big difference between the two is just that these bristles are made of natural fibers (I’m not sure what kind).
[Continue reading…]

There are 26 comments on this post. Leave yours.

Categories: Drugstore Beauty Finds, Makeup Tools, Product Reviews Keywords: bargain, sonia kashuk

5 Fantastic Drugstore Makeup Brushes

February 16th, 2011 by Karen 68 Comments

5 fantastic drugstore makeup brushes

I was cleaning my makeup brushes yesterday when I remembered a recent email exchange across the Northern border. Canadian reader Siobhan asked…

Hi Karen,

Family members are in the States right now and have offered to bring me back a little present. 🙂

I’m thinking about asking for some makeup brushes, and you have stores there that we don’t have here in Canada (Target and CVS come to mind). What kinds of drugstore brushes do you recommend? Thanks!
–Siobhan

Heya Siobhan,

Smart thinking! Makeup brushes are lightweight, easy to pack, and make fantastic little travel gifts. Both of the chains you mentioned, Target and CVS, carry several affordable, high quality brushes like the…

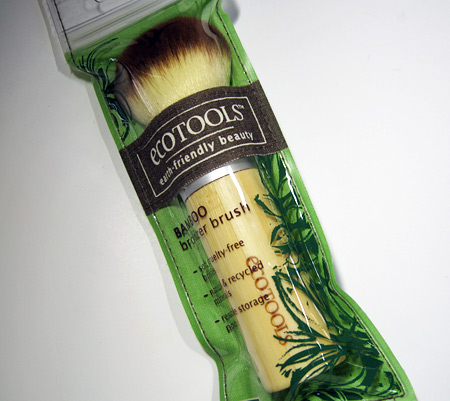
1. EcoTools Bamboo Bronzer Brush

This cruelty-free brush has a dense head (there’s a pun in there somewhere) and super soft bristles. It’s designed to be used with bronzer, but I prefer to use it to buff loose powder on top of my foundation for an airbrushed look. $12

eco tools bamboo bronzer brush review 3

2. Sonia Kashuk Bent Eyeliner Brush

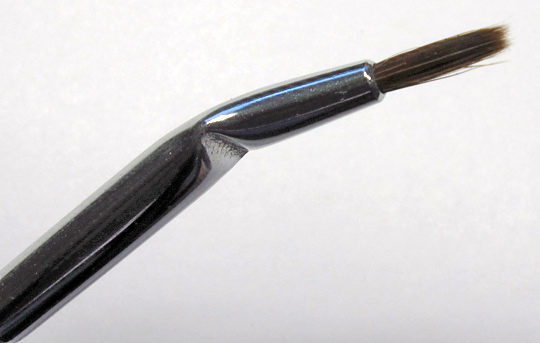
An affordable, all-purpose eyeliner brush with an angled barrel, a long handle and a pointed brush head made with soft, yet firm, synthetic fibers. I think it’s a star with gel liners like MAC Fluidline and makes winged cat eye flicks super easy to do. $6

Sonia Kashuk Bent Eyeliner Brush Review closeup

3. Sonia Kashuk Synthetic Flat Top Blusher Brush

My local Target has a tough time keeping this brush in stock; it’s usually sold out! Forged in the fires of Mt. Kashuk by the mighty SK to apply cream blush, this multitasking tool also tackles liquid foundation, cream/liquid highlighters and powder products, too. It’s totally worth the hunt. $15

Sonia Kashuk Flat Top Blusher Brush
[Continue reading…]

There are 68 comments on this post. Leave yours.

Categories: Drugstore Beauty Finds, Makeup Tips/How To, Makeup Tools Keywords: bargain, nyx, sonia kashuk

MAC Room for the Cute Bag That Comes with the MAC Shape & Perfect Brushes

February 15th, 2011 by Karen 38 Comments

mac packed to go 5 shape perfect brushes

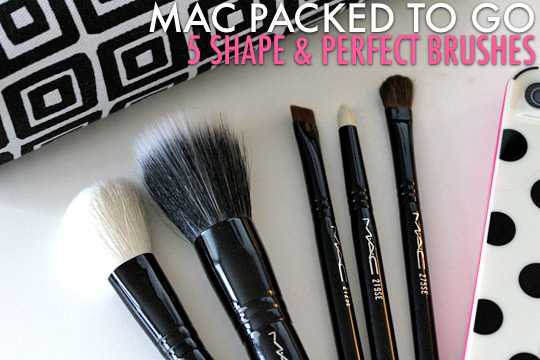
Beep! Beep! The case that comes with the MAC 5 Shape & Perfect Brushes kit is in one way like a Mini Cooper — small on the outside, but surprisingly roomy on the inside (Beep! Beep!).

For kicks today I tried to see just how much stuff I could squeeze into it. In addition to the five miniature makeup brushes it comes with, I managed to also find room inside for two full-size MAC pressed powder compacts, three full-size tubes of Cremesheen Glass and three eyeshadow singles.

Hot damn, that’s a lot! My inner makeup hobo approves. 🙂

mac packed to go 5 shape perfect brushes 3

Frankly, I wish MAC sold the bag separately (it’s zippered and made of some kind of canvas/fabric), because the five travel brushes it comes with really aren’t all that…

I should say right off the bat that I’m not a big fan of MAC’s travel brushes. The ones I’ve tried haven’t performed as well as the brushes in their permanent line, but I tried to keep an open mind today while testing the five in this set — the 168SE Angled Contour Brush, 187SE Duo Fibre Brush, 212SE Flat Definer Brush, 219SE Pencil Brush and 275SE Medium Angled Shading Brush.
[Continue reading…]

There are 38 comments on this post. Leave yours.

Categories: MAC Makeup, Makeup Tools Keywords: mac

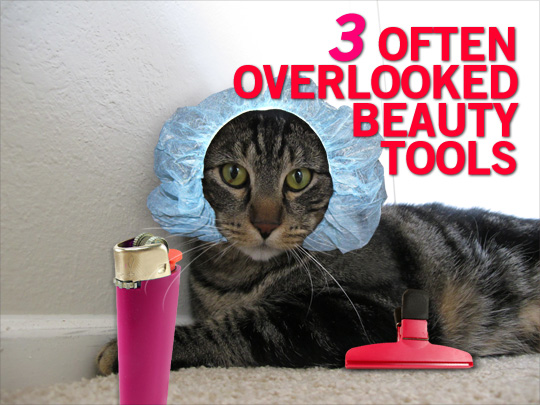
3 Often Overlooked Beauty Tools

January 22nd, 2011 by Karen 24 Comments

Sam

Written by Sam

Some great beauty tools hide in the unlikeliest places. Today freelance makeup artist and blogger Sam shares three you might not have thought of before.

3 Often Overlooked Beauty Tools
“Do I look cray-cray?”

1. Lighter

If you’re a smoker, you may already have one of these in your purse, but if you’re not, dash on down to the drugstore, and pick yourself up a cheap, disposable lighter. These brightly colored, flame-producing confabulations are absolute wonders in the beauty world, and one so few casual artists seem to own.

These little wonders are absolute godsends with pencil eyeliners. Now, you might be thinking, “Gee, Sam, something about heat and my eye just doesn’t sound smart.” And you’d be right. Please, kind ladies and gentlemen, the lighter should not get anywhere near your actual eye with this (or any) trick.

Now, flick that little lever to get your lighter lit, and wave the tip of your favorite eyeliner right through the very top of the flame. One…two…three times.

At this point, your eyeliner is gonna look a little sad and…amorphous. No worries! If you want a fantastic kohl-like application, go straight ahead and draw that line (you may want to test it on the back of your hand first, without blotting, to make sure the tip isn’t too hot). Now, blot the tip on the back of your hand (I would suggest using a tissue, but you don’t want to pick up any fuzzies) to remove any excess and to test the heat level. If it feels too hot, keep it away from your eyes for another second or two, and test again on your hand (NOTE: this means you left it in the flame too long).

What you do next depends on the effect you want. If you want a gorgeous, crayon-like application that you plan to smudge a bit, let it set for 3-5 seconds, and then apply. If you simply want a longer lasting, precise application, blot off the rest, let it set for 5-10 seconds, and apply.

2. Butterfly Clips

I know that only a few of you are going to trust me on this one, but it really does work wonderfully, so I hope you give it a try.

For this tool to work effectively, you’ll want to blow dry your hair until it’s completely bone-dry, and hopefully with some sort of product in it (I’ve found a texturizing or setting lotion works best). Do you know those butterfly clips that people tend to keep in their kitchen drawer? The ones for closing unfinished bags of almond granola or sour cream and onion crisps? Grab an armful, and haul ‘em up into your bathroom. These are going to help you create a perfectly even and not-so-perfectly disheveled wave in your hair (you know, the kind that one of your friends has naturally, and it’s just not fair!).

Starting at eyelevel, take a clip (I like the medium-size ones) and a section of hair, and, using a finger, push this section up and into the clip (the “teeth” should be parallel to the floor and close to your scalp). Do this on the other side as well.

Next, do the same thing at jaw level on either side. Each of these should create a section roughly one-fifth of the total of your hair. Section out a fifth directly on the back of your head, and place one clip up near the crown of your head (remember to pull the section up and into the clip to avoid flatness) and one at about eyelevel.

At this point, you should have two “un-clipped” fifths left. Add a clip on both of these at the eyelevel line only to create a believable wave. This pattern is going to give you that slightly rough, modern look with a wave only through the mid-section.
[Continue reading…]

There are 24 comments on this post. Leave yours.

Categories: Beauty Tips, Makeup Tools Keywords: guest post

  • « Go to Previous Page
  • Go to page 1
  • Interim pages omitted …
  • Go to page 8
  • Go to page 9
  • Go to page 10
  • Go to page 11
  • Go to page 12
  • Interim pages omitted …
  • Go to page 18
  • Go to Next Page »

Primary Sidebar

Welcome to Makeup and Beauty Blog

Welcome to Makeup and Beauty Blog! My name is Karen, and I’m a freelance writer obsessed with makeup.

Makeup and Beauty Blog features daily product reviews, makeup tips and beauty news — like an interactive version of a monthly print magazine, except with occasional pictures of my cat.

Recent Posts

Sundays With Tabs the Cat, Makeup and Beauty Blog Mascot, Vol. 878

Makeup and Beauty Blog Monday Poll, Vol. 894

Makeup and Beauty Blog Monday Poll, Vol. 893

Makeup and Beauty Blog Monday Poll, Vol. 892

Makeup and Beauty Blog Monday Poll, Vol. 891

/* real people should not fill this in and expect good things – do not remove this or risk form bot signups */

Social

  • Facebook
  • Instagram
  • Pinterest
  • Twitter
  • YouTube

Featured Posts

Sundays With Tabs the Cat, Makeup and Beauty Blog Mascot, Vol. 771

Lady Unicorn

Weird Things I Like to Do

brows fill out beforehand

Before You Pluck or Wax Your Brows, You Must Do This

current bare skin status

What’s One Thing That Drastically Changed Your Skin for the Better?

Copyright © 2025 Makeup and Beauty Blog. Get in touch.