Gentle Fume Quad, Take Two
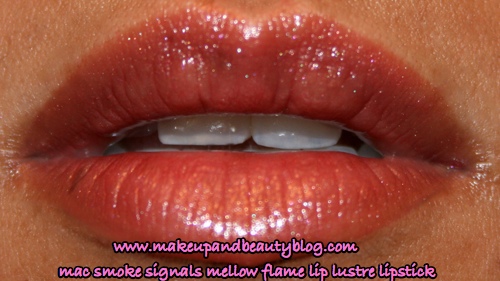
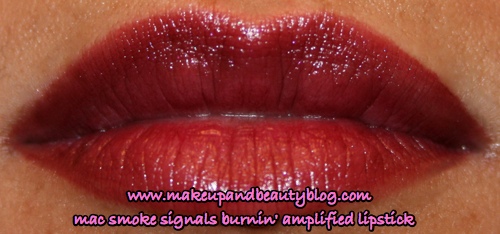
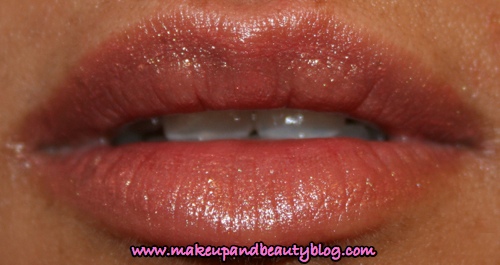
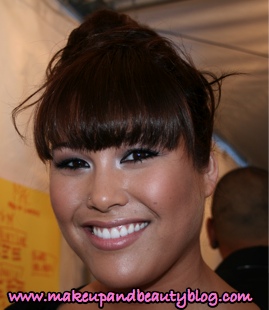
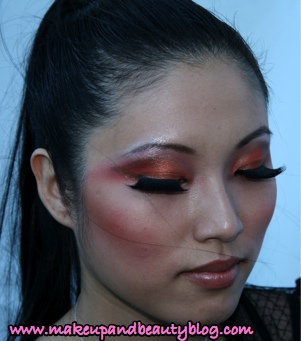
Despite our rocky start, the Smoke Signals Gentle Fume quad and I are starting to become fast friends. I’ve discovered that it really comes in handy when you want to look like a vampire (a cute one, of course). I wore Rondelle on the entire lid, Waft on the outer third and a teeny tiny bit o’ Carbon in the outer v. (Big ups to my blogging buddy temptalia.com for suggesting this look!) I wore this out yesterday and can safely report that I felt 100% non-drag queeny. That’s Burnin‘ on my lips along with Bazaarish Lipglass on top, and lil bit of Emote on the cheeks!

Lol, I just realized that this looks like a high school senior pic with a messy kitchen as the background

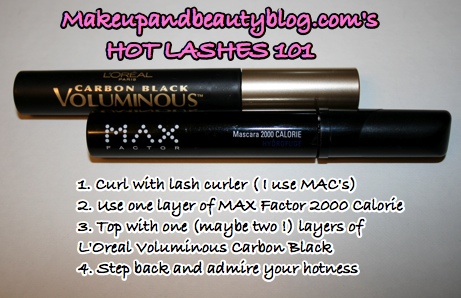
MASCARA REVELATION: L’Oreal Voluminous Carbon Black + Max Factor 2000 Calorie = BIG DRAMATIC LASHES!
Whenever I have a rough day I like to head to the drugstore to grab an ice cream cone and look at makeup. Yeah, yeah, yeah…I know it’s kind of eighth grade but it’s a nice pick me up and it keeps me from dropping serious stress cash at the MAC counter.
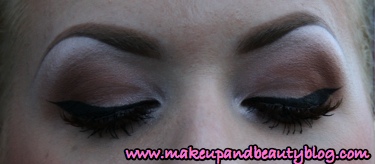
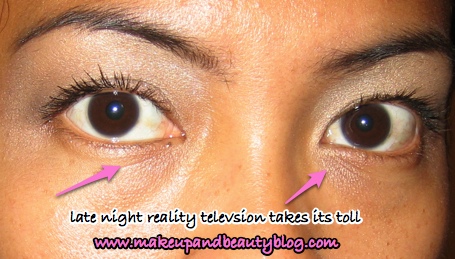
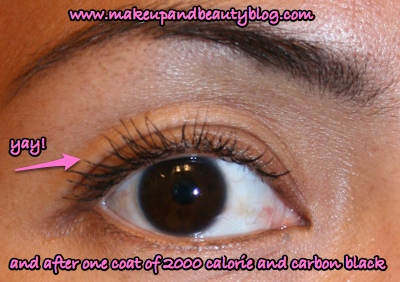
I’ve got straight, medium length lashes that aren’t full or thick, so I’m always looking for mascara. My favorite drugstore mascara lately has been L’Oreal Voluminous Carbon Black. It’s really glossy and dark and builds up my ho-hum, straight lashes nicely. Despite its great color and thickening power, I’ve noticed that it really doesn’t hold a curl from the lash curler. Within an hour or so I have stick straight lashes again. Boo!
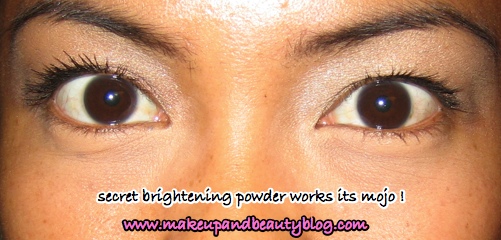
Today just for fun I layered L’Oreal Voluminous over MAX Factor 2000 Calorie. 2000 Calorie has excellent curl hold, but the color isn’t as glossy or dark as Carbon Black. Layering the two mascaras makes a dramatic difference, and I loved the results: I got thick and glossy lashes that kept the curl throughout the day.
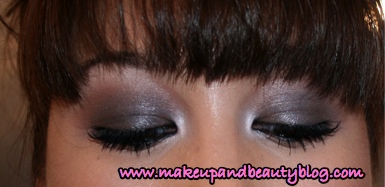
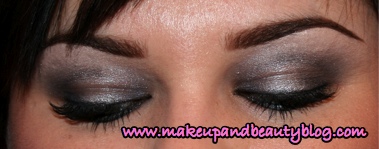
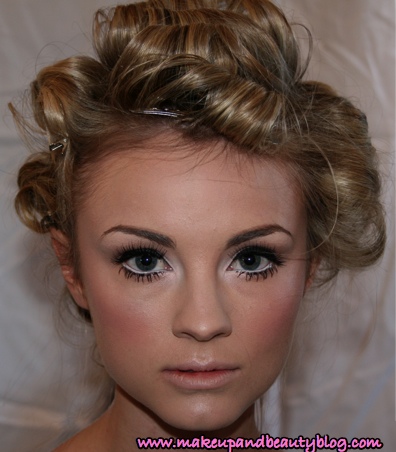
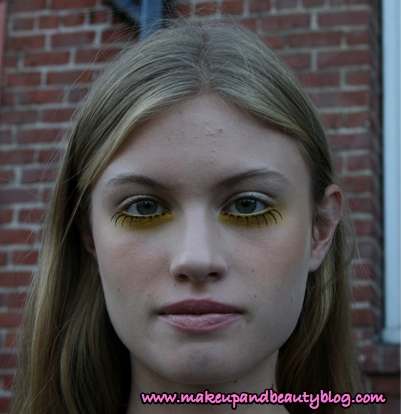
Before

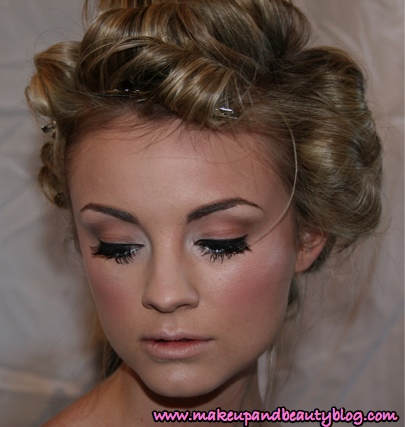
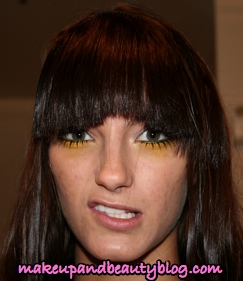
…and after
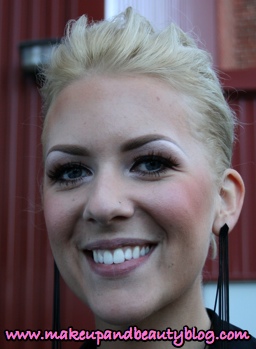
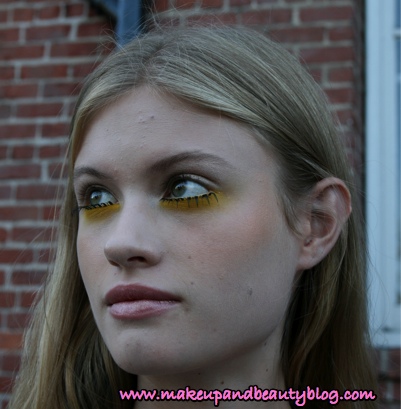
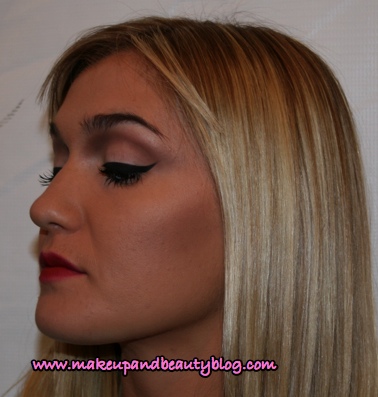
From the earlier FOTD

The only thing is I have to work quickly when applying this both mascaras. I used Waterproof 2000 Calorie, which dries really fast, so if I wait to long to apply the Carbon Black it starts to get flakey and hard to apply.
If you’ve got these two around then give it a go, and let me know if it works for you (I hope it does!)
How’s your Wednesday been so far? I hope that your coffee tastes perfect and that you’re feeling happy and pretty.
Your friendly neighborhood beauty addict,
Karen