• Skip to main content
  • Skip to primary sidebar

Makeup and Beauty Blog | Makeup Reviews, Swatches and How-To MakeupMakeup and Beauty Blog | Makeup Reviews, Swatches and How-To Makeup

A beauty blog blooming with fresh makeup reviews, swatches and beauty tips from your friendly neighborhood beauty addict

  • Home
  • About
    • About
    • Contact
    • FAQ (Frequently Asked Questions)
    • Advertising & Media
  • Categories
    • Product Reviews
    • Makeup
    • Skincare & Fragrance
    • Style & Fashion
    • Hair
    • Nails
    • Tips & Tutorials
    • Just for Fun
  • Brands
  • Store

5 Things I’ve Been Loving Lately

August 11th, 2015 by Karen 35 Comments

limes

1. Lime-flavored ANYTHING

Forget about lemons. Limes are where it’s at, man.

So sour… So good! I was into key lime pie a few weeks ago (haha, I know, I shift gears often), but now I’m all about lime candies and — OOH! — limeade!

It’s like lemonade but made with limes (obvs). There’s a place in town called Rustic Bakery that makes a GREAT limeade that’s nice and tart with a good bite to it, and sometimes I’ll get one there with lunch.

In fact, I’m drinking one right now. 🙂

Well…I was drinking one, but I just finished it! *slurp*

2. Clinique Cheek Pop in Ginger Pop
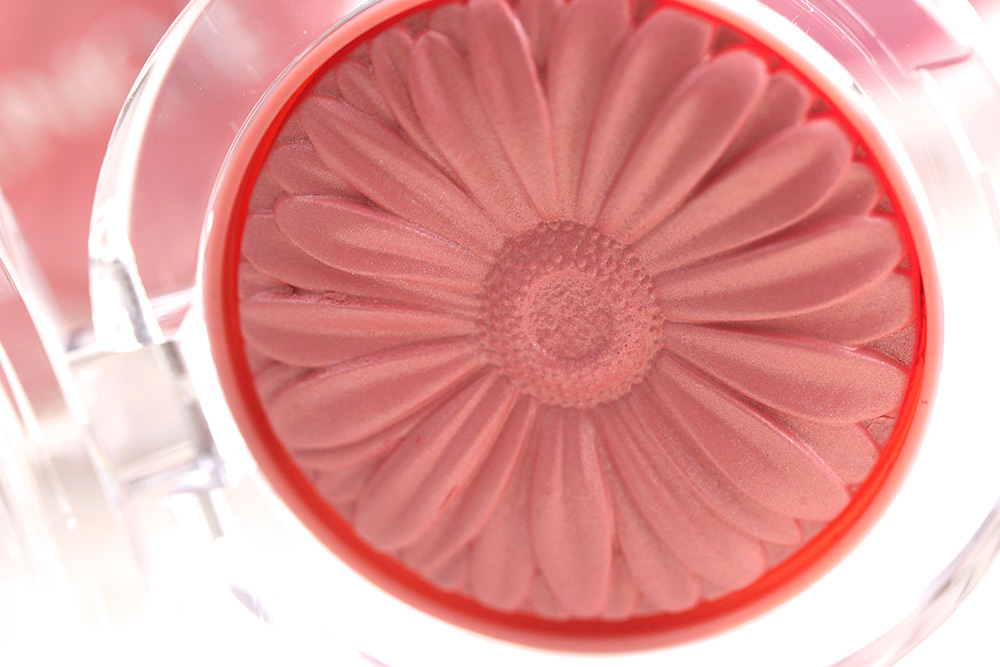
clinique-ginger-pop-blush

Current favorite blush right hurr. This pop is a real gem. It’s a $22 peachy brown nude in Clinique’s permanent line, and it buffs out beautifully on cheeks.

Lasts all day, too.

I guess I forgot about it for a while, but I recently re-discovered it while “shopping” in a drawer.

3. Hourglass Femme Rouge Lipstick in Vintage
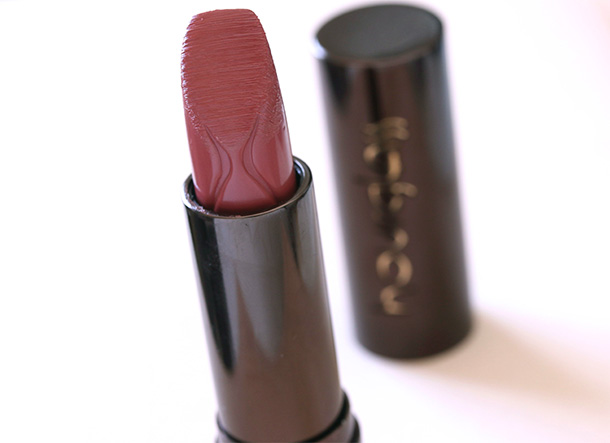
Hourglass Femme Rouge Lipstick in Vintage
Hourglass Femme Rouge Lipstick in Vintage, $30

Another beauty I hadn’t worn in a hot minute, but I’m making up for that now!

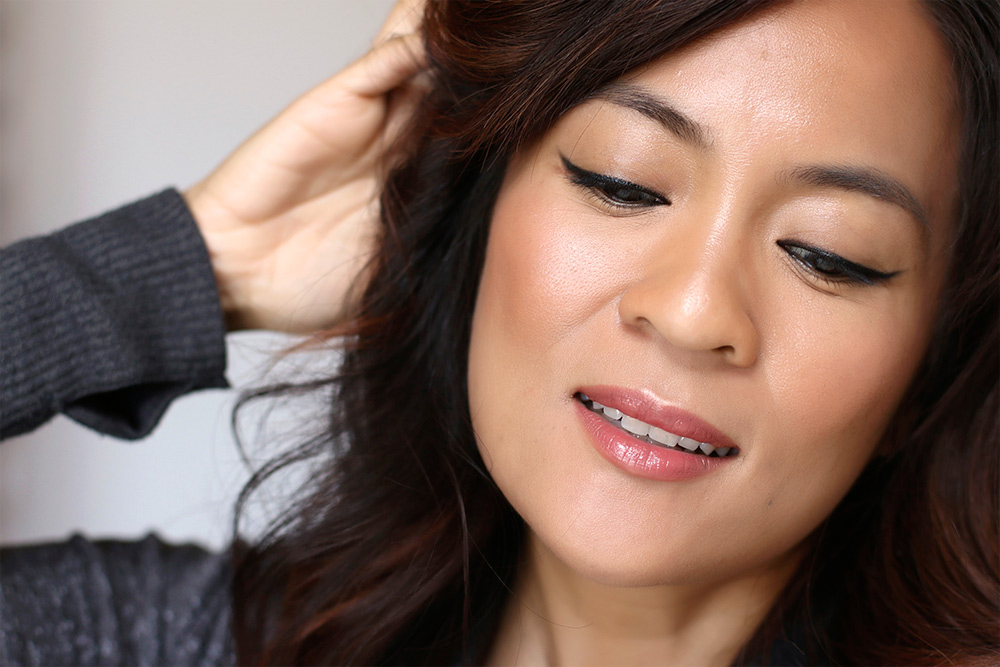
Doesn’t this pinkish brown have kind of a ’90s vibe to it? (I wore it in yesterday’s winged liner tutorial). I love how this neutral/nude works with darker skin tones, especially (if you’re a lighter lass, check out Hourglass Grace).
[Continue reading…]
There are 35 comments on this post. Leave yours.

Categories: Clinique, Hourglass, Just For Fun, Makeup

Estée Lauder Fall 2015 Collection: A Quick Look

August 11th, 2015 by Karen 20 Comments

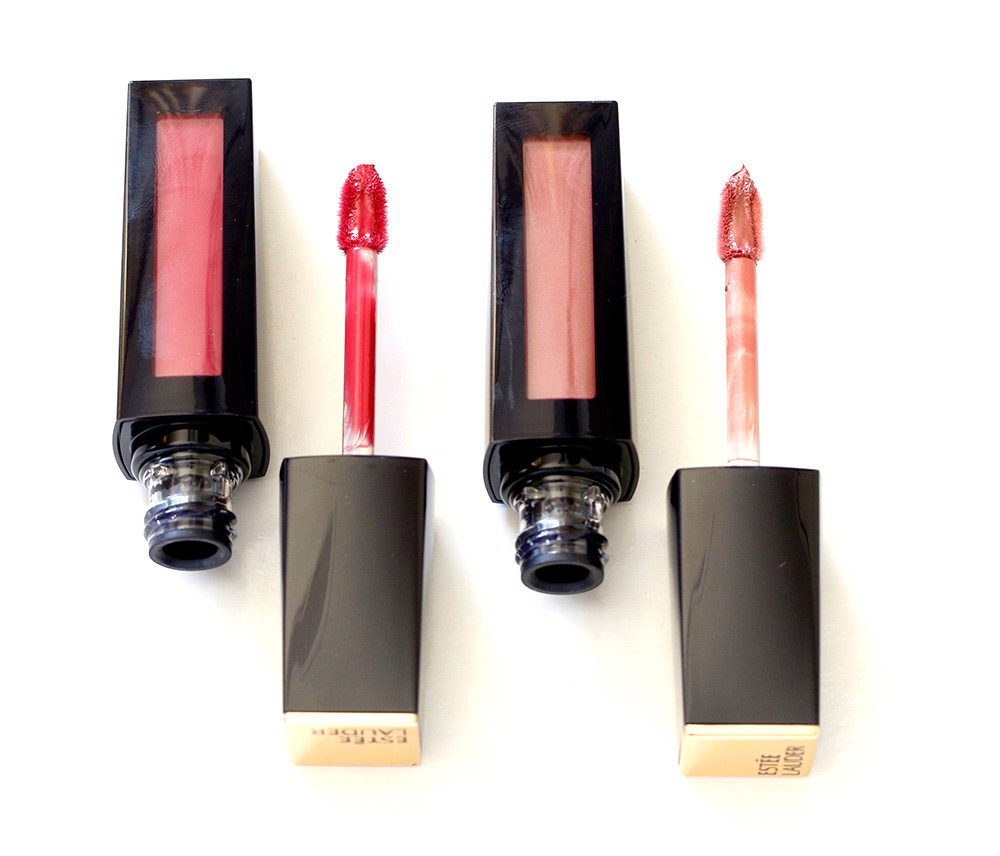
I see you making grabby hands at these new liquid lipsticks!

Girl, I did the same thing. 🙂 Gimme those brights!

I know, when did Estée Lauder start doing such — how shall I put this? — hip stuff? I used to think of them as a fragrance brand mostly (I wore Pleasures and Private Collection for years!) or, like, the makeup that my aunties wore (it’s true), but they’ve been doing some interesting things lately, especially in the realm of color.

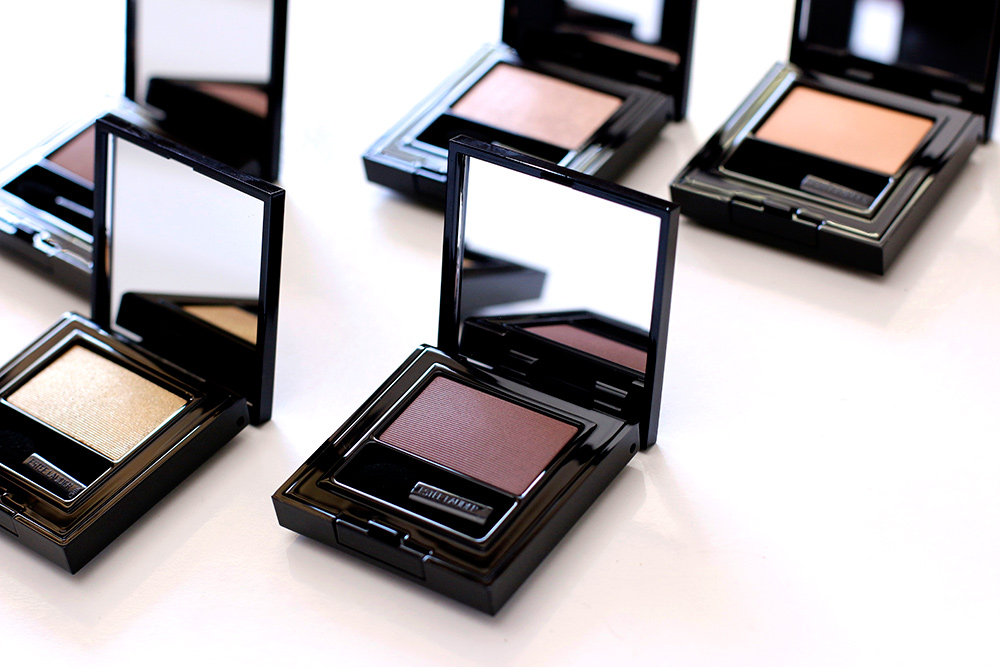
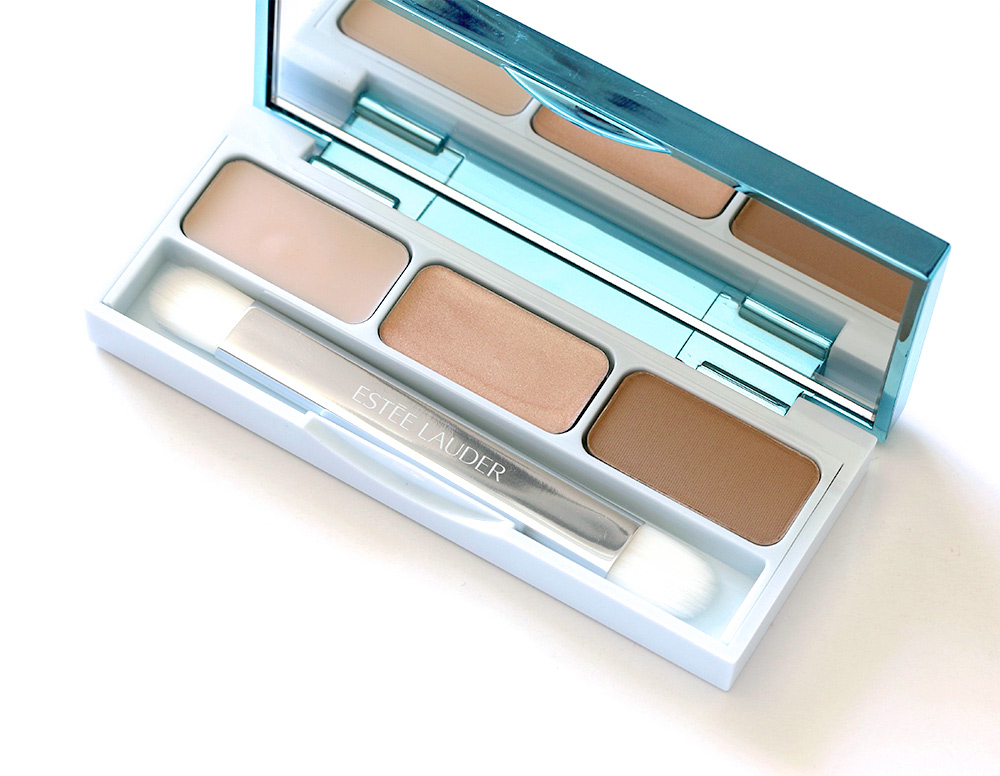
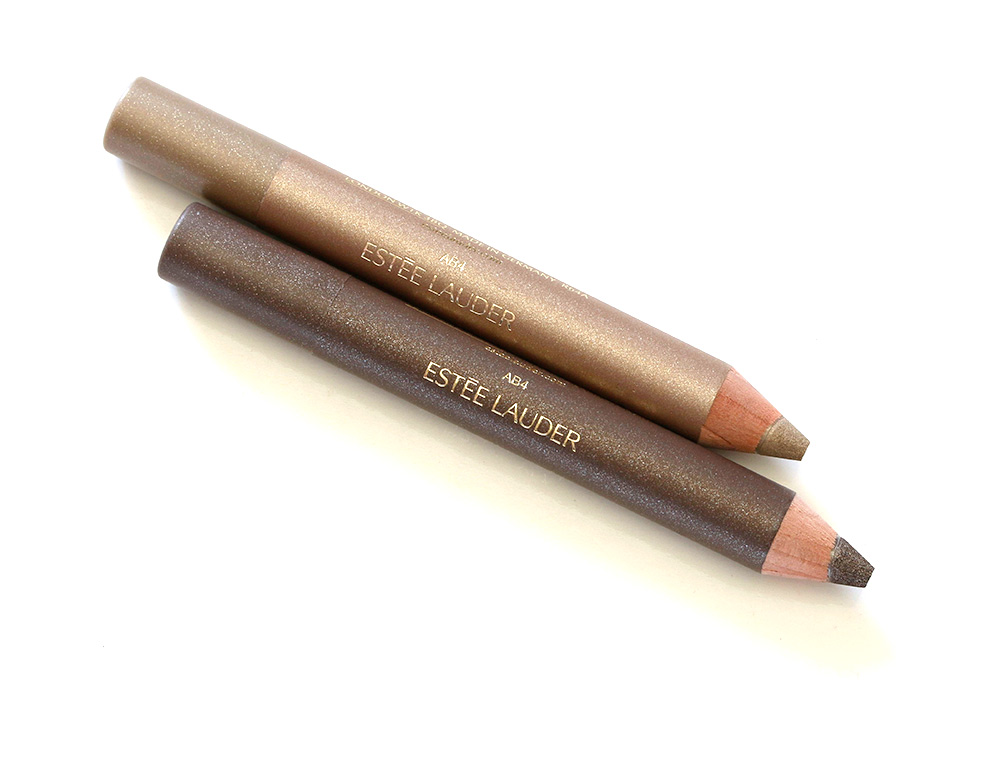
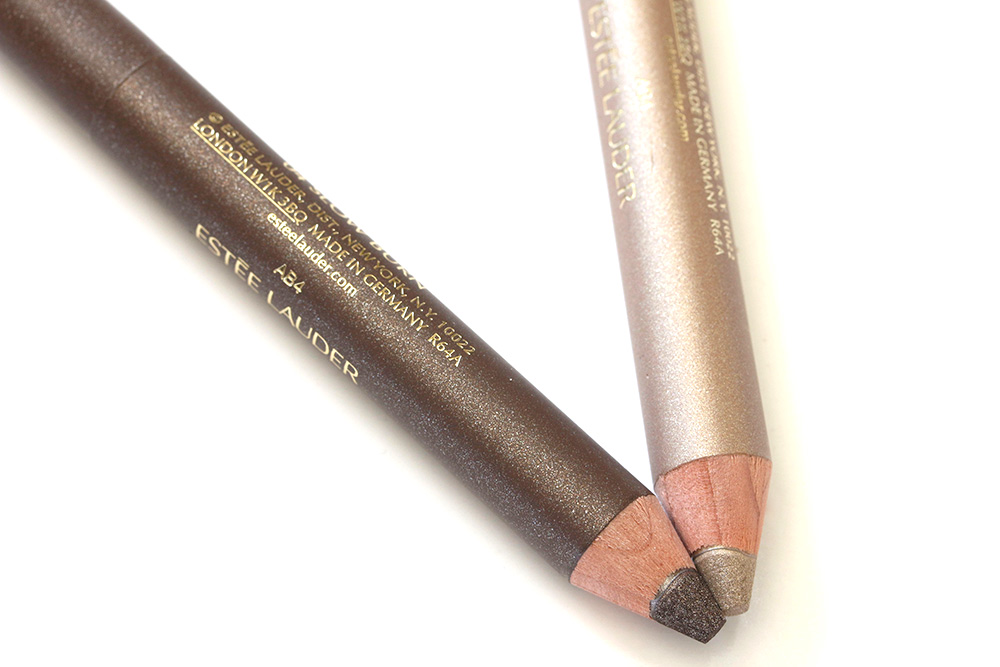
Their fall 2015 collection is huge, with lots of new things, including these liquid lipsticks, a new line eyeshadow singles, shadow sticks and a contouring kit for yo’ eyes.

Press play for a look at a few pieces from the launch. The collection is available right meow online and at Estée Lauder counters.

Products mentioned:

  • Estée Lauder Dimension Shape + Sculpt Eye Kit ($40)
  • Estée Lauder Pure Color Envy Liquid Lip Potion ($30 each)
  • Estée Lauder Pure Color Envy Eye Defining Singles ($25 each)
  • Estée Lauder Magic Smoky Powder Shadow Sticks ($22)
estee aluder pure color envy liquid lip potion
Pure Color Envy Liquid Lip Potion ($30 each)
estee lauder pure color envy eye defining singles
Pure Color Envy Eye Defining Singles ($25 each)
estee lauder eye defining singles
Pure Color Envy Eye Defining Singles ($25 each)
Dimension Shape + Sculpt Eye Kit ($40)
estee lauder smoky powder shadow sticks
Estee Lauder Magic Smoky Powder Shadow Sticks ($22 each)
estee lauder smoky powder shadow sticks 2
Estee Lauder Magic Smoky Powder Shadow Sticks ($22 each)

Your friendly neighborhood beauty addict,

Karen

There are 20 comments on this post. Leave yours.

Categories: Estee Lauder, Makeup, Product Reviews, Video

Would You Rather Do Lash Extensions or Brow Extensions (If You HAD to Choose One)?

August 11th, 2015 by Karen 26 Comments

lash-or-brow-extensions

You’ve heard of lash extensions, right? Where they glue false lash fibers to the ends of your natural lashes to make them look longer and more lavishly luxuriant?

How about brow extensions?

Yes, girl! You knew it was coming eventually, but brow extensions are now officially a thing.

In the process, a brow technician glues teeny, tiny fibers (I read somewhere that some salons use natural hair) either on your existing brow hairs and/or the skin around them, and then BA-BING! BA-BAM! — you have fuller, fluffier, bangin’ brows that are presumably #onfleek, or something of the sort.

I would certainly hope that the “fleek” would be on, because brow extensions run between $150 to $200!

They’re a temporary thing, of course, usually lasting up to three weeks, but probably less if you exercise often (I guess the sweat breaks down the glue?).

If I HAD to choose one…I’d go with the brow extensions. Although I’ve been tempted by lash extensions before (oh, to wake up and have real lashes like a REAL girl!!), I’m very sensitive when it comes my eyes, and I just have a feeling that I’d notice them all the time or see them peeking out of the corner of my eye and would want to rip ’em out.

I don’t see that happening as much with the brow extensions, so that’s my choice.

Plus, I think it would be cool to not have to futz with my brows! Even if it’s just for a few weeks.

Would you rather do lash extensions or brow extensions (if you HAD to choose one)?

View Results

Loading ... Loading ...

Your friendly neighborhood beauty addict,

Karen

There are 26 comments on this post. Leave yours.

Categories: Just For Fun

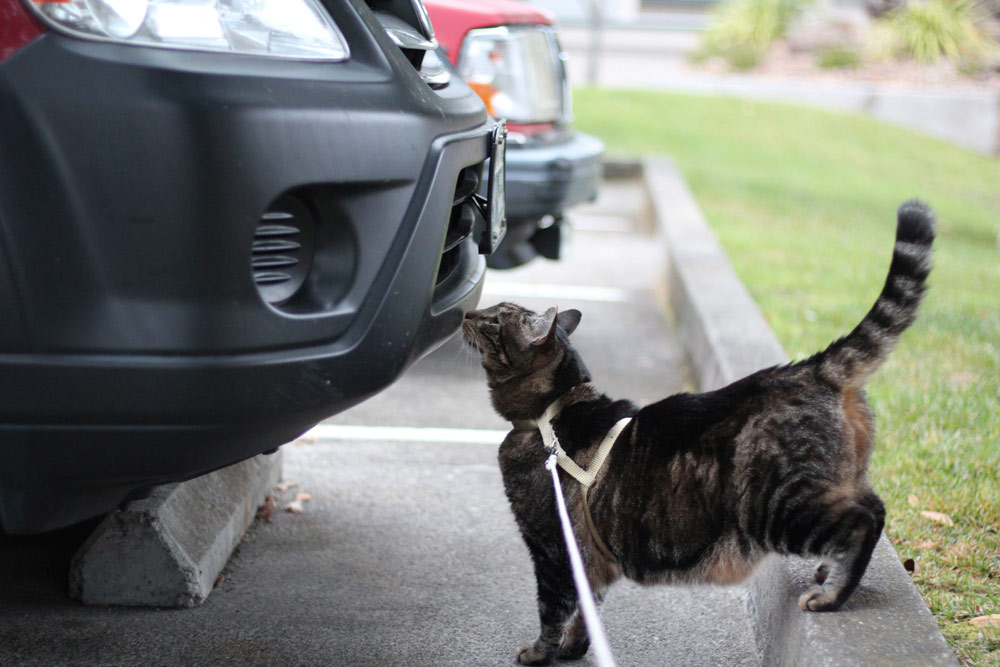
Tabs the Cat: Explorer, Automotive Engineer, Landscape Architect, Thug

August 11th, 2015 by Karen 20 Comments


1-tabs-cat-summer-2015

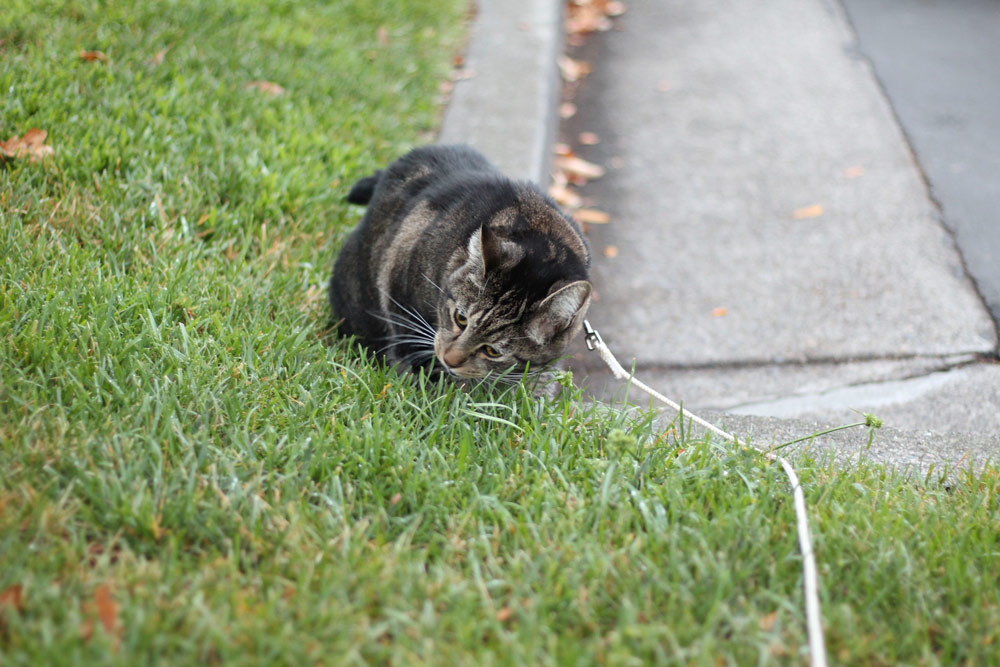
Almost every morning I take Tabs Tabs takes me for a walk, which he calls “inspecting the perimeter,” around the Tabs the Cat Industries, LLC property, and one of the things we do is look for cats intruding on the company’s territory.

For a high-powered exec, Tabs is VERY territorial.

This morning he also inspected the company’s fleet of vehicles, because as you probably know, he is also a licensed automative engineer.

He also checked the corporate lawn and garden area…

2-tabs-cat-summer-2015

3-tabs-cat-summer-2015

4-tabs-cat-summer-2015
[Continue reading…]

There are 20 comments on this post. Leave yours.

Categories: Daily Photo

Easy Winged Eyeliner for Beginners

August 10th, 2015 by Karen 24 Comments

how to winged eyeliner

OK, straight up, by “easy winged eyeliner,” I mean easy in reference to being able to successfully draw the shape and angle you want, and not easy in terms of being able to do the whole thing in 30 seconds (it will probably take longer than that). This method here involves four steps, but they really are easy, and at the end of them you’ll have perfectly placed wings.

Now, we all know someone who can perfectly apply winged eyeliner in a single glorious swoop, but I’m totally not that girl. To get my winged liner the way I like it, I have to apply it in layers and steps.

It’s all about the layers. 😉

If you’ve ever struggled to draw your wings just right, or if you can only do it with an obscene amount of Herculean effort and concentration, this method of layering will help you place your lines and wings exactly where you want ’em. Pretty soon you’ll have winged liner like a BOSS!

What you’ll need…

  • A black pencil eyeliner
  • An angled eyeshadow brush
  • A black powder eyeshadow
  • A gel or liquid eyeliner
  • Q-tips

1. Line your upper lash line (you can also do your water line, but it’s optional)

easy how to winged eyeliner beginners

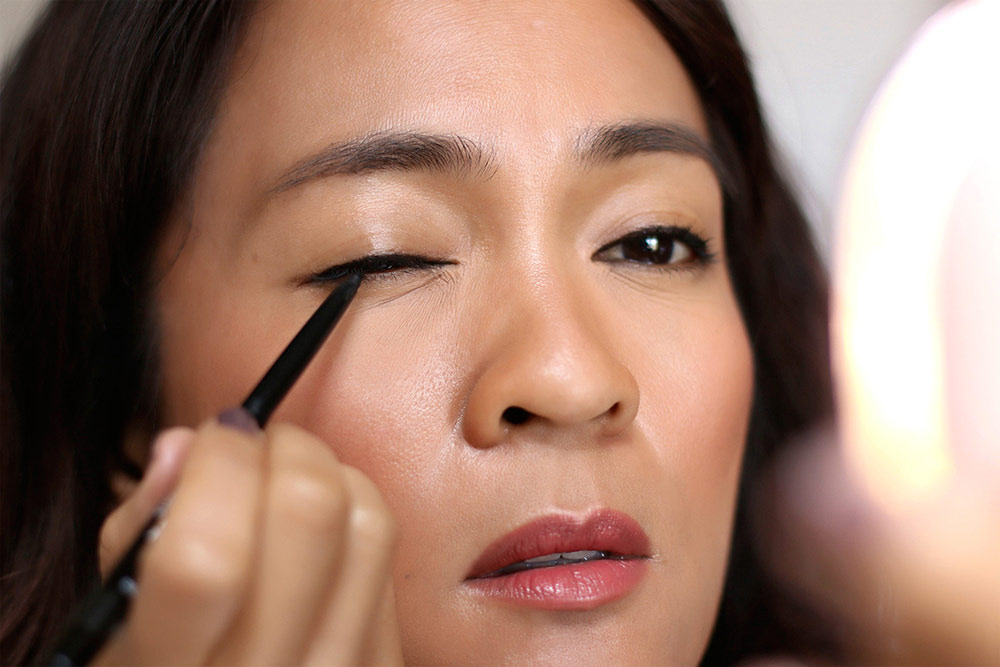
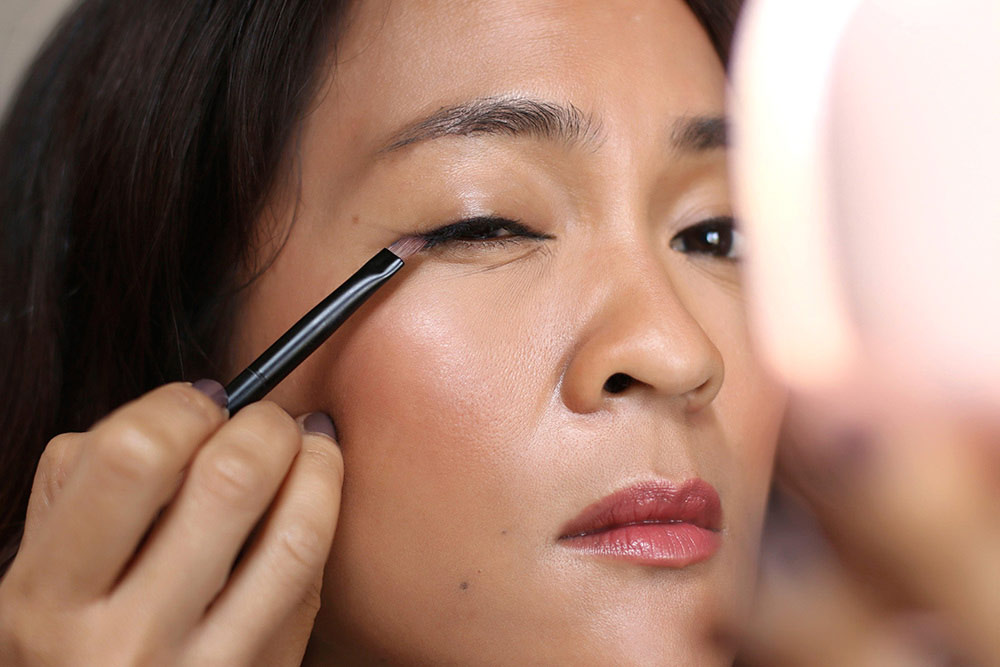
I tightlined my eyes first, because I always tightline, but it’s completely optional. What we’re gonna do now is line our upper lash line, so grab a black pencil eyeliner with a sharp tip (or sharpen a dull one), and line the upper lash line on one of your eyes with it. The sharp tip just makes it easier to be precise than a dull or blunt tip does.

Try to keep your line as thin and as close to your lash line as possible. Don’t worry at this stage if your line isn’t as thick and voluminous as you’d like, or if the edge is a little wonky or jagged, because we’ll rectify that sitch in a second. Repeat on your other eye.

easy how to winged eyeliner beginners

2. Smooth the edge of the line and start building the shape of your wing

easy how to winged eyeliner beginners

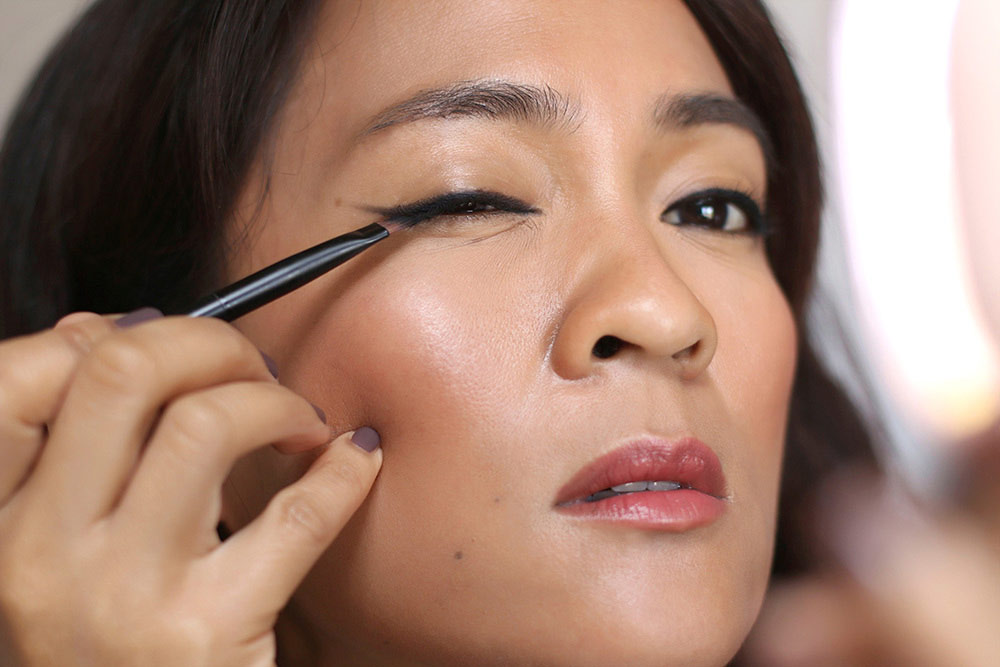
To smooth the edge of the line and start building the shape of your wing, take a clean angled eyeshadow brush, and run it gently along the edge of the line you drew in step one (note: I do each step on each eye along the way to keep them symmetrical). Start at the inner corner and move out. When you get to the outer corner, drag the brush out a bit to create a faint outline of a wing using the remaining product on your brush.

To get both eyes symmetrical, it helps me to look straight into a mirror with both eyes open while I’m working.

If you find that your wings aren’t even, don’t panic! Use a Q-tip to tweak and adjust them.

easy-cat-eye-pictureAs for the angle of your wings, it’s up to you, but I think it helps to visualize an invisible line that extends up and out from the outer corner of your lower lash line. Just follow the angle of your lower lash line up and out.

Totally optional and up to your own personal preference, though. I usually like to flatten my wings out a bit (so not as steep), because it appears to elongate the eye, and I like that effect. Play around a bit until you find an angle that works for you.

3. Thicken the line and wing

easy how to winged eyeliner beginners
[Continue reading…]

There are 24 comments on this post. Leave yours.

Categories: Eyes, Makeup, Makeup Tips/How To

How to Tightline Your Eyes

August 10th, 2015 by Karen 30 Comments

how-to-tightline

Tightlining, or “tight-lining,” despite its action-packed name, is not a new extreme sport. It doesn’t have anything to do with bungee cords, ratchet straps or zip-lining, but along with filling in my brows and curling my lashes, it’s an essential part of my everyday makeup routine.

In tightlining, you line the base of your upper lash line from below, getting down in there between the roots, and I do it EVERY. SINGLE. DAY.

Even when I’m under a severe time crunch and have to start making “tough” decisions on which and what parts of my routine I have to skip, I’ll skip bronzer, highlighter, and if I have to, I’ll even skip blush…as long as I still have time to tightline.

So how does tightlining differ from the typical ways of applying eyeliner? Well, I usually apply eyeliner from above, where I get the tip of the liner down between the roots of my lashes and along the lash line, and in tightlining, it’s the same basic process, but I come at the base of the line from beneath it, where I can really get the liner down in there between each and every lash, and it makes the lash line look nice and thick, and that makes the eyes look bigger.

Before tightlining (left) and after (right)
Before tightlining my upper water line (left) and after (right)

For tightlining, of all the different eyeliner formulas — gels, powders, kohls, liquid liners, etc. — I like black waterproof twist-up pencil liners the best, and I choose the twist-ups because the tips are usually super thin, which makes it easier to get down in between each of the lashes at the roots. I also like waterproof formulas because they last (and I LOVE Chanel’s Waterproof Eye Liner in 88 Noir Intense for this reason).

Of course, if you feel like black liners are too stark for you, you can always use another shade. Deep blackish gray, brownish black, medium-toned gray, navy or brown all work, too. Whatever darkens your lash lines and floats your boat.

Step 1: Sharpen your pencil

To start, the first thing I do is sharpen my pencil.

I know that sounds kind of “Duh, Karen!” but using a sharp tip really helps. It makes it much easier to get between those lashes at the roots.

Step 2: Placing the pencil at the base

Next, I place the tip of the pencil just beneath my lash line, pointing at an upward angle, and close the eye I’m working on so that the tip of the liner presses up against the base of the lashes.

how-to-tightline-2
[Continue reading…]

There are 30 comments on this post. Leave yours.

Categories: Eyes, Makeup, Makeup Tips/How To

Makeup and Beauty Blog Monday Poll, Vol. 385

August 10th, 2015 by Karen 37 Comments

Makeup and Beauty Blog Monday Poll for August 10, 2015
Sephora VIB Epic Rewards starting soon! Sort of. Let’s just say that it did not go off without a hitch…

You might be wondering, “So what in tarnation is this Monday Poll thing anyway!?”

Well, it isn’t exactly a poll. It’s more of a constantly evolving (devolving?), somewhat random list of questions I’ve been putting out to readers every Monday morning for the past seven years. (It’s like a kickstart for your brain.) I’ve always enjoyed reading your answers in the comments, and I hope you enjoy reading mine.

  1. Describe your perfect hair day.
    Long and loose barely-there beach waves with a good amount of volume, especially around the roots, and very little frizz (and no grays showing). 😉 My bangs must also lie perfectly to the side without any weird bumps or stray fly-aways.

    Ah, bangs… I love ’em, but sometimes they seem like straight-up punishment.

    Oh, and if/when a breeze comes along, the hair has to just keep getting better and better. That would be a bomb-@ss hair day right there.

  2. What’s your stance on duck-face selfies?
    I treat ’em like red pepper flakes (in that a little goes a long way). I think they can be cute every once in a great while, like once every three or four months, but when every other pic is a duck face, I think that’s a bit much for me. But it’s just a personal preference.
  3. When was the last time you tried some nail art, and how did it turn out?
    Hmm… I think it was around last January, and I don’t remember exactly what I did, but I remember it being a mess.

    Basically, I’m not the hippest homegirl on the block when it comes to nail art. I think some people are amazing at it, and I’m blown away by what they do, but I barely have the patience these days to paint my paws a single color, much less add an accent nail!

  4. 3 things you’d never, ever wear?
    1. A bowl cut
    2. A cropped white leather jacket with extra long fringe
    3. Capri pants that aren’t workout pants (don’t get me started on this)
  5. Today I’m feeling __________.
    Really good about the week, even though it’s going to be crazy busy. I have quite a few appointments planned (a doctor’s appointment tomorrow, a big blogging project later this week, a work lunch one day, and a few other things), but I did some planning over the weekend, and so I feel well prepared.

    I haven’t been this organized in a really long time, and it feels great.

Le List

Your turn. 🙂 Just copy and paste the following questions into a comment with your answers. I look forward to reading ’em!

1. Describe your perfect hair day.
2. What’s your stance on duck-face selfies?
3. When was the last time you tried some nail art, and how did it turn out?
4. 3 things you’d never, ever wear?
5. Today I’m feeling __________.

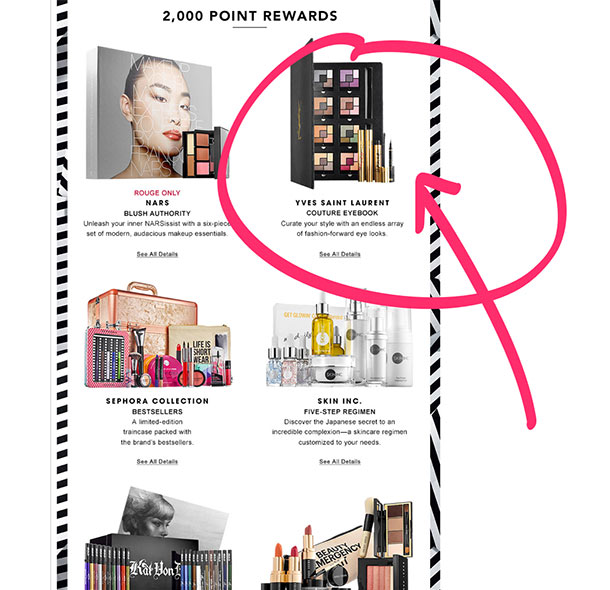
Hello and good morning, sweetpea. I’m sitting here at my desk, constantly refreshing the Sephora website because I’m waiting for their VIB Rouge Epic Rewards program to start. 🙂

The store’s doing a promotion where you can cash in your VIB points for some cool gift sets, and I’ve been hoarding my points for years! Literally, years. So I’ve got my eye on this YSL set with a whole bunch of eyeshadow palettes and mascaras in it. Everything’s first come, first serve, and Cave Girl Karen is hovering around the campfire waiting to pounce…

sephora-2000-point-reward

How’s your Monday coming along? Peaceful, easy and filled with kitties, I hope.

Your friendly neighborhood beauty addict,

Karen

There are 37 comments on this post. Leave yours.

Categories: Just For Fun

Sundays With Tabs the Cat, Makeup and Beauty Blog Mascot, Vol. 358

August 9th, 2015 by Karen 8 Comments

rainbow-shave-ice-makeup-look-thumbnail

Hello, my loves. Aloha!

Even though I was born and raised here in Marin County, California, I consider myself a local boy because of my strong ties to Hawaii. One of my assistants is from there, and I try to visit the islands often. I love the welcoming aloha spirit, the diversity, the climate and the fresh seafood.

This tutorial is a celebration of color inspired by a favorite local treat called shave ice. Not “shaved ice,” but “shave ice.” Something to wear next time you’re feeling tropical and sweet.

Mahalo nui loa,
Tabs

There are 8 comments on this post. Leave yours.

Categories: Just For Fun, Tabs

  • « Go to Previous Page
  • Go to page 1
  • Interim pages omitted …
  • Go to page 573
  • Go to page 574
  • Go to page 575
  • Go to page 576
  • Go to page 577
  • Interim pages omitted …
  • Go to page 1912
  • Go to Next Page »

Primary Sidebar

Welcome to Makeup and Beauty Blog

Welcome to Makeup and Beauty Blog! My name is Karen, and I’m a freelance writer obsessed with makeup.

Makeup and Beauty Blog features daily product reviews, makeup tips and beauty news — like an interactive version of a monthly print magazine, except with occasional pictures of my cat.

Recent Posts

Sundays With Tabs the Cat, Makeup and Beauty Blog Mascot, Vol. 878

Makeup and Beauty Blog Monday Poll, Vol. 894

Makeup and Beauty Blog Monday Poll, Vol. 893

Makeup and Beauty Blog Monday Poll, Vol. 892

Makeup and Beauty Blog Monday Poll, Vol. 891

/* real people should not fill this in and expect good things – do not remove this or risk form bot signups */

Social

  • Facebook
  • Instagram
  • Pinterest
  • Twitter
  • YouTube

Featured Posts

Sundays With Tabs the Cat, Makeup and Beauty Blog Mascot, Vol. 771

Lady Unicorn

Weird Things I Like to Do

brows fill out beforehand

Before You Pluck or Wax Your Brows, You Must Do This

current bare skin status

What’s One Thing That Drastically Changed Your Skin for the Better?

Copyright © 2025 Makeup and Beauty Blog. Get in touch.