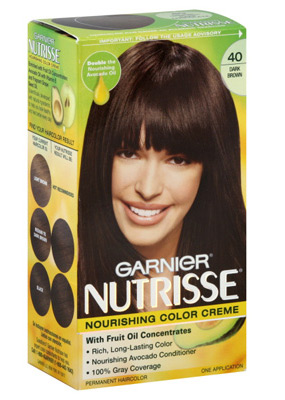
Product: Garnier Nutrisse Permanent Color
Use: At home color to change your current color or cover up grays
Price: about $7.00 for a one application box
Makeup and Beauty Blog Rating: A
I can justify spending $75 on a haircut because I have naturally wavy hair that’s really hard to tame — I’ve had so many bad haircuts resulting in everything from the poofy mushroom to the rats nest look at, so I never skimp on getting a good haircuts.
Throughout my 20s and early 30s, I was also willing to spend money on salon color. I went through all sorts of hair color phases, changing my naturally brown-black hair with red highlights, light brown and blonde highlights. It’s so much fun to change your hair color, but now that I’m living on a writer’s paycheck it’s really hard to part with $120 every three months to get those roots done, especially when the do-it-yourself color boxes at the store are $7.00.
During my year of living cheaply (wait, what am I talking about, I’m still living cheaply) I gave up getting my hair colored at the salon. I was a little nervous about doing it at first because the last time I did at-home hair color was in high school. I mean, what if my hair turned orange? Or what if I accidentally fried it somehow and it started breaking off? Or what if I ended up with scary too-dark Halloween hair that looked like an Elvira-Mistress-Of-The-Night wig? The mishap possibilities were endless.
I wish I could say that it all went perfectly from the get-go, but I can’t. Like with any new skill, I made a few mistakes along the way but thank god it didn’t really result in anything too horrific. One time I started from the roots because I got really freaked out about seeing gray hairs at the front of my head, so I piled on globs of dye on the roots like a crazy person and I ended up with light roots and dark ends. And another time I used a too-dark color that I left in too long which resulted in scary dark Elvira-Halloween hair for about a week until most of the color washed out. But in the grand scheme of things, these mistakes weren’t *that* bad. They weren’t noticeable to the majority of bystanders, unless I pointed it out (which of course I didn’t).
Now I color my hair every month, and it’s as easy as pie. I use Garnier Fructis Permanent Hair color. The smell is pretty strong, but in comparison to other at-home dyes, it’s not bad. It also doesn’t dry my hair out, which is one thing I hated most about Feria, the dye I used in high school. If you have dark hair like me and want to go a few shades lighter, Garnier is a good choice, because it does a pretty good job of lifting your hair color a few shades.
Here what I do to make at home hair color work for me:
- 1. I wash my hair in the morning with a clarifying shampoo. Right now I use Alberto VO5 Kiwi and Lime Squeeze shampoo. It’s cheap and gets the gunk out. I use a lot of gel so I shampoo twice to get my hair squeaky clean and don’t put any conditioner afterwards.
2. I then let my hair air dry during the day so that I can dye my hair in the evening.
3. When it’s time to dye, I put on an old t-shirt and sweatpants so I don’t ruin any nice clothing. I also grab an old wash cloth and wet it. I use this to immediately wipe any dye that accidentally gets on my face or my neck. I don’t have to use this as much now, because I’m getting less messy with practice.
4. Garnier gives an estimated time of how long you should leave the color in. I start the clock the moment I being the coloring process. If the box says 35 minutes, then I take into account total dye time from start to finish. I do not dye my hair and then wait for 35 minutes, and the one time I did, the color ended up being too dark, which resulted in the Elvira-Halloween hair mishap. Ugh!
5. If I’m using a new color, I always start from the ends and put the color on the roots last.
6. I never pile the hair on top of my head while I’m coloring. I just let it hang down (hence the wearing of the crappy t-shirt).
remember rule of thumb, never shampoo your hair the day of. Hair color actually works better of the hair is a little dirty. Just wash your hair the day before then color it of you don’t like going long without washing it.
This is perfect info, we are doing my daughter’s hair for the first time today and as you can guess, I’m a little nervous. We put back the Feria in exchange for the Garnier and now I’m glad we did!
Thanks for the info!
Char
I’ve colored myself for years before going to the salon for foils. Now that I’m graying, I sometimes color in between foils or if I want to save the $$. The only thing I disagree with in the article is where to start. However, I should state that I am blonde, so that is a different animal. I always ask my stylists for tips and the one thing the ALL universally agree on is start at the top. The fried, damaged hair on the ends is like a sponge and will soak up color much more quickly. For a more natural look, I put it on with my gloved hands, heaviest at the root, pulling it through like balyage technique. Then I use a wide toothed comb to pull it through. I let that sit for 20 and in the last 5 minutes I put more on my gloved hands and pull that through to the ends (not all of them) then comb again. I don’t pile it either. This gives a varied color rather than that solid one color look that is obviously dyed. Just my two cents for blondes!