• Skip to main content
  • Skip to primary sidebar

Makeup and Beauty Blog | Makeup Reviews, Swatches and How-To MakeupMakeup and Beauty Blog | Makeup Reviews, Swatches and How-To Makeup

A beauty blog blooming with fresh makeup reviews, swatches and beauty tips from your friendly neighborhood beauty addict

  • Home
  • About
    • About
    • Contact
    • FAQ (Frequently Asked Questions)
    • Advertising & Media
  • Categories
    • Product Reviews
    • Makeup
    • Skincare & Fragrance
    • Style & Fashion
    • Hair
    • Nails
    • Tips & Tutorials
    • Just for Fun
  • Brands
  • Store

Estee Lauder

A Springy Purple and Orange Makeup Look Inspired By Purple Rain

March 3rd, 2020 by Karen 19 Comments

prince purple rain
When the Purple One inspires your look

The first time I saw Purple Rain I was eight, and it was at my friend Peachy’s slumber party.

Peachy’s mom let us pick out whatever movie we wanted at the video store (this was right after she took us to Chuck E. Cheese, of course, where I killed it at ski ball), and I’m 100% positive she had no idea what the movie was about when she rented it.

Even though none of us understood what was going on when we watched it, we knew that Prince was in it, and that’s all we really needed to know. To this day, the soundtrack from the movie is one of my favorite albums of all time.


I don’t care pretty baby, just take me with you.

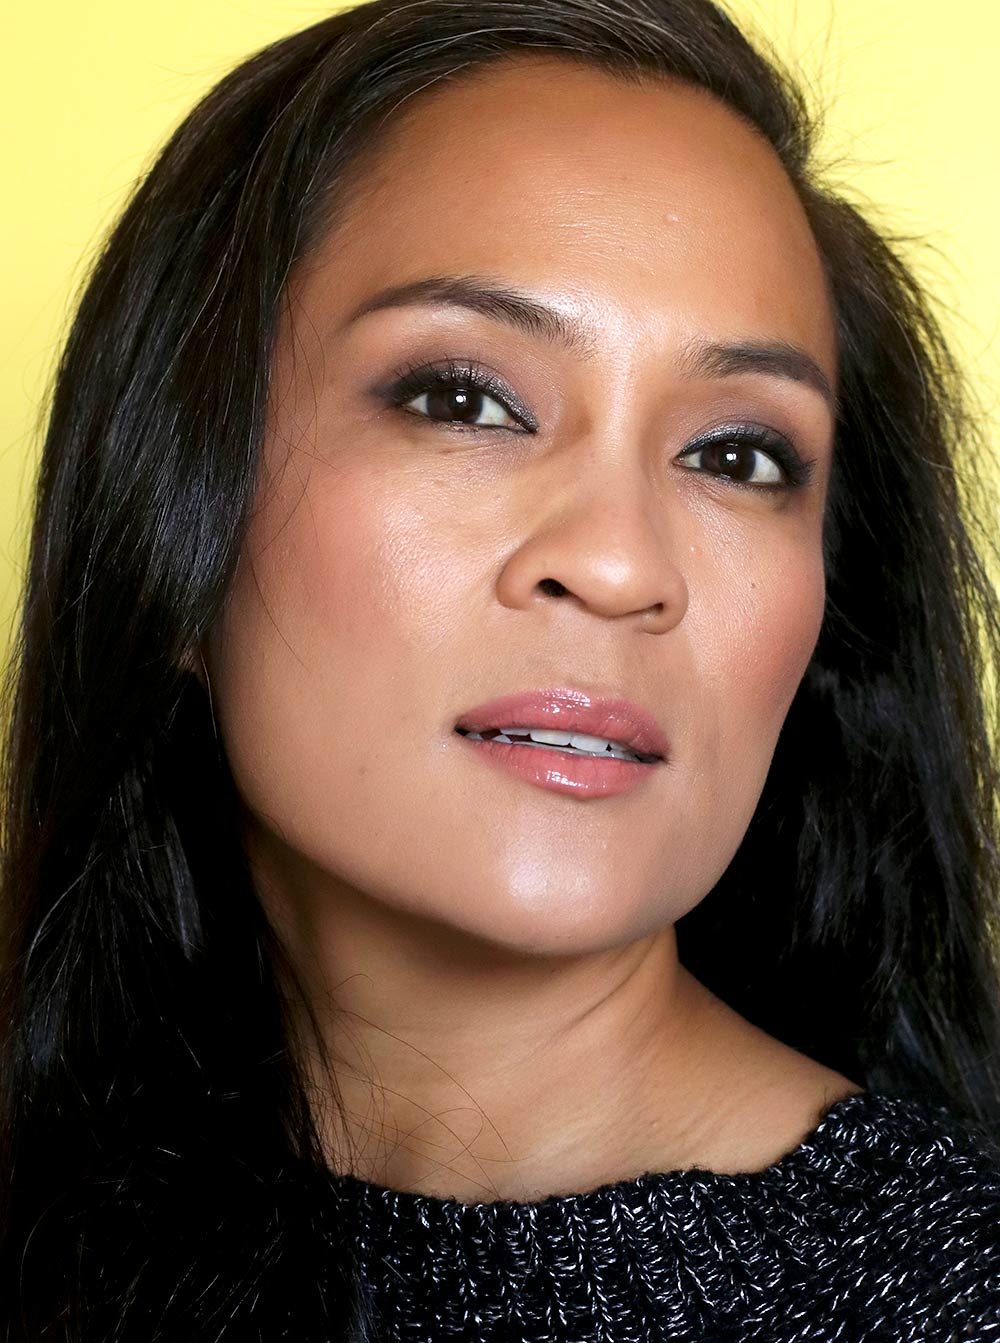
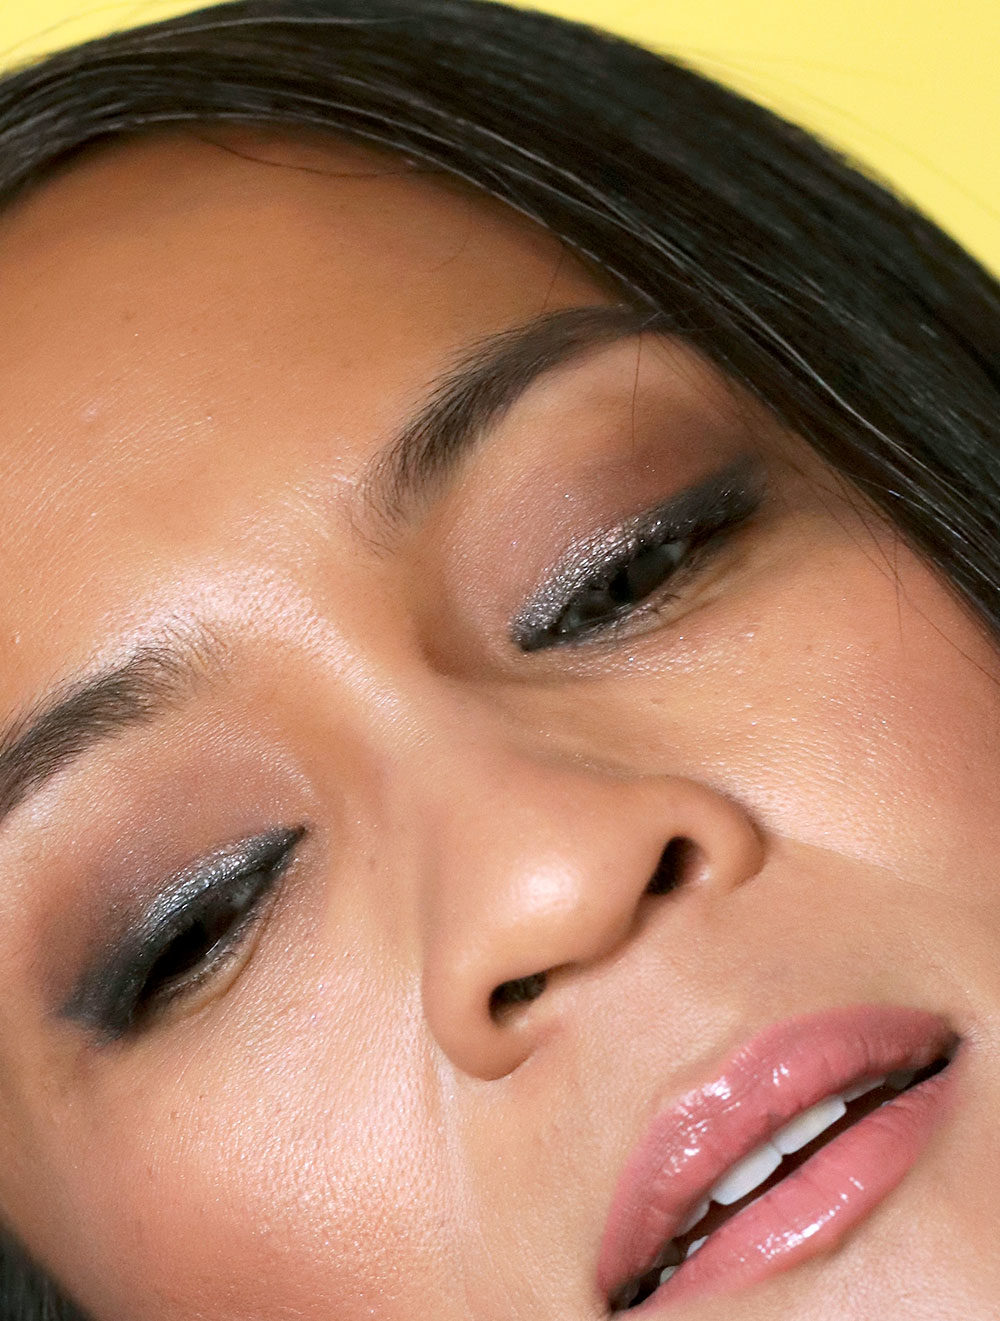
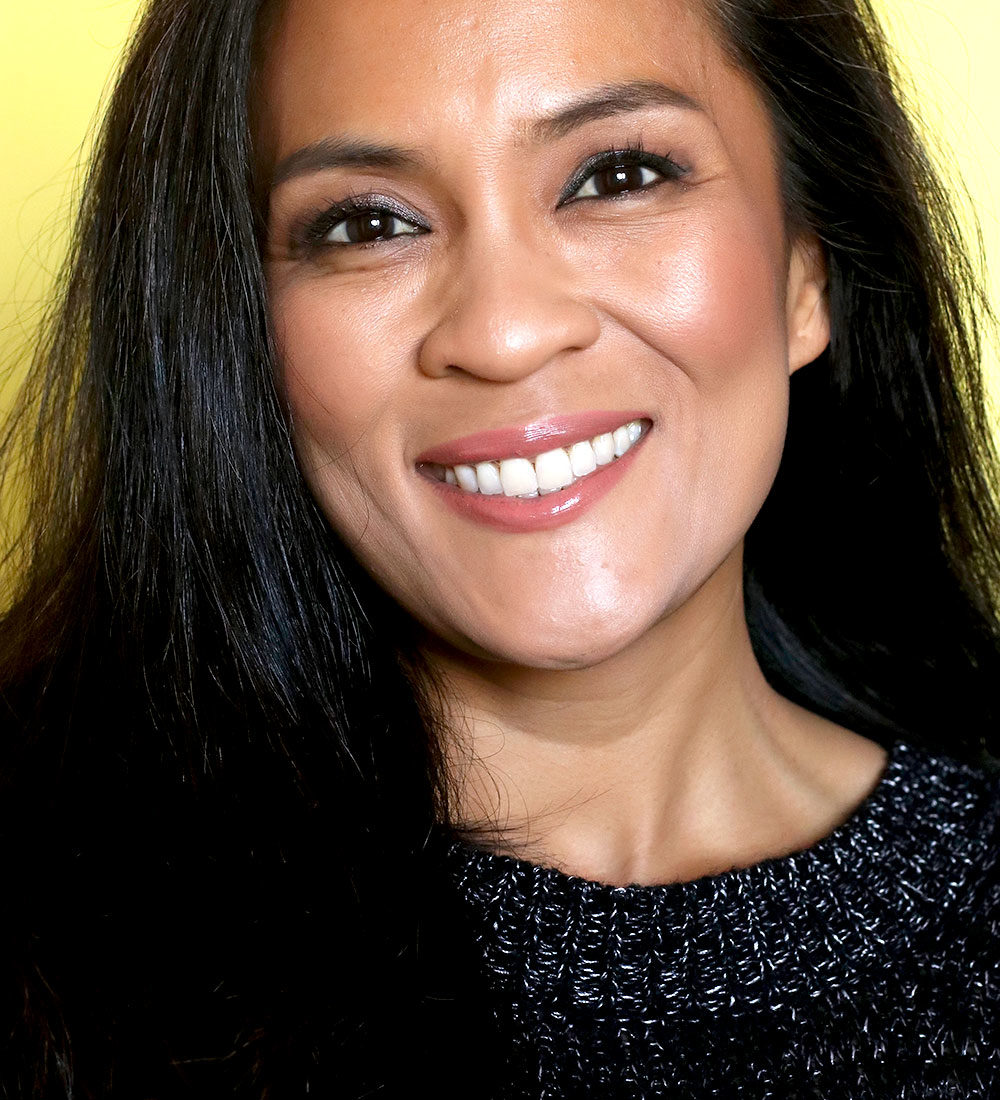
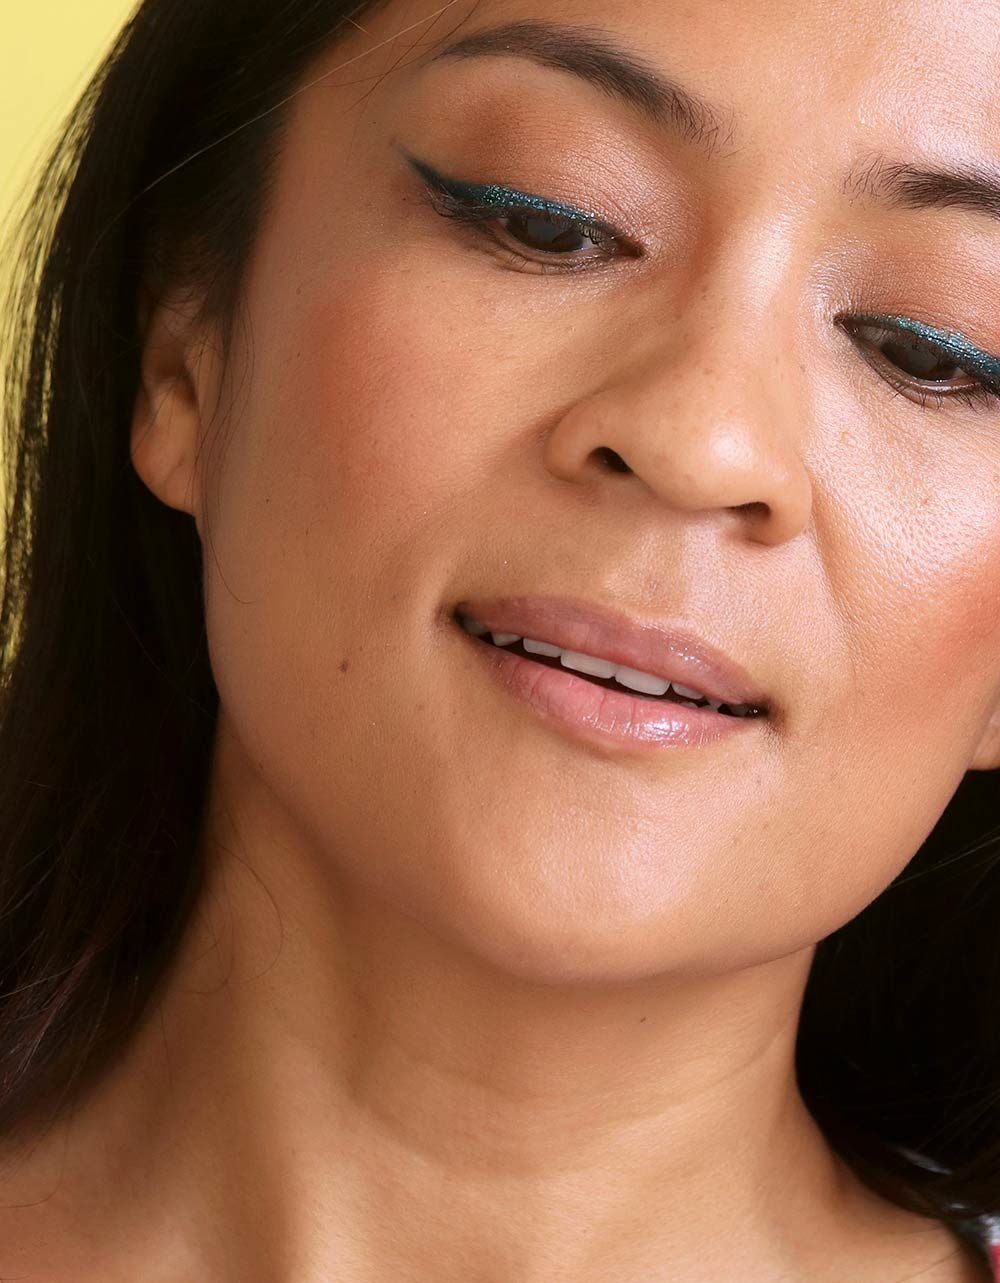
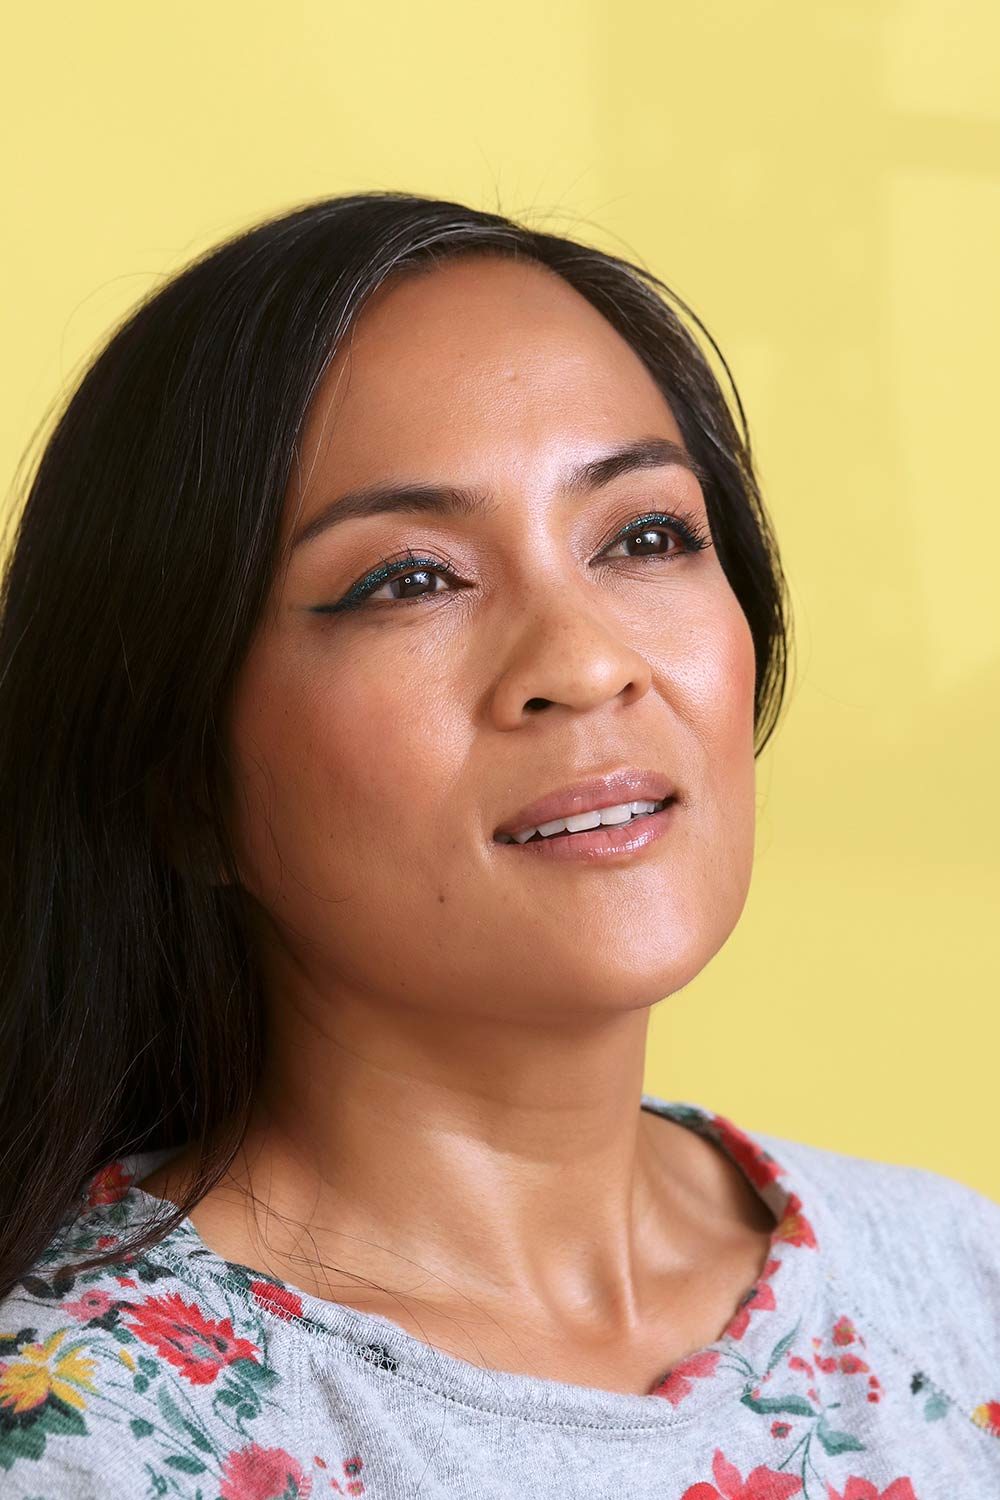
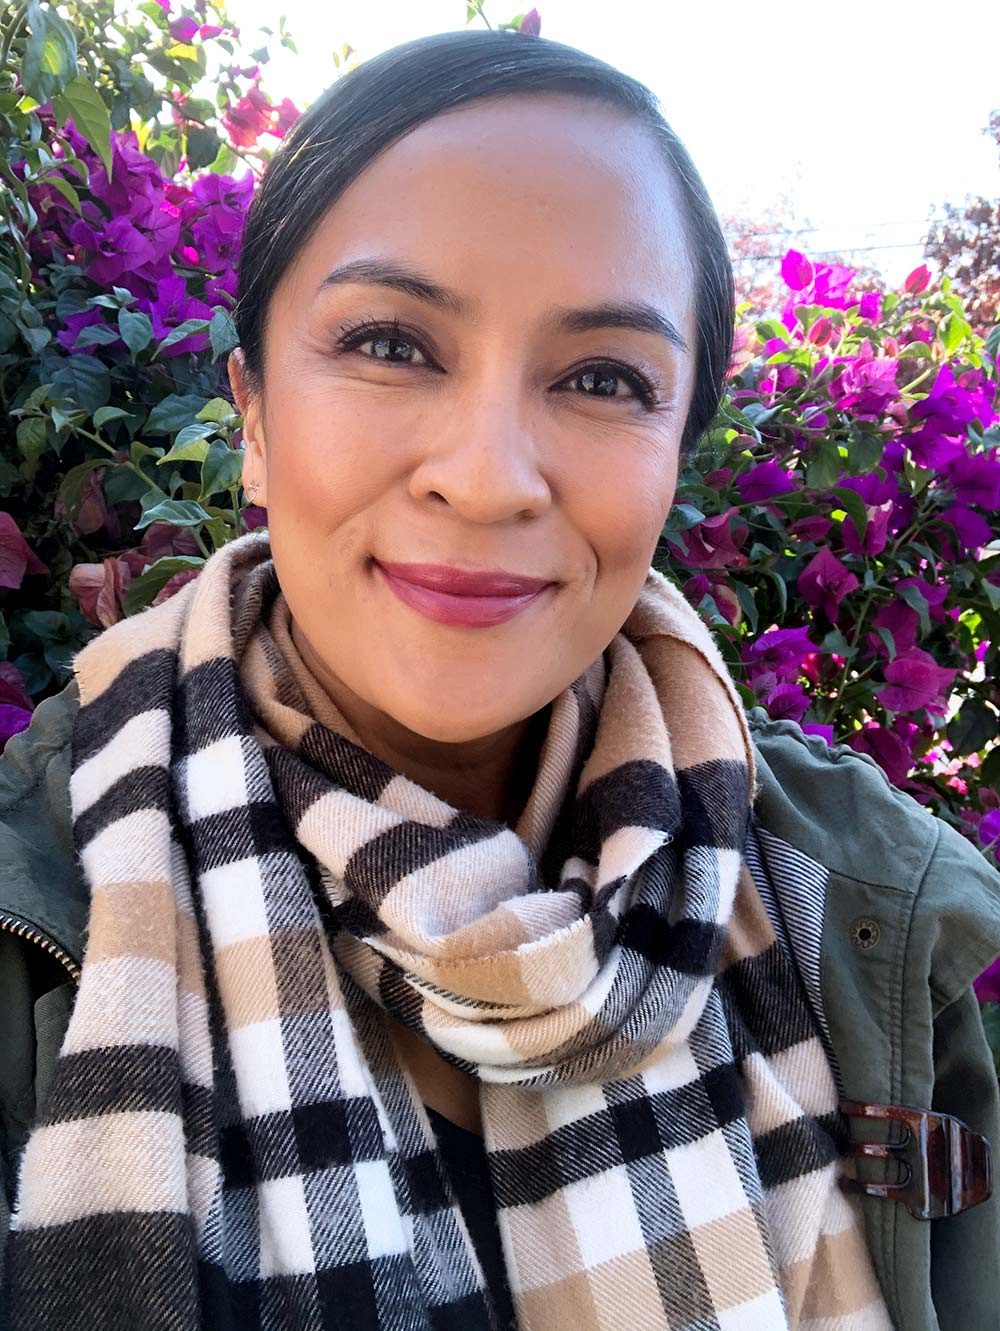
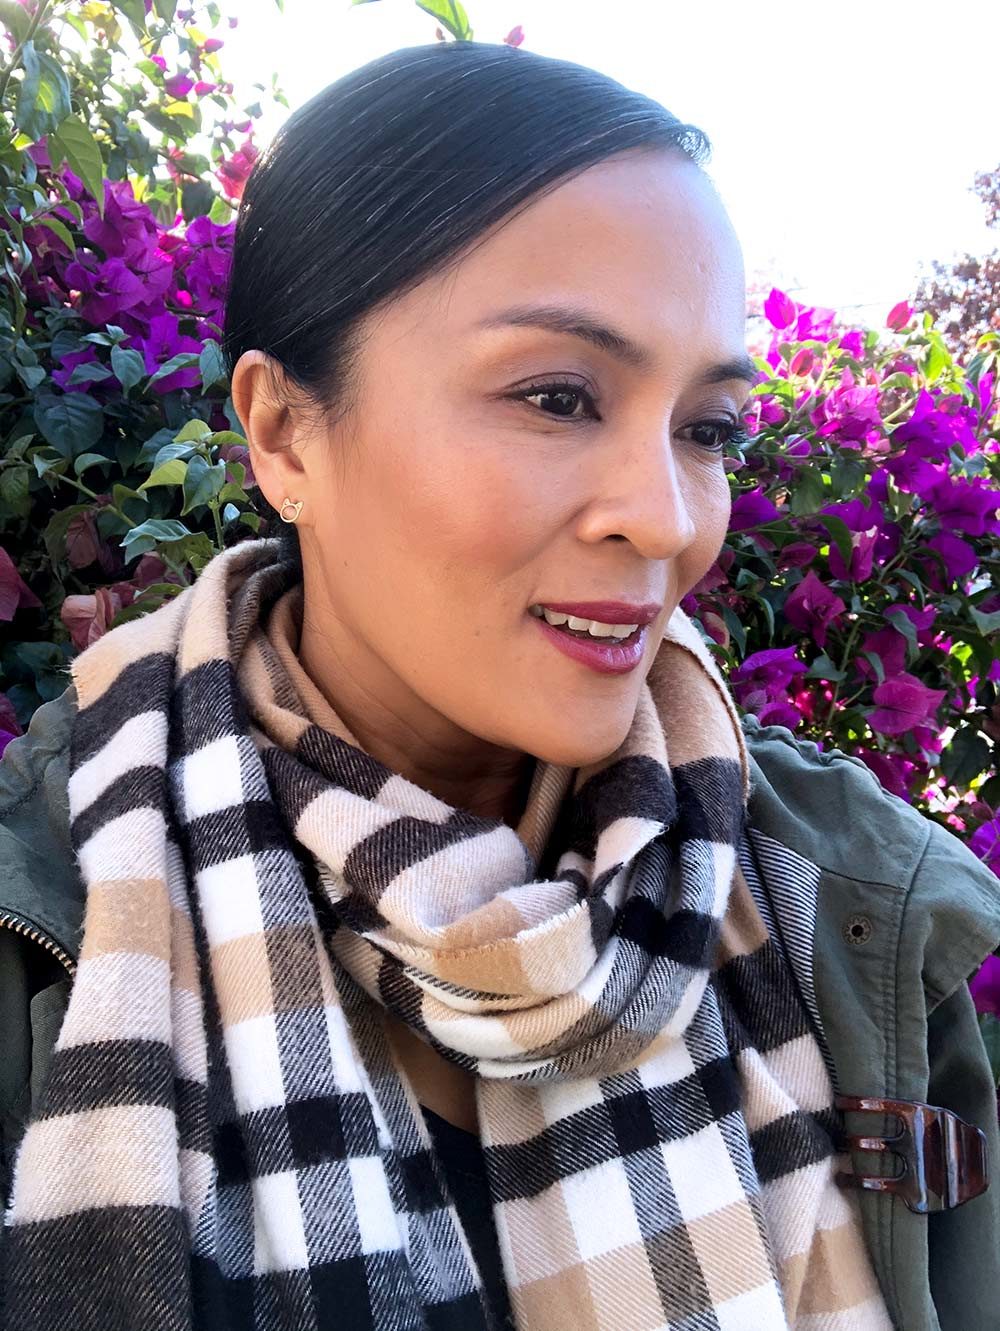
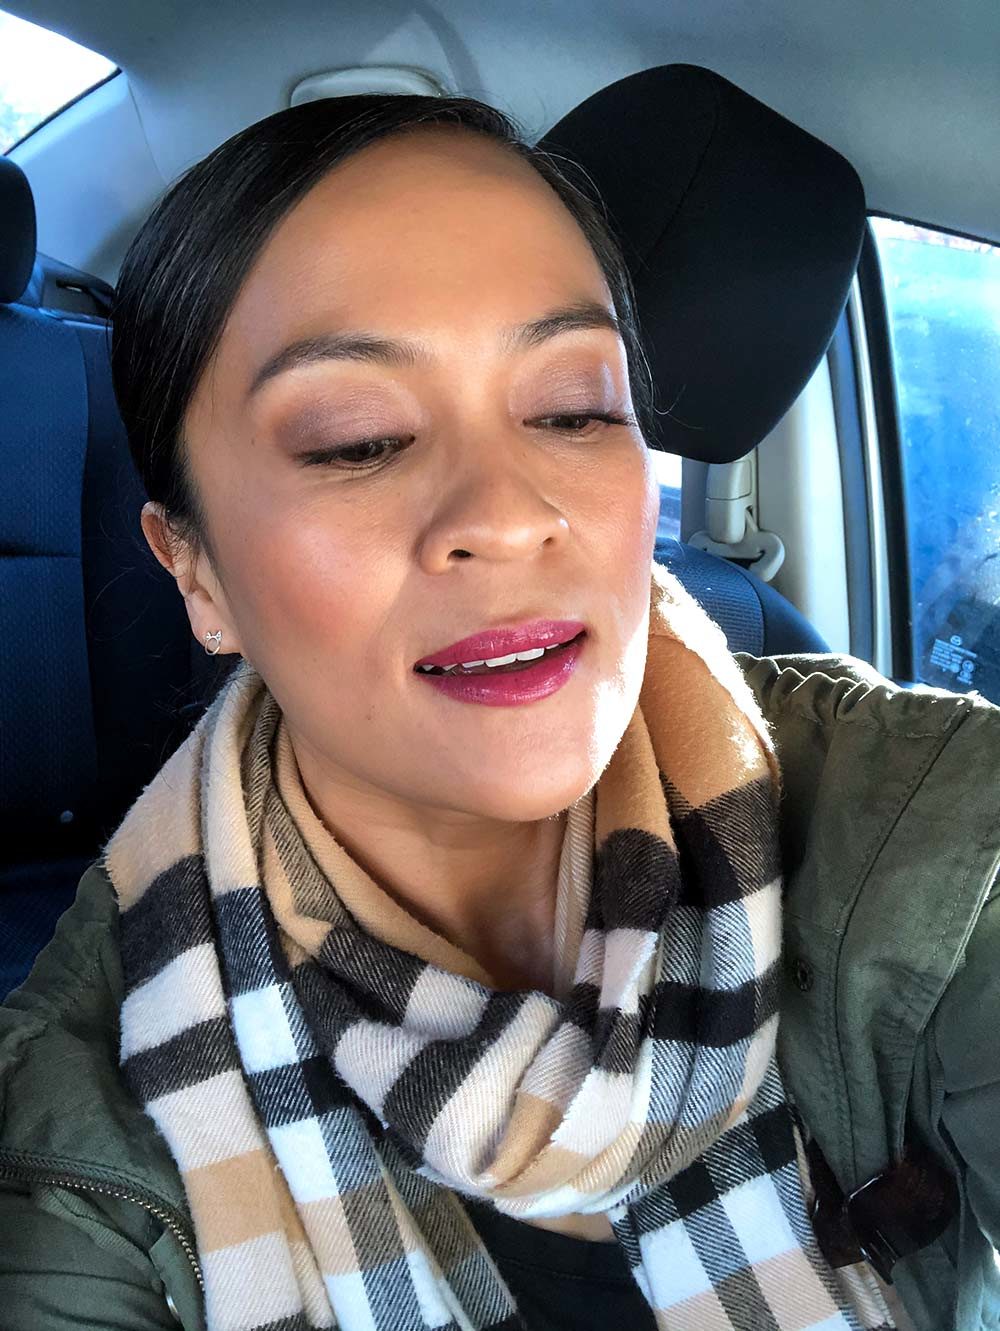
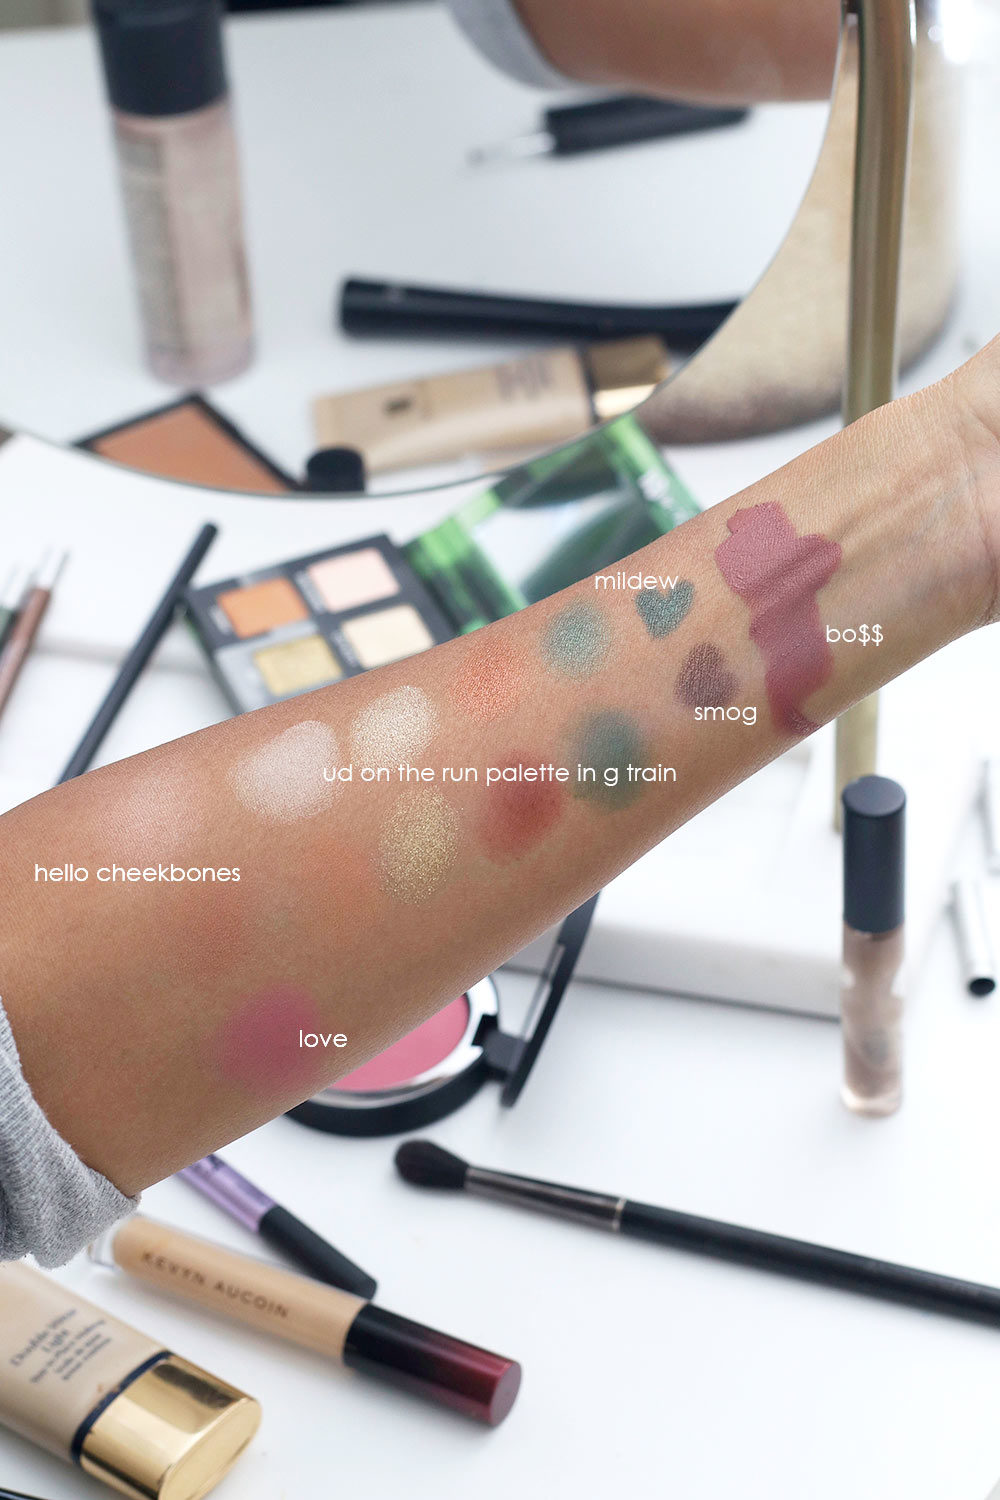
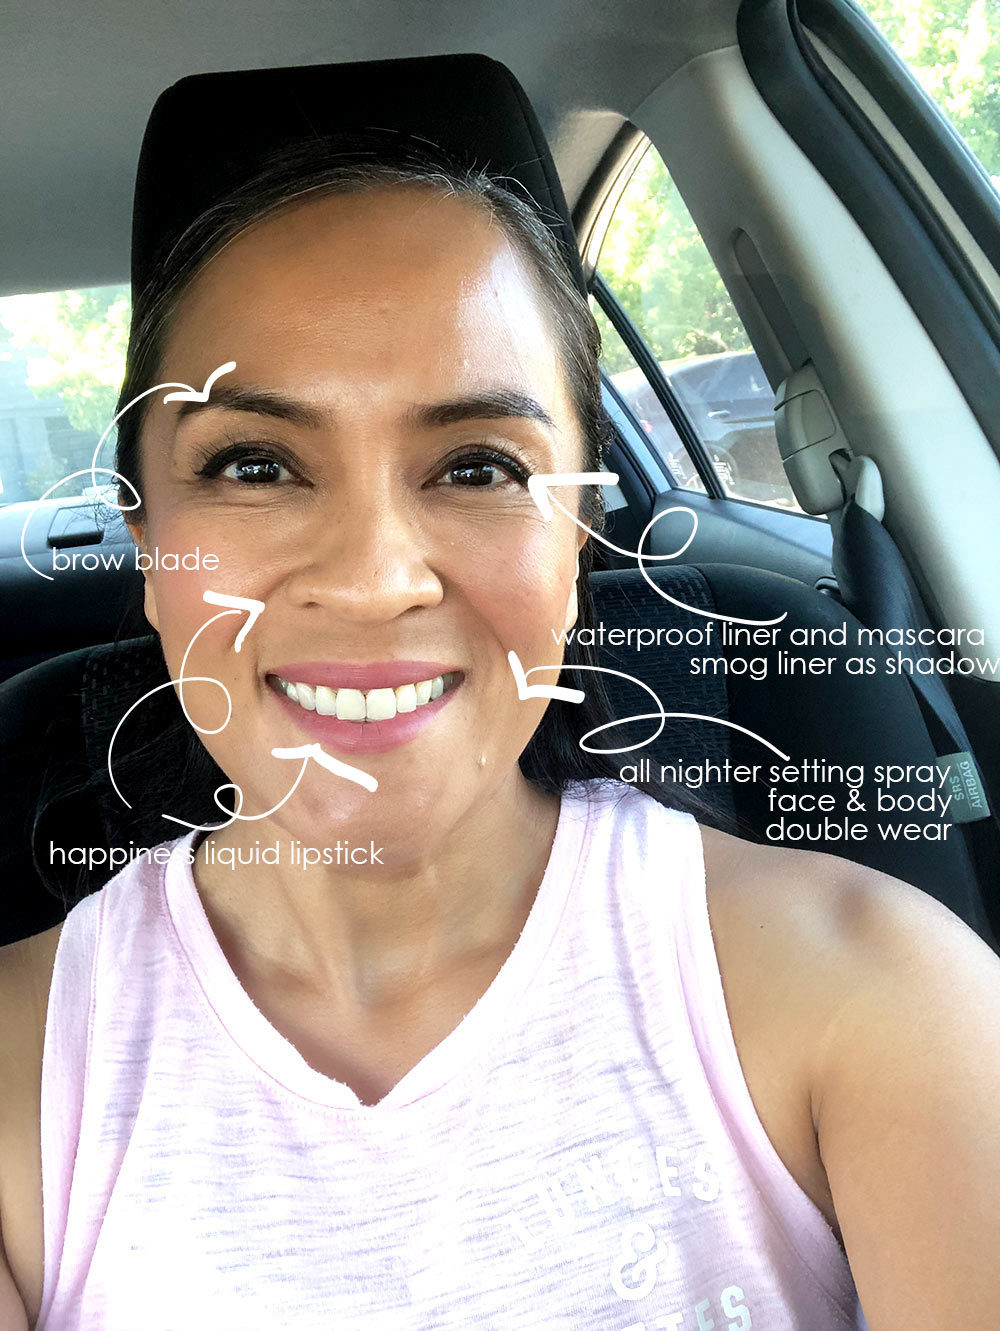
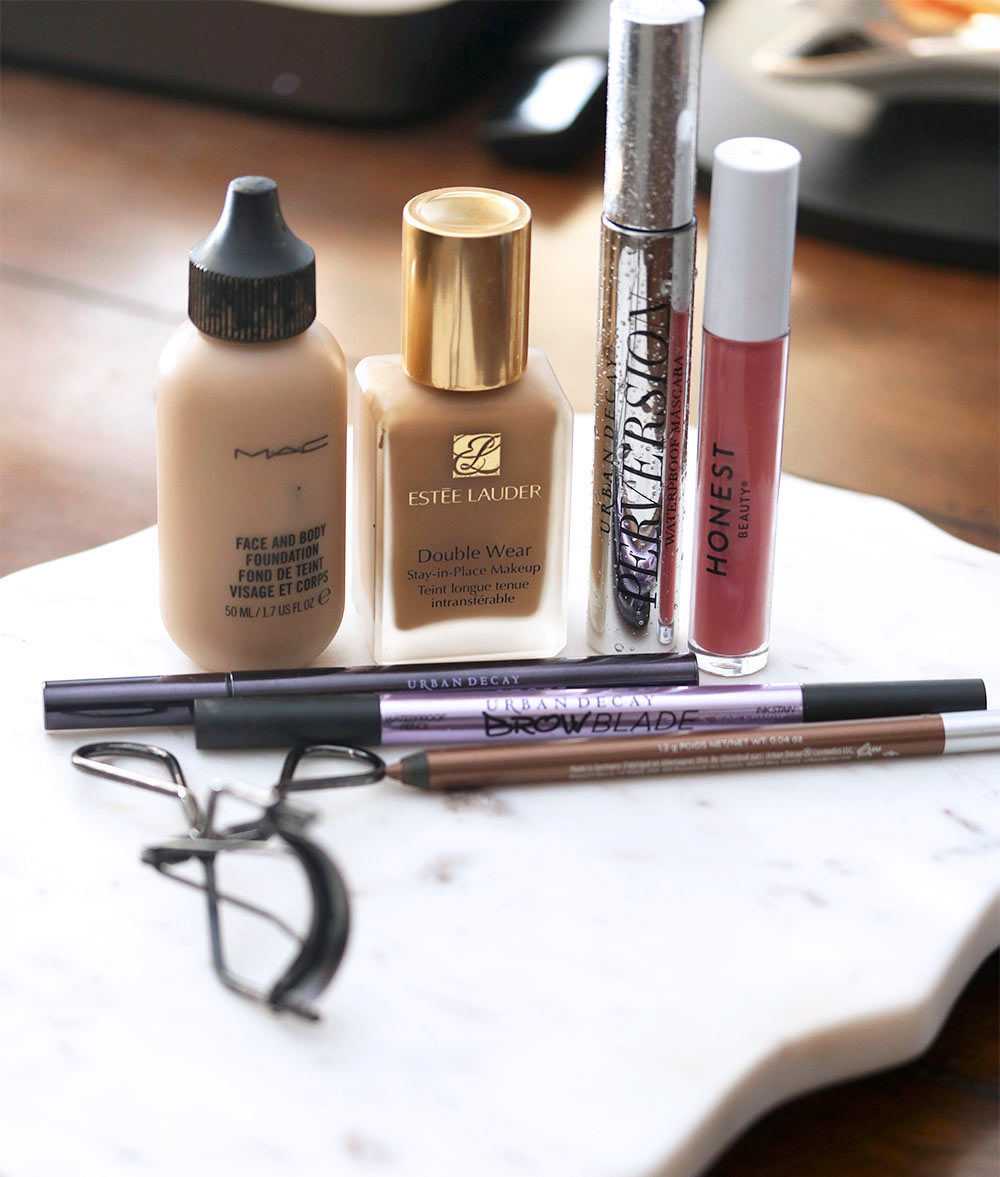
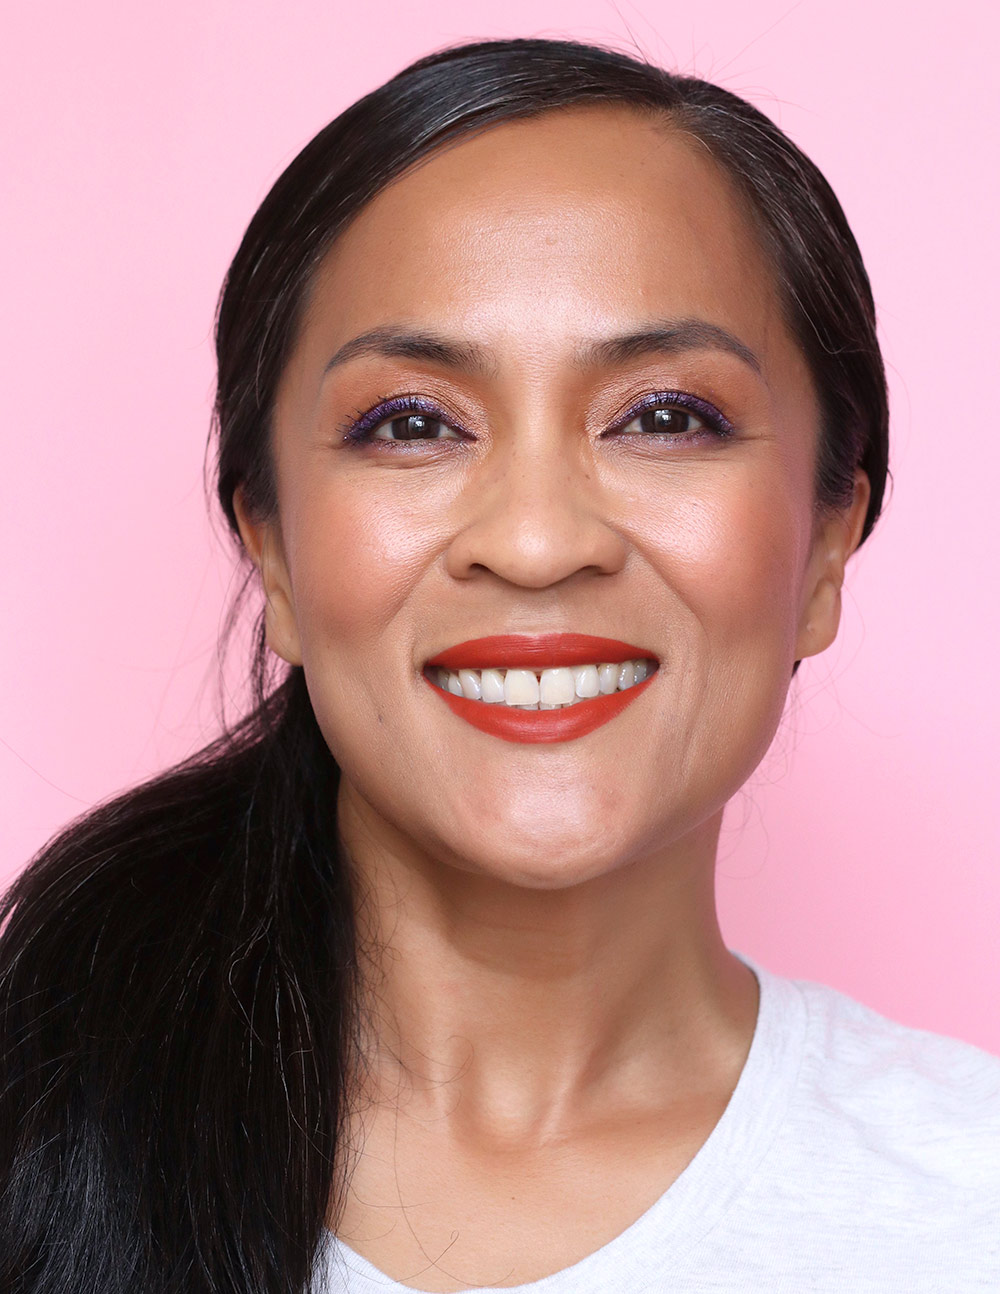
To take it a step further, the colors on my Purple Rain tee (thanks, Target) inspired this orange and purple makeup look…

One of my favorite tees

[Continue reading…]

There are 19 comments on this post. Leave yours.

Categories: Estee Lauder, Face of the Day (FOTD), MAC Makeup, Makeup, Makeup Tips/How To, NARS, Urban Decay

NARS Kalahari Love

February 27th, 2020 by Karen 10 Comments

nars kalahari
Love ya, NARS Kalahari!

They say, if you love something, set it free, which I guess makes sense if you love butterflies or toucans, but in the case of makeup, if you love something, I say you should talk about it ALL THE TIME, which is why I’ve been raving about NARS Kalahari for years!

Kalahari eyeshadow duo is perfect for lightly defining your lids. One side is a shimmery rosy bronze, and the other side is a shimmery taupe — two colors, granted, that you can find in almost any line, but here’s the kicker: NARS found a way to avoid all of the typically problematic side effects that befall so many shimmery shadows.

For instance, Kalahari is reflective, but it isn’t frosty, so fine lines aren’t even a thing. When you sweep and swirl it on your skin, a sweet, bronzed glow remains. It’s very “J. Lo running errands in her velour track suit.” Casual, but still noticeable. (This is a good thing in my book.)

Here’s one of my favorite ways to wear it:
Mix the two shades together with a domed shadow brush, then apply from lash line to crease (or just above the crease if your eyes are hooded like mine). Build it up if you want more color intensity, but don’t worry — this is eyeshadow that won’t look heavy, since the powder is very delicate and fine.

Next, wet that same brush, and apply more of the mix on the mobile part of your lid, which is the part of your eye that “blinks.” Leave it a few minutes to dry, and work on the rest of your face. Once you’ve almost gotten to the end — I usually wait until I’m done with almost everything, including blush and lipstick — take a clean tapered blending brush, and gently rock it back and forth in your crease and along the outer corners to blend.

nars kalahari

If you want, you can also rim your lash or water lines with chocolate brown eyeliner, which I did for these pics. I also smudged a cooler taupe liner (Urban Decay’s Mushroom) on the bottom lash line ’cause I like the subtle contrast of tones.

Makeup worn in this look

  • Eyes: Nars Kalahari (lids), MAC Coffee (water line, upper lash line, smudged between lashes and layered beneath Kalahari), Urban Decay Mushroom (lower lash line smudged with the darker side of Kalahari), It Cosmetics Superhero Mascara (lashes)
  • Blush: MAC Glow Play Blush in No Shame
  • Lips: BECCA Lush Lip Colour Balm in Almond Fraise (on sale now!) topped with BECCA Glow Gloss in Snap Dragon
  • Base: Estee Lauder in Honey Bronze, Estee Lauder 24H Hydra Prep concealer, MAC Mineralize Skinfinish Natural in Golden Tan

[Continue reading…]

There are 10 comments on this post. Leave yours.

Categories: Becca, Estee Lauder, Eyes, Face of the Day (FOTD), Lips, MAC Makeup, Makeup, Makeup Tips/How To, NARS

Greens and Grays

January 29th, 2020 by Karen 18 Comments

greens and grays urban decay on the run
Greens and grays

Raise your paw if you ever get stuck in color combo ruts.

I FEEL YOU!

So, lately I’ve been trying to wear color combos that I normally wouldn’t think to pair together, but it’s hard to break out of old habits, man. Like with this green and gray look. I naturally want to wear greens with warm brown, so it was a little challenging to go against my nature and swap the brown for gray.

I ended up liking how it turned out, though, so yay for makeup experiments! I’m getting a springtime vibe from it… Only 51 days till winter is over.

There’s a ton of sh*t happening on the lids, I know. It’s A LOT of color. I started with a mid-toned matte gray in the crease, then blended a shimmery green on the lids and lower lash lines, finishing with a darker blackened green on the outer corner and a bright light green on the lower waterline (I think it pops against the darker colors). And lots of mascara, of course.

greens and grays urban decay on the run

greens and grays urban decay on the run
Key eye colors

Makeup worn in this look

Eyes: NARS Eyeshadow Primer in Medium (all over lids), Viseart Netural Matte Palette (matte gray shade in crease), UD Born to Run Palette (green is Wanderlust and Big Sky mixed together and applied with a wet brush to lid and lower lash line); the dark greenish blackened gray in the outer corner is Jet, Drift and Radio mixed together), Urban Decay liner in Freak (lower lash and water lines), IT Cosmetics Superhero Mascara (lashes), MAC Brun and Omega (brows)

Cheeks: Clinique Cupid Blush, MAC Hush (highlighter), Hourglass Radiant Bronze Light (bronzer)

Base: MAC Next to Nothing Face Colour in Medium Plus and MAC Studio Fix Soft Matte Foundation Stick in NC42 (foundation), Estee Lauder 24H Concealer in Medium Deep Warm (concealer), MAC Mineralize Skinfinish Natural in Medium Golden (powder)

Lips: Estee Lauder Raw Sugar Lipstick topped with Hourglass Horizon Lipgloss

Coywolf’s snow story

When I dropped off the Coywolf at school one day this week, I couldn’t help but notice some new artwork on the classroom wall. Last week the kids all got to take turns dressing up in an Olaf snowman costume and discussing snow, and the teacher took pics. I had one of those, “This is definitely my child” moments when I found Connor’s…

I like the part where she talks about ice cubes on her head, ha ha ha!

Your friendly neighborhood beauty addict,

Karen

There are 18 comments on this post. Leave yours.

Categories: Eyes, MAC Makeup, Makeup, Makeup Tips/How To, NARS, Urban Decay

Layering Bronze Eyeshadow on Top of Black Liner To Correct Wonky Liner

January 13th, 2020 by Karen 15 Comments

eye reflection shadow palette pixi natural beauty

Oh, my hooded lid ladies… I know you can feel me on this. There are days when my upper lash liner turns out perfectly…but then there are those other days when it does not. ?

And those days are baaaaad.

You know how it is. One minute, you’re applying your liner, oblivious to the disaster about to strike. Next thing you know, your liner has taken over half your lid. If you have hooded lids like I do, it also makes your eyes look smaller.

So, that’s what initially happened with this particular look here. Started out, I was in the mood for black cat eyeliner, but I was rushing, and things got out of hand quickly.

My liner was too thick, and the wings didn’t match. My eyes looked teeny, tiny.

Because I didn’t have enough time to remove everything and start again from scratch, I recalled the trick I’ve been using lately with light pencil liner to make my lids look less hooded, and I employed a similar technique to fix this mishap.

Here’s what I did.

I dipped a flat angled brush into a sparkly bronze eyeshadow, wet that brush head with a setting spray, and blended it directly on top of the black liner from the inner corner to about three fourths of the way out.

Why?

Well, just like how applying a light-colored liner on the upper lash line opens up the eye, layering a bronze on top of black also makes lids look more pronounced and larger than they really are.

Next, I cleaned the brush I used, dipped it into a dark brown, and blended that on the outer corner of the black liner to soften it and create the illusion of a little more lift.

eye reflection shadow palette pixi natural beauty

eye reflection shadow palette pixi natural beauty

I didn’t fully appreciate just how much larger it made my lids look until I got to Costco and started trying on prospective eyeglasses…

I took a pic of my face without frames so I could compare it to pics of myself wearing some of the new frames I was interested in (because I’m nerdy like that), and when I saw my makeup in the harsh overhead Costco lighting, I realized — OH, SNAP! — this eye makeup was actually working for me.

Yeah…I’m definitely gonna do this again, but, like, on purpose. LOL! 🙂

Key makeup worn in this look

Eyes: Pixi Endless Sikly Eye Pen in Black Noir, Pixi Eye Reflection Shadow Palette in Natural Beauty, MAC Omega and Brun (eyebrows), Chanel Dimensions de Chanel, MAC Brow Gel

Base: Estee Lauder Double Wear foundation in Honey Bronze, MAC Strobe Cream in Pinklight, Charlotte Tilbury Filmstar Bronze & Glow in Fair-Medium, MAC Sur Blush

Lips: MAC Boldly Bare lip pencil, MAC Candy Box Lipglass

This made me laugh so hard!

[Continue reading…]

There are 15 comments on this post. Leave yours.

Categories: MAC Makeup, Makeup, Makeup Tips/How To

Glittery Green Gradient Wings: A Quick and Easy Holiday Makeup Look

December 11th, 2019 by Karen 16 Comments

urban decay stage dive mainline

Current dilemmas du jour?

  1. What to do with the five pounds of lemons Rosie’s former foster mom gave me (she has a tree in her yard that produces a RIDICULOUS amount of lemons).
  2. What’s some festive and colorful holiday makeup that won’t take me till Valentine’s Day to finish? (I’m only half-kidding.)

As of yet, I still have no clue what to do with the lemons (ugh, lemon bars and lemonade? Maybe some kind of lemon marinade?), I figured out a trick to flying through different colorful looks.

And here it is…

Play with your winged liner. THERE ARE SO MANY WAYS!

Like with this look here with glittery green gradient wings. It was surprisingly quick and easy to do.

The step-by-step

  1. Start by drawing your winged liner with a dark green matte liner as the base (I used Urban Decay Mainline). Be as subtle or dramatic as you like.
  2. Then, for a bright shimmer POP, layer a bright green glitter in the center (I’m wearing Urban Decay Stage Dive) on your lash line.
  3. Lastly, to create a color gradient, dip an angled brush into a black eyeshadow (MAC Carbon for life!), and pat that on top of the outer portion of your wing.

Green goes well with warm browns and peaches, which is what I’m wearing on my lids, lips on these cheeks in this look. If you want to be more adventurous, however, pink would be a playful complementary color… I’m just sayin’. 🙂

urban decay mainline side

urban decay stage dive front

Your friendly neighborhood beauty addict,

Karen

There are 16 comments on this post. Leave yours.

Categories: Chantecaille, COVERGIRL, Eyes, Kahina, Lips, MAC Makeup, Makeup, Makeup Tips/How To, Revlon, Urban Decay

5-Minute Makeup: Bright Berry Lips and Glowing Taupe Lids

November 22nd, 2019 by Karen 19 Comments

mac craving lipstick
Yes, Bay Area people will wear scarves and thermals when it’s 63 degrees outside. ?

So…you know those mornings when everything goes smoothly, and you even have extra time to do a load of laundry or stop by the drive-through coffee shop to get a latte before you start your day? On top of that, you also get to work 15-minutes early (so you don’t have to drive around the block two times to find good parking)?

Yeah…this was not one of those mornings. LOL!

I don’t know what happened, but Connor and I made it out the door by the skin of our teeth. We made it, though!

And I still managed to 1) get out of my pajama bottoms (although I seriously considered wearing them to the bakery, HA HA HA!), and 2) put on 5-minute makeup.

I grabbed what was within reach and moved with a quickness. Funny thing is, I even got compliments on my makeup today!

You know, sometimes the quickie looks are the best ones…

I think the bright berry lipstick really helped. Berry is great when you’re rushing because it’s just so colorful, and it instantly brightens up your face, but it’s usually also less labor-intensive than red or bright pink.

Also, you can pair it with a bunch of different colors. Purple and gray work, but a lightly shimmering taupe is my go-to to wear with berry. If you’re ever in a serious time crunch, go with a berry lipstick, 100%.

mac craving lipstick
I took this right before starting my shift at the bakery, LOL!

mac art library nude model palette k
When you have a photoshoot in your car…

[Continue reading…]

There are 19 comments on this post. Leave yours.

Categories: Estee Lauder, Eyes, Face of the Day (FOTD), Lips, MAC Makeup, Makeup

3 Powerful Tips for Doing Quick, Colorful Makeup (And a 20-Minute Bronze/Green/Gold Eye Look With Pink Cheeks and Nude Matte Lips!)

October 31st, 2019 by Karen 17 Comments

urban decay on the run g train
Today’s 20-minute makeup look

Working at the bakery has been such a blessing in so many ways, makeup and otherwise. I’ve been learning so many new things, and the loneliness I’ve felt for a long time is finally starting to leave.

In terms of makeup, though, my goodness! — the 15-minute window I typically have now to don my face paint in the mornings has been the catalyst for all manner of shortcuts.

Like these three powerful tricks you can use when you want to do quick, colorful makeup (but don’t have a lot of time). I used them for to do bronze, green and gold eye look (paired with pink cheeks and a matte nude-pink lip), which I wore to the bakery yesterday…

urban decay on the run g train
The color palette!
urban decay on the run g train
YER SO CLOSE.

Tip No. 1: Intensify and extend the wear time of your eyeshadow by using a long-wearing pencil liner as a base

This is one of the speediest ways I know to 1) get your eyeshadow to last longer, and 2) to amplify the intensity of your shadows to make them look brighter and richer.

For this, you want to use a liner that sets relatively quickly…like in less than 30 seconds. I love the Urban Decay 24/7 Glide-Ons because they come in tons of colors and finishes. And, because they dry very quickly, I’m forced to work fast!

Note: When you’re using a quick-drying pencil liner as a base, your best friend is a stiff (but still soft) synthetic brush, ideally something with a slightly domed tip, like the Real Techniques Domed Shadow Brush.

Synthetic bristles tend to be more rigid than natural bristles, so you can push and blend that liner and tell it where to go, LIKE RIGHT MEOW!

In the look I wore yesterday, I wore Urban Decay 24/7 Glide-On Eye Pencil in Smog as a base. I roughly drew a few fatty-bo-batty messy lines all over my lids, and then I took the Real Techniques brush and buffed the liner into a thin, even layer.

Then, I applied warm browns and bronzes from the new Urban Decay On the Run Palette in G Train.

Tip No. 2: Use an angled brush to line your eyes with the darkest shade from your favorite eyeshadow palette

Not only is lining with an eyeshadow and angled brush super speedy, but it’s also forgiving, so you can make mistakes and nobody will even realize it!

Note: If you want the most room for error, keep the brush head dry for a soft and diffused line.

You can also wet your brush head with a setting spray to dial up the richness of the color, but FYI, it’s not as forgiving as a dry application.
[Continue reading…]

There are 17 comments on this post. Leave yours.

Categories: Face of the Day (FOTD), Makeup, Makeup Tips/How To

Adventures in Long-Lasting, Sweat-Proof Makeup (and a Shout-Out to Urban Decay)

August 13th, 2019 by Karen 13 Comments

long lasting makeup top
Anatomy of an (easy) long-wearing makeup look!

I wore makeup to the gym for the first time in forever yesterday (There was a reason… More on this in a sec.), and guess what? It led me to develop a list of go-to sweat-proof long-lasting makeup products that I know won’t budge an inch, even after an intense 60-minute HIIT class!

Not that I ever wear a full face when I exercise, but it never hurts to be prepared, right? At least now I know what to grab if Sydney Cummings ever asks me to do a workout video with her.

long lasting makeup products
The go-to gang

I think having a number of sweat-proof, water-proof products on hand is a good idea for people who do performances (dude, those stage lights are HOT), or if you’re going to be a guest at a destination wedding in a tropical locale, or if you’re going to Vegas to sit by the pool — basically, any situation where you know you’ll be sweating and you don’t want your brows/lashes/lips to melt off.

long lasting makeup before
The before pic: Let’s get sweaty!

Anyway, the reason this particular makeup challenge came about was because my HIIT teacher asked me to be the “member of the month” at the gym for September 2019.

Being member of the month entails having your picture taken, which will appear on a big ol’ poster in the middle of the gym (EEK), and answering some exercise-related interview questions.

long lasting makeup after
The after pic: Makeup after a 60-minute HIIT workout

We did the picture part during Monday night’s class, and that included some action shots of me sweating (and hopefully) looking somewhat cute with makeup on, even in that terrible overhead florescent lighting.

Sweating in progress…
long lasting makeup after
Brows still in place, YES!

I used the least amount of product I could get away with because I didn’t want to be wearing layers and layers of heavy makeup. Also, most of the items I used were from Urban Decay, a line with a solid reputation for long-wearing makeup.

BROWS

I’ve noticed that filled-in brows make all the difference in pics, so I used Urban Decay Brow Blade Waterproof Pencil and Ink Stain in Dark Drapes to fill them in (pencil first, then the ink).

By the end of the workout, the drawn-in tail on my right brow had faded ever-so-slightly, which wasn’t surprising, really, with the amount of sweat that was pouring out of me, but both brows remained more or less intact.
[Continue reading…]

There are 13 comments on this post. Leave yours.

Categories: Estee Lauder, MAC Makeup, Makeup, Urban Decay

  • « Go to Previous Page
  • Go to page 1
  • Go to page 2
  • Go to page 3
  • Go to page 4
  • Interim pages omitted …
  • Go to page 11
  • Go to Next Page »

Primary Sidebar

Welcome to Makeup and Beauty Blog

Welcome to Makeup and Beauty Blog! My name is Karen, and I’m a freelance writer obsessed with makeup.

Makeup and Beauty Blog features daily product reviews, makeup tips and beauty news — like an interactive version of a monthly print magazine, except with occasional pictures of my cat.

Recent Posts

Sundays With Tabs the Cat, Makeup and Beauty Blog Mascot, Vol. 878

Makeup and Beauty Blog Monday Poll, Vol. 894

Makeup and Beauty Blog Monday Poll, Vol. 893

Makeup and Beauty Blog Monday Poll, Vol. 892

Makeup and Beauty Blog Monday Poll, Vol. 891

/* real people should not fill this in and expect good things – do not remove this or risk form bot signups */

Social

  • Facebook
  • Instagram
  • Pinterest
  • Twitter
  • YouTube

Featured Posts

Sundays With Tabs the Cat, Makeup and Beauty Blog Mascot, Vol. 771

Lady Unicorn

Weird Things I Like to Do

brows fill out beforehand

Before You Pluck or Wax Your Brows, You Must Do This

current bare skin status

What’s One Thing That Drastically Changed Your Skin for the Better?

Copyright © 2025 Makeup and Beauty Blog. Get in touch.