• Skip to main content
  • Skip to primary sidebar

Makeup and Beauty Blog | Makeup Reviews, Swatches and How-To MakeupMakeup and Beauty Blog | Makeup Reviews, Swatches and How-To Makeup

A beauty blog blooming with fresh makeup reviews, swatches and beauty tips from your friendly neighborhood beauty addict

  • Home
  • About
    • About
    • Contact
    • FAQ (Frequently Asked Questions)
    • Advertising & Media
  • Categories
    • Product Reviews
    • Makeup
    • Skincare & Fragrance
    • Style & Fashion
    • Hair
    • Nails
    • Tips & Tutorials
    • Just for Fun
  • Brands
  • Store

Drugstore Beauty Finds

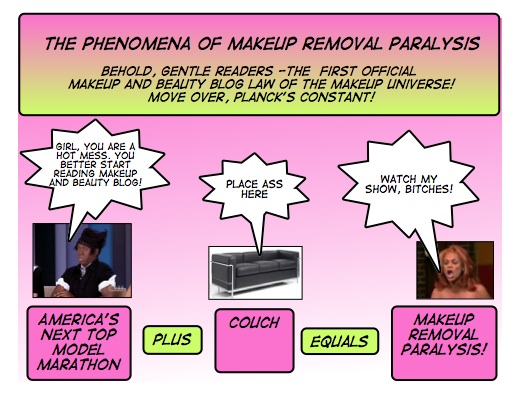
Quick Beauty Tip – Keep Baby Wipes Near Your Couch or Wherever Your Bum Parks to Watch TV

April 23rd, 2007 by Karen Leave a Comment

makeup-paralysis-law

After a long day, I like to relax sometimes by watching the telly. What can I say? Buffy reruns are quite soothing. And don’t pretend that you can resist the lure of the “America’s Next Top Model” marathons on VH1, either. I know you can’t. It’s physically impossible.[Continue reading…]

Leave the first comment on this post.

Categories: Beauty Tips, Drugstore Beauty Finds

Product Review – GiGi Sugar Bare Microwave Formula

April 21st, 2007 by Karen 6 Comments

gigi-sugar-microwave-wax

Product: GiGi Sugar Bare Microwave Formula
Use: As a hair remover for legs, bikini, face and underarms.
Price: $9.99 for a 12oz jar.
Makeup and Beauty Blog Rating: D

In order to save a few bucks in my ongoing war against excess body hair I started doing at-home waxing — legs, bikini area and lip. I’ve gotten pretty good with these areas, although I will admit to being totally inept at waxing my armpits (it might have to do with me being *extremely ticklish*). I also can’t wax my brows because I have an irrational fear of hot wax falling into my eye and melting off my cornea. Yeah, yeah … I know I can just close my eyes but STILL.

I’ve used several different waxes and I always like to try new ones, so I was really stoked to find Gigi Sugar Bare Microwave Formula on sale at Sally Beauty Supply. Because sugar waxes are sugar-based they wash off easily with water, so they’re great for beginning at-home waxers.

The first thing I noticed about this product was the groovy handle on the side of the jar. It allows you to easily take the jar out of the microwave. It’s such a small thing, but it makes it easier to get that hot jar out of the microwave. The second thing I noticed was the ingredient list, which contained only one ingredient: Hydrolyzed Corn Starch. Hmmm. So much for the “sugar” part of this wax.

Trust me people – I could wax the shizz out of my shins in a dark room during a major earthquake and still get legs smoother than a baby’s butt. I know what I’m doing. But unfortunately, that knowledge was tested when I tried waxing my lower legs with GiGi Sugar Bare.

I didn’t make it farther than one quarter of my left shin because GiGi Sugar wasn’t baring anything!

Ideally, when you lift off the muslin or cloth strip (rrrrrrrrrrrip!) your legs are left clean without any hairs or residual wax sticking to them. The product removed only 50% of the hair and left huge clumps of wax on my legs. As I sit here typing this, I’m still peeling huge chunks of wax off!

I even tried several different methods to try and make this product work. I’d put a thin layer of wax on, lay down a muslin strip, rub in the direction of the hair, waited and then rrrrrripped. Still only half the hairs removed. Then I’d put a thicker layer on, do the same drill — and I’d still get the same result of half-assed hair removal.

I went back to Sally Beauty Supply today to return this wax. They let me return it without any drama (of course I had my receipt.) I will not be buying this wax again.

Pros:
The only thing that really saves this wax from an F is the nice handle that allows you to pull it out of the microwave easily when it’s hot. Plus, it’s easy to find – I’ve seen it at almost every beauty supply store in Marin County, including Sally Beauty Supply and Pure Beauty. You get a lot of wax in the jar for the money.

Cons:
No smell – I’m used to Parissa waxes, which have nice scents like lavender and honey. The wax only grabbed half of my leg hair and completely refused to grab onto any of the shorter, coarse hairs. Left huge clumps of residual wax on my legs. If you are waxing at home for the first time you may be extremely frustrated by this product.

There are 6 comments on this post. Leave yours.

Categories: Drugstore Beauty Finds, Product Reviews

Product Review – Crest Vivid White Toothpaste

April 20th, 2007 by Karen 1 Comment

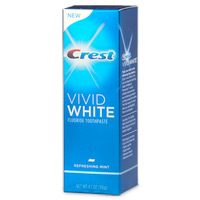
crest-vivid-whiteProduct: Crest Vivid White Fluoride Toothpaste in Refreshing Mint
Use: A whitening toothpaste
Price: $3.99 for a 4.1 oz tube
Makeup and Beauty Blog Rating: A+

I have a slight obsession with teeth. It’s not freaky or scary or potentially debilitating (I hope), but I have to admit to loving vigorous flossing and Sonicare brushing a little too much. It hasn’t always been this way.

It started when I met my current dentist Dr. Y – a total character and diva extraordinaire. When I first sat in her dentist’s chair she immediately asked me who made my suit (it was bebe.) She then told me to check out the Versace store down the street. “They have similar cuts in their clothing and it’s very flattering for petite women. Plus, I get a discount!” Just when I thought I met the coolest dentist ever, she frightened the bejeebus out of me by giving me a totally scary lecture on the importance of gum health. There were many, many, many frightening pictures of gingivitis and swollen gums. It ain’t pretty, folks. I’ve been touting the virtues of mint floss ever since.

A few months ago when I told Dr. Y I was getting married the first thing she said was, “Congratulations! Is this your first?”

She was the only person who had that reaction, but then again she’s been married three times. But who’s keeping track? The next thing she said was that for my wedding gift she’d hook me up with Zoom teeth whitening. Woo-hoo!

The process of Zoom whitening itself was pretty painful – and to be blogged about in sordid detail in a future post – but in the end I got a set of really nice, white teeth. However, the teeth whitening was in June so it’s been a while. I’e started to do things to keep my teeth from re-staining, like drinking coffee and red wine with a straw (I know, I know, it’s kinda tacky-looking in public but I don’t care!) but I still noticed in the past few months that they aren’t as white as they used to be.

I asked one of my best friends, Mary Anne, a superb dentist as well and all around cool gal (sorry fellas, she’s taken), and she recommended Crest Vivid White Fluoride Toothpaste in Refreshing Mint. Mary Anne told me that it’s probably the best whitening toothpaste you can get at the drugstore, and after three weeks of use I have to agree – this stuff is the shizz for getting those canines white!

Pros
The formula doesn’t make my teeth feel tingly or weird. It has a refined mint taste. The biggest pro: it actually works. The whitening effect is subtle yet noticeable. Granted, if you’ve been smoking for 20 years and sip coffee through your front teeth I don’t know how white your teeth are gonna get. It’ a tube of toothpaste, not a Christmas miracle, people.
crest-vivid-christmas-miracle
Cons
It’s pricy for toothpaste. My good old standby toothpaste, Colgate Total, is the same price for a tube that’s twice a big, but ultimately I don’t mind because I don’t use a lot and it works really well.

There's 1 comment on this post. Leave yours.

Categories: Drugstore Beauty Finds, Product Reviews

A Quick Makeup Removal Tip

April 18th, 2007 by Karen 2 Comments

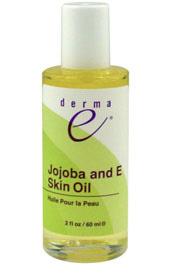
Derma E Jojoba and E Skin Oil

derma e Jojoba and E Skin Oil – A Versatile Product and Your New Best Friend

I’m right handed, so I hold brushes in my right hand and use the back of my left hand as a palette. I put cream or liquid products like MAC Paint, tinted moisturizer, concealer, etc. on the back of my hand before applying with a makeup sponge or brush. I also use the back of my hand to get rid of excess color. Instead of blowing on a brush to remove excess eyeshadow, blush or powder, I’ll swipe the brush head against the back of my hand.

This leaves me with all sorts of makeup on the back of my hand, which can take a long time to remove with bar soap or liquid hand wash. To get rid of makeup quickly and easily I keep a bottle of derma e Jojoba and E Skin Oil in my medicine cabinet. I drop the smallest drop on the leftover makeup on the back of my hand and then give it a quick rub and voila – it’s all gone. I’ll rinse with water and then just rub the leftover Jojoba oil in for some quick moisture.

Jojoba and E Skin Oil is one my favorite workhorse products because I use it for so many different things. When my hair feels dry, I put a rub a few drops between my palms and then work the oil through the ends to condition it. After a shower, I use it as a body moisturizer. You can also use it as a massage oil as well. It’s $9.50 for a 2 fl oz bottle, and a little bit of the product goes a long way. Derma e products aren’t tested on animals, have no parabens and are 100% vegetarian, too. Yay for your skin, and yay for the bunnies.

There are 2 comments on this post. Leave yours.

Categories: Beauty Tips, Drugstore Beauty Finds, Makeup, Makeup Tips/How To, Skin Care

A Quick Money Saving Tip for Beauty on the Cheap: Keep Scissors in Your Bathroom

April 13th, 2007 by Karen Leave a Comment

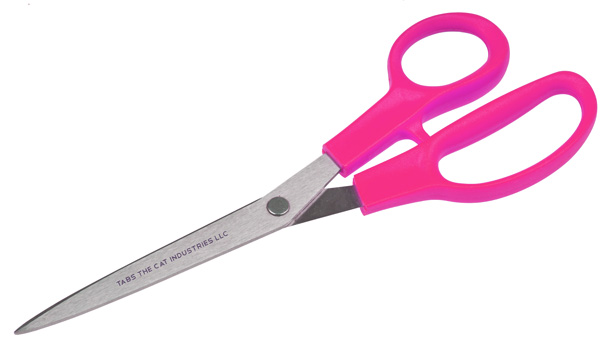
tabs-scissors

As some of you know, I’m a big fan of making my dollar go as far as it can when it comes to beauty, makeup and skin products, and one way I stretch out my dollars is by keeping a pair of scissors in my medicine cabinet.

I use it to cut disposable products, like Oil of Olay Daily Facials Express Wet Cleansing Cloths. A box of 30 cleansing cloths is about $5.50, and if you use one cleansing cloth every day that’s $5.50 per month, or $66.00 per year.

You can make those Olay Cleansing Cloths last even longer by cutting them into two pieces, or sometimes four (which is what I do when I only have to remove tough eye makeup or just need a quick refresher.) If you cut them in half, you can easily make that box last two months and save $33.00 per year!

I cut or divide stuff in half when I can. I’ve done this with cotton balls (just tear them apart, you don’t need the scissors), makeup remover cloths and benzoyl peroxide pads.

For non-disposable products that aren’t easily “dividable,” like expensive face treatments and creams, I just use less to make them last longer. For instance, I’m currently using a pricier product for acne treatment, DDF Benzoyl Peroxide Gel 5% With Tea Tree Oil, which costs $24.00 for a tube (ouch). But because I only use a pea-sized amount over my entire face, I can stretch out the use of the product for at least 8 months. That’s $3.00 of DDF product usage per month, which my wallet can totally get behind!

Leave the first comment on this post.

Categories: Beauty Tips, Drugstore Beauty Finds, Skin Care

Garnier Skin Products Finally In The U.S.

March 22nd, 2007 by Karen 5 Comments

Garnier Regenerating Eye Moisturizer
Garnier-regenerating-eye-moisturizer

Garnier Purifying Wet Cleansing Cloths
Garnier-wet-cleansing-cloths

I was wandering around Long’s yesterday and found that Garnier has some new skin products available for the face. I haven’t tried them yet, but I’m going to pick up the Regenerating Eye Moisturizer and the Purifying Wet Cleansing Cloths when my next paycheck comes in. I’m really excited that Garnier has finally released some skin products here. I went to England in 2005 and while I was in a Boot’s store I randomly purchased a bottle of Garnier’s Body Cocoon Lotion, which isn’t available in the US. I kid you not – it was possibly the best lotion I’ve ever tried . It smelled light, absorbed easily and provided excellent moisture. I hope that they roll out body products in the future. I’ve been jonesing for this lotion for two years!!!

Garnier’s Body Cocoon – Possibly The Most Awesome Lotion Ever
Garnier-body-cocoon

There are 5 comments on this post. Leave yours.

Categories: Drugstore Beauty Finds, Product Reviews, Skin Care

Drug Store Skin Care – Queen Helen Mint Julep Masque

March 15th, 2007 by Karen 2 Comments

Queen Helen Mint Julep Masque


Product: Queen Helene Mint Julep Masque
Use: To exfoliate or purify acne-prone skin
Price: About $3.50 for an 8oz tube
Makeup and Beauty Blog Rating: A+++++++++++

Before I started writing this entry I slathered on a thick layer of this green, minty, clay mask and as I’m waiting for it to dry I can feel all of the gunk being sucked out of my pores. This really is the raddest mask ever, and it’s a must-have in any acne-prone person’s routine.

What it does
The tube says that Mint Julep Masque “helps dry up acne pimples, rinse away blackheads, and shrink enlarged pores.” And for once, I think the marketing folks weren’t just trying to sell hope in a jar (or tube), because this stuff works. Granted, I didn’t witness any miraculous skin revelation after using this once. I’ve had this in my skin routine for about two years, and I think with consistent use this product really helps to keep my skin clear. As the mask dries I can feel my skin tightening up and after I wash it off I can see all of the whiteheads that are brought to the surface. Gross, I know, but strangely fascinating.

How I use it
I use this mask once a week, right after I get out of the shower when my pores are opened up. I slather on a thick, even amount and avoid the eye area. Then I walk around the house with the scary green mask and try to scare my husband or any other person in the vicinity, ha ha ha! Actually, I’ll let the mask dry as I do other stuff like put on lotion, iron clothes, etc., and after 15-20 minutes I rinse it off with just water and follow up with a toner.

Cons
While this mask is great for oily and acne-prone faces, it might be too harsh if you tend to dry out easily. Also, the packaging is not cute at all. And I’ve noticed that if I have a tube for a few months, the mask consistency gets thicker and harder to manipulate out of the tube.

Pros

Still, you can’t be the cheap price and the effectiveness of this product for acne-control. I’ve shelled out many dollars for high-end at-home masks from Dermalogica, DDF and other brands and nothing compares to this stuff. Try it, use it, love it!

There are 2 comments on this post. Leave yours.

Categories: Drugstore Beauty Finds, Product Reviews, Skin Care

Garnier Nutrisse Product Review Plus Tips For At-Home Hair Color

March 8th, 2007 by Karen 3 Comments

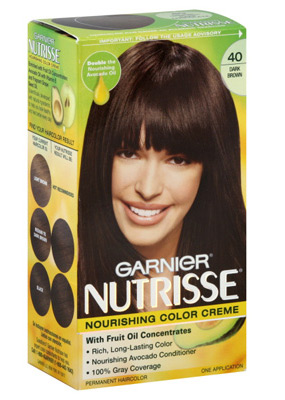
Garnier Nutrisse Permanent Hair Color
Product: Garnier Nutrisse Permanent Color
Use: At home color to change your current color or cover up grays
Price: about $7.00 for a one application box
Makeup and Beauty Blog Rating: A

I can justify spending $75 on a haircut because I have naturally wavy hair that’s really hard to tame — I’ve had so many bad haircuts resulting in everything from the poofy mushroom to the rats nest look at, so I never skimp on getting a good haircuts.

Throughout my 20s and early 30s, I was also willing to spend money on salon color. I went through all sorts of hair color phases, changing my naturally brown-black hair with red highlights, light brown and blonde highlights. It’s so much fun to change your hair color, but now that I’m living on a writer’s paycheck it’s really hard to part with $120 every three months to get those roots done, especially when the do-it-yourself color boxes at the store are $7.00.

During my year of living cheaply (wait, what am I talking about, I’m still living cheaply) I gave up getting my hair colored at the salon. I was a little nervous about doing it at first because the last time I did at-home hair color was in high school. I mean, what if my hair turned orange? Or what if I accidentally fried it somehow and it started breaking off? Or what if I ended up with scary too-dark Halloween hair that looked like an Elvira-Mistress-Of-The-Night wig? The mishap possibilities were endless.

I wish I could say that it all went perfectly from the get-go, but I can’t. Like with any new skill, I made a few mistakes along the way but thank god it didn’t really result in anything too horrific. One time I started from the roots because I got really freaked out about seeing gray hairs at the front of my head, so I piled on globs of dye on the roots like a crazy person and I ended up with light roots and dark ends. And another time I used a too-dark color that I left in too long which resulted in scary dark Elvira-Halloween hair for about a week until most of the color washed out. But in the grand scheme of things, these mistakes weren’t *that* bad. They weren’t noticeable to the majority of bystanders, unless I pointed it out (which of course I didn’t).

Now I color my hair every month, and it’s as easy as pie. I use Garnier Fructis Permanent Hair color. The smell is pretty strong, but in comparison to other at-home dyes, it’s not bad. It also doesn’t dry my hair out, which is one thing I hated most about Feria, the dye I used in high school. If you have dark hair like me and want to go a few shades lighter, Garnier is a good choice, because it does a pretty good job of lifting your hair color a few shades.

Here what I do to make at home hair color work for me:

    1. I wash my hair in the morning with a clarifying shampoo. Right now I use Alberto VO5 Kiwi and Lime Squeeze shampoo. It’s cheap and gets the gunk out. I use a lot of gel so I shampoo twice to get my hair squeaky clean and don’t put any conditioner afterwards.

    2. I then let my hair air dry during the day so that I can dye my hair in the evening.

    3. When it’s time to dye, I put on an old t-shirt and sweatpants so I don’t ruin any nice clothing. I also grab an old wash cloth and wet it. I use this to immediately wipe any dye that accidentally gets on my face or my neck. I don’t have to use this as much now, because I’m getting less messy with practice.

    4. Garnier gives an estimated time of how long you should leave the color in. I start the clock the moment I being the coloring process. If the box says 35 minutes, then I take into account total dye time from start to finish. I do not dye my hair and then wait for 35 minutes, and the one time I did, the color ended up being too dark, which resulted in the Elvira-Halloween hair mishap. Ugh!

    5. If I’m using a new color, I always start from the ends and put the color on the roots last.

    6. I never pile the hair on top of my head while I’m coloring. I just let it hang down (hence the wearing of the crappy t-shirt).

There are 3 comments on this post. Leave yours.

Categories: Drugstore Beauty Finds, Hair, Product Reviews

  • « Go to Previous Page
  • Go to page 1
  • Interim pages omitted …
  • Go to page 80
  • Go to page 81
  • Go to page 82
  • Go to page 83
  • Go to Next Page »

Primary Sidebar

Welcome to Makeup and Beauty Blog

Welcome to Makeup and Beauty Blog! My name is Karen, and I’m a freelance writer obsessed with makeup.

Makeup and Beauty Blog features daily product reviews, makeup tips and beauty news — like an interactive version of a monthly print magazine, except with occasional pictures of my cat.

Recent Posts

Sundays With Tabs the Cat, Makeup and Beauty Blog Mascot, Vol. 878

Makeup and Beauty Blog Monday Poll, Vol. 894

Makeup and Beauty Blog Monday Poll, Vol. 893

Makeup and Beauty Blog Monday Poll, Vol. 892

Makeup and Beauty Blog Monday Poll, Vol. 891

/* real people should not fill this in and expect good things – do not remove this or risk form bot signups */

Social

  • Facebook
  • Instagram
  • Pinterest
  • Twitter
  • YouTube

Featured Posts

Sundays With Tabs the Cat, Makeup and Beauty Blog Mascot, Vol. 771

Lady Unicorn

Weird Things I Like to Do

brows fill out beforehand

Before You Pluck or Wax Your Brows, You Must Do This

current bare skin status

What’s One Thing That Drastically Changed Your Skin for the Better?

Copyright © 2025 Makeup and Beauty Blog. Get in touch.