• Skip to main content
  • Skip to primary sidebar

Makeup and Beauty Blog | Makeup Reviews, Swatches and How-To MakeupMakeup and Beauty Blog | Makeup Reviews, Swatches and How-To Makeup

A beauty blog blooming with fresh makeup reviews, swatches and beauty tips from your friendly neighborhood beauty addict

  • Home
  • About
    • About
    • Contact
    • FAQ (Frequently Asked Questions)
    • Advertising & Media
  • Categories
    • Product Reviews
    • Makeup
    • Skincare & Fragrance
    • Style & Fashion
    • Hair
    • Nails
    • Tips & Tutorials
    • Just for Fun
  • Brands
  • Store

Food

Stress Baking While Social Distancing: A Glorious Gluten-Free Glazed Lemon Blueberry Loaf!

May 6th, 2020 by Karen 25 Comments

glazed gluten free lemon blueberry loaf
Get this yummy in your tummy, ASAP.

This mug by Kate Spade succinctly expresses how I feel about this gluten-free glazed lemon blueberry loaf. ?

My sentiments exactly! (Mug by Kate Spade)

But really, you could have it for tea, breakfast, brunch, lunch, dinner, snack time, and it totally works for dessert, too! (So basically all teh meals.)

The sweet blueberries beautifully balance with the tartness of the lemon, and the powdered sugar glaze is juuust enough. It’s an irresistible, ideal partnership of sharp and sweet.

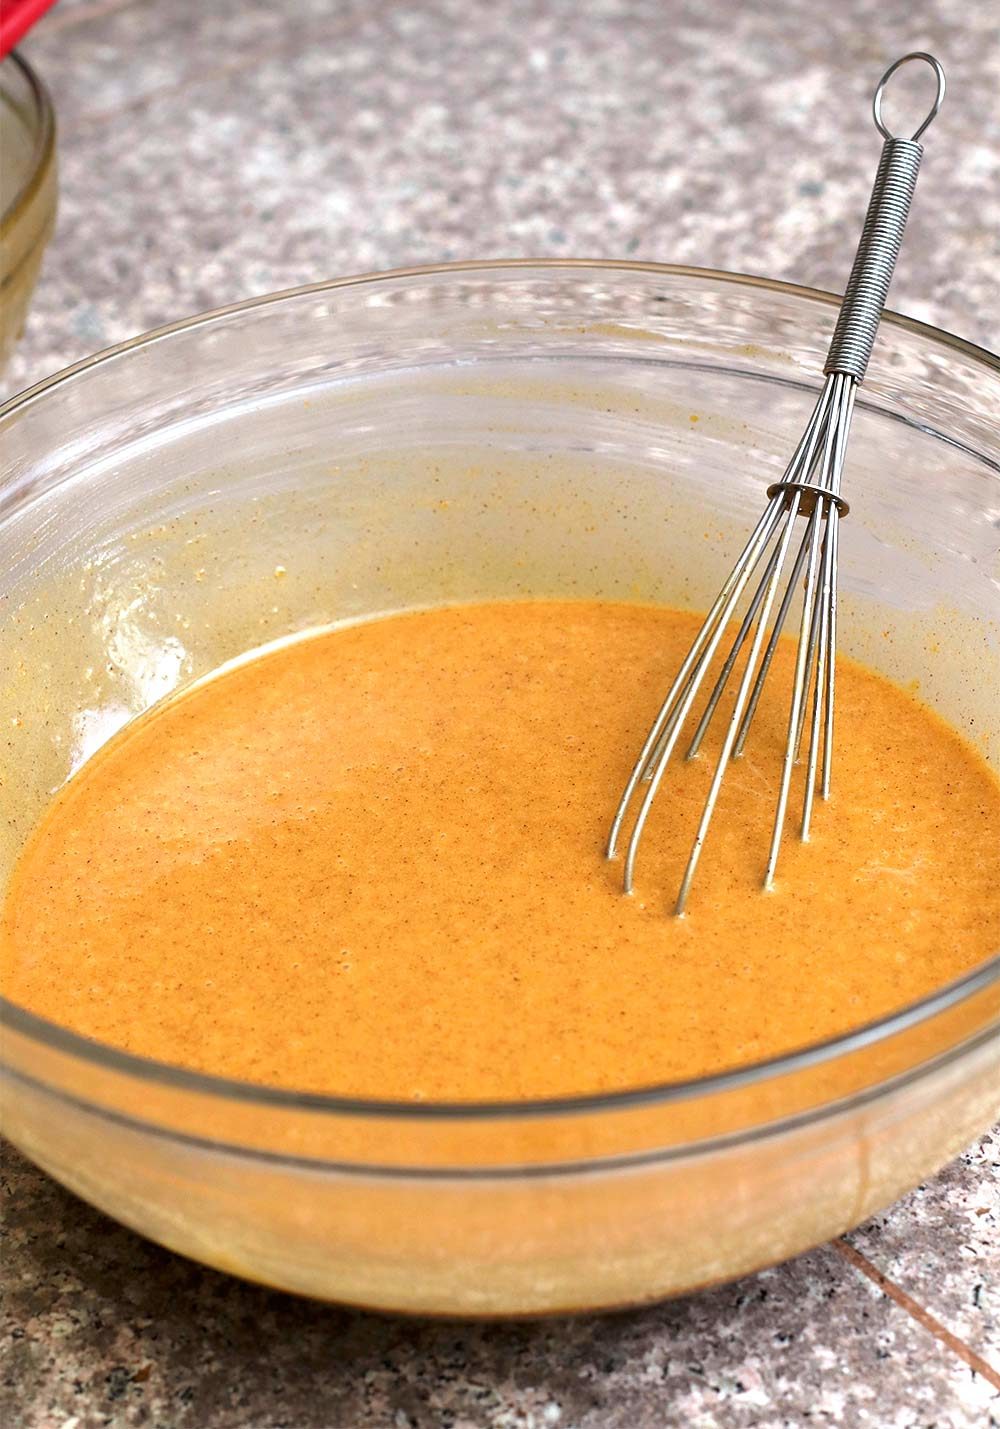
Oh, and the texture?! A lot of gluten-free cakes and loaves have a dense, tough crumb, but this one’s light and fluffy.

What’s the secret?

It’s the sour cream! It makes each bite so silky that it yearns to melt in your mouth.

This cake is divine, but I have to warn you… There is a strong chance you’ll be bombarded with requests to bake it again and again and again. And again. I know this because when I first served it to El Hub and Connor Claire, they took a few bites and, with cake still stuffed in their cherub cheeks, asked me to make it again!

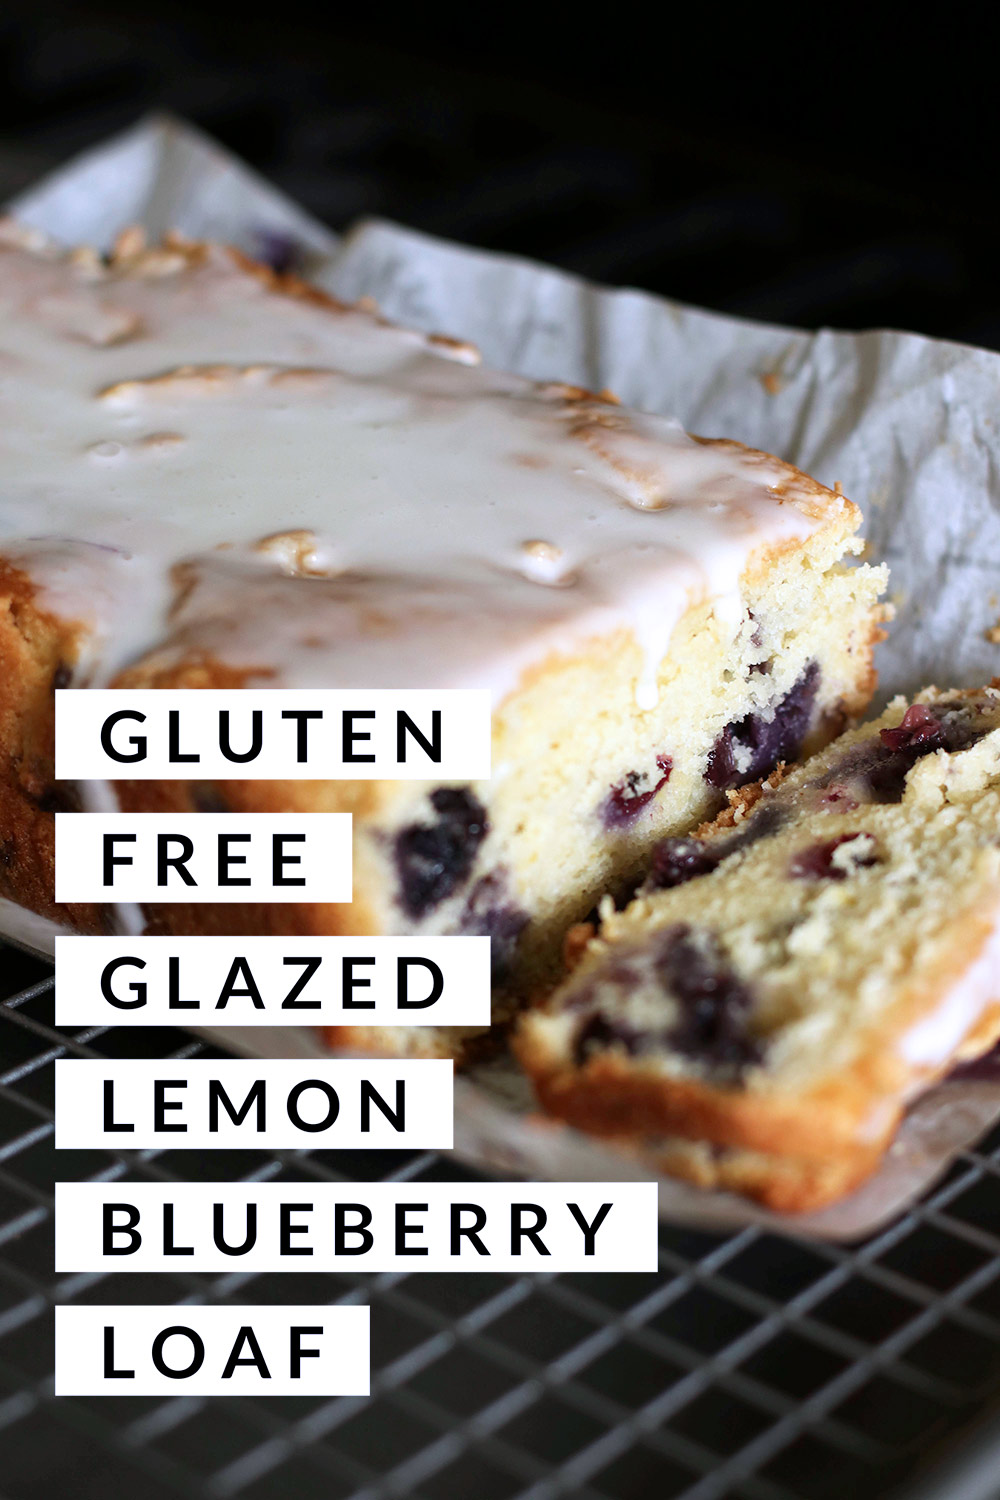
Gluten-Free Glazed Blueberry Loaf

DESCRIPTION
Topped with a powdered sugar glaze, this loaf’s plump blueberries and tangy lemon notes create a perfect balance of sharp and sweet. It’s especially lovely as an afternoon treat with tea, but it works extremely well for breakfast too (I can attest to this!). If you don’t have any gluten-free 1-to-1 flour around, no worries. It’s just as delicious with full-gluten all-purpose flour.

  • Prep time: 25 minutes
  • Bake time: 50-65 minutes
  • Total-ish time: 2 hours (including cooling time and glaze prep)
  • Yield: 1 loaf (makes 8-10 nice slices)

INGREDIENTS FOR THE LOAF

  • 1-1/2 cups (213 g) gluten-free 1-to-1 flour (I like King Arthur Gluten Free Measure for Measure, or Bob’s Red Mill Gluten-Free 1-to-1 Baking Flour)
  • 1/2 teaspoon baking powder
  • 1/2 teaspoon baking soda
  • 1/2 teaspoon salt
  • 1/3 cup (71 grams) butter, softened to room temperature
  • 1 cup (225 g) sugar
  • 2 large eggs at room temperature (out of the fridge is fine, but they’ll take longer to incorporate)
  • 1 teaspoon vanilla extract
  • 1 tablespoon grated lemon zest
  • 3 tablespoons fresh lemon juice
  • 1/2 cup (115 grams) sour cream
  • 1 cup (142 grams) blueberries

INGREDIENTS FOR THE GLAZE

  • 1 cup confectioners’ sugar (115 g)
  • 1 tablespoon evaporated milk (you may not need all of it, and you can substitute with whole milk)

INSTRUCTIONS
[Continue reading…]

There are 25 comments on this post. Leave yours.

Categories: Food, Just For Fun

Stress Baking While Social Distancing: The Best Gluten Free Chocolate Chip Cookies You’ll Ever Eat

March 20th, 2020 by Karen 14 Comments

gluten free chocolate chip cookie baked
Stress baking is the new normal.

Well, it’s official. I, and all of my former coworkers, have been laid off from the bakery, and I’m filing for unemployment for the first time since the dot-com bust. ?

So much is changing so quickly around the world right now, and I find myself constantly shaking my head in utter disbelief all the time. ? I just… I can’t… Words can’t… It’s surreal, isn’t it? Does not compute.

I know that millions of people are in a similar situation. I’ve been reminding myself to be grateful for what I have, and in this case, grateful for the extra time to spend with El Hub and Connor.

Still, I can’t pretend that my heart doesn’t feel heavy. It does.

To keep my spirit up, I’ve been baking, like, A LOT.

gluten free chocolate chip cookie baked
Here we go.

In the midst of all the whisking, weighing and rolling, I finally found a gluten-free chocolate chip cookie recipe I don’t totally hate (hey, man, it’s harder than you think). After many, many failed attempts, I think I found a winner! ???

These are slightly crunchy around the edge but soft and chewy inside. Mmm… You know Mrs. Fields cookies? These are a lot like them. The only downside is how good they are…because I can’t stop eating them. I’m eating them so fast I could give Cookie Monster a run for his money.

A few baking tips before you start:

  • Room temperature butter: If you have time, take your butter out of the fridge a couple hours ahead of time and leave it on the counter to reach room temperature. How long this will take depends on the temperature of your kitchen, but you’ll know the butter is ready when you can gently press your fingertip into the side.

    If you don’t have time to wait, slightly melt the butter in a microwave on low heat in 15-second increments.

  • Room temperature eggs: I also like to take my eggs out and leave them on the counter with the butter, since room temperature eggs incorporate faster than cold eggs do, but you can also use cold eggs straight from the fridge. They’ll just take longer to combine with your dough.
  • Chill that dough: I know it’s tempting to scoop the cookies right after you make the dough, but it’s worth waiting to pop it into the fridge for at least an hour. You want that dough to be cold, homie! Cold dough won’t stick to your hands as much, so it’s easier to roll. Plus, the cold butter in the dough will give more lift to your cookie.
  • Speaking of lift: This recipe calls for a gluten-free flour that already has xantham gum in it, so look for anything that says “1-to-1” on the package. At the bakery we use Cup4Cup, which I like. I also like the King Arthur 1-to-1 as well.
  • Weigh it out: If you can, weigh out your ingredients using a kitchen scale. Accuracy is your ally when it comes to baking.
  • Get to know your oven: An oven thermometer is REALLY helpful, because most ovens aren’t perfectly accurate when it comes to temp… My oven is consistently 25 degrees under the temperature it says on the screen, so if I want to bake something at 350 degrees, I set it for 375.
  • Do a test cookie: Bake one test cookie at a time to figure out the best timing and cookie size.
gluten free chocolate chip cookie baked
Scrape down that bowl and that paddle!
gluten free chocolate chip cookie baked
Try a couple of them with potato chips (it sounds weird, but it’s delicious).

Gluten-Free Chocolate Chip Cookies

DESCRIPTION
Slightly crispy around the edge with a soft, chewy middle, these gluten-free chocolate chip cookies are reminiscent of Mrs. Fields at the mall! WARNING: Once you start eating them, you might not be able to stop.

  • Prep Time: 20 minutes to measure and make the dough; however, you’ll want to have enough time to bring your butter to room temperature, as well as time to chill the dough for at least an hour in the fridge (and ideally overnight!) before baking, so plan accordingly
  • Bake Time: 9-11 minutes
  • Total-ish Time: 1 hour, 20 minutes
  • Yield: 3 dozen cookies

INGREDIENTS

  • 1 cup (227g) room temperature butter (if you don’t have time to do this, then soften it in the microwave on low in 15-second increments until you can gently press your fingertips into the sides)
  • 1 cup (213g) brown sugar, firmly packed
  • 1/2 cup (99g) granulated sugar
  • 2 teaspoons gluten-free vanilla extract
  • 2 large eggs
  • 2 1/3 cups (361g) gluten-free 1-to-1 flour
  • 1 teaspoon baking powder
  • 1 teaspoon baking soda
  • 1 teaspoon salt
  • 2 cups (340g) chocolate chips
  • Optional mix ins, like nuts or butterscotch chips, potato chips, pretzels or sprinkles

INSTRUCTIONS

  1. In a mixer with a paddle attachment, beat the butter and sugars till fluffy at a low speed for 2-3 minutes.
  2. Beat in the first egg until well incorporated; you’ll know it’s combined when the dough no longer looks shiny. Beat in the second egg along with the vanilla until combined. Continue to beat at a medium speed, and scrape down the paddle and sides of the bowl halfway through to make sure everything is fully incorporated. This step takes between 7-9 minutes, so don’t rush it.
  3. While the butter, sugar, eggs and vanilla are beating, whisk together the flour, baking powder, baking soda and salt.
  4. Separate the dry ingredients into thirds (you can eyeball this; it doesn’t have to be precise), and add each third, one at a time, into your butter and sugar mixture and mix until each is fully incorporated.
  5. Add the chocolate chips, and then beat on low speed. Again, scrape the bottom and sides of the bowl to be sure everything is well blended.
  6. Cover the bowl, and stick it in the fridge for at least one hour to chill the dough. Ideally, though, you’d leave it there overnight. It can stay in there for up to 2 days.
  7. When you’re ready to bake, preheat your oven to 350°F, then and line your baking sheets with parchment paper.
  8. Line a scale with parchment paper too, and measure out each cookie to 30g (this is about two tablespoons). Roll them into balls, and place them on the baking sheets with room to spread.
  9. At this point, I like to also mix in different ingredients by hand into each ball for variety. For the batch above, I added some crushed potato chips to some of the cookies.
  10. Bake the cookies for 7 minutes; they’ll be very puffy at this point, since gluten-free baked goods tends to rise higher than gluten-ful ones (it’s the baking soda and baking powder, both of which control the height and spread of the cookies.) Pull out the sheet, noting which side is closest to you (you’ll need this in the next step), and press down gently on each cookie with an oven mitt to flatten them slightly.
  11. When you return the baking sheet to the oven, rotate the pan so the side that was closest to you is now on the opposite side. Bake for an additional 4 minutes, but this depends on how soft you want the center of your cookies. If you want a softer middle, try 2-3 minutes. (Side note: This is where baking your test cookie comes in handy.)
  12. Remove from the oven. Let them rest on the baking sheets for 5 minutes to set, and transfer to racks to cool completely.
  13. Enjoy!

Your friendly neighborhood beauty addict,

Karen

There are 14 comments on this post. Leave yours.

Categories: Food, Just For Fun

Pumpkin Spice Cupcakes With Brown Sugar Pecans and Cream Cheese Frosting 🧁

November 26th, 2019 by Karen 9 Comments

Let’s discuss the struggle.

The eternal Thanksgiving struggle.

You see, it’s real, it’s totally legit, and it’s deadly serious.

It typically manifests toward the end of the meal (when your shirt is covering the top of your jeans because you’ve just unbuttoned them), and you’re sitting there wondering, “Hmm…do I conclude this carbfest with a slice of pumpkin pie, or do I go with the pecan?”

Truly, it is one of life’s most difficult decisions…

If you, too, have faced this challenging predicament, then this cupcake recipe is for you. ? It’s a Frankenstein of fall flavors that combines the beautifully balanced spiciness of a perfect pumpkin pie, with the glorious greatness of brown sugar pecans — toasted first, then incorporated into the batter.

And as if that weren’t tantalizing enough, a cream cheese frosting tops it all off!

Also, as a full-time employee in the Crazy Cat Lady Department, I decorated mine with sprinkles and cute kitty fondant cutouts, but you could sub the cats for leaves or turkey shapes (that should also work).

In the cupcake world, there are two major categories of cupcake batter — oil-based and butter-based. Butter-based batters tend to be a little more complicated and finicky (mainly with regard to how far you’ve melted your butter) than oil-based batters. Basically, with oil-based batters, you just dump and mix! Also, oil makes it easy to end up with a melt-in-your mouth texture. No dry cake here! So, this recipe uses an oil-based batter.

You don’t need any special equipment either. Just a couple of mixing bowls and a whisk, and heck, if you don’t have a whisk, you can use a fork.

If you want to bake Thanksgiving cupcakes but don’t want something too complicated, this is the recipe for you.

Pumpkin Spice Cupcakes With Brown Sugar Pecans

DESCRIPTION
This melt-in-your mouth pumpkin cupcake has a subtle kick of spice for a festive addition to your Thanksgiving table! Studded with brown sugared pecans and finished with a cream cheese frosting.

  • Prep Time: 20 minutes
  • Cook Time: 30 minutes
  • Total Time: 3 hours
  • Yield: 12 cupcakes

INGREDIENTS

For the brown sugar pecans:

  • 1 cup finely chopped pecans
  • 2 tablespoons salted butter, melted
  • 3 tablespoons light brown sugar

Dry ingredients for the batter:

  • 1 cup (125g) cake flour (spoon & leveled)
  • 1 teaspoon baking powder
  • 1/2 teaspoon baking soda
  • 1/2 teaspoon salt
  • 1 teaspoon ground cinnamon

Wet ingredients for the batter:

  • 1 and 1/2 teaspoons pumpkin pie spice
  • 1/2 cup (120ml) grapeseed oil (any neutral tasting oil, like canola or vegetable oil, works too)
  • 2 large eggs
  • 3/4 cup (150g) packed light brown sugar
  • 1 cup (225g) canned pumpkin puree
  • 1 teaspoon pure vanilla extract

For the frosting:

  • 8 ounces (224g) full-fat block cream cheese, softened to room temperature
  • 1/2 cup (115g) unsalted butter, softened to room temperature
  • 3 cups (360g) confectioners’ sugar (you may need to add a 1/4 cup if you prefer a stiffer frosting)
  • 1 teaspoon pure vanilla extract
  • 1/8 teaspoon salt

For the decorations:

  • Fall-colored sprinkles (I got mine at Micahels)
  • Orange or other fall-colored fondant (I bought premade fondant at Michaels)
  • Cat shaped cookie cutter

INSTRUCTIONS:

1. Steps to prep
Preheat your oven to 350°F (176°C). Line 12-cup muffin pan with cupcake liners, and set aside. Roll out your orange fondant, and then cut out 12 cat shapes with your cookie cutter. Allow to air dry for at least 30 minutes, or take a blow dryer and dry them using the cool setting until they harden; set aside for later.

2. Toast the pecans
Line a cookie sheet with parchment paper. Chop pecans into small pieces. In a medium-sized bowl, combine the melted butter, brown sugar and chopped pecans. Toss to coat. Spread the pecans evenly on the cookie sheet, and bake for about 7 minutes, or until they’re toasted. Set aside to cool.
[Continue reading…]

There are 9 comments on this post. Leave yours.

Categories: Food, Just For Fun, Recipes Keywords: baking, cupcake, recipe

Long Lasting Makeup for Hot Kitchens (A 15-Minute Look)

October 25th, 2019 by Karen 41 Comments

What’s baking?

No, I am not trying to tease your sweet tooth…but yes, you are staring at cupcakes for a reason. ??

That reason would be this: I started a new job this week! At a bakery!

I know, it’s out of my lane, but with Connor going to preschool five days a week now, and me having been working at home for eons, I’ve been going a little stir crazy. Then one day a couple weeks ago, an opportunity arose to bake for a local bakery, and I took it.

If you’ve followed MBB for a while, then you probably know that I love to bake at home, and I’d love to get better at it. I want to learn to make all teh things! And I want to be surrounded by sugar and gluten and chocolate and frosting ALL. DAY. LONG.

k baking
Look who’s baking now.

I’ll try to temper/limit the amount of baking-related pics and info I share on MBB (unless you REALLY want to see more, in which case lemme know), but I’ve been doing MBB for almost 13 (!) years now. I love it too much to stop, but mama needs some other interests too. Way I see it, I’ll still be wearing makeup to work at the bakery, so I’ll still have plenty of makeup and skincare to test and talk about. So…you won’t be getting rid of me yet. LOL!

The new new gig is “back of the house,” which means that my primary responsibilities will be the actual baking…of all the delicious things.

Mmm…

First thing I noticed this week in the kitchen for training was that it gets REALLY hot when the ovens are cranking, and even HOTTER when it’s also hot outside, like it has been the past few days.

I wore the littlest amount of stick foundation on my first day (and I also happened to skip powder), so my base had all but slid off my face by the end of my shift.

So, for my second day at work, I busted out the long-wearing guns…

urban decay highway queen palette
When you’ve only got 15 minutes…

Base

Estée Lauder Double Wear Stay-in-Place Foundation (my shade is Honey Bronze) and Maybelline Instant Age Rewind Concealer (I wear Golden). Both of these base products last a long while, and neither one looks or feels heavy. I set them with a light dusting of Chanel loose powder, which has a lovely natural finish.

Eyes

A liquid bronze eyeshadow base (Wander Beauty Amber Wave! Layer it under your bronze eyeshadows for added intensity and staying power) with a dusting of a shimmery warm bronze from the new Urban Decay On the Run Mini Palette in Highway Queen. I also went with a long-wearing purple liner on the upper lash line (UD Ether, which pairs well with bronze shades and doesn’t look *too* obviously purple. Unfortunately, it’s discontinued.). Next, I used a long-lasting curling mascara on my lashes (MAC Extended Play Perm Me Up Lashes).

Eyebrows

I was blown away by how well my brows made it through the second day, because — no joke — it was hot ? in the kitchen. I’d assumed they would disappear, BUT THEY DIDN’T! Anyway, I wore NARS Komo brow pencil and MAC Clear Brow Set.

Note to self: this combo frickin’ lasts.

Cheeks and lips

Charlotte Tilbury Ecstasy blush on my cheeks, along with a couple of shades from the Wander Beauty Cloud9 Mini Lipstick Kit (the lipsticks are super creamy, so they don’t really last more than two hours) mixed together.

urban decay highway k closeup
My hair is crazy, I know.
urban decay highway k closeup
Isn’t that purple liner all kinds of amazing?

It took me 15 minutes to do this look, which I put on at 6:45 in the morning.

I’m writing this post a full 12 hours later, and after five hours in a hot kitchen, all of the makeup I used in the morning still looks pretty good, if I do say so myself…with the exception of the creamy lipstick.

Oh, and just in case you’re wondering, I don’t eat cupcakes all day long now, HA HA HA!

I certainly want to though. ?

Your friendly neighborhood beauty addict,

Karen

There are 41 comments on this post. Leave yours.

Categories: Food, Makeup, Makeup Tips/How To

  • « Go to Previous Page
  • Go to page 1
  • Go to page 2

Primary Sidebar

Welcome to Makeup and Beauty Blog

Welcome to Makeup and Beauty Blog! My name is Karen, and I’m a freelance writer obsessed with makeup.

Makeup and Beauty Blog features daily product reviews, makeup tips and beauty news — like an interactive version of a monthly print magazine, except with occasional pictures of my cat.

Recent Posts

Sundays With Tabs the Cat, Makeup and Beauty Blog Mascot, Vol. 878

Makeup and Beauty Blog Monday Poll, Vol. 894

Makeup and Beauty Blog Monday Poll, Vol. 893

Makeup and Beauty Blog Monday Poll, Vol. 892

Makeup and Beauty Blog Monday Poll, Vol. 891

/* real people should not fill this in and expect good things – do not remove this or risk form bot signups */

Social

  • Facebook
  • Instagram
  • Pinterest
  • Twitter
  • YouTube

Featured Posts

Sundays With Tabs the Cat, Makeup and Beauty Blog Mascot, Vol. 771

Lady Unicorn

Weird Things I Like to Do

brows fill out beforehand

Before You Pluck or Wax Your Brows, You Must Do This

current bare skin status

What’s One Thing That Drastically Changed Your Skin for the Better?

Copyright © 2025 Makeup and Beauty Blog. Get in touch.