• Skip to main content
  • Skip to primary sidebar

Makeup and Beauty Blog | Makeup Reviews, Swatches and How-To MakeupMakeup and Beauty Blog | Makeup Reviews, Swatches and How-To Makeup

A beauty blog blooming with fresh makeup reviews, swatches and beauty tips from your friendly neighborhood beauty addict

  • Home
  • About
    • About
    • Contact
    • FAQ (Frequently Asked Questions)
    • Advertising & Media
  • Categories
    • Product Reviews
    • Makeup
    • Skincare & Fragrance
    • Style & Fashion
    • Hair
    • Nails
    • Tips & Tutorials
    • Just for Fun
  • Brands
  • Store

Makeup Tips/How To

Cream Blush Is Your Secret Weapon Against Raggedy Ann Cheeks

March 30th, 2018 by Karen 11 Comments

kjaer weis suntouched blush
I’m wearing one of my favorite cream blushes of all time, Kjær Weis Cream Blush in Sun Touched.

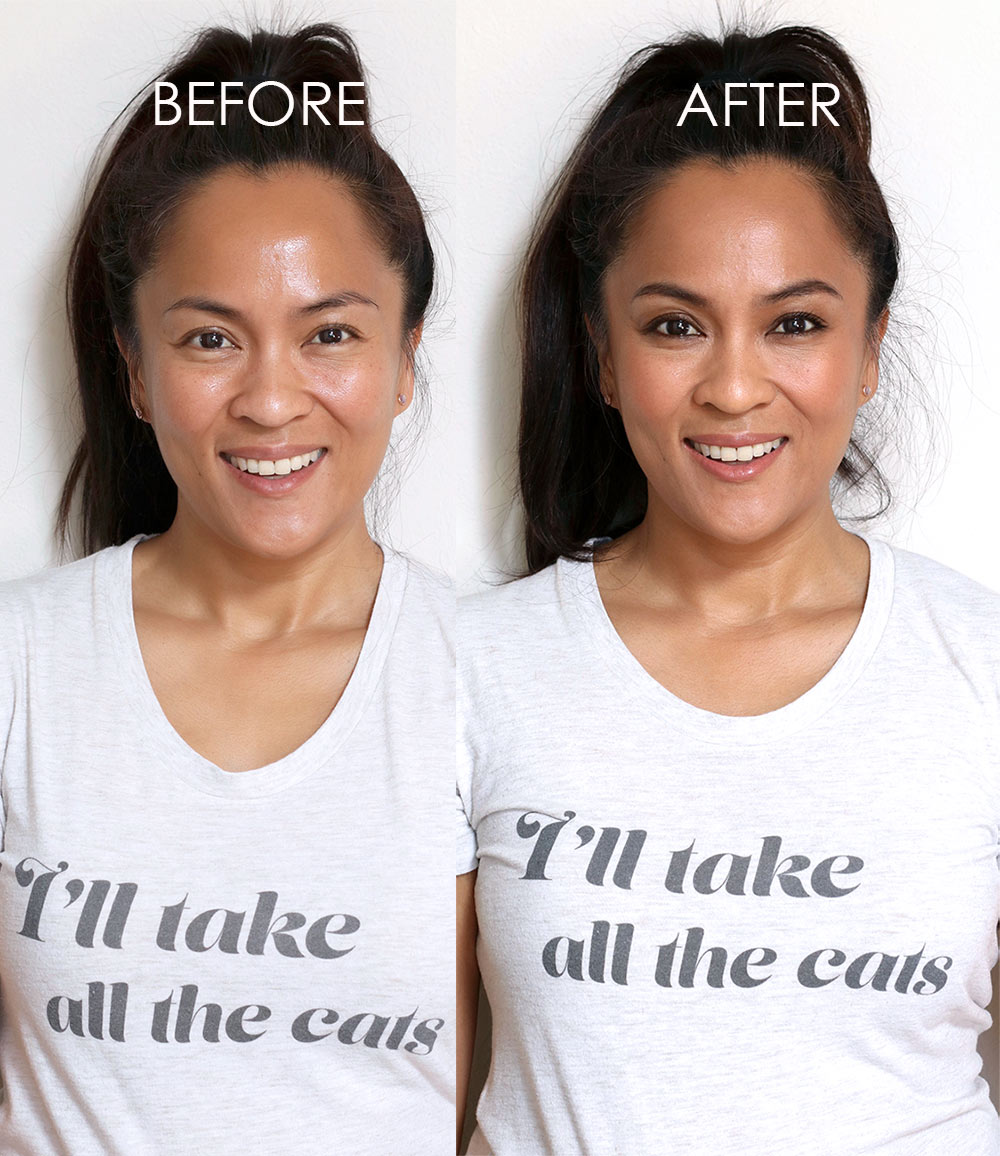
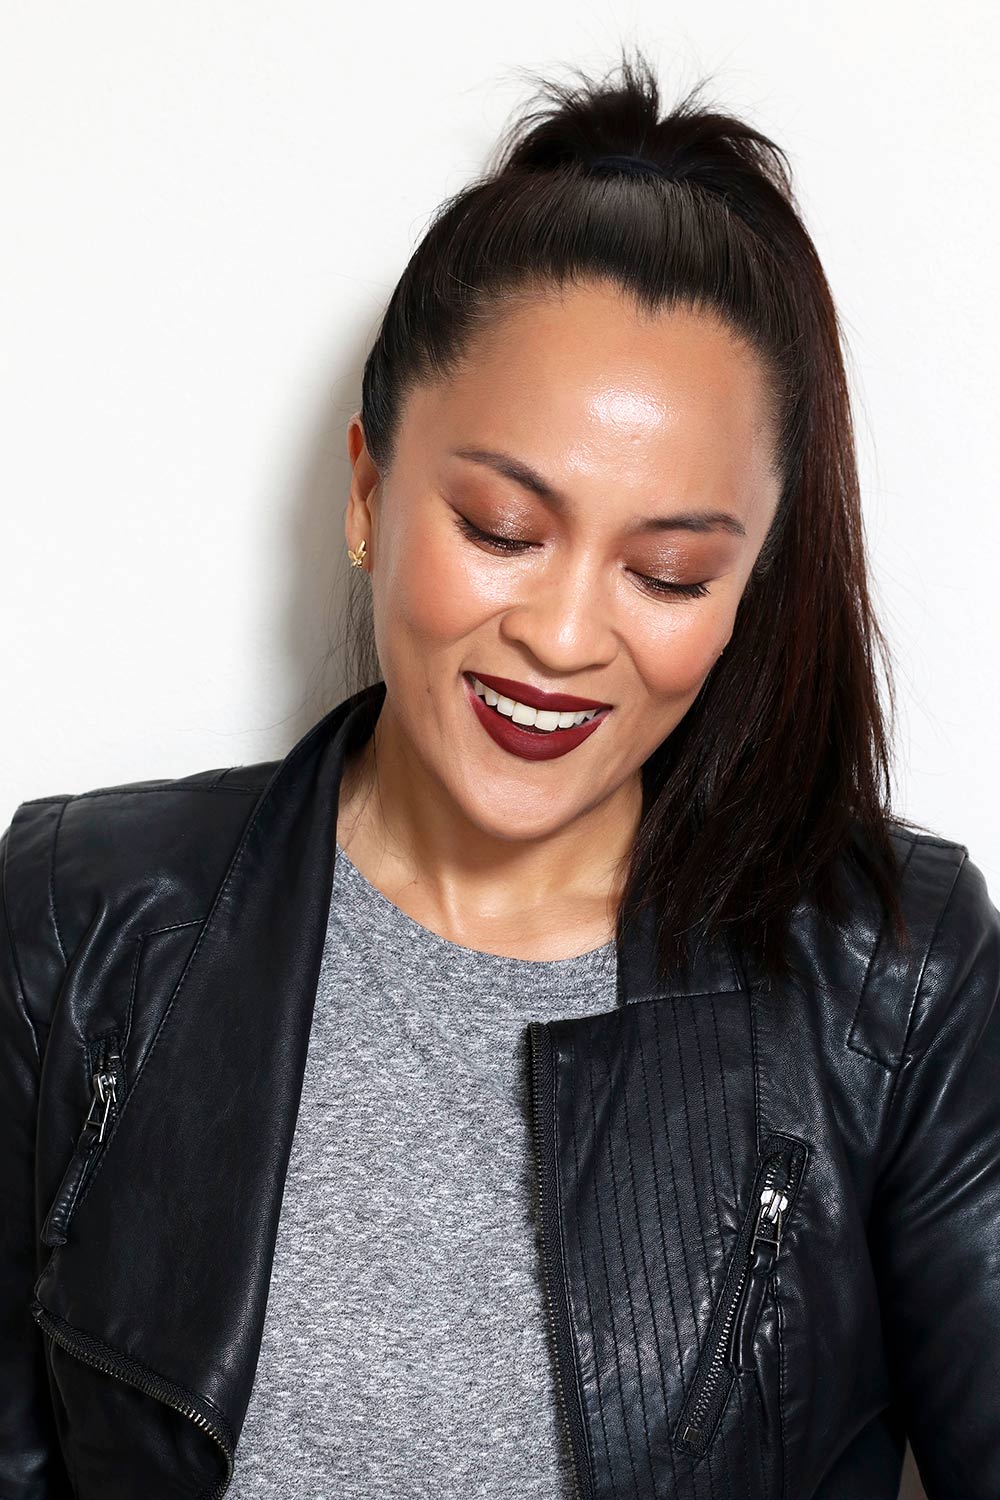
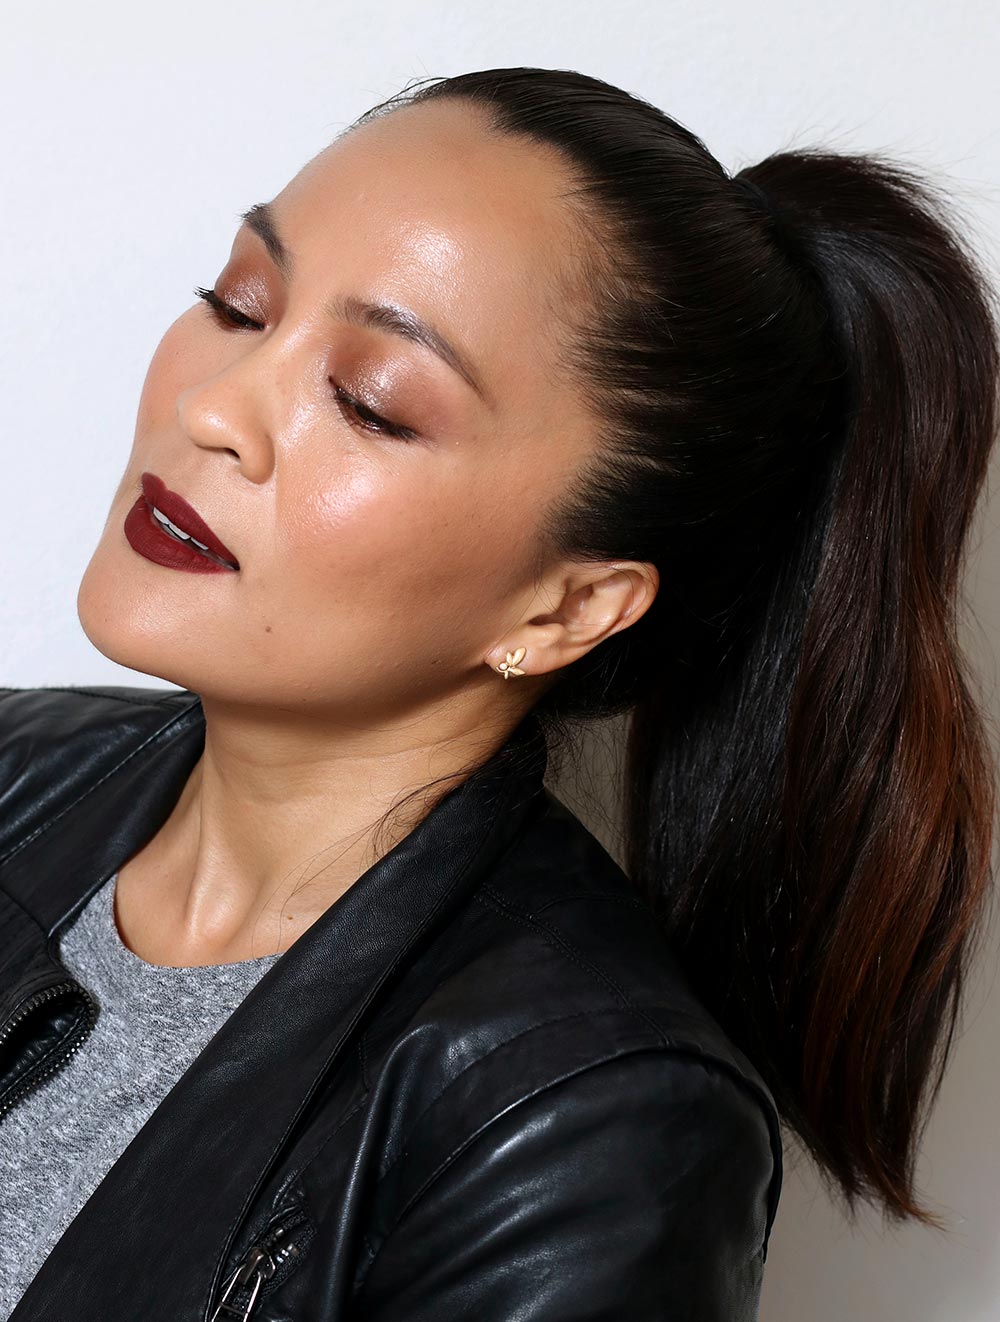
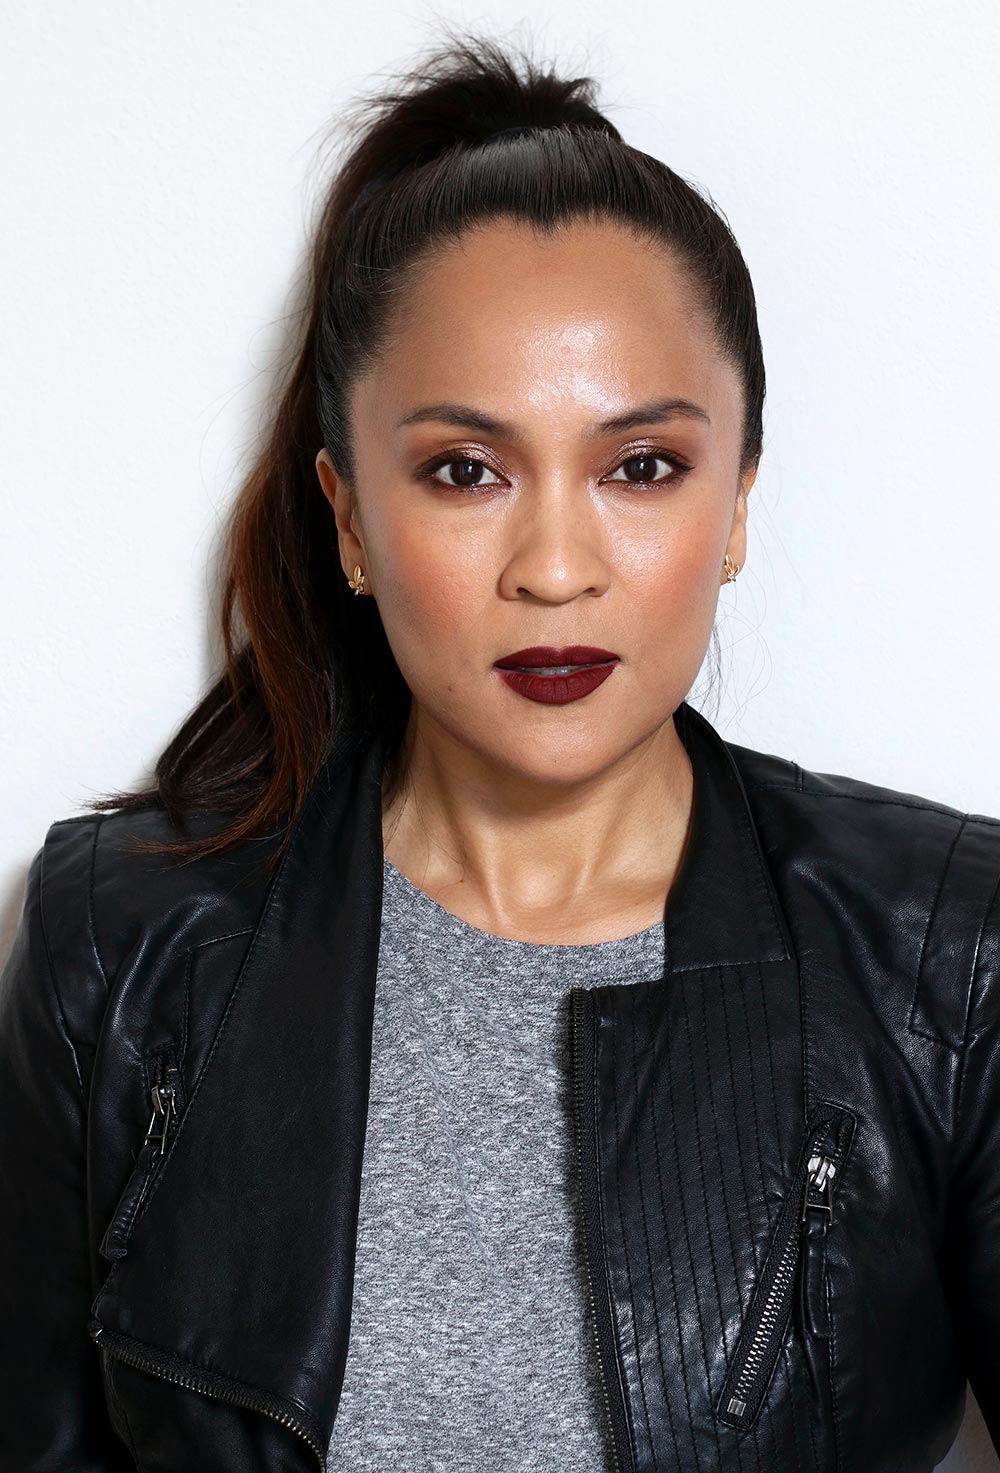
Yo, I know I’ve been talking about cream blush A LOT this week, but I once unknowingly left the house with blush that looked like two little Raggedy Ann doll circles on my cheeks. I’ve since converted to the Church of Cream Blush because it merges with my foundation and never looks powdery. Amen and hallelujah to makeup that looks like real skin!

In other news, I’m making improv shrimp scampi tonight! It’s Good Friday, which meant seafood for dinner around here, which I’m totally cool with because I was a pascatarian for years, but when I mentioned “no red meat” to El Hub this morning his eyes got wide like we were headed for certain doom.

I googled this skinny version… I don’t know if it’s so skinny anymore because I threw in a bunch of Parmesan and extra butter, but YUM!

Hope you’re having a good night. Got any Netflix recs for me? I want to keep watching season two of Santa Clarita Diet, but I can’t watch it while I’m eating…

Your friendly neighborhood beauty addict,

Karen

There are 11 comments on this post. Leave yours.

Categories: Face, Kjaer Weis, Makeup, Makeup Tips/How To

How to Use Lipstick as a Cream Blush Without It Looking Streaky or Patchy

March 29th, 2018 by Karen 5 Comments

how to make cream blush look natural

That’s basically it in the gif. That’s how I use ? lipstick as a blush. Just rub the bullet on the back of your hand to warm it up a bit, which makes it more pliable and slippery, then dab it with a synthetic blush brush, and bounce the bristles on cheeks.

Gently, though! — because you don’t want your base makeup to shift.

Now you’re ready to come with me to Target to get plastic Easter eggs. 🙂

Your friendly neighborhood beauty addict,

Karen

There are 5 comments on this post. Leave yours.

Categories: Face, Makeup, Makeup Tips/How To

Convert Crazy Clown Blushes Into Wickedly Wearable Cheek Colors With a Drop of This

March 29th, 2018 by Karen 6 Comments

nars wanted ii palette
The NARS Wanted II Palette, MAC 240S brush, Urban Decay Urban Defense Primer, MAC Prep + Prime Face Skin Base

Rise and shine, pal o’ mine! ? Good morning. It’s the day before Good Friday. Here’s a Thursday quick tip you can use in your Easter Sunday look.

What’s the easiest way to wear those bright red and orange powder blushes you hoard ?️ and love ❤️ but never wear (I’m guilty)?

Try this: swirl a stiff brush in the pan, tap/brush the powder on the back of your hand, and mix in a drop or two of face primer. Finish by patting on your cheeks with fingers.

That’s it! It’s a quick way to add the perfect amount of cheek color and mellow out your pores. ?

Your friendly neighborhood beauty addict,

Karen

There are 6 comments on this post. Leave yours.

Categories: Face, Makeup, Makeup Tips/How To

Quick Tip: Do Your Dark Circles a Favor, and Apply Your Under-Eye Concealer Last

March 28th, 2018 by Karen 10 Comments

If your under-eye concealer looks thick and heavy, apply it last.

Yes, I realize that this goes against what some makeup peeps suggest, and it might sound weird, but give it a try! Apply the rest of your makeup first. Do your eyes, your base, lipstick, blush — the whole nine yards — and do your under-eye concealer as your last step.

I’m serious! Do it *after* mascara, too. If you’re anything like me, you’ll subconsciously use less concealer without even realizing you’re doing it, and your under-eye area will look much more natural than it does when you conceal as one of your first steps.

Why?

Honestly, I can’t say for sure! But I don’t care. ? All I know is that when I’ve got my full face on with foundation, powder, blush, lipstick, ad infinitum, I have some context to work from, and it’s just easier to figure out how much or how little concealer to use… Actually, how little you need to wear.

It’s the same idea as applying red lipstick before blush. How much blush should you use? Base it on the brightness/boldness of your lips.

In almost every case when I do my under-eye concealer FIRST, I use more concealer than I need, and the less concealer I wear, the lighter and better it looks.

Your friendly neighborhood beauty addict,

Karen

There are 10 comments on this post. Leave yours.

Categories: Eyes, Makeup Tips/How To

Everyday Soft Glam Makeup Tutorial: My Go-To 10-Minute Makeup Look With Bronzed Plum Eyes, Peachy Coral Cheeks and Lips

February 8th, 2018 by Karen 35 Comments

everyday soft glam makeup tutorial top
I could happily wear this makeup every day.

This look… To say that it’s one of my favorites is an understatement. I’ve been wearing it FOR YEARS, and it has shown up many times on MBB in different iterations (most recently in the MAC Hyper Real Palette post), but I don’t know (or at least I can’t remember) if I’ve ever really broken it down before.

I don’t know why, but whenever someone asks me about it, I’m always surprised — maybe because it doesn’t seem like anything special — but now that I think about it, there must be a reason I rely on it so much.

I’ve done this look in moving cars, office cubicles, on public transpo, cramped airplane bathrooms (during turbulence), and lately with a wiggly toddler in my lap!

everyday soft glam makeup tutorial k and c 2
I literally did this makeup with Connor in my arms.

The eyes are lightly defined with shimmery bronze, plum and brown, and they’re paired with a soft coral-peach on the cheeks and lips. The skin is just shy of medium coverage and has some sheen to it.

It’s not an advanced or complicated look, but who cares? That makes it practical and realistically doable, and I like how I feel when I wear it. I can wear it pretty much anywhere and feel like the best version of K-$ is in the house. 🙂

I’ve listed the steps and products I use down below, but as usual, the brow gel, mascara, eyeliner, highlighter, bronzer, and even the foundation and lipstick, are easily substitutable.

That said, I do think that two of the products I use are “musts” (in makeup land, I use that term loosely) because they make the look what it is.

everyday soft glam makeup tutorial top

[Continue reading…]

There are 35 comments on this post. Leave yours.

Categories: Makeup, Makeup Tips/How To

A Glamorously Grungy Makeup Tutorial: Smoky Reddish Brown Eyes and Vampy Matte Lips

February 7th, 2018 by Karen 24 Comments

reddish brown smoky eye tutorial top pic 1

I’m warning you now — ONLY wear this makeup when you want to feel like a total bad-@ss capable of capturing, and then breaking, all of the hearts in a room within the span of 5 minutes.

This beauty buddy movie pairs two bold focal points together — a messy reddish brown smoky eye and a crisp blackened red matte lip — to create a jammin’ juxtaposition of grungy and glam, and you know I’m all about the contrasts in makeup.

To keep the overall look approachable and well out of Insta-glam territory, I paired the eyes and lips with moderately matte skin (there’s a semblance of a sheen), casual, messy brows and a warm bronzed mauve cheek.

red brown smoky eye tutorial top pic 2

red brown smoky eye tutorial top pic 3

Are you ready to rock?

What you’ll need

FACE PRODUCTS

  • Face Primer with pearly sheen (BECCCA Backlight)
  • Medium coverage liquid matte foundation (NARS Natural Longwear Radient Foundation in Stromboli and Valencia)
  • Concealer for your under eye area, if you want (MAC Matchmaster Concealer in 4)
  • Face Powder (MAC Mineralize Skinfinish Natural in Golden Tan)
  • Warm pinkish mauve powder blush (MAC Extra Dimension in Faux Sure!)
  • Peachy tan bronzer (MAC Mineralize Skinfinish Natural in Give Me Sun)
  • Matte blackened red lipstick (MAC Retro Matte Liquid Lipstick in Carnivorous)
  • Reddish brown lip liner (MAC Mahogany)

EYE MAKEUP

  • Brow gel, either clear or a color that matches your brows (Hourglass Arch Brow Volumizing Gel in Warm Brown)
  • Two powder eyeshadows: a warm reddish brown powder eyeshadow (MAC Swiss Chocolate) and a glittery bronzy peach (MAC Honey Lust)
  • A warm reddish brown eyeliner, ideally something creamy which you can buff out and blend (MAC Costa Riche)
  • Mascara (Benefit BAD Gal Bang!)

TOOLS

  • Smudge brush (MAC 219S)
  • Fluffy angled eyeshadow brush (MAC 275S)
  • Blush brush (MAC 127S)
  • Flat eyeshadow brush (or, you can just use a finger)
  • Something to blend your foundation (BeautyBlender)

red brown smoky eye tutorial products

[Continue reading…]

There are 24 comments on this post. Leave yours.

Categories: Becca, Benefit, Eyes, Hourglass, Lips, MAC Makeup, Makeup, Makeup Tips/How To, NARS, Top Posts

A 10-Minute Minimalist Makeup Tutorial: Gleaming Rose Gold Wings With Glossy Cheeks and Lips

February 1st, 2018 by Karen 21 Comments

nudestix golden rose top pic
You CAN do this in 10 minutes!

I’ve been wearing this look with gleaming rose gold wings and glossy cheeks and lips lately, most recently to brunch with my friend Cindy, and on the day I did this side-roll ponytail tutorial.

It’s borderline glam, which I like, but it’s still quick and easy. From start to finish, you can do this in 10 minutes.

There are three things about this look that help keep the time from spiraling out of control.

nudestix golden rose breakdown

1. The concealer is doing the heavy lifting.

I’m not wearing any foundation at all. There’s just a medium-coverage liquid concealer with a natural satin finish, which I’m using for spot treatments to even out specific places, and I’ve chosen a liquid concealer that can be built up in layers wherever I need the extra coverage (it’s nice to have that option).

2. Pressed powder gives you more control.

The concealer is set with a medium-coverage pressed powder, which is handy for 10-minute looks, whereas loose powder is usually messier… Pressed is just easier for me to grab and go.

Also, pressed powder tends to look sheerer than loose powder does for me, which provides a lot more control over how much powder actually ends up my skin.

Basically, I’d rather apply less product and have to build it up to the coverage I want than accidentally apply too much powder and have to remove the excess… It’s always easier to add makeup than take it away, IMO.

3. A creamy eyeshadow pencil corrects any mistakes with the liquid liner.

Running the cream shadow along the edge of the liquid liner helps to hide any dips and imperfections. There’s also a subtle transition of shine from the high beam gleam of the liquid liner to the softer shimmer of the pencil, which gives some subtle complexity to the liner.

Alright… Are you ready for the breakdown? I hope so, because here we go! 🙂

nudestix golden rose breakdown
Before and after

[Continue reading…]

There are 21 comments on this post. Leave yours.

Categories: Hourglass, MAC Makeup, Makeup, Makeup Tips/How To, NUDESTIX, Tarte

Low Double Side-Roll Ponytail Hair Tutorial: An Easy, Casual Alternative to Messy Buns (ALL SKILL LEVELS)

January 31st, 2018 by Karen 13 Comments

low double side roll ponytail side closeup final

Sometimes I wear this low-key style as an alternative to the messy bun I’ve been rocking for, oh, the last 1,456 years. LOL! It’s uncomplicated and quick, and you can make it as purposefully messy or neat as you want (always good to have options!).

Oh, and you can do it in less than 10 minutes.

It’s also great for when you’re two (or, let’s be real, three) days into your blowout, and you want to skip washing your hair one more day but can’t bear the thought of wearing it down.

Note: You can still do this style if your hair is shorter than mine, too. Just do one low roll and skip the second.

low double side roll ponytail back final

low double side roll ponytail side 2

low double side roll ponytail front

low double side roll ponytail steps

Tools:

2 Ponytail holders that match your hair color
Bobby pins that match your hair color
A texturizing spray (optional)
Hairspray

Steps:

1a. Optional first step: spray texturizing spray from mid-shaft to ends for texture and volume.
1b. Begin by gathering your hair into a loose, low side ponytail, and secure with an elastic band.
2. Part hair above the hair-tie.
3. Pull pony up, over and through the part to form a low roll.
4. Ease out a few strands to add volume and texture to the roll.
5. Wrap a section of hair around the hair tie, and secure with bobby pins.
6. Next, wrap another elastic band about three inches down from the first low roll.
7. Repeat steps 3 through 6 to form a second low roll.
8. Finish by spraying lightly with hairspray. 🙂

Your friendly neighborhood beauty addict,

Karen

There are 13 comments on this post. Leave yours.

Categories: Hair, Makeup Tips/How To

  • « Go to Previous Page
  • Go to page 1
  • Interim pages omitted …
  • Go to page 14
  • Go to page 15
  • Go to page 16
  • Go to page 17
  • Go to page 18
  • Interim pages omitted …
  • Go to page 93
  • Go to Next Page »

Primary Sidebar

Welcome to Makeup and Beauty Blog

Welcome to Makeup and Beauty Blog! My name is Karen, and I’m a freelance writer obsessed with makeup.

Makeup and Beauty Blog features daily product reviews, makeup tips and beauty news — like an interactive version of a monthly print magazine, except with occasional pictures of my cat.

Recent Posts

Sundays With Tabs the Cat, Makeup and Beauty Blog Mascot, Vol. 878

Makeup and Beauty Blog Monday Poll, Vol. 894

Makeup and Beauty Blog Monday Poll, Vol. 893

Makeup and Beauty Blog Monday Poll, Vol. 892

Makeup and Beauty Blog Monday Poll, Vol. 891

/* real people should not fill this in and expect good things – do not remove this or risk form bot signups */

Social

  • Facebook
  • Instagram
  • Pinterest
  • Twitter
  • YouTube

Featured Posts

Sundays With Tabs the Cat, Makeup and Beauty Blog Mascot, Vol. 771

Lady Unicorn

Weird Things I Like to Do

brows fill out beforehand

Before You Pluck or Wax Your Brows, You Must Do This

current bare skin status

What’s One Thing That Drastically Changed Your Skin for the Better?

Copyright © 2025 Makeup and Beauty Blog. Get in touch.