• Skip to main content
  • Skip to primary sidebar

Makeup and Beauty Blog | Makeup Reviews, Swatches and How-To MakeupMakeup and Beauty Blog | Makeup Reviews, Swatches and How-To Makeup

A beauty blog blooming with fresh makeup reviews, swatches and beauty tips from your friendly neighborhood beauty addict

  • Home
  • About
    • About
    • Contact
    • FAQ (Frequently Asked Questions)
    • Advertising & Media
  • Categories
    • Product Reviews
    • Makeup
    • Skincare & Fragrance
    • Style & Fashion
    • Hair
    • Nails
    • Tips & Tutorials
    • Just for Fun
  • Brands
  • Store

Top Posts

Sundays With Tabs the Cat, Makeup and Beauty Blog Mascot, Vol. 771

July 30th, 2023 by Karen 4 Comments

So, while those of us of the bipedal, humanoid variety were in the islands last week, Rosie kept herself busy here at the home office, of course. Not only did she keep the business running smoothly, she also found time to invent a DIY irrigation system to keep our potted plants properly hydrated.

Sure, she could have used the watering hose, but that would have been too easy! 🙂

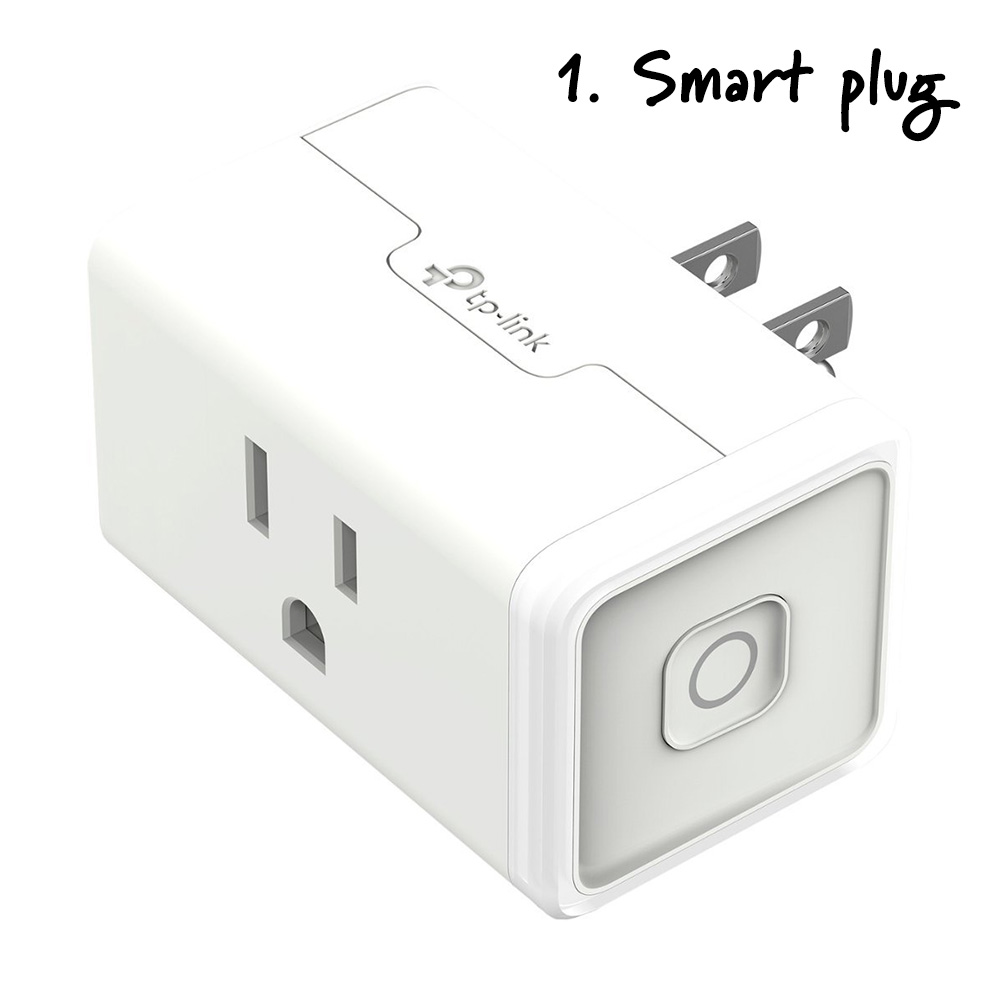
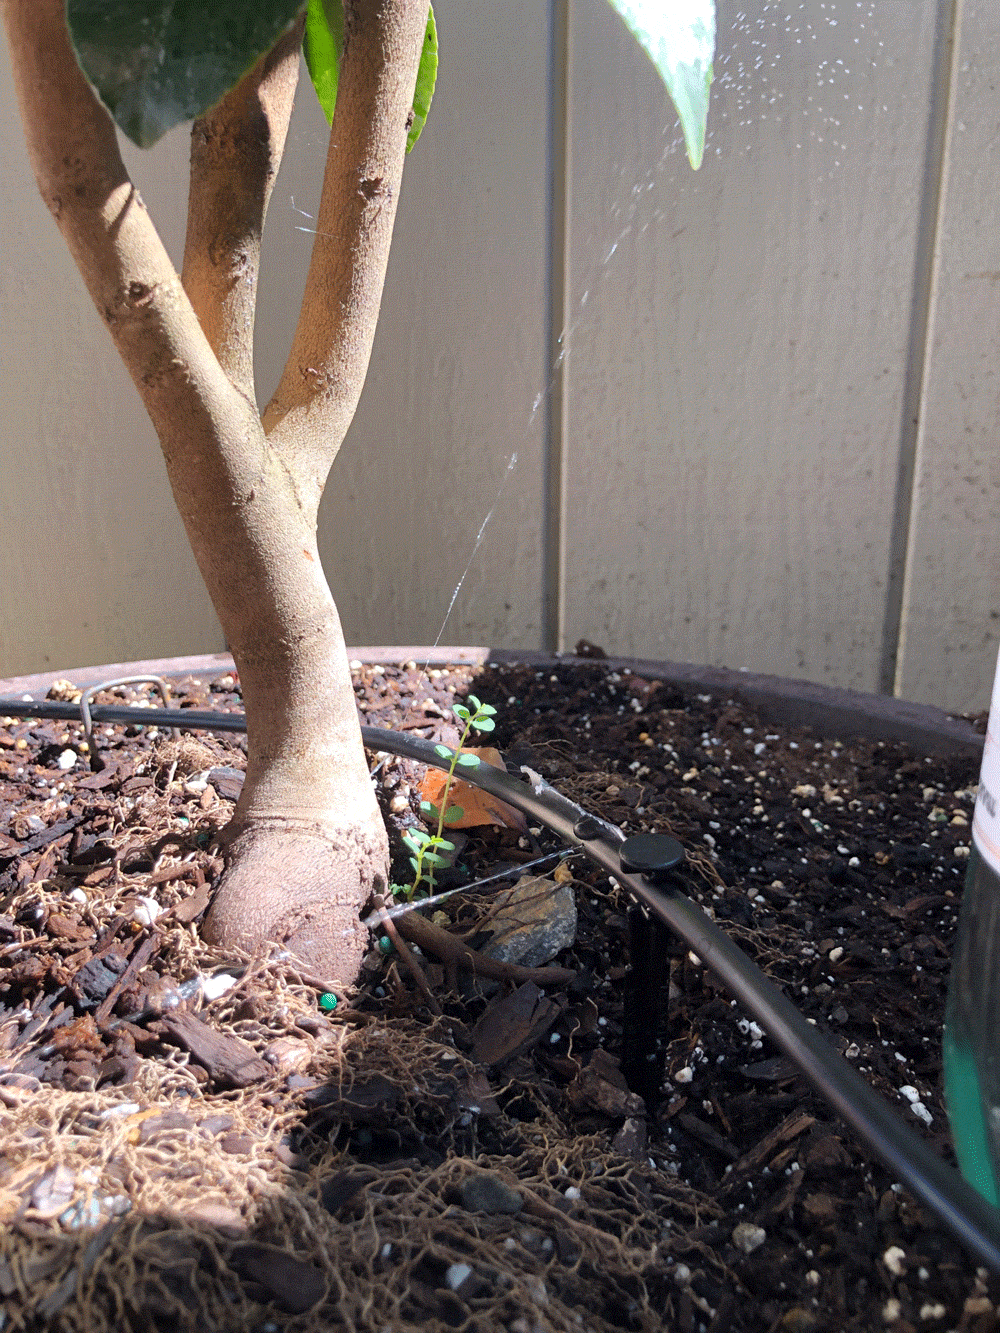
Here’s the gist of it: Everything’s available from Amazon, and the components are pretty affordable. Everything here can be purchased for about $75 dollars and be reused for many years. It combines a mini submersible water pump like the kind used to circulate water in a small aquarium, with a simple WiFi smart plug. You place the small pump into a bucket or other container of water, run some irrigation tubing from it to each of your potted plants, poke some holes into the tubing where you want the water to spritz your plants, and control everything from your phone with a smart plug app! You can even set an automatic schedule. Like, Rosie set hers to run for 30 minutes every morning.

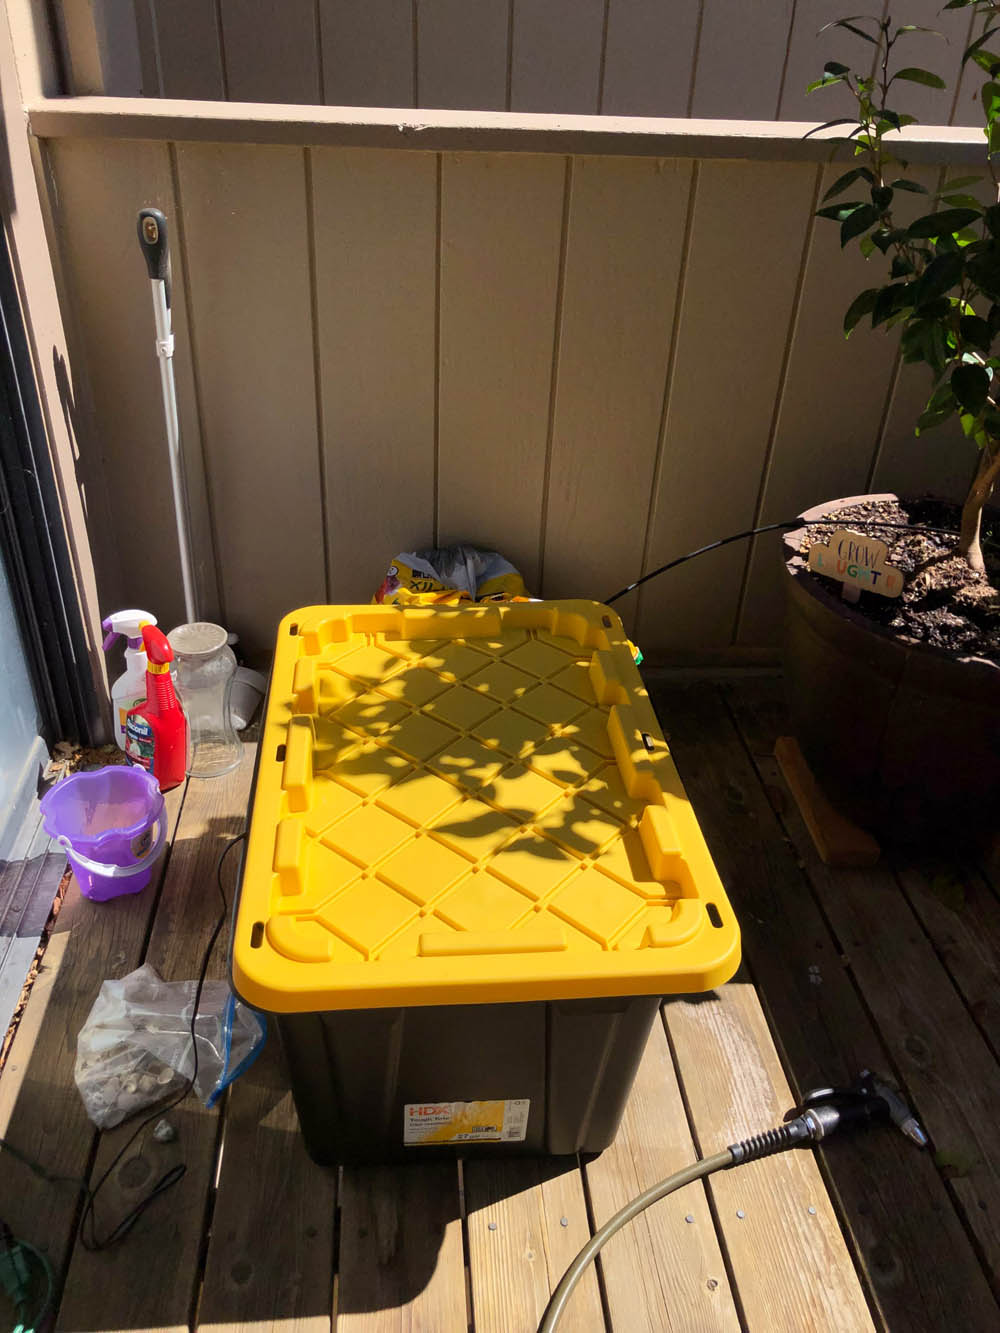
A large tote like the one Rosie used here holds more than enough water to keep a handful of large potted plants happily hydrated for two to three weeks. When we got back from Hawaii, our tomatoes were going off! The bushes were bursting with bright red deliciousness. 🍅 Thank you, Rosie! 🙂

Note: The wine bottle watering spikes in these pics were from a previous effort to automatically water our plants. Rosie wasn’t too thrilled about how well they worked. They did alright for a couple days, but then they were empty, which is why she developed her WiFi water pump method, which could last a whole lot longer.

Here’s what you need:

  1. Kasa Smart Plug
  2. Submersible Pump
  3. In-Line Dripper/Emitter
  4. Raindrip 1/4 in. Supply Tubing, 50 ft.

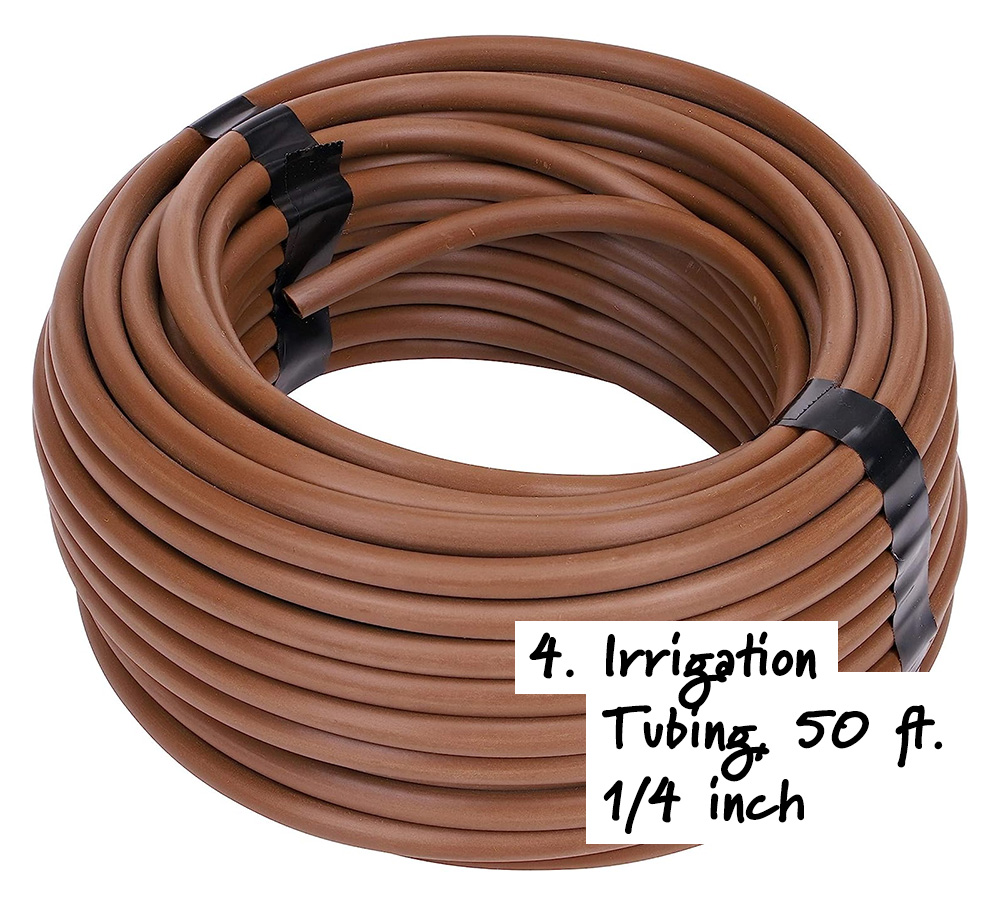
The pump Rosie recommends has an automatic shutoff in case the tote or bucket it sits in runs out of water. She said the whole thing is really easy to set up, but give yourself a couple hours to cut the tubing, which you can easily do with a pair of household scissors, and poke the little holes into the tubing with a sewing needle. You can use little pieces of duct tape to cover up any holes in the tubing you decide you don’t want to use.

The Kasa smart plug Rosie used isn’t outdoor rated, so this one works best if it isn’t exposed to rain. Kasa does make a fully outdoor smart plug if you need one.

It’s a good idea to cover the water container you use, especially if it’s going to be left outside, because of, you know, MOSQUITOS. No one wants to come home to a billion hungry bugs.

Small plastic stakes are available that you can use to keep the tubing off the ground, but they really aren’t necessary. You can use a rock or something else to position the tubing and keep it where you want it.

You may, and probably will, also need an extension cord, because the submersible pump only has about a 4 ft. long power cable. Here’s a pretty good one.

At the very end of your tubing, you may want to crimp or fold the last inch or two of tubing and hold it crimped with a rubber band. If you don’t do that, that last plant in the line will probably get a lot more water than everything else — probably a lot more water than it needs. Crimping the end will increase the water pressure and the flow rate to the needle holes you make elsewhere in the tube.

Happy watering! 🙂

Your friendly neighborhood beauty addict,

Karen

There are 4 comments on this post. Leave yours.

Categories: Just For Fun, Rosie, Tabs, Top Posts

Lady Unicorn

May 31st, 2019 by Karen 27 Comments


GIRL. I haven’t worn big lashes in how long? But it’s just like riding a bike!

I’m also wearing a lot of glitter in this lady unicorn look, I know.

I was inspired by unicorns because my daughter is obsessed with them at the moment, and, let’s face it, so am I.

Oh, and body glitter. I’m wearing it too because WHY NOT? FYI, body glitter has come a loooooong way since I wore it back in the day. This one from Urban Decay comes in a tube, and you kinda just put it anywhere — on your face, in your hair, on your arms, on your neck, your legs.

And, seriously, it does not come off! My goodness, I remember the old stuff lasting about 2.5 seconds in my clubbing days, so props to the sparkly scientists who finally discovered a way to get glitter to stick to yo’ body.

  • Eyes: Urban Decay After Dark Palette, Urban Decay 24/7 Pencils (Roxy, Electric Empire), MAC 75 Lashes, MAC Graphblack liner, MAC Princess Jasmine Palette (from the Aladdin collection), Urban Decay Glitter Liner in Disco
  • Face: MAC Studio Fix in NC42 mixed with Pinklite Strobe Cream, NARS Summer Lights palette (bronzer and highlighter), Urban decay Heavy Metal Glitter Gel in Saturday Stardust
  • Lips: MAC Honey Love Lipstick, Hourglass Prose Lip Gloss


[Continue reading…]

There are 27 comments on this post. Leave yours.

Categories: Eyes, Face of the Day (FOTD), Lips, MAC Makeup, Makeup, Top Posts, Urban Decay

Weird Things I Like to Do

September 7th, 2018 by Karen 21 Comments

I mean…there are so just many things, and most of them are silly like…

1. Using two mugs to drink coffee

When the automatic warmer in my coffee maker shuts off and the coffee isn’t as hot as I’d like it to be, I grab two mugs — one mug that I use in the microwave to warm up the coffee, and a second “fancy mug,” which I pour the hot coffee into and drink from.

Now, I could save a step and just drink directly from the first mug…but it’s too hot to hold when it comes out of the microwave, LOL!

2. Pretending I’m the cat paw-parazzi

Why do I derive so much joy out of taking covert pictures of Tabs?? I like to hide behind the couch or peek around corners to catch him in the act of…doing something. These days, it’s usually just him napping (because he’s old), but it’s still weirdly fun.

3. Posting weirdo face pics that have absolutely no context

Me: Stop posting weird pictures of yourself on the Interwebz without any context!

Also me:

[Continue reading…]

There are 21 comments on this post. Leave yours.

Categories: Just For Fun, Top Posts

Before You Pluck or Wax Your Brows, You Must Do This

September 4th, 2018 by Karen 20 Comments

brows fill out beforehand
Oh, hai, brows!

Before you pluck or wax your brows, fill them out first so you can clearly see the shape you’re going for. Then, just remove the hairs that *aren’t* in that shape.

Makes total sense, right? — yet peeps (myself included) repeatedly fall into the trap of tweezing willy-nilly without keeping in mind the final brow look.

Whenever I do it (tweeze without planning ahead), I miscalculate my brow arch and end up over-plucking the wrong place.

DOH!

Apparently, this has been a lesson I’ve needed to relearn over and over again…

Brow fillers that won’t let you down

Here are my faves at the moment!

  • MAC Eye Brows Styler — This easy-to-use tool has a super thin tip that makes it easy to draw in those tiny brow hairs, and the formula lasts a long time.
  • Hourglass Arch Brow Volumizing Fiber Gel — THE BEST for speed. It’s great for quickly filling in and fluffing up your brows. And did I mention it’s super fast!? You gotta get a tinted one, though, because the clear one is pretty much useless.
  • Tom Ford Brow Sculptor — Pricey, but the best of the best IMO.
  • MAC Brow Sculpt — This is MAC’s version of the Tom Ford Brow Sculptor, and I think it’s pretty good (although no match for Tom’s).

So, yeah, next time you notice things looking kinda jungly up there, grab your brow pencil, brow powder, gel or whatever you’re using at the moment, “fill out” and “fluff up” those fuzzy little caterpillars, and then go to town with your removal method o’ choice!

Your friendly neighborhood beauty addict,

Karen

P.S. Happy Tuesday! ?

There are 20 comments on this post. Leave yours.

Categories: Makeup, Makeup Tips/How To, Top Posts

What’s One Thing That Drastically Changed Your Skin for the Better?

May 11th, 2018 by Karen 33 Comments

current bare skin status
Wearing: nothing

Was it a new laundry detergent? Cutting out chocolate from your diet? Drinking more water? Wearing less makeup? Trimming your bangs? Going to bed earlier? Finding a new product? A procedure? A new dermatologist whose knowledge parted the clouds and let the sun shine through?

There are a few things that really helped me, but one immediately springs to mind: Kate Somerville Anti-Bac Clearing Lotion, which I’ve been using and loving for years. Finding it straight-up drastically changed my skin for the better. Without it, I will break out, no question.

For a little bac story (get it? haha, bad pun), I started struggling with acne at around 11 or 12 and dealt with it off and on (mostly on) for most of my life.

For years, I (thought I) tried everything — every OTC paste, pad and cream; antibiotics (which many dermatologists prescribed for acne back in the day), facials — seriously, everything. Then in college I ended up doing a round of prescription Accutane.

I don’t remember the potency, but I remember my skin (even my lips) being painfully dry while I was using it, and every pimple going crazy and coming to a head at once. It was very uncomfortable, but it worked. My skin stayed clear for several years afterward, but then in my 30s I started getting hormonal breakouts along my chin and around my mouth, and that was rough.

Again, I tried everything I could get my hands on — every new ingredient and product I could find. Good old salicylic acid products helped a little, like Clinique’s Mild Clarifying Lotion, but they didn’t clear up my skin completely.

[Continue reading…]

There are 33 comments on this post. Leave yours.

Categories: Just For Fun, Skin Care, Top Posts

A Glamorously Grungy Makeup Tutorial: Smoky Reddish Brown Eyes and Vampy Matte Lips

February 7th, 2018 by Karen 24 Comments

reddish brown smoky eye tutorial top pic 1

I’m warning you now — ONLY wear this makeup when you want to feel like a total bad-@ss capable of capturing, and then breaking, all of the hearts in a room within the span of 5 minutes.

This beauty buddy movie pairs two bold focal points together — a messy reddish brown smoky eye and a crisp blackened red matte lip — to create a jammin’ juxtaposition of grungy and glam, and you know I’m all about the contrasts in makeup.

To keep the overall look approachable and well out of Insta-glam territory, I paired the eyes and lips with moderately matte skin (there’s a semblance of a sheen), casual, messy brows and a warm bronzed mauve cheek.

red brown smoky eye tutorial top pic 2

red brown smoky eye tutorial top pic 3

Are you ready to rock?

What you’ll need

FACE PRODUCTS

  • Face Primer with pearly sheen (BECCCA Backlight)
  • Medium coverage liquid matte foundation (NARS Natural Longwear Radient Foundation in Stromboli and Valencia)
  • Concealer for your under eye area, if you want (MAC Matchmaster Concealer in 4)
  • Face Powder (MAC Mineralize Skinfinish Natural in Golden Tan)
  • Warm pinkish mauve powder blush (MAC Extra Dimension in Faux Sure!)
  • Peachy tan bronzer (MAC Mineralize Skinfinish Natural in Give Me Sun)
  • Matte blackened red lipstick (MAC Retro Matte Liquid Lipstick in Carnivorous)
  • Reddish brown lip liner (MAC Mahogany)

EYE MAKEUP

  • Brow gel, either clear or a color that matches your brows (Hourglass Arch Brow Volumizing Gel in Warm Brown)
  • Two powder eyeshadows: a warm reddish brown powder eyeshadow (MAC Swiss Chocolate) and a glittery bronzy peach (MAC Honey Lust)
  • A warm reddish brown eyeliner, ideally something creamy which you can buff out and blend (MAC Costa Riche)
  • Mascara (Benefit BAD Gal Bang!)

TOOLS

  • Smudge brush (MAC 219S)
  • Fluffy angled eyeshadow brush (MAC 275S)
  • Blush brush (MAC 127S)
  • Flat eyeshadow brush (or, you can just use a finger)
  • Something to blend your foundation (BeautyBlender)

red brown smoky eye tutorial products

[Continue reading…]

There are 24 comments on this post. Leave yours.

Categories: Becca, Benefit, Eyes, Hourglass, Lips, MAC Makeup, Makeup, Makeup Tips/How To, NARS, Top Posts

A Rainy Day Minimalist Makeup Tutorial: Cheerful Pink Cheeks, Rosy Lips and Doe Eyes

January 25th, 2018 by Karen 18 Comments

rainy day makeup tutorial
Y tho?!

For the record, it’s hard to look cute in a raincoat. (In case you were wondering.)

It’s rainy and gloomy here in NorCal today, but I’m not complaining, because the rain makes me feel alive! The world around me is thirsty, and it’s taking a much-needed shower and a big gulp of refreshing H2O. And when it’s done, the oak trees and the grass on the hill and the sidewalks and my car (haha) are all going to look fresh and new. 🙂

Or…maybe that’s just California Karen romanticizing the rain, since we haven’t had much of it this winter. I’m sure that if I lived someplace where it’s been pouring 24/7, I’d be like FRICKIN’ RAIN RUINING EVERY MINUTE AND EVERY SECOND OF MAH LIFE!!!

Weather like this calls for a dose of cheerful pink cheeks and bright rosy lips (it couldn’t hurt). Thanks to an illuminating primer, the skin is ever-so-dewy, and the dark blue liner plays off the pink. It’s strategically placed on the middle of the lower lash line for a doe-eyed effect, so you can give strangers a come-hither stare while you sashay by them in your raincoat.

Side note: #teamraincoat ALL THE WAY. Raincoats are the way to go (even if they are hard to look cute in), because they let you keep your hands free, and if there’s a kitten huddling in an rainy alley and you need to save her, you can carry her and comfort her with both hands.

See? Always looking ahead. ?????

When it’s raining, I like to keep my makeup on the minimal side, because you never know if you and your raincoat will get caught in a downpour, and I figure that if my face gets drenched in the rain, better for it to happen while I’m wearing minimal makeup than a full face of war paint… You know, less to clean up when I get wherever I need to go. *shrugs shoulders*

Here’s a breakdown of this look…

rainy day makeup tutorial 2

rainy day makeup tutorial 1

TOOLS (products I used are in italic):

  • Whatever you like to blend your foundation and cream with — a blending brush, BeautyBlender or your fingers
  • Q-tips
  • A brow gel (I used Hourglass Arch Brow Gel in Warm Brunette)
  • A waterproof Mascara (L’Oreal Voluminous Lash Paradise Waterproof)
  • A long-wearing dark blue pencil liner (Urban Decay 24/7 Glide-On Eye Pencil in Sabbath)
  • An under-eye concealer (I used MAC Studio Waterweight Concealer in a mix of NC20 and NW45)
  • A liquid foundation (Physicians Formula The Healthy Foundation in DW2)
  • An illuminating liquid primer (I like Physicians Formula Spotlight Illuminating Primer)
  • A creamy pink blush (Kosas Cosmetics Creme Blush in 8th Muse)
  • A matte rosy pink liquid lipstick (Physicians Formula The Healthy Lip Velvet Finish in Dose of Rose) — I chose a liquid matte lipstick because I didn’t want to wear anything that would stick to my hair

[Continue reading…]

There are 18 comments on this post. Leave yours.

Categories: Hourglass, Kosas Cosmetics, Loreal, Makeup, Makeup Tips/How To, Physicians Formula, Top Posts, Urban Decay

10-Minute Work or Weekend Makeup With Red Blush, Red Lipstick and Smudgy Bronze-Black Cat Eyeliner

January 13th, 2018 by Karen 24 Comments

10 minute makeup
Today’s 10-minute makeup

A few things:

  1. It’s Saturday morning, and I’m wearing the same pajamas I put on Thursday night.
  2. My head feels like it’s being squished in a vice (yes, I’m still a walking germ factory).
  3. I haven’t washed my hair in three (four?) days.

But thanks to the healing power of makeup, I can pretend I briefly look like I’m a somewhat functioning adult, LOL!

This 10-minute makeup look was 1) to help myself feel better, and 2) for Sheena (yay for the Bay, girl, woo-hoo!), who liked the NUDESTIX Intense Lip + Cheek Pencil in Purity post earlier this week but wanted to see me use a darker color from the line.

This time I used warm red Stiletto, and I used it as both a blush and a sheer lip color. And then I also did a smudgy, bronze-y black cat eye.

Everything I used is listed below, and if you have any questions, you know where to find me (hints: it involves Netflix, a laptop and my couch).

nudestix stiletto
When you’re trying to not look like you’re a walking germ factory…
nudestix stiletto
Oh, this? I always look like this when I have a 101-degree fever…

One note about the skin. I used a very sheer liquid skin tint to even everything out just a touch, then boosted the coverage on my cheeks with a loose foundation. This is a very cool shortcut I like to do when I’m pressed for time/have very little patience.

Also, because I went into this look planning to only spend 10 minutes on it, and because the pencil was an opaque bright red, I opted for the sheer lip stain because I figured I’d be able to fudge the edge of the lip line (which I did).

[Continue reading…]

There are 24 comments on this post. Leave yours.

Categories: Hourglass, MAC Makeup, Makeup, Makeup Tips/How To, NARS, Neutrogena, NUDESTIX, Sweat Cosmetics, Tom Ford Beauty, Top Posts

  • Go to page 1
  • Go to page 2
  • Go to page 3
  • Interim pages omitted …
  • Go to page 6
  • Go to Next Page »

Primary Sidebar

Welcome to Makeup and Beauty Blog

Welcome to Makeup and Beauty Blog! My name is Karen, and I’m a freelance writer obsessed with makeup.

Makeup and Beauty Blog features daily product reviews, makeup tips and beauty news — like an interactive version of a monthly print magazine, except with occasional pictures of my cat.

Recent Posts

Sundays With Tabs the Cat, Makeup and Beauty Blog Mascot, Vol. 878

Makeup and Beauty Blog Monday Poll, Vol. 894

Makeup and Beauty Blog Monday Poll, Vol. 893

Makeup and Beauty Blog Monday Poll, Vol. 892

Makeup and Beauty Blog Monday Poll, Vol. 891

/* real people should not fill this in and expect good things – do not remove this or risk form bot signups */

Social

  • Facebook
  • Instagram
  • Pinterest
  • Twitter
  • YouTube

Featured Posts

Sundays With Tabs the Cat, Makeup and Beauty Blog Mascot, Vol. 771

Lady Unicorn

Weird Things I Like to Do

brows fill out beforehand

Before You Pluck or Wax Your Brows, You Must Do This

current bare skin status

What’s One Thing That Drastically Changed Your Skin for the Better?

Copyright © 2025 Makeup and Beauty Blog. Get in touch.