• Skip to main content
  • Skip to primary sidebar

Makeup and Beauty Blog | Makeup Reviews, Swatches and How-To MakeupMakeup and Beauty Blog | Makeup Reviews, Swatches and How-To Makeup

A beauty blog blooming with fresh makeup reviews, swatches and beauty tips from your friendly neighborhood beauty addict

  • Home
  • About
    • About
    • Contact
    • FAQ (Frequently Asked Questions)
    • Advertising & Media
  • Categories
    • Product Reviews
    • Makeup
    • Skincare & Fragrance
    • Style & Fashion
    • Hair
    • Nails
    • Tips & Tutorials
    • Just for Fun
  • Brands
  • Store

Makeup Tips/How To

Help for Dry Winter Lips

January 28th, 2015 by Karen 18 Comments

Help for Dry Winter Lips

I saw a ChapStick ad this morning before a video on YouTube, and the girl in it said that our skin is thinnest on our lips.

I thought, yeah…maybe that’s why mine hurt so much every winter!

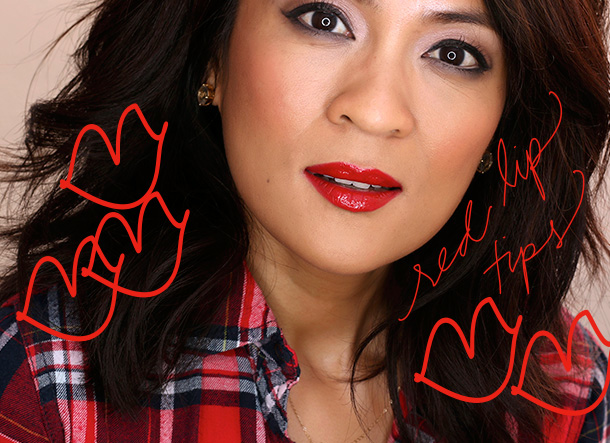
It’s always the same, too, every year. When winter rolls around, so much ouch. My lips get cracked and dry, and it hurts.

It gets worse for a few weeks after we visit my in-laws in Redding, which is a town near the Oregon border.

Weirdly, Oregon gets a ton of rain, but Redding, even though it’s close, does not. I swear, the air there gets drier than the inside of a hot oven.

But time has taught me a few things that help my perpetually parched pout. I hope they help yours too. 🙂

1. Scrub-a-dub-dub

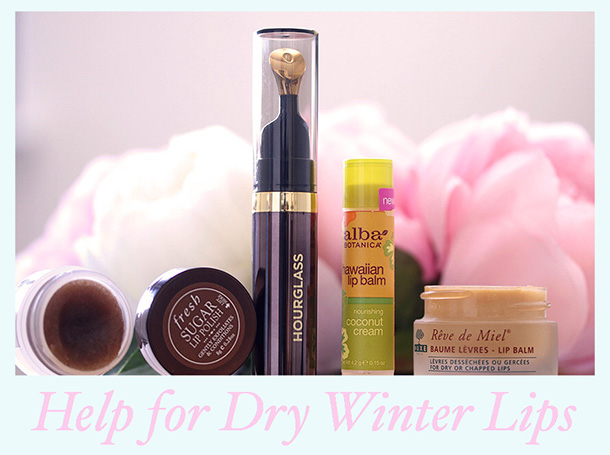
Exfoliate. It’s easier when my lips are soft and damp, like right after I get out of the shower.

Every once in a while I’ll mix a spoonful of sugar with a little honey or olive oil, and gently scrub (more like rub) that on my lips with an old toothbrush after I shower.

The Nimbus Microfine Regulars are awesome for this, by the way. Softest toothbrushes I’ve ever used.

They’re kind of hard to track down in stores… I’m not sure why, but here’s a five-pack on Amazon for $14. Highly recommended.

Brush your teeth (and your lips), kids! (And don’t forget to floss.)

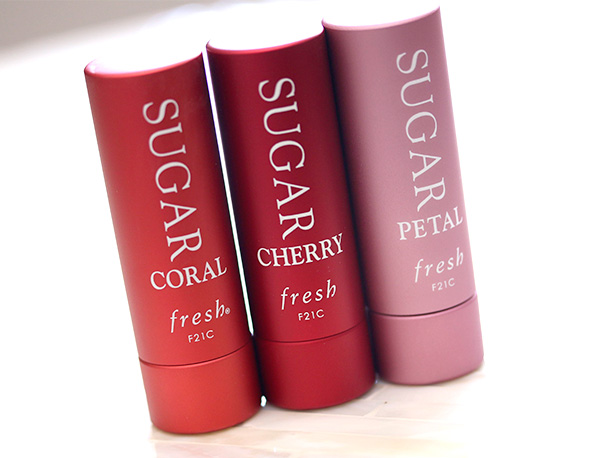
If DIY doesn’t sound good, then you can use a regular lip exfoliator instead. Fresh Sugar Lip Polish ($22.50) is an excellent choice, as is Lush Mint Julips Lip Scrub.

2. A balm before bed

And keep it right on your nightstand, where it’ll be easy to remember (and reach).

I apply a thick layer of balm after I kiss El Hub and Tabs goodnight. It’s become part of my regular bedtime routine — 1) kiss El Hub, 2) kiss Tabs, 3) insert mouth guard, and 4) smear a thick layer of lip balm on my lips. Zzzz…

Nuxe Reve De Miel Ultra-Nourishing Lip Balm ($19) is the one on my nightstand now. It’s almost as thick as a paste and tastes and smells like honey.

The big glass jar isn’t super convenient to carry around during the day, but it’s purrfect for bedtime at night.

3. Guzzle water

For real though! Drink a sh*t-ton throughout the day. I notice a HUGE difference when I fall out of the habit of drinking enough water, and it’s not just that my lips get drier. My skin gets worse and less, I dunno…plump?

The difference is crystal clear, especially in winter. When I don’t drink enough water, my lips get tow up.
[Continue reading…]

There are 18 comments on this post. Leave yours.

Categories: Beauty Tips, Lips, Makeup Tips/How To

How to Build Your Courage for Crimson Lips

January 23rd, 2015 by Karen 25 Comments

5 tips to build your courage for crimson lips
Don’t be scurred!

Dude! Valentine’s Day? I know it’s hella commercial and cheesy, but I don’t even care. Chocolate, love and baby cherubs? You can’t go wrong with that. Plus, crimson lips? If there’s a day to go crazy with crimson, it’s gotta be V-Day.

But what if you’re scared to wear really red lips? What if you like the idea of going full-tilt Gwen Stefani, but you’re too terrified to try?

These five baby steps will build your courage for crimson lips. Remember, Drake was on Degrassi Jr. High once upon a time. Everybody’s gotta start somewhere.

1. Keep calm, and start with a red lip tint or balm

Fresh Sugar Lip Treatment in Cherry
Wearing Fresh Sugar Lip Tint in Cherry ($22.50)

Before going all the way with opaque red lips, you can take a baby step with a tint.

Red balms and tints are like crimson kitten heels, and years from now, when you’re strutting around town in the red lipstick version of 5-inch stilettos, you’ll think back to your starter balms…

When you wear a red balm or a tint, you’ll get a sense of what it’s like to wear red on your lips without the full-on shock of something opaque like MAC Ruby Woo.

Fresh Sugar Lip Treatments
Ease your way into red with something like Fresh Sugar Lip in Cherry (pictured in the center)

And that shock at seeing yourself in red lipstick for the first time is a legitimate thing. The first time I wore red (I think it was in high school, which would place it in the early Cretaceous Period), I didn’t recognize the person staring back at me in the mirror. A red lip balm reduces that risk.

Some tints/balms to try…

Fresh makes a great one called Sugar Lip Tint in Cherry ($22.50). Burt’s Bees Tinted Lip Balm in Red Dahlia is also gorgeous (and affordable at $6.99).

2. Shine with a sheer red gloss

NYX Butter Gloss Cherry Pie
Wearing NYX Cherry Pie

If you’re more of a gloss girl, you could skip the balm, and go for a sheer red gloss instead. It’s the same idea of easing your way into red with a baby step.

Look for a sheer red gloss that lets most of your natural lip color through. That way you won’t have to worry about the gloss migrating outside your natural lip line.

Check out Buxom Full-On Lip Polish in Taylor ($19) or NYX Butter Gloss in Cherry Pie ($4.99).

3. Text a friend

Think of her as your makeup training buddy. Here’s the scenario: you’re visiting a makeup counter and trying to choose your sheer red gloss, but you can’t decide. Do you go with a sheer blue-based gloss or a warm-toned yellowish red? Sparkles or no sparkles?

Gah! These decisions are tough. 🙂

If all of the reds start to look the same, swatch the top contenders on your arm or the back of your hand, then take a quick pic with your phone.

Text it to a friend who (hopefully) knows a little bit about makeup, and ask her which shade she likes best for you, because it never hurts to have a second opinion.
[Continue reading…]

There are 25 comments on this post. Leave yours.

Categories: Makeup Tips/How To

The Accent Nail Files: Find Common Ground to Create Unexpected Pairings Like Purple and Burgundy

January 20th, 2015 by Karen 24 Comments

Smith & Cult Check the Rhyme paired with Lo-Fi
Smith & Cult Check the Rhyme nail polish teamed up with Lo-Fi lacquer

ME: “Oh, Magic 8 ball, will my attempt at nail art today turn out to be epically flawless and fabulous and absolutely everything I’ve ever dreamed nail art could be?”

MAGIC 8 BALL: “All signs point to hell naaaaw!”

That particular accent nail combo up top was the result of an epic nail art fail last Sunday.

I’d started out trying to do something involving negative space and jerry-rigged Band-Aid cutouts and… Anyway, it didn’t work out, but it led me to the purple and burgundy combo here, ’cause you know I’m all about that accent nail life. 🙂

After the Band-Aid cutout disaster (long, sad story), I started thinking about creamy purple nails and got this picture in my head of a hand with bright violet nails wrapped around a glass of red wine.

So I dug through my stash and pulled out this vibrant violet shade by Smith & Cult called Check the Rhyme, which I paired with a burgundy called Lo-Fi, also from Smith & Cult.

By the founders of Hard Candy, Smith & Cult is a new line with some really cool colors, packaging and names. They only came out a few months ago. Wear time is OK, like 4-5 days with a base and top coat, so not as sturdy as OPI, but good enough if you like to swap out your polish every few days. The bottles are kind of expensive though at $18 each, but I like a lot of their colors.

Smith & Cult Check the Rhyme paired with Lo-Fi
The purple: Check the Rhyme. The burgundy: Lo-Fi.

[Continue reading…]

There are 24 comments on this post. Leave yours.

Categories: Makeup Tips/How To, Nails, Smith & Cult

3 Steps to Fuller, Natural-Looking Brows

January 8th, 2015 by Karen 22 Comments

3 Steps To Full, Natural-Looking Brows
3 steps to full, natural-looking brows

Brows — my sweet, sweet joy and my sweet, sweet pain.

I’ve reluctantly come to grips with the painful reality that I will very likely never be one of those lucky gals/guys who wakes up in the morning with immaculately lush, gorgeous brows, and I’m OK with that.

Because that’s what makeup is for.

Although, truth be told, I’ll always be jealous of my BFF Jen for being one of those naturally big-browed babes…

Let me tell ya, it’s really annoying, LOL!

Back in the ’90s, when everyone was plucking their brows into oblivion, Jen was constantly bemoaning her beautiful brows, saying that they were too damn full and sooo difficult to tame. 🙂

Yeah, what I wouldn’t have given for that problem. I’m always having to fill in mine (freaking Raul!).

On the positive side, at least I’ll probably never run out of new techniques and brow products to try. There’s an endless supply and lots of room to play.

Last year I was really into filling them in with eyeshadow for a full, kinda in-your-face brow look, and sometimes, let me tell ya, those big brows entered a room before I did, haha!

These days I’m more chill about my brows… I still like them big and full, but a little less blocky and more textured, so that they look more natural and real, if that makes any sense. I want brows that look like they just naturally grew out of my head that way.

There are different ways to get a full, but natural brow look, but here’s mine. I use a brow pencil, brow gel, and follow these three simple steps.

First, you’ll need the following…

  • A brow pencil with a skinny tip. I like Brow Wiz by Anastasia Beverley Hills ($21). It has a twist-up pencil on one end and a brow comb on the other.
  • A brow comb (if your pencil doesn’t have one; see above)
  • A clear brow gel, and my favorite of the moment is unsurprisingly called Clear Brow Gel ($22), also by Anastasia. I like it because it dries to a matte finish and has a very strong hold, so those little brow hairs don’t move a muslce once it sets.

3 Steps To Full, Natural-Looking Brows

Step 1

Begin by filling in your brows with your brow pencil starting at the inner end using short strokes, light pressure, and moving in the same direction that your brow hairs grow, with the goal being to go with the natural flow.
[Continue reading…]

There are 22 comments on this post. Leave yours.

Categories: Makeup Tips/How To

Go Straight From Work to the Party With This 5-Minute Makeup Upgrade

December 30th, 2014 by Karen 15 Comments

arte Tartlette Palette and MAC Smolder on my eyes, Le Metier Cheeky Chic Kaleidoscope on my cheeks, and MAC Ultimate Lipstick in Femme de Luxe and NARS Easy Lover Gloss on my lips

One of my New Year’s resolutions? Go to more parties.

But the free food and drinks and great excuse to wear heels are not the primary drivers here (although, not gonna lie, they’re all super fun reasons)… My main reasons are “research.”

No, seriously. Parties are perfect places to talk to people about makeup!

Case in point: at my BFF Cindy’s birthday lunch a couple weeks ago (aka Carb Fest 2014!), I sat next to a gal named Stacy. When I introduced myself, the first thing she said was, “Oh! You’re Cindy’s makeup blogger friend!” which, of course, opened the floodgates. 🙂

We covered so many bases! We talked about under-eye concealer (run to the closest NARS counter, and pick up Pure Radiant, ASAP), highlighting, and traded makeup ideas for parties.

Stacy wanted ideas for fast ways to crank up her makeup after work, but she said she didn’t have the best blending skills.

I suggested three things — a black pencil liner, a bright lipstick, and five minutes.

First, the before…

The before/work look

the Tarte Tartlette Palette on my eyes, Le Metier Cheeky Chic Kaleidoscope on my cheeks and Tarte Ethereal Pink Lipstick
Here’s the before look. I’m wearing the Tarte Tartlette Palette on my eyes, Le Metier Cheeky Chic Kaleidoscope on my cheeks and Tarte Ethereal Pink Lipstick on my lips.

This would be a typical standard-issue work makeup look for me with neutral eyes, cheeks and lips.

Step 1: Reducing shine, and applying black liner

Tarte Tartlette Palette and MAC Smolder on my eyes, Le Metier Cheeky Chic Kaleidoscope on my cheeks and Tarte Ethereal Pink Lipstick
MAC Eye Kohl in Smolder

First, blot or reapply powder on any shiny spots, and then line your upper and lower water and lash lines with a creamy black pencil eyeliner. Next, soften the lash lines with a pencil brush, then create a smokey haze around them.

Now, to intensify the look, apply a new coat of mascara to your upper and lower lashes.

Stop here if you just want to end with a smokey eyes/nude lips combo.
[Continue reading…]

There are 15 comments on this post. Leave yours.

Categories: Makeup Tips/How To

Look Book: Save Time With Big Lashes and Bold Lips

December 23rd, 2014 by Karen 19 Comments

Too Faced Melted Liquified Long Wear Lipstick in Melted StrawberryToo Faced Melted Liquified Long Wear Lipstick in Melted Strawberry
When you’re trying to look cute but your hair is crazytown

Big lashes + bold lips = a purr-fect pairing! The combo is one of the fastest ways to get a dramatic makeup look without using a ton of different products.

There are times when “I’ll be done with my makeup in 20 minutes” really has to mean 20 minutes…and not 45, and in order to prevent El Hub from yelling things like, “You said you’d be done in 20 minutes an hour ago!” I’ll pop on the biggest, fluffiest, most dramatic pair of false lashes I can find (I keep a few pairs around because you just never know) and a bold lip color — usually a fiery red, hot pink or colorful coral (basically, if it’s a color that could stop traffic, it’s a contender).

I love doing this look because it’s so much quicker than looks with intense and complicated blending on the lids or dramatic winged liner, and I can play up both my lips and eyes with minimal effort.

Katy Perry Color Pop Lashes and Too Face Melted Liquified Lipstick in Strawberry
Katy Perry Color Pop Lashes ($10) and Too Face Melted Liquified Lipstick in Strawberry ($21)

Melted Liquified Lipstick in Melted Strawberry is one of several new Melted Lipstick shades available now at Too Faced counters and online for $21 each. Melted Strawberry’s a smooth, lightweight full-coverage creamy red. When I use it, I prep my lips first with a lip balm because these lipsticks can be kind of drying, and then I apply it with a lip brush to get a nice crisp edge.

[Continue reading…]

There are 19 comments on this post. Leave yours.

Categories: Face of the Day (FOTD), Lips, Makeup, Makeup Tips/How To, Too Faced

A Quick Makeup Tip: For Fiery Red Lips, Set Boundaries

December 17th, 2014 by Karen 30 Comments

Makeup Tips for Red Lips

Red lips, like fire, are hard to contain. They’re also hard to resist. Every gal I’ve ever known has wanted to wear red lips at one time or another. Even my staunchly anti-makeup BFF Cindy, who will get in her car and drive 50 miles away from me if I approach her with a lip brush, craves crimson sometimes.

MAC Red Red Red Lipsticks

One trick to controlling the fiery power that is red is containing it within a boundary, like by lining the edges of your lips with lip liner. For a defined, distinct boundary around your red, use a liner shade slightly darker than the red lipstick you plan to apply, then fill your lips with the same liner, except for the middle of your top and bottom lips (to create subtle variations between the color in that middle area and the other parts of your lips for extra dimension).

Now, soften any harsh edges with a lip brush, while keeping that open area in the middle of your lips clear for the next step: your lipstick.
[Continue reading…]

There are 30 comments on this post. Leave yours.

Categories: Makeup Tips/How To

DIY Makeup Storage Hacks: 3 Ways to Repurpose Your Packaging

December 16th, 2014 by Karen 39 Comments

DIY Makeup Storage Hacks: 3 Ways to Repurpose Your Packaging

“I have way too much makeup!” said no woman, EVER.

If your figurative makeup storage cup currently runneth over, take a look at what you have around your apartment/house/condo/igloo/yacht. There’s a good chance you have at least one of the three items below, which you can repurpose for more makeup storage.

1. Shopping bag gets a haircut

DIY Makeup Storage Hacks

Trim the top section from a shopping bag (I like using MAC bags for this), and then you can stash makeup in the bottom part.

One other nice thing about this hack is that you can trim the bags down to whatever height you need. 🙂

DIY Makeup Storage Hacks
[Continue reading…]

There are 39 comments on this post. Leave yours.

Categories: Makeup Tips/How To

  • « Go to Previous Page
  • Go to page 1
  • Interim pages omitted …
  • Go to page 35
  • Go to page 36
  • Go to page 37
  • Go to page 38
  • Go to page 39
  • Interim pages omitted …
  • Go to page 93
  • Go to Next Page »

Primary Sidebar

Welcome to Makeup and Beauty Blog

Welcome to Makeup and Beauty Blog! My name is Karen, and I’m a freelance writer obsessed with makeup.

Makeup and Beauty Blog features daily product reviews, makeup tips and beauty news — like an interactive version of a monthly print magazine, except with occasional pictures of my cat.

Recent Posts

Sundays With Tabs the Cat, Makeup and Beauty Blog Mascot, Vol. 878

Makeup and Beauty Blog Monday Poll, Vol. 894

Makeup and Beauty Blog Monday Poll, Vol. 893

Makeup and Beauty Blog Monday Poll, Vol. 892

Makeup and Beauty Blog Monday Poll, Vol. 891

/* real people should not fill this in and expect good things – do not remove this or risk form bot signups */

Social

  • Facebook
  • Instagram
  • Pinterest
  • Twitter
  • YouTube

Featured Posts

Sundays With Tabs the Cat, Makeup and Beauty Blog Mascot, Vol. 771

Lady Unicorn

Weird Things I Like to Do

brows fill out beforehand

Before You Pluck or Wax Your Brows, You Must Do This

current bare skin status

What’s One Thing That Drastically Changed Your Skin for the Better?

Copyright © 2025 Makeup and Beauty Blog. Get in touch.