• Skip to main content
  • Skip to primary sidebar

Makeup and Beauty Blog | Makeup Reviews, Swatches and How-To MakeupMakeup and Beauty Blog | Makeup Reviews, Swatches and How-To Makeup

A beauty blog blooming with fresh makeup reviews, swatches and beauty tips from your friendly neighborhood beauty addict

  • Home
  • About
    • About
    • Contact
    • FAQ (Frequently Asked Questions)
    • Advertising & Media
  • Categories
    • Product Reviews
    • Makeup
    • Skincare & Fragrance
    • Style & Fashion
    • Hair
    • Nails
    • Tips & Tutorials
    • Just for Fun
  • Brands
  • Store

Makeup Tips/How To

Sunday Funday 5-Minute Makeup

July 14th, 2014 by Karen 16 Comments

5-minute makeup
Fresh-faced in 5

Most of the time I’m happy to blend out 6 different eyeshadows, but sometimes…I simply don’t want to.

Like on the weekends (hey, man, it’s summer!). The last thing I want to be doing on a sunny summer Sunday is spend 20 minutes making those little circles in the outer corners.

Bluh…

That’s time I could be hiking or walking my cat or eating an ice cream cone outside.

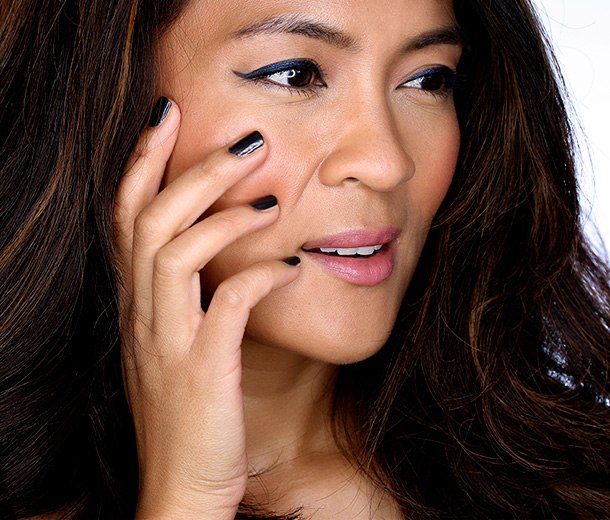
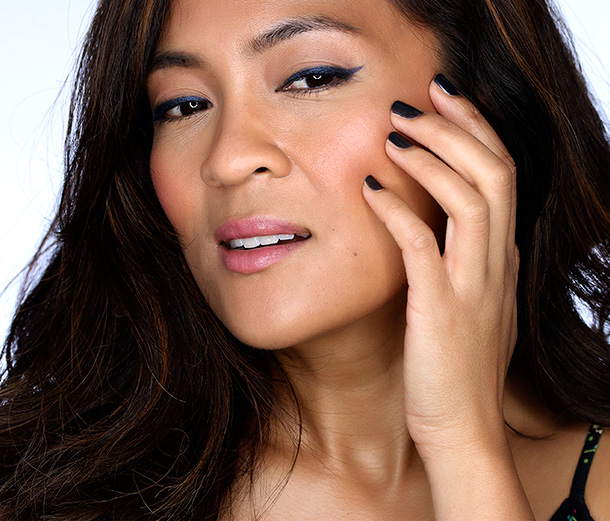
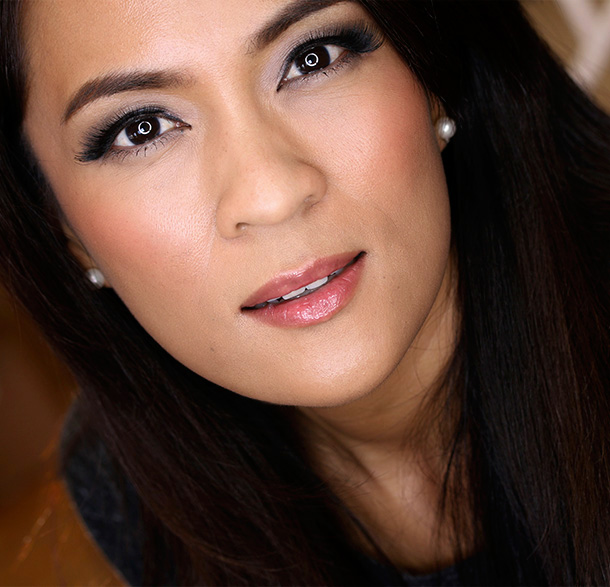
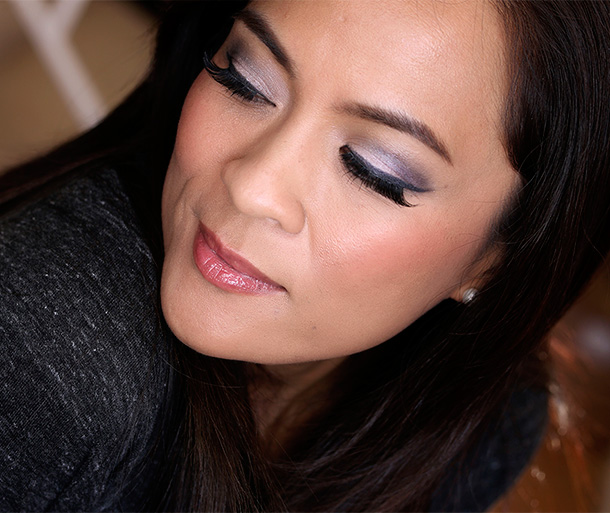
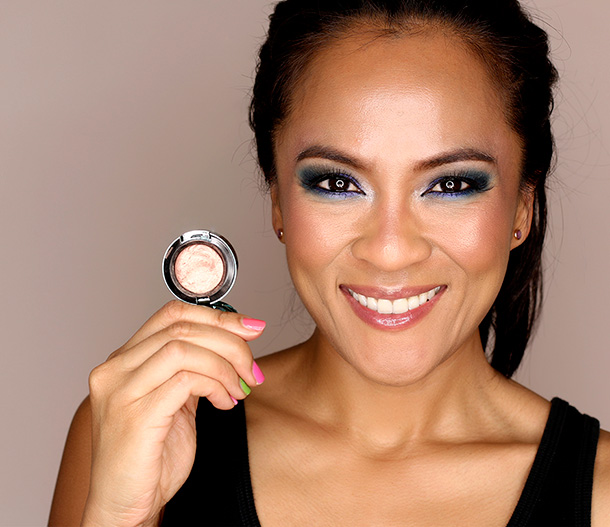
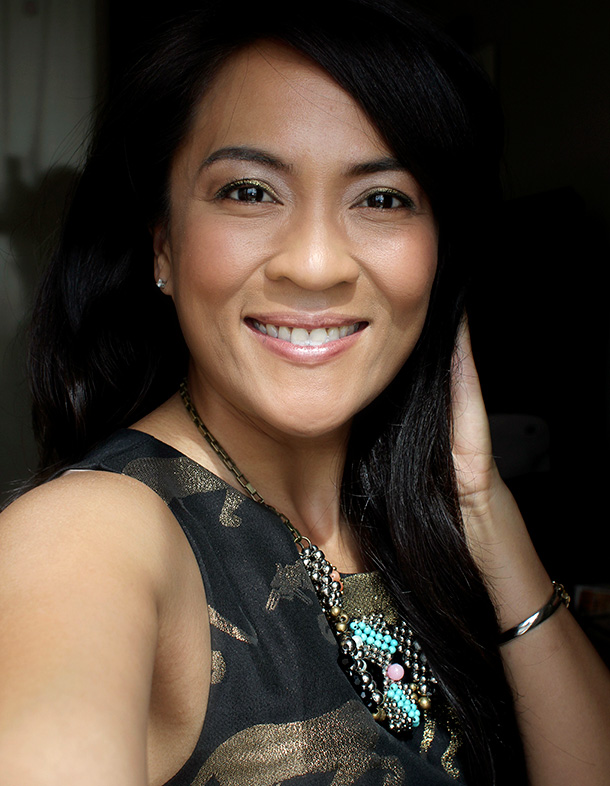
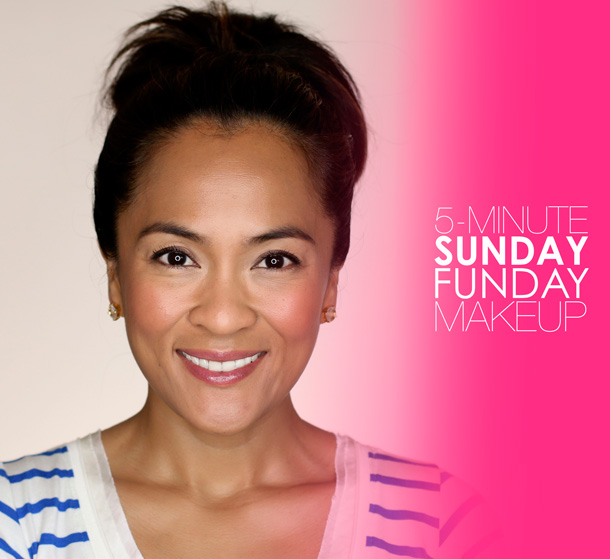
So, along those lines, here’s the 5-minute makeup (using just one brush) I wore to run errands and hang out with my girlfriends last Sunday in SF (we went to a spa!).

It’s not fancy or fussy at all, but I think the whole thing still looks reasonably well put together.

5-Minute Sunday Funday Makeup
As easy as 1, 2, 3…

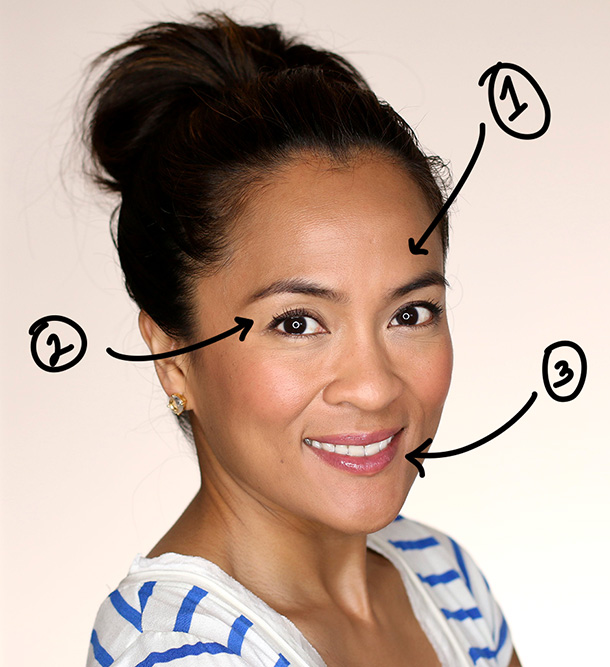
1. Good evening…skin

Evening, as in “evening out the skin.”

Since time is of the essence in a 5-minute makeup look, sheerer face products like BB creams, sheer foundations and tinted moisturizers are great (they make it easier to get away with mistakes than full-coverage, opaque products). They also make blending a whole lot easier.

Here I used MAC Face & Body in shade C5 and applied it with my fingers.

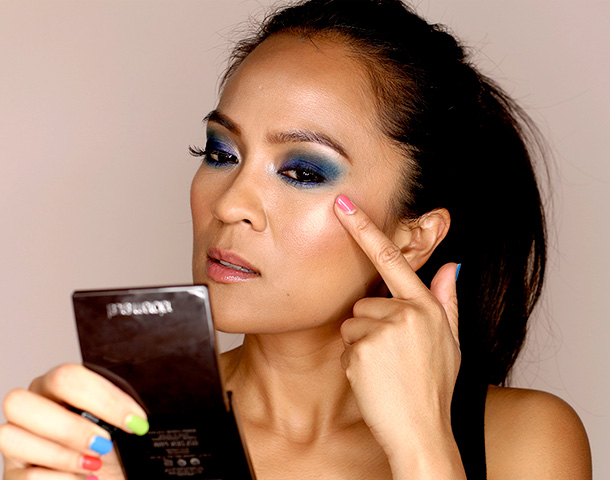
And, uh…because of that whole dark circle action happening under my eyes, I also used concealer, specifically a brightening concealer, YSL Touche Éclat in 4.5. It comes in brush pen packaging, which makes it really easy to swipe.

Then I blended that out with my fingers…

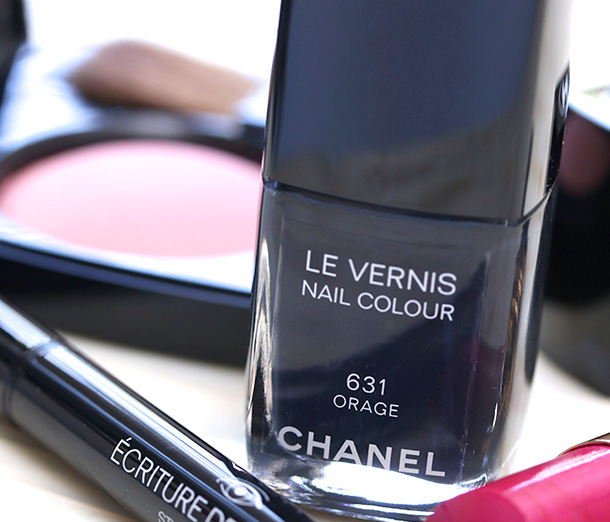
Sunday Funday 5-Minute Makeup: Products Used

  • Foundation: MAC Face & Body in C5
  • Concealer: YSL Touche Éclat in 4.5
  • Brow pencil: Tom Ford Brow Sculptor in Espresso
  • Waterproof eyeliner: Chanel Stylo Yeux Waterproof in Santal
  • Thickening Mascara: Guerlain Cils D’Enfer Waterproof Mascara
  • Blush: Chanel Joues Contraste Blush in Malice
  • Sheer Pink Lip Balm: Clarins Lip Balm Crayon in My Pink

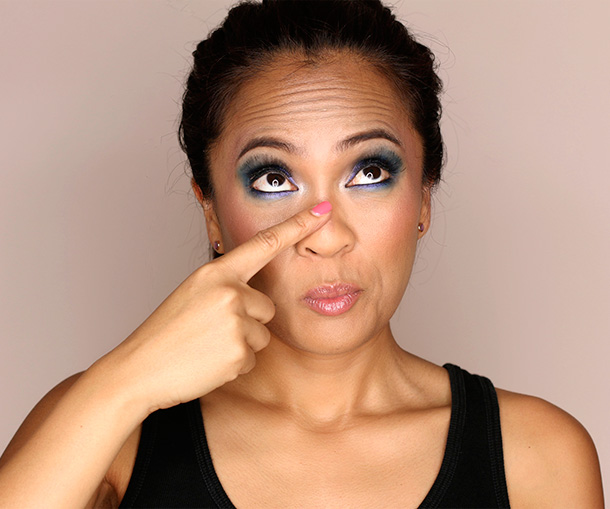
Speaking of targeted brightening, I’m a big fan. 🙂 So, for some extra highlighting on my skin, I also swiped Touche Éclat in the middle of my forehead, down the bridge of my nose, just above my Cupid’s bow, and around the corners of my mouth, blending all of that in with my fingers.
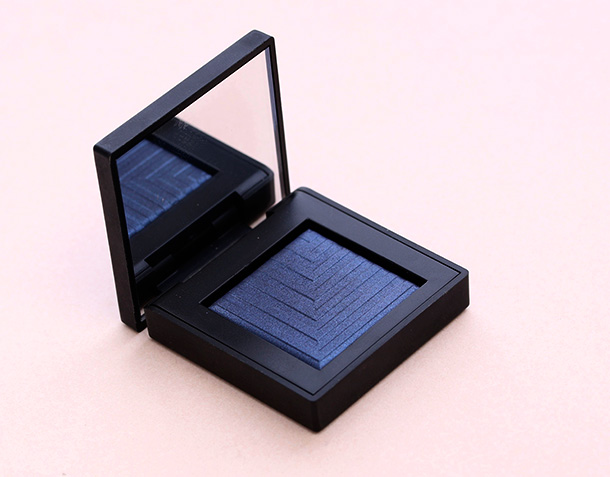
2. Define the eyes

We’re looking for big impact steps here because we don’t have much time (just 5 minutes), and with eyes, I like filling in my brows, because I think does a lot for the overall look, and adding some thickness along the upper lash line, which I think just makes you look more awake.

I used a brow pencil that has a brow brush on one end (that’s some tool efficiency right there!), quickly filling in the outer tail and middle portions of my brows but leaving the inner portion alone (just to save a little time, but I think it also looks more natural).

To thicken your upper lash lines, grab one of your go-to waterproof pencils. This way you can skip eye primer (ding-ding-ding!), saving you even more time.

[Continue reading…]

There are 16 comments on this post. Leave yours.

Categories: Makeup Tips/How To

For a Chic Twist on a Neutral Look, Try Pairing Dark Blue Eyeshadow With Dark Blue Nails, and Use the Shadow as a Liner

July 1st, 2014 by Karen 29 Comments

Blue liner and nails with NARS Giove and Chanel Orage
Here I’m doing a Vulcan mind meld on myself… Kidding. I’m wearing Dual-Intensity Eyeshadow in Giove as a liner on my lash lines and Chanel Le Vernis Nail Colour in Orage on my claws.

QUESTION: Why use a blue eyeshadow instead of a blue liner?

ANSWER: Why not?

Picture it: dark blue liner coupled with super deep, dark, almost black nails, only, instead of using a pencil, gel or liquid liner, you use a powder eyeshadow.

NARS Giove and Chanel Orage
Incidentally, that’s Dolce & Gabbana Classic Cream Lipstick in Petal on my lips.

Do you ever just get stuck in a rut and feel like you’re wearing nothing but brown and beige? Feel like trying something different but don’t want to go over the top?

I’m always looking for ways to keep things interesting for myself, especially when it comes to wearable makeup looks — ideally chic and wearable, but not totally snooze-worthy, if you catch my drift.

One day I decided to pair dark blue liner with dark blue claws, and the first thing I thought when I finished was, “Why haven’t I done this before?”

Seriously, though, why use a blue eyeshadow as a liner instead of an actual blue liner?

NARS Duo-Intensity Eyeshadow in Giove
Ciao, NARS Giove!

Using a dark blue eyeshadow as a liner, instead of a dark blue pencil, gel or liquid eyeliner, creates a more diffused edge, so the overall effect looks softer.

I’ve done it with lots of different liner styles, too, like spicy cat eye looks, and even soft washes of color, where the liner is smudged along my upper and lower lash lines.

Sometimes I’m just in the mood for a blurred edge (and the accompanying less attention to detail).

Just for fun: add dark blue nails

Chanel Le Vernis Nail Colour in Orage, $27

I like seeing the flash of dark blue on my fingers whenever I tuck my bangs behind my ears or push my (nerdy Gamma Ray computer glasses) up.

And it think it sort of reinforces the blue liner, too. You know, more blue.

I also like how the softer liner contrasts with the harder edge of the dark blue nails, so you also have that contrasty thing going.

I call this liner look the Tabby T-1000 (after the liquid metal Terminator from T2)

NARS Giove and Chanel Orage
I’m wearing a blend of two Chanel Joues Contraste blushes — Innocence and Malice — on my cheeks, coupled with MAC Mineralize Skinfinish in Give Me Sun used as a bronzer, and Hourglass Ambient Powder in Luminous Light used as a highlighter

For this cat liner look, I applied metallic dark blue NARS Dual-Intensity Eyeshadow in Giove ($29) with an angled brush.

First, I applied it dry to create the shape of the cat eye and get that softer edge. Then I wet the brush head, dipped it back into the pan, and applied the shadow on my lash line close to the lashes, to sort of intensify the metallic finish and crete a subtle gradient.

You could definitely keep it simpler by picking one — just wet or just dry — but ya know. I’m just saying.

NARS Duo-Intensity Eyeshadow in Giove
NARS Duo-Intensity Eyeshadow in Giove, $29

[Continue reading…]

There are 29 comments on this post. Leave yours.

Categories: Chanel, Dior, Eyes, Makeup, Makeup Tips/How To, Nails, NARS

Do You Reuse False Lashes? (I do)

June 16th, 2014 by Karen 10 Comments

How to reuse your false lashes
Reusing your false lashes

Toss ’em or keep ’em? Which way to go?

First of all, if you liked a pair of false lashes you wore and wouldn’t mind wearing them again, ain’t no shame in that game. I reuse mine. All. The. Time.

Might as well get the most bang for your buck, ya know, and save some extra dough for your cat’s gravy fund.

We all know how that is. 🙂

So, if you liked a pair of false lashes enough to reuse them, here’s what you can do…

False Lashes, Take 2: Reusing Your False Lashes

  1. First, after carefully removing the lashes, I soak a Q-tip with regular isopropyl rubbing alcohol from the drugstore, then gently run the Q-tip along the band and the false lash fibers to sanitize them and remove any remaining adhesive, bits of mascara and other eye makeup.
  2. If that doesn’t take care of every last bit of glue or other gunk (and it usually doesn’t get every last tidbit of glue), I gently finish the cleaning with my fingers, peeling away the last shreds of tiny glue globs.
  3. Then, I just place the lashes back into their original packaging (the one for the right eye on the right side, and the left eye on the left side), which retains their shape and keeps them clean until the next time I use ’em.

This is probably pretty obvious, but I think it’s worth mentioning anyway: reusing lashes worn by someone else is a big no-no for sanitary reasons (pinkeye, anyone?). I’m sure you already knew that because, hello, it’s pretty gross, but I’m just putting it out there. ‘Nuff said.

[Continue reading…]

There are 10 comments on this post. Leave yours.

Categories: Makeup Tips/How To

Now That You’ve Applied Your False Lashes, How the Heck Do You Remove Them?

June 5th, 2014 by Karen 16 Comments

Katy Perry Lashes Feline Fierce
My inner cat lady loves these Katy Perry Lashes in Feline Fierce, mrrow!

OK, let’s say we’ve put our false lashes on, partied like rock stars, and now it’s time to get ready for bed.

What now? How do we actually remove the darned things?

Ardell 105
I can’t wait to try these just Ardell 105s I just picked up from Ulta!

Well, I have a confession… I’m totally guilty of just ripping those suckers off, mostly with pairs that felt heavy or uncomfortable for some reason, and I JUST COULD NOT TAKE IT ANYMORE.

I’ve actually done this more times than I can count (even though I knew it was terribly unwise). Once it was halfway through a fancy party. Mid-mingling I suddenly said, “Please excuse me for a moment. I need to remove these false lashes because they’re driving me completely insane.”

Ripping those bad boys off is quick (rrrrrrip!), but it’s also risky. You could, and probably will, tear out some of your natural lashes with the falsies, and when you barely have any lashes to start with (like me), that’s ill-advised.

Back to that party I mentioned…

Luckily, being a makeup hoarding packrat, I had a tube of mascara and a lash curler in my bag, so I plopped a few coats on in the bathroom.

Crisis averted.

Now, when I’m in my right mind, here’s how I like to remove my lashes…
[Continue reading…]

There are 16 comments on this post. Leave yours.

Categories: Makeup Tips/How To

A Few False Eyelash Application Tips

June 4th, 2014 by Karen 35 Comments


Here I’m wearing Katy Perry Lashes in Banging Beauty, $6.99

True or false: applying false eyelashes can be very intimidating.

For me? TRUE. The very thought of applying false lashes, especially if I’m tired or not on my game that day, or if I’m using a brand new style of lashes I’ve never used before, can be downright terrifying. Sometimes it’s so daunting that I don’t even want to try.

When I first got into ’em, I was total crap at the application, for real! — but as with most things, if you practice, it gets easier.

When we looked at the awesome $4 Ardell 120s last week (LOVE these), you asked some good questions about false eyelash application in the comments…

Applying false eyelashes: I need halp!

Ardell Demi 120
The Ardell Demi 120s

“These look really natural and what a great deal. I only wish I knew how to apply false eyelashes. You should do a tutorial on that!”
—Agata

Hi Agata,

Hey, girl! 🙂 When it comes to easy-to-apply lashes, those Ardell 120s are some of the best I’ve ever used. With those or any pairs, if you practice and be patient, and give yourself a week or two, it’ll get super easy. The best advice I can give is to look down into a mirror while you’re applying them. That really helps me a lot!

Go easy on yourself, too. It takes a few tries, but seriously, you’ll get the hang of it. Here are some other things that can help…

  1. Paint the white band first before you start applying (I just use black gel liner), so you don’t have to paint it after you’re finished and it’s tougher to reach without disturbing your makeup or the lashes. 

  2. Give the glue time to get sticky. I usually wait from 30 seconds to a minute. When it first comes out of the tube, it’s not very sticky.
  3. Use as little of the glue as possible. Seriously! I find that when I use too much, the lashes feel really uncomfortable.

[Continue reading…]

There are 35 comments on this post. Leave yours.

Categories: Makeup Tips/How To

Guess What? Your Eyeshadow Can Double as a Highlighter

May 7th, 2014 by Karen 26 Comments

MAC Lorelei Extra Dimension Eyeshadow

Problem: Your favorite highlighter is MIA, possibly due to your cat, despite lacking opposable thumbs, hiding it somewhere in your condo.

You turn over every inch of the place looking for it, peering under every piece of furniture and checking each of your cat’s favorite hiding places, but still can’t find it.

WHERE IS THAT DAMN PAN OF MAC SOFT AND GENTLE MINERALIZE SKIN FINISH?!

Er…not that I’ve ever experienced this. We’re talking hypothetically, of course. 🙂

Solution: You reach for a shimmery peach, coral, beige or white eyeshadow instead.

Yup — that’s right. Because your eyeshadow can double as a face highlighter!

Here I’m using MAC’s Extra Dimension Eye Shadow in Lorelei, a shimmery golden beige from the new MAC Alluring Aquatic collection.

MAC Lorelei Extra Dimension Eye Shadow, a golden beige
Lorelei Extra Dimension Eye Shadow

After I’m done applying blush and bronzer, I swirl a clean finger in the pan, and gently rub it on my upper cheekbones…

MAC Lorelei Extra Dimension Eyeshadow

…down the bridge of my nose (goofy face is totally optional!)…

MAC Lorelei Extra Dimension Eyeshadow

[Continue reading…]

There are 26 comments on this post. Leave yours.

Categories: Face, MAC Makeup, Makeup Tips/How To

Feed Your Fuzzy Li’l Caterpillars! Try an Ombre Brow Right Now for Natural, Lush-Looking Brows

April 17th, 2014 by Karen 15 Comments

Ombre Brows!
Ombre brows, babe. They’ll change yo’ life!

I feel like I’m always having change-your-life eyebrow episodes (eyebrow epiphanies, if you will).

Buuuuuut any time someone who’s known you for years — in my case, like-minded beauty lovers like my friend Alis, who cuts my hair, and Kim here on the blog (haaaay, Kim!) — and they notice something different about your look, it says something.

The very first thing Alis said to me when I saw her last week was, “Did you do something different to your brows?”

Why, yes, I have. 🙂

I’ve been doing more of an ombre brow lately, and I have to say, it’s been kind of — YES! Life changing.

Soft and subtle, yet bold at the same time, ombre brows are perfect for spring and summer because they can look really full and lush but not overdone.

The ombre effect comes from using two different brow colors, one lighter than the other. I learned about the technique from MAC Senior Artist Victor Cembellin at the MAC Pro Store a couple months back, and I use the same approach he showed me, with a slight brush modification.

For the inner part of my brows (the side closer to my nose, as opposed to the outer part toward the ear), I apply the lighter color, in this case MAC Cork, a neutral matte brown, with a MAC 214 Short Shader Brush (Victor likes to use a pencil brush for this instead), filling from the far inside end of the brow to just about the peak of the arch.

Next, I fill in my arch and outer tail area of the brow using a dark brown eyeshadow, in this case MAC Brun, and the MAC 266, an angled eyeshadow brush.

[Continue reading…]

There are 15 comments on this post. Leave yours.

Categories: Makeup Tips/How To

Double Duty Drugstore Beauty! Multi-Talented Makeup From Neutrogena

April 15th, 2014 by Karen 9 Comments

Multitasking makeup products from Neutrogena
Wearing a few double-duty products from Neutrogena! — Crease Proof Shadow in Improper Copper as a highlighter on my upper cheekbones and down the bridge of my nose, Healthy Skin Blends Bronzer in Sunkissed as an eyeshadow on my lower lash lines, MoistureSmooth Color Stick in Healthy Peach as a blush on my cheeks, and Nourishing Long Wear Liquid Makeup Broad Spectrum SPF 20 in Warm Beige as a concealer under my eyes

It’s true.

You really do learn something new every day — like yesterday I learned that a ton of Neutrogena makeup products actually double as…well, they double. They’re multitasking, which is super cool, for one, because a) they’re drugstore, so they’re totally affordable, and b) if you’re traveling somewhere or just want to lighten your makeup load, it’s always nice to have a product that can do a bunch of things.

Celebrity Makeup Artist Amy Oresman broke it down for me in Nashville yesterday as I sat (OMG!) in her makeup chair. She just broke it down, man. She had some great product recommendations from the Neutrogena line, like the brand’s Crease Proof Eye Shadows…

1. Crease Proof Eye Shadows in Stay Golden and Improper Copper ($8.49 each)

Amy Oresman
Improper Copper in my crease…

There are two she really loves — Stay Golden and Improper Copper. Stay Golden she compared to, basically, Nylon or Shroom Eye Shadow from MAC, but in cream form.

Cream shadows with a built-in primer, these were designed for lids, but they work on other parts of the face, too — especially as a highlighter. Amy will take either one, Stay Golden or Improper Copper, and apply it directly to the skin. Then she buffs it down with a foundation brush.

On me, because I have a deeper skin tone, she used Improper Copper, which is kind of like a coppery gold with subtle shimmer.

Amy Oresman has worked her makeup magic on a multitude of makeup-loving mavens, including Madonna, Heidi Klum, Victoria Beckham, Hayden Panettiere, Vanessa Hudgens, Emma Roberts and Kate Bosworth. “When it comes down to it,” she says, “we all want the same thing — to look and feel beautiful.”

She applied it directly from the stick, too, right into the crease of my eyes, and then brought it out to my upper cheekbones, still just using the stick. Then she blended it all in with a foundation brush for a super soft, really glowing highlight.

And you can use it on other parts of the face — wherever you would apply a traditional highlight, like down the bridge of the nose, Cupid’s bow, that kind of thing.

Stay Golden works great for all skin tones, but it rocks the Casbah on fair skin; Amy recommended Improper Copper for medium and darker skin tones.

Yay, so that’s one thing.

But there’s more… 🙂

Sometimes Amy also likes to rub the stick shadows in her palm to get some product in there, and then she’ll mix that with a foundation. Yesterday she did that with Neutrogena Nourishing Long Wear Makeup Foundation, a liquid foundation, mixed those together in her palm, and just applied on me where she wanted more of a shimmery, dewy finish.

So, yeah, that’s one majorly multitasking product in the Neutrogena makeup line.

Amy also recommends the MoistureSmooth Color Sticks, which are first and foremost sheer lip balms, and I love these.

2. Neutrogena MoistureSmooth Color Sticks ($8.49 each)

Amy Oresman
Amy applying Healthy Peach MoistureSmooth Color Stick Gloss on my cheeks as a blush

I use Fresh Papaya. Love it, wear it all the time, but what I didn’t know until yesterday was that these also double as cream blushes. You can put them on top of foundation, powder, bare skin.

Amy will apply the Color Sticks directly on the cheeks, on the apples of the cheeks, and then just blend that in with a foundation brush to give a nice, sort of light, sheen to the cheeks with a pop of color, and then, if you don’t want to deal with finding a coordinating lip color, you just take that same Color Stick and apply it on your lips.

Next up, Healthy Skin Blends Bronzer in Sunkissed. One of three Healthy Skin Blends Bronzers from Neutrogena — these are the ones with the little squares inside the palettes. Amy calls Sunkissed a great eyeshadow palette that nobody knows about.

[Continue reading…]

There are 9 comments on this post. Leave yours.

Categories: Drugstore Beauty Finds, Makeup Tips/How To, Neutrogena

  • « Go to Previous Page
  • Go to page 1
  • Interim pages omitted …
  • Go to page 39
  • Go to page 40
  • Go to page 41
  • Go to page 42
  • Go to page 43
  • Interim pages omitted …
  • Go to page 93
  • Go to Next Page »

Primary Sidebar

Welcome to Makeup and Beauty Blog

Welcome to Makeup and Beauty Blog! My name is Karen, and I’m a freelance writer obsessed with makeup.

Makeup and Beauty Blog features daily product reviews, makeup tips and beauty news — like an interactive version of a monthly print magazine, except with occasional pictures of my cat.

Recent Posts

Sundays With Tabs the Cat, Makeup and Beauty Blog Mascot, Vol. 878

Makeup and Beauty Blog Monday Poll, Vol. 894

Makeup and Beauty Blog Monday Poll, Vol. 893

Makeup and Beauty Blog Monday Poll, Vol. 892

Makeup and Beauty Blog Monday Poll, Vol. 891

/* real people should not fill this in and expect good things – do not remove this or risk form bot signups */

Social

  • Facebook
  • Instagram
  • Pinterest
  • Twitter
  • YouTube

Featured Posts

Sundays With Tabs the Cat, Makeup and Beauty Blog Mascot, Vol. 771

Lady Unicorn

Weird Things I Like to Do

brows fill out beforehand

Before You Pluck or Wax Your Brows, You Must Do This

current bare skin status

What’s One Thing That Drastically Changed Your Skin for the Better?

Copyright © 2025 Makeup and Beauty Blog. Get in touch.