• Skip to main content
  • Skip to primary sidebar

Makeup and Beauty Blog | Makeup Reviews, Swatches and How-To MakeupMakeup and Beauty Blog | Makeup Reviews, Swatches and How-To Makeup

A beauty blog blooming with fresh makeup reviews, swatches and beauty tips from your friendly neighborhood beauty addict

  • Home
  • About
    • About
    • Contact
    • FAQ (Frequently Asked Questions)
    • Advertising & Media
  • Categories
    • Product Reviews
    • Makeup
    • Skincare & Fragrance
    • Style & Fashion
    • Hair
    • Nails
    • Tips & Tutorials
    • Just for Fun
  • Brands
  • Store

Makeup Tips/How To

An Everyday Neutral Eye Look Using Classic MAC Colors (Permanent Line)

March 5th, 2014 by Karen 9 Comments

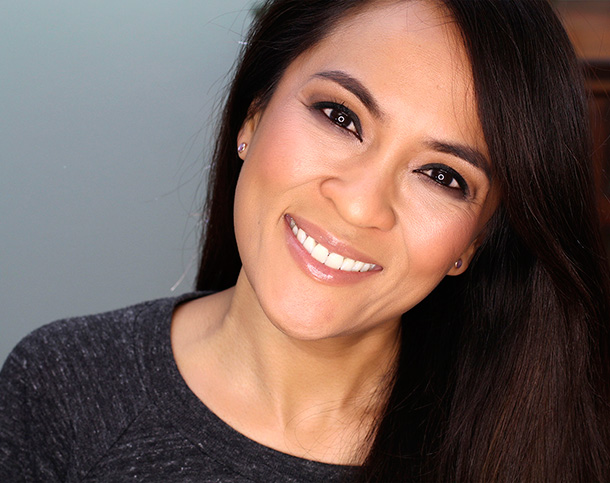
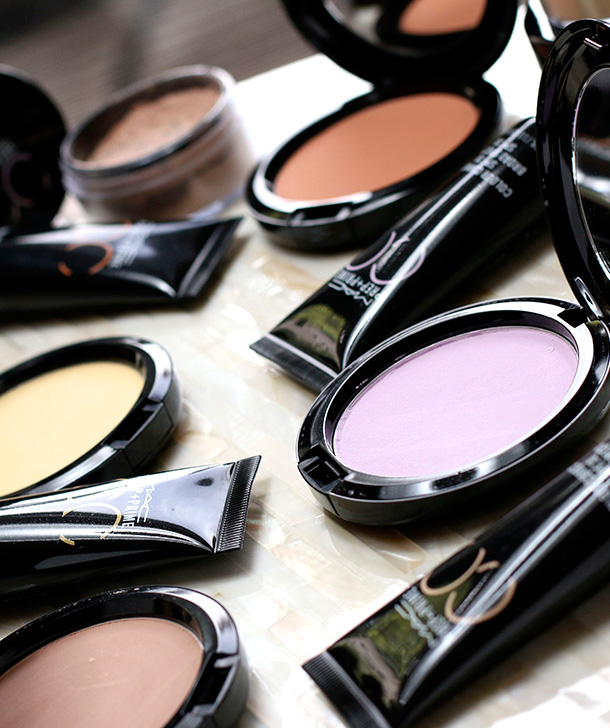
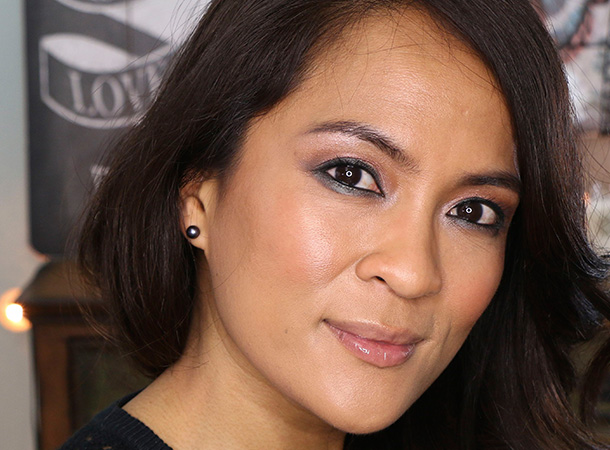
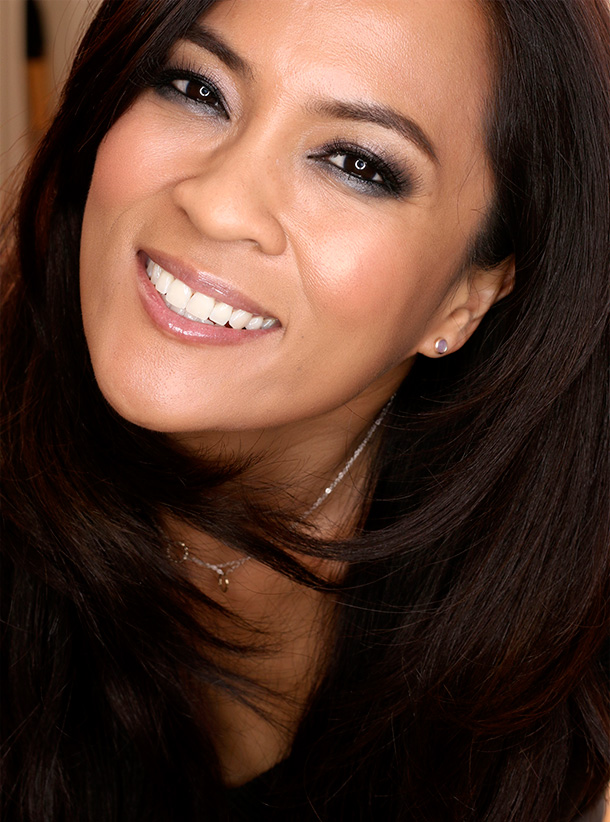
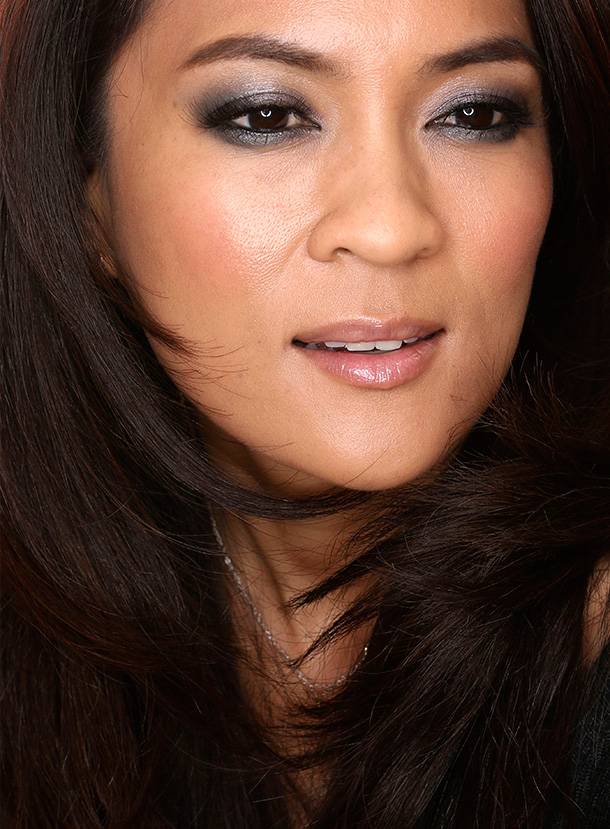
Before heading to the dentist today, which is always one of my favorite things in the entire world to do (that’s actually not true at all), I did a neutral look using some classic MAC colors from the permanent line.

When I posted about this look before, a few people asked for a tutorial, so here goes!

It’s just that — uh…it ran a little long.

mac-classic-colors-everyday-eye-look-1

Dude, I’m sorry, but I ramble. It’s an ongoing struggle. 🙂

Here are the products mentioned in the video…

  • NARS Pro Prime Smudge Proof Eye Shadow Base
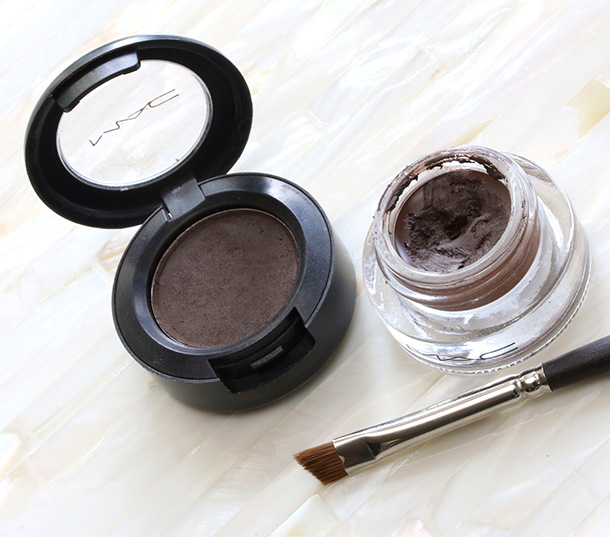
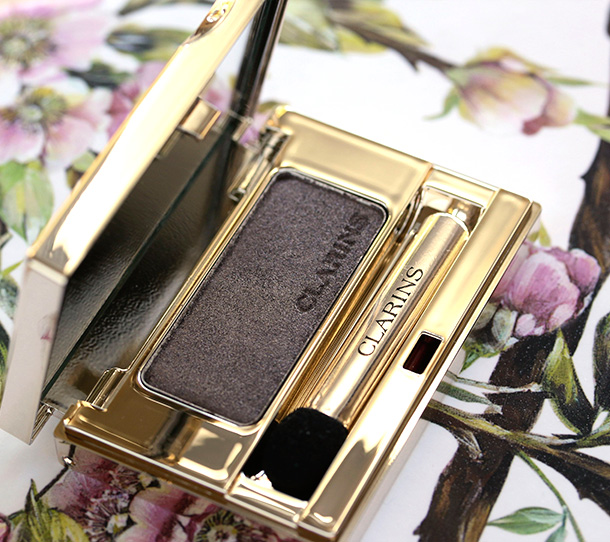
  • MAC Brule Eye Shadow
  • MAC All That Glitters Eye Shadow
  • MAC Saddle Eye Shadow
  • MAC Sable Eye Shadow
  • MAC Shroom Eye Shadow
  • MAC Carbon Eye Shadow
  • MAC Club Eye Shadow
  • MAC Smolder Eye Kohl
  • MAC Extended Play Gigablack Lash

That’s MAC Blush in Cantaloupe on the apples of my cheeks and MAC Iridescent Loose Powder in Golden Bronze on my upper cheekbones.

An Everyday Neutral Eye Look Using Classic MAC Colors

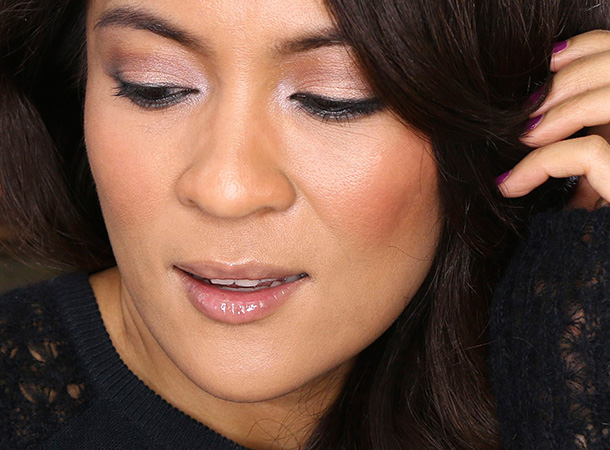
Oh, and that’s MAC Plushglass in Fulfilled on my lips.

I hope you like it, and thank you for watching (and for putting up with my rambling!).

Your friendly neighborhood beauty addict,

Karen

P.S. So earlier at the dentist, I actually did cry. It was supposed to just be a cleaning, but the hygienist said she needed the dentist to look at something in my mouth, and when he came in, he started sharpening his dental tools in front of me!

I was like, uh…no, we’re not going to do this right now.

I guess I just freaked out a little. Anywho, now I have to go back at some point to finish my cleaning.

Have you ever freaked out like that in the dentist’s office?

There are 9 comments on this post. Leave yours.

Categories: Makeup Tips/How To, Video

One Pan of Eyeshadow, A Trio of Looks! A Smokey Plum Eye Makeup Tutorial Trifecta

March 3rd, 2014 by Karen 22 Comments

Are you ready for three ways to work a smokey (or smoky, depending on your preference) plum eye?

Here are THREE different ways to rock the new Clarins Smoky Plum Ombre Minérale Mono Eye Shadow ($21)…or any other eyeshadow you like.

(Click here to watch the video on YouTube.)

Clarins Smoky Plum Ombre Minérale Mono Eye Shadow
Clarins Smoky Plum Ombre Minérale Mono Eye Shadow ($21)

The first look is the most casual one, good for daytime. The second is slightly turned up, like for grabbing drinks after work, and the third is a full-on smokey look with lashes, drama and the whole nine yards.

Definitely one for a big night out…or perhaps just to run errands around town, if you’re a diva like that. 😀

I’m using a shimmery purplish taupe shadow in the video, but you could definitely swap that out for another purple or taupe from your collection.

OOH! I think something like MAC Satin Taupe or Shale would look really pretty.

Or, you could skip the purple entirely and go with something like a shimmery bronze, brown, green, gold or blue. Seriously — whatever your heart desires at this moment! The most important thing is that you like it. Whatever it is, you’ll do great. 🙂

Clarins Smoky Plum Eye Shadow
Lashes, BAM! (Yup, this is the third look…)
Clarins Smoky Plum Eye Shadow
Another shot of the third and final look
A smokey plum eye makeup tutorial
A better look at my lids from the final look…

Products mentioned in the video…

  • Clarins Ombre Mineral Mono Eye Shadow in Smoky Plum ($21)
  • MAC Eye Kohl in Smolder ($16)
  • MAC 239 Eye Shader Brush ($25)
  • MAC 217 Blending Brush ($24)
  • Katy Perry Lashes in Punk Princess ($6.99)

Thank you for watching! If you give it a try, snap a quick pic and tweet it to me @karenmbb, or tag me at hashtag #makeupandbeautyblog on Instagram. Please!

Your friendly neighborhood beauty addict,

Karen

There are 22 comments on this post. Leave yours.

Categories: Clarins, MAC Makeup, Makeup Tips/How To, Video

5 Uses for Your Recently Used But As-Yet-Unwashed Foundation Brush

February 27th, 2014 by Karen 21 Comments

Hourglass No. 2 Brush
One of my favorite foundation brushes, the No. 2 by Hourglass

Before you relegate that recently used foundation brush to the pile of brushes you plan to wash later this week (or today), believe it or not, it’s still a useful tool, even after you’ve used it to apply whichever face product you’re wearing on any given day and the brush has leftover product in the bristles.

I mean, of course we are going to wash it eventually (I wash my brushes every day), but before that, while we’re still doing our makeup, we can use it to…

1. Tone down bold brows

A recently used foundation brushOops! Uh, oh. We’ve accidentally applied too much brow filler and crossed the fine line between bold brows and Groucho Marx.

What to do?

Well, we can run our recently used foundation brush across our brows a few times to break up our brow powder or gel and lighten them up.

2. The definition of cheeky

We can also use our used foundation brush to give our cheeks a boost! After applying our blush and/or bronzer, we can sweep our used foundation brush right below the apples of our cheeks to define and sculpt their shape.

3. Lift that look!

I think you’ll really like this tip because it’s easy but makes a big difference. After we finish applying eyeshadow, let’s grab that used foundation brush, and swipe it from the outer corner of our lower lash line to the outer tip of our eyebrow to clean up the edges a bit and give a little lift to our look.

4. A blank canvas for nude lips

Let’s make nude lips look even nuder (nuder?). Working with your favorite nude lipstick or gloss, swipe however much product remains on your recently used foundation brush across your lips. Now, this trick works better if your lips are in good shape. In my experience, if we see any flakes at all, our foundation will only draw attention to them.

I only do this one every once in a while, as it tends to dry out my lips…

[Continue reading…]

There are 21 comments on this post. Leave yours.

Categories: Makeup Tips/How To

Adventures in Oribe: Getting To Know the Oribe Hair Product Line, and Insider Hair Stylist Tips

February 25th, 2014 by Karen 22 Comments

Today I was a hair model for an Oribe class
Hair modeling for my friend Alis in a class on Oribe products…

I experienced, not one, but two major revelations in that class on Oribe hairstyling products earlier today at Corte Madera’s Fox + Stone Salon.

The first, how to pronounce the word, “Oribe.”

Oh-ree-bay? Or-rib-bay? Oh-ruh-hibe?

Fox + Stone Salon in Corte Madera, California
This is where I get my hair done! Fox + Stone Salon in Corte Madera, California.

Turns out it’s OR-bay! — she said, her eyes widening to the size of saucers when she heard Northern California Brand Manager Karen Kerr pronounce it.

I swear the clouds parted when I heard it, LOL!

Karen was there at the salon to teach the stylists there about Oribe’s products, and I was invited, along with two other ladies, to be a hair model.

Which brings me to the second revelation I mentioned — that I now know what it feels like to be a puppy at a dog park, because there was a lot of petting going on…and by that I mean that the stylists in the class were instructed to repeatedly touch my hair and that of the other models.

Yup, another one to cross off ye olde bucket list. 🙂 “Have 20 people touch my hair in one day.” Check.

Three Hair Models, Three Hairstyles

There were three separate stations, one for each of the models, among which the stylists would move to play with the products on each person’s hair.

There were three hair themes — Curl Power, Full-Blown Bombshell (which I was desperately hoping to be picked for, not gonna lie) and Big, Bold and Beautiful, which was the theme I was assigned.

Big, Bold and Beautiful

My hair’s job was to sit there and showcase three products from Oribe’s line — their Foundation Mist, Creme for Style and Maximista Thickening Spray.

The recipe for the Big, Bold and Beautiful Look
Oribe’s recipe for Big, Bold and Beautiful hair

I use Oribe’s Shampoos and Conditioners at home and have had really good luck with them, so it was interesting to learn more about the products, the best ways to use them and what makes them tick.

Step 1: Wash and Condition

After washing my mop with Oribe’s Shampoo for Brilliance and Shine ($46) and Conditioner for Beautiful Color ($42), they sat me in my chair and went to work.

Step 2: Prep With Foundation Mist

Oribe’s Foundation Mist ($24) works kind of like a makeup primer for your hair. I found out that it’s not really designed for hold, but rather to prepare hair for styling by evening out the texture of every strand from root to end.

My stylist buddy Alis, who works at the salon and invited me today, explained it like this: sometimes hair has natural dips in the strands, which are like potholes. Foundation Mist does something called “evening out the porosity,” which means that it fills in those potholes, turning the strands into one long, smooth road.

With the strands filled in, any styling products layered on top apply more smoothly and evenly, and basically perform better.

Oribe Products for Big Bold Beautiful Look from the left: Foundation Mist, Creme for Style and Maxinista
From the left: Foundation Mist, Creme for Style and Maxinista

On top of that, Foundation Mist also offers UV protection, which is particularly helpful for color-treated hair.

To use it, just spray it all over your hair, from roots to ends, and don’t be afraid to saturate those strands!

Step 3: Condition With Creme for Style

After prepping my hair with Foundation Mist, the stylists worked in Oribe’s Creme for Style ($38), a creamy leave-in conditioner ideal for thick, heavy hair.

Layering is an important part of the Oribe philosophy, and this lightweight cream adds firm, yet flexible, hold and volume, among other things. You can apply it to either wet or dry hair, curly or straight, for shine, separation and body. It’s also great for giving extra oomph and structure to blowouts.

The stylists squeezed a pearl-sized amount into one of their palms and rubbed their hands together to thin and distribute the product, which they then applied from the mid-shaft, all the way to the ends. Whatever was left over, they ran through my hair at the crown of my head.

Creme for Style also conditions hair, and like Foundation Mist, it provides UV protection.

Step 4: Crank Up the Volume With Maxinista Finishing Spray

Next came the blow dryers! Two stylists dried my hair until it was about 80 percent done. Then it was time for the finishing touches with a round brush and the final product for my big, bold and beautiful look, volumizing Maxinista Thickening Spray ($28), which is used to create BIG volume, like the kind you see in big, puffed-out, blow-dried hair.

K with Alis
That’s my friend Alis on the right

[Continue reading…]

There are 22 comments on this post. Leave yours.

Categories: Hair, Makeup Tips/How To, Oribe

How To Do a Basic Brown Smokey Eye

February 24th, 2014 by Karen 33 Comments

Please ignore the Christmas decorations behind my shoulder, LOL! I filmed this back in December before Christmas but then got too carried away with the holidays to prepare it.

I still wanted to finish it, though, because it’s a staple look of mine that I wear all year round, perfect for just about any occasion from work things to movie dates to running errands around town.

I make little tweaks to it all the time, but this time I paired the eyes with nude cheeks and lips. You could always opt for more dramatic colors to brighten it up.

Here’s the final look…

Brown smokey eyes with nude peachy coral cheeks and lips
The final look
The final look

There are some steps and layering involved, but I’m sure you can do it. If you haven’t tried something like this before, it just takes a little practice.

Full list of products mentioned in the video…

[Continue reading…]

There are 33 comments on this post. Leave yours.

Categories: MAC Makeup, Makeup Tips/How To, NARS, Video

Spice Up Your Side Braids With This Easy 5-Minute Hair How-To

February 21st, 2014 by Karen 23 Comments

Kristin Perry Daisy Flower Braid In
Flower power!

Not gonna lie — the Katniss side braid has been saving my @ss the past few months. Whenever I’m too lazy to really do anything substantial with my hair, a casual side braid werks.

But ya know, even tried-and-true hairstyles can benefit from new twists.

Kristin Perry Daisy Flower Braid In
The Daisy Flower Braid In by Kristin Perry Accessories, $14

When I stumbled across the Daisy Flower Braid in by Kristin Perry Accessories ($14), I thought, yes! This’ll spice up ye olde side braid quite nicely without adding any time to the process.

It’s a long suede cord with embroidered daisies and golden leaf detailing at the ends. You work it into braids for extra texture and to add some color to your hair.

To use it, I start by gathering my hair into a low side ponytail, which I secure with an elastic. Then I wrap the cord around the base of the ponytail several times to conceal the elastic.

Kristin Perry Daisy Flower Braid In
Step 1

Once done with that, I tie a loose knot, then double up the cord. Then I section the hair in the ponytail into two parts, leaving me with the three components of the braid — the first section of hair, the second section and the doubled-up cord.

Kristin Perry Daisy Flower Braid In
Step 2

Next part’s easy. Just braid the three components together. When I get to the bottom, I grab another elastic to secure the end of the braid, wrap the cord around it several times to conceal said elastic, and tie the ends of the cord in a knot.

Kristin Perry Daisy Flower Braid In
Step 3

[Continue reading…]

There are 23 comments on this post. Leave yours.

Categories: Beauty Tips, Hair, Makeup Tips/How To

Try This Tip for Bangin’ Brows

February 20th, 2014 by Karen 20 Comments

Where my brows at?!

“It’s complicated.”

My relationship with my brows. It’s complicated. I’ve been growing them out for what seems like millennia (but has only been about a year).

They’re just so damned moody! Moody little brows.

Weeks will pass without so much as a peep out of them — no dramatic diva outbursts whatsoever. I’ll go about my days filling them in with eyeshadow or a brow pencil and be done in the blink of a fuzzy caterpillar’s eye.

Until…

They turn against me and become totally uncooperative.

It’s weird…and it usually happens overnight, like the follicles all had a meeting while I slept and voted to revolt.

All of a sudden, they all have their own little ideas and refuse to lay down correctly, and I start feeling like I have to use more product than usual to get them to behave. Consequently, I end up unintentionally crossing that invisible line that separates bold brows from Groucho Marx.

Told ya. Complicated.

Seriously, though, if your brows consistently behave, cherish it. You’re lucky.

Mine have been going through one of their spells… The outer tail areas (the sides closer to my ears) have been particularly ill-tempered lately, and I just haven’t been able to get them to look as crisp or defined as I like with my usual slate of products, so I’ve been brainstorming possible solutions.

And I think I found one…

MAC Brun Eye Shadow (left) and Dipdown Fluidline (right)

Instead of filling in each entire brow with a single product, I’ve been using a combination of two — a powder eyeshadow and a matte gel liner.

First, I fill in the inside half of both brows with a dark brown eyeshadow (usually MAC Brun) using an angled brush.

Applying MAC Brun to the inner portion of my brows with an angled brush

Then, I quickly clean my angled brush by wiping it across a paper towel, and use it to fill in the outer half with a matte gel liner. I’ve been using MAC Fluidline in Dipdown for this, a dark brown with a flat matte finish.

Filling the outer tail with MAC Dipdown Fluidline

The result? Brows that start softly defined closer to my nose but get progressively darker and crisper and more defined as they move out toward my ears. Natural, yet bold, and not Groucho Marx, LOL!

Naturally bold brows, yo!

[Continue reading…]

There are 20 comments on this post. Leave yours.

Categories: Makeup Tips/How To

How To Use the New MAC Prep + Prime CC Colour Correct Line: Tips From MAC Senior Artist Victor Cembellin

February 14th, 2014 by Karen 21 Comments

The new MAC Prep Prime CC Colour Correct collection
The new MAC Prep + Prime CC Colour Correct line, available now

GUUUURL, don’t even get me started about brighting products ’cause we’ll be here for days.

DAYS, I tell ya. Possibly even years.

I’m actually never not looking for something — anything — to give me an extra brightening lift. It’s one of my ongoing personal makeup missions. 🙂

When MAC’s new Prep + Prime CC Colour Correct line came out last week, I was intrigued! — but admittedly confused.

I wasn’t sure where to start… I mean, lavender powder? Yellow face lotion?

What gives? And what are they for?

I asked MAC Senior Artist Victor Cembellin, who I’ve known for a few years, about the new products, what they do, and the best ways to use ’em.

Hi, Victor! What can you tell me about these new Prep + Prime CC Colour Correct products? Should I be intrigued?

OK, so, essentially, what’s kind of awesome about these is that products like this have been on the market for many years, but what I like is that we’ve sort of re-worked them into something entirely new.

MAC Prep + Prime Colour Correcting SPF 30
Prep + Prime Colour Correcting SPF 30, $30 each

Obviously, these are for adjusting skin tones. The CC is for “color correct,” but what’s exciting about them is that whereas in the past, there was this sort of mentality from the consumer of, like, if I grab this green cream and put it on top my red cheeks, everything’s going to be gone and Photoshopped and all that.

MAC Prep + Prime CC Colour Correcting Products in Adjust
Adjust, a sheer apricot

I think what’s exciting about these particular products is how delicately we used the technology to our advantage to make them really workable, user friendly, and into something that actually does what it claims to do, which is to color correct the actual tones and the idiosyncrasies of the skin.

MAC Prep + Prime CC Colour Correcting Products in Recharge
Recharge, a sheer apricot

[Continue reading…]

There are 21 comments on this post. Leave yours.

Categories: Beauty Tips, Face, MAC Makeup, Makeup, Makeup Tips/How To

  • « Go to Previous Page
  • Go to page 1
  • Interim pages omitted …
  • Go to page 41
  • Go to page 42
  • Go to page 43
  • Go to page 44
  • Go to page 45
  • Interim pages omitted …
  • Go to page 93
  • Go to Next Page »

Primary Sidebar

Welcome to Makeup and Beauty Blog

Welcome to Makeup and Beauty Blog! My name is Karen, and I’m a freelance writer obsessed with makeup.

Makeup and Beauty Blog features daily product reviews, makeup tips and beauty news — like an interactive version of a monthly print magazine, except with occasional pictures of my cat.

Recent Posts

Sundays With Tabs the Cat, Makeup and Beauty Blog Mascot, Vol. 878

Makeup and Beauty Blog Monday Poll, Vol. 894

Makeup and Beauty Blog Monday Poll, Vol. 893

Makeup and Beauty Blog Monday Poll, Vol. 892

Makeup and Beauty Blog Monday Poll, Vol. 891

/* real people should not fill this in and expect good things – do not remove this or risk form bot signups */

Social

  • Facebook
  • Instagram
  • Pinterest
  • Twitter
  • YouTube

Featured Posts

Sundays With Tabs the Cat, Makeup and Beauty Blog Mascot, Vol. 771

Lady Unicorn

Weird Things I Like to Do

brows fill out beforehand

Before You Pluck or Wax Your Brows, You Must Do This

current bare skin status

What’s One Thing That Drastically Changed Your Skin for the Better?

Copyright © 2025 Makeup and Beauty Blog. Get in touch.