• Skip to main content
  • Skip to primary sidebar

Makeup and Beauty Blog | Makeup Reviews, Swatches and How-To MakeupMakeup and Beauty Blog | Makeup Reviews, Swatches and How-To Makeup

A beauty blog blooming with fresh makeup reviews, swatches and beauty tips from your friendly neighborhood beauty addict

  • Home
  • About
    • About
    • Contact
    • FAQ (Frequently Asked Questions)
    • Advertising & Media
  • Categories
    • Product Reviews
    • Makeup
    • Skincare & Fragrance
    • Style & Fashion
    • Hair
    • Nails
    • Tips & Tutorials
    • Just for Fun
  • Brands
  • Store

Makeup Tips/How To

Product Reviews: MAC Cremestick Liners; Makeup Tips/How to: MAC Artist Louise Zizzo Gives Tips for Working With Matte2 and Mattene; Just for Fun: Team Midget MAC!

October 17th, 2007 by Karen 14 Comments

Newest MAC Obsession: Cremestick Liners

mac-cremestick-lineres
Product: MAC Cremestick liners
Use: A long lasting, retractable lip, creamy lip liner
Price: $14.00
Makeup and Beauty Blog Rating: A+

MAC Cremestick liners, where have you been all of my lipgloss life?

For many years I thought Subculture was the epitome of all lip liners. Little did I know there were other kinder, gentler options like Pink Treat, Honey B. and Beurre.

Cremestick liners …

– Glide on smoothly
– Don’t tug on my lips
– Are rich and highly pigmented
– Don’t dry out my lips
– Are easy to use and are great for really getting into the lip corners
– Are retractable so they don’t have to be sharpened (“YES!” says the lazy beast beauty blogger!)

Pink Treat, a recommendation from my girl Christine from Temptalia.com, is my favorite out of the three, followed by Honey B. next and then Beurre last.

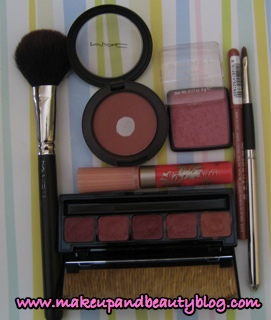
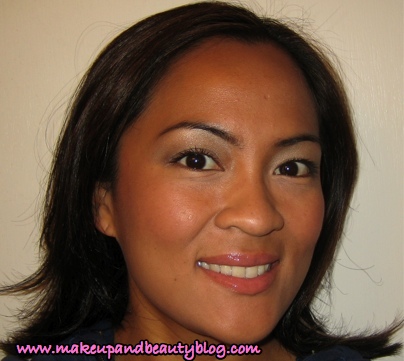
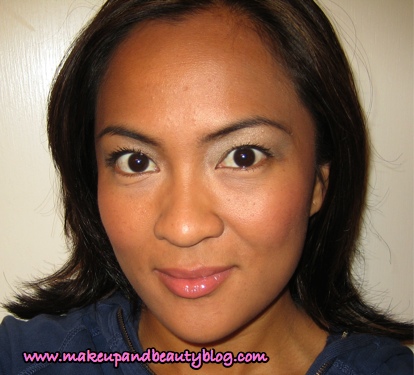
I like combo-ing Pink Treat with Soft & Slow lipglass (a soft rose with gold pearl from the Smoke Signals collection) and have been using this on my lips every day for the last week.

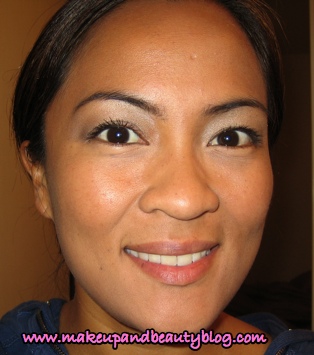
It’s an easy, natural and pretty pink lip for minimum makeup days:

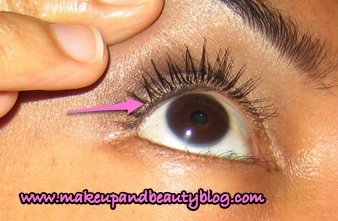
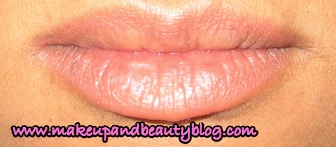
– Line with Pink Treat Cremestick liner, making sure to define the corners of the lips to get good definition
– Soften the line with your fingertip (or a lipbrush, whichever is handy)
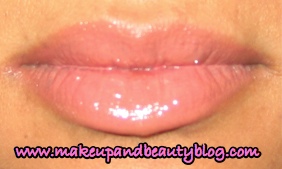
– Apply 1 coat of Soft & Slow lipglass
– Run out the door!

I am looking forward to adding more Cremestick liners to my collection. On my wish list right now are:

– Mother Pearl (sheer yellow gold)
– Softwood (coral-brown)
– Gingerroot (flesh pink)

Are you a Cremestick fan? What’s your favorite combo?

Ease My Pain, Please! Everything You Ever Wanted to Know About Working with MAC Matte2 Shadows and Mattene

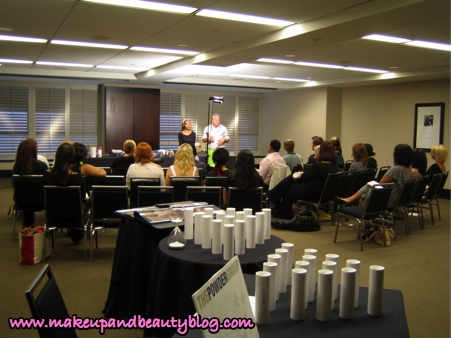
MAC Senior artist and all around makeup p.i.m.p. Louise Zizzo always hooks me up with the best MAC tricks.
louise-saves-you-from-yourself

After bemoaning my Matte2 application misery she offered the following tips for working with the shadows and Mattene lipsticks. She even offered fave her combos, too. Rock on, Louise. Rock on.

Matte2 101: Louise Saves Me From Myself

What shadow bases can you recommend using with Matte2 shadows which will keep the matte texture (while minimizing glitter/sparkle) on the eye but still give a good base to grab the color?

These Shadows are amazing because they are extremely silky which means they do grab easily to the skin, I have found the paint pots in neutral shades and no frost or simply concealor dusted over with powder.

Many of us who remember matte shadows from the 90s recall having a difficult time blending. Can you please give a few of your favorite blending tips when working with Matte2?

The key is to make sure whenever you are using these shadows or any matte shadows is you need to make sure you have a nice powdery base to put them on, otherwise they will grab patchy. I really recommend using softer brushes to apply these like the #224 and gradually building up to the intensity you desire. Don’t press hard, use a light touch and these look absolutely amazing.

Can you recommend an easy day eye look for makeup novices who want to use Matte2 shadows?

Oh my gosh the best everyday combo…
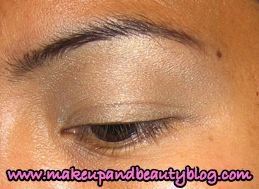
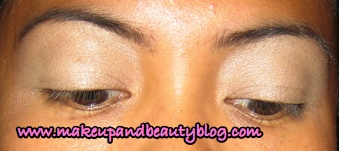
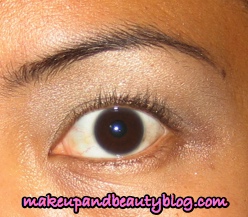
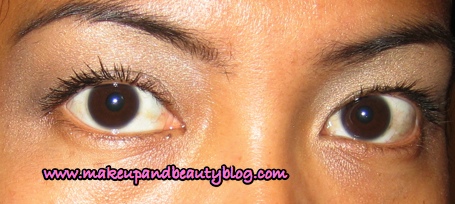
Base – Blanc Type
Crease – Tete-A-Tint
Liner – Handwritten ( you can also use this to deepen the crease in the corner)

Work that Mattene 101: Louise Breaks it Down

What is your favorite neutral color lip/eye combo with the Mattene and Matte2?

The above shadow combo and then I love, Flattering with spice lip pencil

How about your favorite bright combo lip/eye combo?

I love the cherry red lip and classic eye using…

Lips – Cherry pencil & Classic Dame
Eyes – Blanc Type – Tete-A-Tint and Black Track Fluid Line

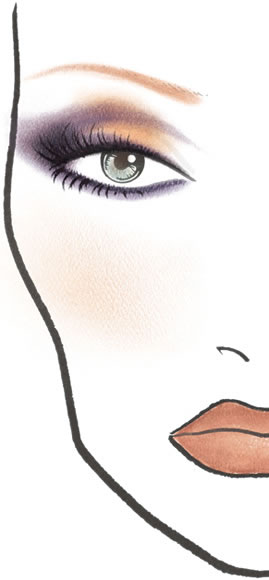
Also I have to add my favorite smokey eye combo

Eye Lid- Satin Taupe
Brow Highlight – Blanc Type
Crease – Handwritten and a touch of Typographic in the corner
Smoulder on the inner rim of eye
Lots and Lots of Plush Lash in Black

Do you prep the lips with anything before using Mattene?

No need because they glide on like silk!

If you have problems with bleeding my fool proof and must have product is the clear brow finisher used around the edge of the lips, it works wonders.

Midget MAC LIVES!

There’s something about this season of I LOVE NY 2 that begs for serious print diarrhea.
midget-mac-floatie
As usual, my hydrophobic homeboy MIDGET MAC comes through once again. Despite his inability to swim, he managed to survive a brush with death (via a defective frog floatie) and even wins a date with Miss NY!

That dumb-ass Tailor Made!
tailor-made-final

I gotta admit that he did work it when he brought NY those shoes. I’d be won over by a man bearing a pair of Manolos. I can’t lie; I’m easy that way.

manolos-gold-shoes

I liked how his ex said that he was a workaholic, because I admire a man with a strong work ethic. However, I can’t stand anyone who would let me trample all over them, and Tailor Made has DOORMAT written all over his moisturizing mask face.

And last but not least, there’s IT. Words cannot express how I feel about this fool. Isn’t his mamma ashamed? RUN, NEW YORK, RUN!

it-roses-wtf

The rain continues on here today and so of course does the boot shopping. I’m still looking for a pair of cute rain boots and the quest hasn’t been easy. Oh Zappos! Be good to me!

Anyway, aren’t you glad it’s Wednesday? We’re that much closer to Friday! How’s your day been so far? Have you been productive? Are ya slacking? Whatever you’re doing I hope that it’s getting you closer to your goals.

Stay dry…

Your friendly neighborhood beauty addict,

Karen

There are 14 comments on this post. Leave yours.

Categories: Just For Fun, MAC Makeup, Makeup Tips/How To, Product Reviews

Makeup Tips from Emmy Makeup Artist Bruce Grayson; Just for Fun – Talk Like a Pirate Day; Accessories – My New Luluemon Athletica Bag

September 19th, 2007 by Karen 10 Comments

With all the talk about red lips, TV and pirates around here lately, it was only a matter of time before www.makeupandbeautyblog.com found experts to wax philosophic on the subjects.

And while I was 100% unsuccessful in finding a legitimate pirate to interview (damn), I did manage to track down celebrity makeup artist Bruce Grayson, the Makeup Department Head for the 2007 Primetime Emmy’s (hooray).

He was nice enough to offer some tips how to get the perfect red lip, one of the dominant makeup these at this year’s Emmy’s, and how to have perfect makeup in HDTV conditions.

Makeup and Beauty Blog: This year we saw several stars at the Emmy’s rockin’ the red lips. While it’s pretty, many women have a hard time in real life recreating this dramatic look. What are your favorite tricks and products that real women can do and use to create the perfect bold lip?
christina-aguilera-courtesy-people
Xtina working the red lip. Photo credit: people.com

Bruce Grayson: Dramatic lips are easy to create if you have the right tools. Start with a good round tip lip brush.

Apply lipstick from the center of the lips and paint towards lip line. Use a complimentary colored lip pencil to draw the lip line.

Start at the bow of the upper lip and the center of the lower lip to the corners. Don’t be afraid to draw outside the lip line to recreate shape.

Use a cream highlighter with a brush or highlighter pencil above the bow and below the lower liner to define.

Makeup and Beauty Blog: HDTV is notorious for showing extreme detail in a makeup, and some makeup companies like Kryolan are even creating special products to adjust to the fine detail of High Definition TV. What tricks and products do you like to use to deal with the HDTV?

Bruce Grayson: The first thing I do is become buddies with the cameraman. Lighting is the most important element in HD.

Second I make sure that the skin is even tone using a minimum of foundation and thin concealers only where needed.

I always defuse eyeliners, especially black which can look harsh in HD.

Before I even begin to apply eye make-up, I like to start with Olay Definity Eye Illuminator ($25.99 at drugstores nationwide) because it has multi-colored micas that help to hide imperfections. It limits the amount of make-up I need to use around the eye.

I use shimmer eyeshadows and blush selectively, HD accentuates all contrast including shimmer makeups. I use shading to give the face contour. Blending is key!

Translucent pressed powders are used where needed to tone down areas of the face where reflection is distracting to create strategic shine.

The Products:
Nars Translucent Pressed Powders
Stilla Sheer pressed power
Olay Definity Eye Illuminator
Olay Definity Deep Penetrating Foaming Moisturzer- a great underbase before foundation
Concealer: Amazing Cosmetics Concealers
Mac Shaping powders

Makeup and Beauty Blog: What are your three can’t-live-without products that you absolutely must have backstage and why?

Bruce Grayson: The three can’t-live-without products backstage are:

1. Mac Clear Lipglass- compliments any lipstick.

2. Clean and Clear Oil Absorbing Sheets- take the shine down without powder build up.

3. Laura Mercier Undercover Concealers- Comes in a variety of shades and are workable to provide just enough coverage to get the job done.

Makeup and Beauty Blog: Thanks Bruce! Now we’re all ready for our close ups!

ARGH! Tis Talk Like a Pirate Day, Mateys!

Today is Talk Like a Pirate Day, and yesterday it occurred to me that nobody does heavy black eyeliner like those crazy pirates.

And of course, in typical Karen fashion, this epiphany happened while I had my left arm stuck between an extremely heavy desk and a wall for 15 minutes:
my-left-arm-is-stuck
I work part time in a book agent’s office, so while she was out yesterday I had to install a new fax machine. Everything was fine and dandy until it was time to plug the damn thing in. The desk weighed about a million pounds and was pressed up so close to the wall that I couldn’t get the plug in easily.

Somehow I managed to snake my left arm in, and for five minutes I kept trying to get the plug in unsuccessfully. When I finally gave up I tried to shimmy my arm out and BAM, that bad boy is stuck. Really and truly STUCK. And it remains stuck for 15 minutes. And of course, the phone is three feet away from me, so I can’t call anybody.

During that time I contemplate spitting all over my arm to get it all lubed up (so gross). I comtemplate yelling, “HELP! CALL 911” at the top of my lungs on the off chance that someone in the office building might hear my cry.

And then I remember the episode of COPS I saw a few years back where a kid gets stuck between a toilet and a bathtub and the police have to bring the JAWS OF LIFE to get him out. I start sweating profusely.

So after the initial panic and then having my life flash before my eyes, I finally get myself to relax enough by thinking of Talk Like a Pirate Day. I start wondering whether Captain Jack Sparrow would prefer Technakohl or Fluidline (I don’t see him as a brush fanatic), and soon enough, that left arm slinks right back out.

I wonder what he uses on his waterline
captain-jack-sparrow

MACY’S PASSPORT 2007 is Tonight!

Tonight I’m heading to SF to attend MACY’S PASSPORT 2007, a fashion-charity show, and to interview MAC Viva Glam Spokesperson Dita Von Teese!

After attending SF Fashion week I realized that I need a big bag to fit all of my camera and tech equipment when going to these shows, so yesterday after I freed myself from the wall I went to the mall and picked up this lovely bag from Lululemon Athletica.

luluemon-purse1

It’s supposed to be a gym bag but it can also be a massive purse, overnight bag, makeup bag (!) or school bag. The best part? It’s only $64.00.

Check out the three cavernous sections and envision all of the crap you could put in it! All of my stuff fits in it; I stuffed my laptop, my cameras, my tripod and a bunch of other stuff in it and there was still room to spare.

luluemon-purse2

It’s lightweight, you can throw it in the wash and it holds 50 FRICKIN POUNDS! And there’s even a designated pocket for my Crackberry, awww!

So I’m all packed up and pretty much ready to go for the interview tonight! Wish me luck!

Your friendly neighborhood beauty addict,

Karen

There are 10 comments on this post. Leave yours.

Categories: Just For Fun, MAC Makeup, Makeup, Makeup Tips/How To

Face of the day (FOTD) — MAC Smoke Signals Gentle Fume Eyes, Part Deux; Makeup Tip – Get Dramatic Lashes with a L’Oreal Voluminous Carbon Black and Max Factor 2000 Calorie Mascara Combination

September 5th, 2007 by Karen 7 Comments

Gentle Fume Quad, Take Two

Despite our rocky start, the Smoke Signals Gentle Fume quad and I are starting to become fast friends. I’ve discovered that it really comes in handy when you want to look like a vampire (a cute one, of course). I wore Rondelle on the entire lid, Waft on the outer third and a teeny tiny bit o’ Carbon in the outer v. (Big ups to my blogging buddy temptalia.com for suggesting this look!) I wore this out yesterday and can safely report that I felt 100% non-drag queeny. That’s Burnin‘ on my lips along with Bazaarish Lipglass on top, and lil bit of Emote on the cheeks!

090407-fotd-gentle-fume-eye

Lol, I just realized that this looks like a high school senior pic with a messy kitchen as the background
090107-mac-fotd-smoke-signals-gentle-fume-quad-final2

MASCARA REVELATION: L’Oreal Voluminous Carbon Black + Max Factor 2000 Calorie = BIG DRAMATIC LASHES!

090107-hotlashes-101
Whenever I have a rough day I like to head to the drugstore to grab an ice cream cone and look at makeup. Yeah, yeah, yeah…I know it’s kind of eighth grade but it’s a nice pick me up and it keeps me from dropping serious stress cash at the MAC counter.

I’ve got straight, medium length lashes that aren’t full or thick, so I’m always looking for mascara. My favorite drugstore mascara lately has been L’Oreal Voluminous Carbon Black. It’s really glossy and dark and builds up my ho-hum, straight lashes nicely. Despite its great color and thickening power, I’ve noticed that it really doesn’t hold a curl from the lash curler. Within an hour or so I have stick straight lashes again. Boo!

Today just for fun I layered L’Oreal Voluminous over MAX Factor 2000 Calorie. 2000 Calorie has excellent curl hold, but the color isn’t as glossy or dark as Carbon Black. Layering the two mascaras makes a dramatic difference, and I loved the results: I got thick and glossy lashes that kept the curl throughout the day.

Before
090407-eye-no-mascara-boo-hoo

…and after
090407-eye-after-max-loreal

From the earlier FOTD
090407-superlong-lashes

The only thing is I have to work quickly when applying this both mascaras. I used Waterproof 2000 Calorie, which dries really fast, so if I wait to long to apply the Carbon Black it starts to get flakey and hard to apply.

If you’ve got these two around then give it a go, and let me know if it works for you (I hope it does!)

How’s your Wednesday been so far? I hope that your coffee tastes perfect and that you’re feeling happy and pretty.

Your friendly neighborhood beauty addict,

Karen

There are 7 comments on this post. Leave yours.

Categories: Drugstore Beauty Finds, Face of the Day (FOTD), MAC Makeup, Makeup, Makeup Tips/How To, Product Reviews

Face of the Day (FOTD) – More MAC Mulch Shadow Fun – An easy, day look

August 10th, 2007 by Karen 10 Comments

My current fascination with MAC’s Mulch shadow continues, and today I rocked the Mulch once more with a super-easy look that’s great for makeup newbies.

When girls/boys do these makeup tutorials it seems customary to have a mortifying shot of your face without any makeup on it. I don’t even go across the street without any concealer on, ya’ll!
080907-start-nomakeup-boo

First I prepped my skin by washing it with a gentle cleanser, Clean & Clear. I have acne-prone skin so I put on a thin layer of DDF’s Benzoyl Peroxide with Tea Tree Oil, followed by Olay Complete. After all of this stuff sinks in I put on a thin layer of Laura Mercier Oil-Free foundation all over my face, including my lids.
080907-prep

I’m kind of clumsy, so I like to do eyes first. That way if I totally screw up I don’t have to bother with re-doing foundation, powder, blush, etc. I also do this because inevitably there will always be niblets of shadow all over the place, and I like to swipe the under eye area clean before applying concealer.

Here’s what I used, from the left to the right going counterclockwise:
– MAC Paint in Magrittes
– MAC Concrete shadow (I use this in my brows)
– MAC Ricepaper shadow
– MAC Mulch shadow
– MAC 266 (stiff angled brush)
– Studio Basics lash and brow comb
– MAC 217SE (blending brush)
– MAC 217 (blending brush)
– MAC 209SE (eyeliner brush)
– MAC 212SE (push brush)
– MAC 252 (laydown brush)
– MAC 275SE (angled fluff brush)
– LORAC 103 (concealer brush)
– Laura Mercier Secret Brightening Powder in #2
– L’Oreal Voluminous Mascara in Carbon Black
– MAC Select Moisturecover in NW 25
– MAC lash curler
– MAC Fluidline in Blacktrack

080907-whatyouneed-eyes

I used MAC Paint in Magrittes as a lid primer. Magrittes is a really pretty gold, with shimmer. Don’t fear this shimmer — it’s not too disco, I promise.

MAC Paints are creamy and give shadow something to grab onto. I like ‘em because I find it easy to blend shadows with Paints as a base. One caveat: if your lids are oily you may have some product migration if you use Magrittes by itself. One trick to try is to use Urban Decay’s Potion Primer first and then layer Magrittes on afterwards.
080907-magrittes-closeup

Next I used a 252 brush to apply Ricepaper shadow all over the lid.
080907-magrittes-ricepaper-closeup

Now it’s time to rock the Mulch. I first used the 217 to put a light wash of Mulch all over the lid (from the lash and then upward to just the start of the crease), and then concentrated the color on the outer ends using the 252. Then I blended with the 217 to remove any harsh lines.
080907-mulch

Using MAC’s Lash Curler, I the curled my lashes: I placed the curler closed to the base of the lashes and then pulsed the lash curler (not pinched!) as I moved it upwards to the end of the lashes to create a smooth curl.

If you find the lash curler intimidating or scary you are not alone! So if you have long, thick, pretty lashes then you can probably get away with skipping this step and maybe even skipping mascara. It’s really up to you and how comfortable you are.
080907-curl-lash-no-mascara

Next I added two layers of L’Oreal Voluminous mascara in Carbon Black. Love. This. Stuff. Side note: see those purple-ish undereye circles? Last night I was sucked into a vaccum of bad late night television, and I stayed up way past my bedtime to watch both “Lindsey Lohan: Hollywood Trainwreck” and “Mission: Man Band,” on VH1, LOLOLOL. Oh, and if you happen to know who “Color Me Badd” is then don’t miss “Man Band.”
080907-loreal-voluminous-carbon

I initially was going to skip liner totally but on a whim decided to use MAC Fluidline in Blacktrack to line the outer-upper-lash line. I used a 212 push brush, but the 209 liner brush is a good option, too. I only lined the outer two-thirds because I didn’t want it to look too obvious. This trick is awesome — it totally makes your upper lashes look thicker.
080907-blacktrack

After I finished with shadow and before I applied concealer did a quick cleaned up of my underye area with Boot’s No. 7 Quick Thinking cleansing wipes.

Remember those purple-lish undereye circles? Well, some MAC Select Moisturecover applied with a Lorac concealer brush helps to remedy the situation by leaps and bounds. I set it by applying Laura Mercier Secret Brightening Powder in #2 with the 217SE. THANK YE GODS FOR CONCEALER!

080907-concealer

Now the eyes are done, yay!

Now onto foundation and powder.
080907-foundation-brushes

I mixed together Laura Mercier Oil-Free Tinted Moisturizer in Almond with Laura Mercier Oil-Free Foundation in Suntan Beige and applied the mix with a MAC 190 foundation brush. I don’t like to feel like I’m spackling on the foundation, so I apply just a light layer on to even out the red spots around my nose and to even out the my skin tone. I then set it all over with Laura Mercier Translucent Loose Setting Powder using a Sonia Kashuk powder brush.

080907-foundation
Whew … almost there!

Lastly I do cheeks and lips. Here’s what I used from left to right:
– MAC 129 blush brush
– MAC Blushbaby blush
– Rimmel Pink Rose blush
– Rimmel 1000 Kisses Lipliner in Tiramisu
– MAC 316 Lip Brush
– Bobbi Brown Beige Lipstick, from the Best Of lip palette
– Paul & Joe Lipgloss in #10
080907-blushes-lipstuff-flash
080907-blushes-lipstuff-noflash

For lips I lined with Rimmel’s 1000 Kisses Lipliner in Tiramisu and then used my finger to blend the color in.
080907-lip1
I then added a layer of Bobbi Brown Beige lipstick and topped it off with Paul & Joe Lipgloss, using a MAC 316 lip brush.
080907-lipfinal

I used a MAC 129 to apply Blushbaby on the cheeks and to blend the color upwards toward my ears. I then put a pop of pink shimmer with Rimmel’s Pink Rose blush on the apples only.

Voila! Here’s the final look, without and with the flash.

080907-final-no-flash

080907-final

Crap, now I have to clean up …
080907-cleanup-time

I usually don’t like to write with music on but because this post was so pic-heavy I spent most of my time working with the pics and listening to this song by Robin Thicke and Pharrell. It’s called “Wanna Love You Girl” and it totally makes me want to dance. Give it a listen – it’ll be like we’re hanging out together and talking shop about makeup, LOL.

You better be working it today because it’s FRIDAY!

Your friendly neighborhood beauty addict,

Karen

There are 10 comments on this post. Leave yours.

Categories: Beauty Tips, Face of the Day (FOTD), MAC Makeup, Makeup Tips/How To

Makeup Events – The American Beauty Tour Opens in San Francisco

July 24th, 2007 by Karen 5 Comments

amer-beauty-group-pic
The American Beauty Tour kicked off on Sunday, July 22, 2007 in San Francisco at the W Hotel

This past Sunday, July 22, I got up at the crack o’ dawn and headed over to San Francisco for the opening session of The American Beauty Tour.

The speaker, celebrity makeup artist Billy B., offered tips on making it in the competitive world of the makeup industry, makeup application and life in general. Cheesy as it sounds, I was actually really inspired. [Continue reading…]

There are 5 comments on this post. Leave yours.

Categories: Beauty Tips, Makeup, Makeup Tips/How To, News

Makeup Storage for Traveling and Vacation; Makeup and Beauty Blog’s Travel Makeup List

June 13th, 2007 by Karen 7 Comments

Here’s a pic of my travel makeup:

travel-ziploc-makeup1

Ziplocs aren’t sexy, I know.

I go on trips a few times a year, and at the airport I always see at least one cute girl hauling a sleek, heavy-looking train case full of makeup to her gate – and I’m always glad it’s not me.

While I like the thought of having access to all of my makeup while I’m on vacation, I don’t want to have to carry it around from plane to train to car to boat to rickshaw to … well, you get the picture. Basically I don’t want to haul around more than I have to. And I also don’t want to risk breaking or losing blushes, eye shadows and other products while I’m in transit. [Continue reading…]

There are 7 comments on this post. Leave yours.

Categories: Beauty Tips, Makeup Tips/How To, Makeup Tools

MAC favorites from Allure Magazine Reader’s Choice Awards

May 24th, 2007 by Karen 5 Comments

debbie-harry-mac-facechart

I got my June Allure magazine in the mail yesterday and the first article I read was the Reader’s Choice Awards. I was not surprised to see that several MAC products were voted as favorites in several makeup catagories. Here’s a quick round-up of the MAC faves that Allure Magazine readers voted for:

Lipstick: Mac Viva Glam V. If you don’t have this yet, get it. It’s beautiful, universally flattering, and easy to apply even when you are in a hurry.

Lipgloss: MAC Lustreglass Lip Gloss in Pinkarat. I haven’t tried any Lustreglasses (I’m more of a Lipglass girl) but this is now on my list of upcoming MAC purchases.

Eye Shadow: MAC Eye Shadow in All That Glitters. I don’t have this, but the MAC website describes this “a mid-tone beige with gold reflects.” I will have to check this one out as well; it sounds like a pretty highlight color.

Eyeliner: MAC Fluidline Eye Liner Gel in Blacktrack. I love me some Fluidlines. However, blacktrack is *not* my favorite black. I prefer Blitz & Glitz, which is softer and has a little more dimension to it because of the gold flecks.

Concealer: MAC Select Moisturecover. I recently purchased MAC Select Moisturecover and after feeling just so-so about it for a few months I’ve decided that it’s one of my favorite concealers. It works well with my skintone and it doesn’t budge, even through dance class.

I am leaving for San Diego tomorrow and still have yet to pack. It’s a surf/spa trip, and I haven’t surfed since last July when I was in Hawaii. I dug out my surf wetsuit from the nether regions of my closet yesterday. I haven’t worn it since 2003 (the NorCal ocean is too damn cold to surf in!) so wish me luck – I’m gonna need tons of it when I attempt to squeeze into it.

Friday is right around the corner and I can’t wait. I hope you’re having a great day.

Your friendly neighborhood beauty addict,

Karen

There are 5 comments on this post. Leave yours.

Categories: MAC Makeup, Makeup Tips/How To, News

Beauty Tip – Makeup and Beauty Tips for DMV License Pictures

May 11th, 2007 by Karen 5 Comments

dmv-guide-to-picture-taking

My mission today is possibly one of the biggest of all of beauty challenges: I have to go to the DMV to take a new license picture and somehow make it look cute.

The nasty florescent lighting, the institutional blue paper background … there are many elements that point toward certain disaster. Plus, I think the picture-taking dude that works at the nearby DMV REALLY HATES his job. He purposely waits for your eyes to be crossed, or for you to look like you’re confused before he snaps away, thus preserving your startled doe-in-the-headlights look for all eternity.

The only decent license picture I ever took was when I was 21 and weighed 20 pounds less … needless to say, I need a little bit more help now, since the fresh blush of youth and innocence has left (I’m not bitter!).[Continue reading…]

There are 5 comments on this post. Leave yours.

Categories: Beauty Tips, Makeup Tips/How To

  • « Go to Previous Page
  • Go to page 1
  • Interim pages omitted …
  • Go to page 89
  • Go to page 90
  • Go to page 91
  • Go to page 92
  • Go to page 93
  • Go to Next Page »

Primary Sidebar

Welcome to Makeup and Beauty Blog

Welcome to Makeup and Beauty Blog! My name is Karen, and I’m a freelance writer obsessed with makeup.

Makeup and Beauty Blog features daily product reviews, makeup tips and beauty news — like an interactive version of a monthly print magazine, except with occasional pictures of my cat.

Recent Posts

Sundays With Tabs the Cat, Makeup and Beauty Blog Mascot, Vol. 878

Makeup and Beauty Blog Monday Poll, Vol. 894

Makeup and Beauty Blog Monday Poll, Vol. 893

Makeup and Beauty Blog Monday Poll, Vol. 892

Makeup and Beauty Blog Monday Poll, Vol. 891

/* real people should not fill this in and expect good things – do not remove this or risk form bot signups */

Social

  • Facebook
  • Instagram
  • Pinterest
  • Twitter
  • YouTube

Featured Posts

Sundays With Tabs the Cat, Makeup and Beauty Blog Mascot, Vol. 771

Lady Unicorn

Weird Things I Like to Do

brows fill out beforehand

Before You Pluck or Wax Your Brows, You Must Do This

current bare skin status

What’s One Thing That Drastically Changed Your Skin for the Better?

Copyright © 2025 Makeup and Beauty Blog. Get in touch.