• Skip to main content
  • Skip to primary sidebar

Makeup and Beauty Blog | Makeup Reviews, Swatches and How-To MakeupMakeup and Beauty Blog | Makeup Reviews, Swatches and How-To Makeup

A beauty blog blooming with fresh makeup reviews, swatches and beauty tips from your friendly neighborhood beauty addict

  • Home
  • About
    • About
    • Contact
    • FAQ (Frequently Asked Questions)
    • Advertising & Media
  • Categories
    • Product Reviews
    • Makeup
    • Skincare & Fragrance
    • Style & Fashion
    • Hair
    • Nails
    • Tips & Tutorials
    • Just for Fun
  • Brands
  • Store

Hourglass

Spring Sparkle With Gleaming, Glowing Skin for a Trip to Old Navy

April 25th, 2018 by Karen 27 Comments

mac show gold spring sparkle tutorial
There isn’t a rule that says you can’t shimmer and go to Old Navy in the middle of the week, and MAC Show Gold is perfect for that.

“Because Old Navy” is as good a reason as any to sport sparkly skin on a typical spring Tuesday. Or Wednesday. ?

I mean, I really just want to get out of my pajamas before noon and feel cute again on the regular, truth be told. If there’s a maximum number of days a person should spend in sleepwear per year, I’ve definitely exceeded that limit!

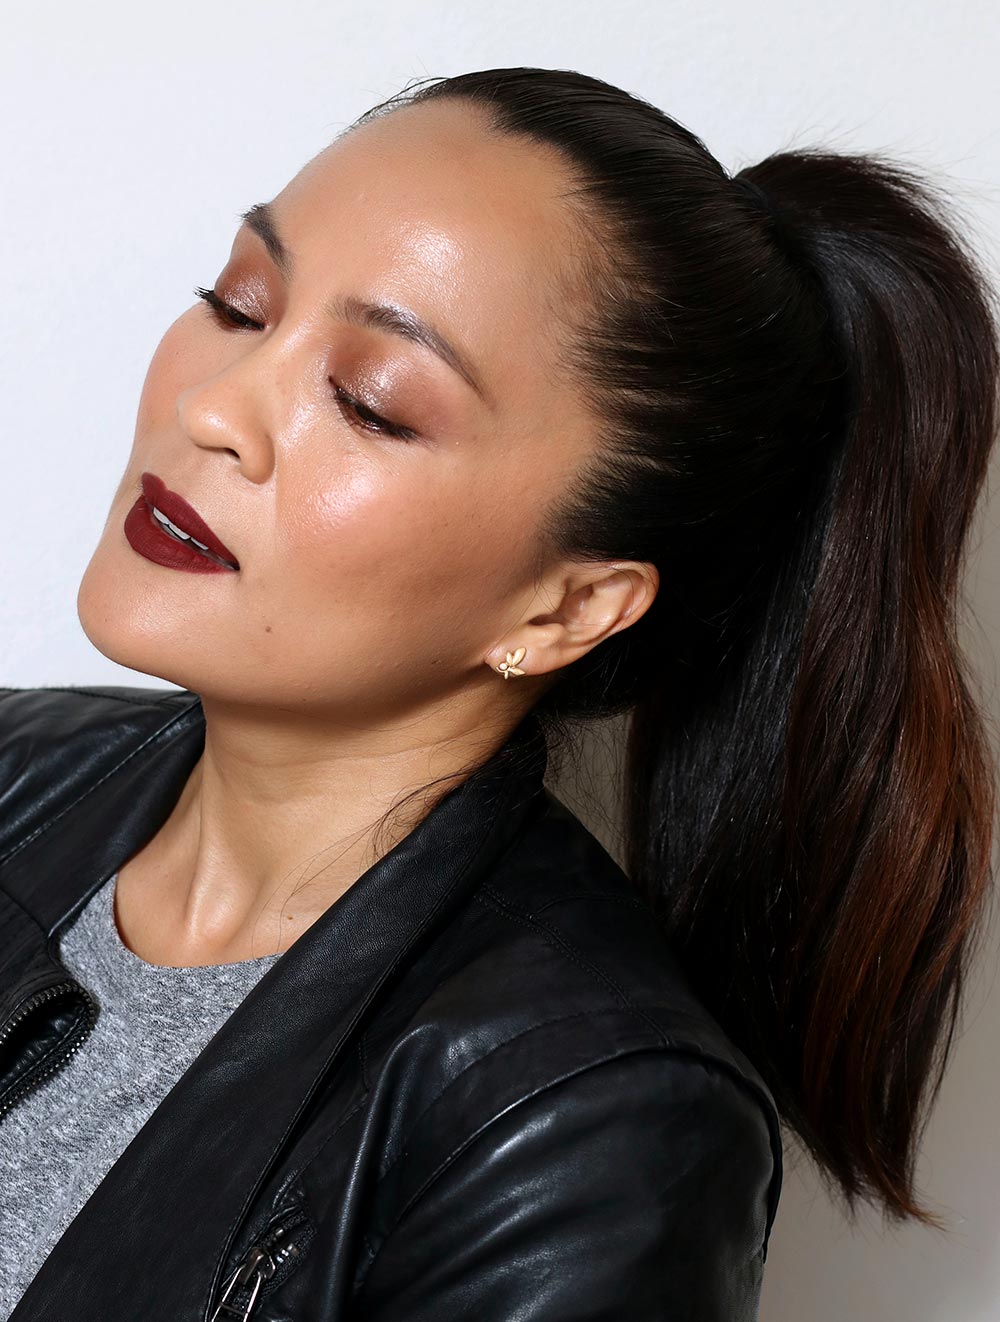
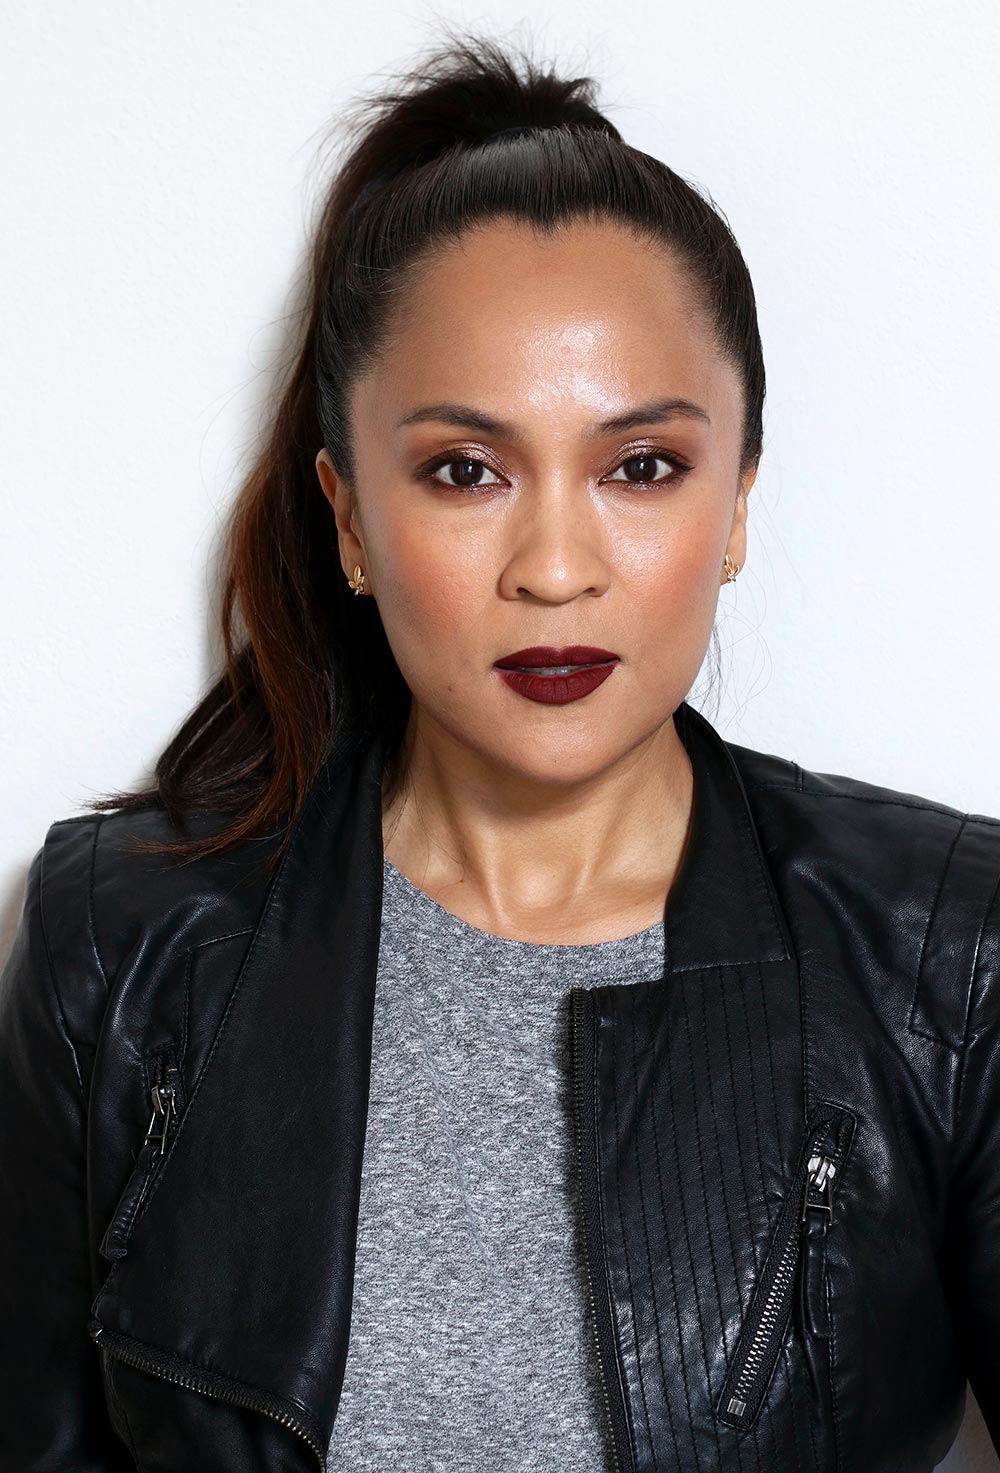
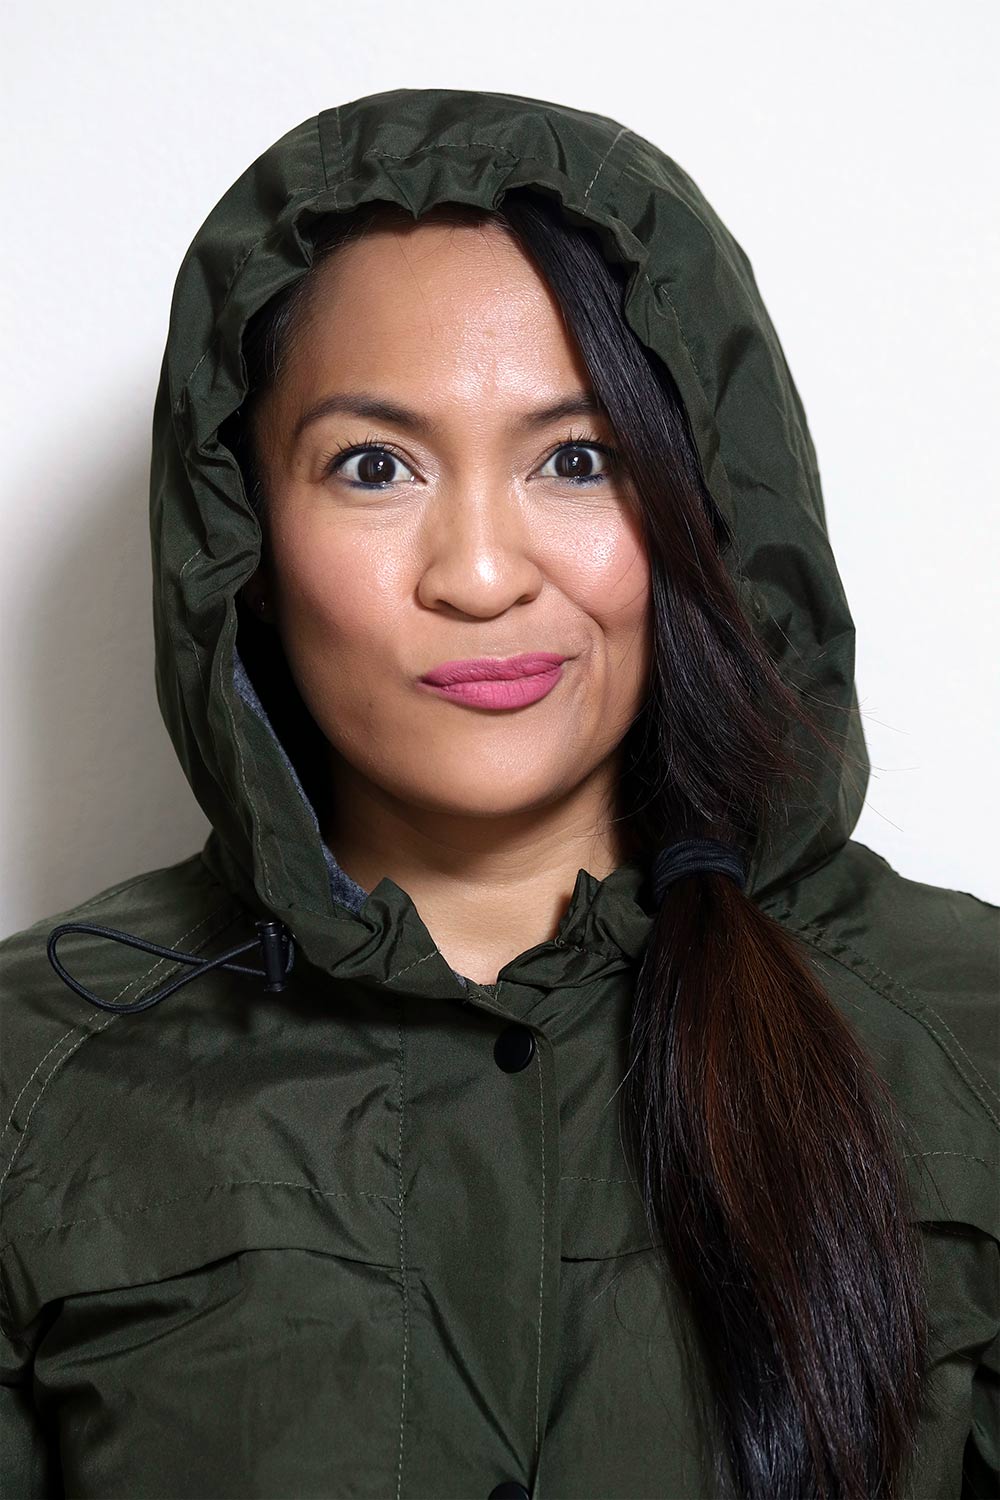
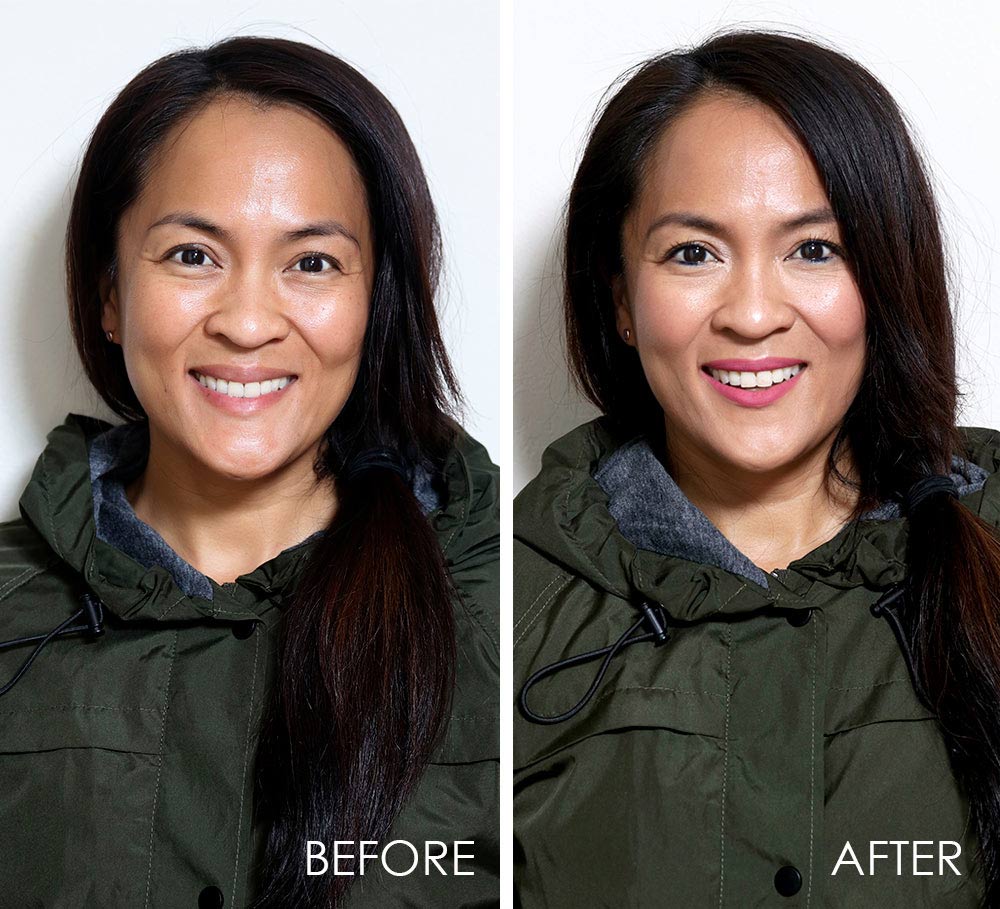
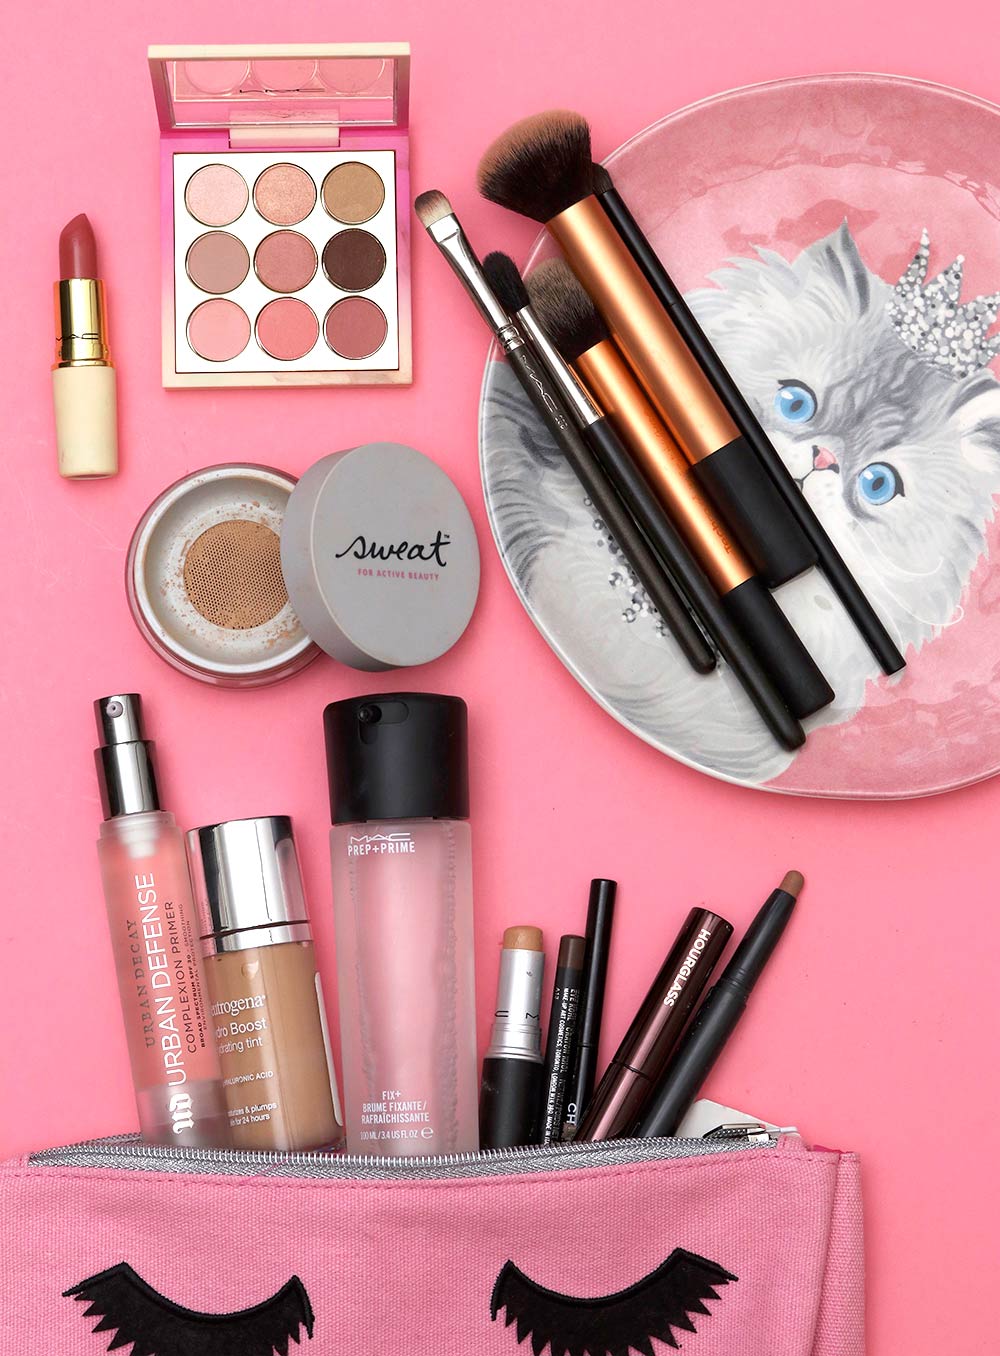
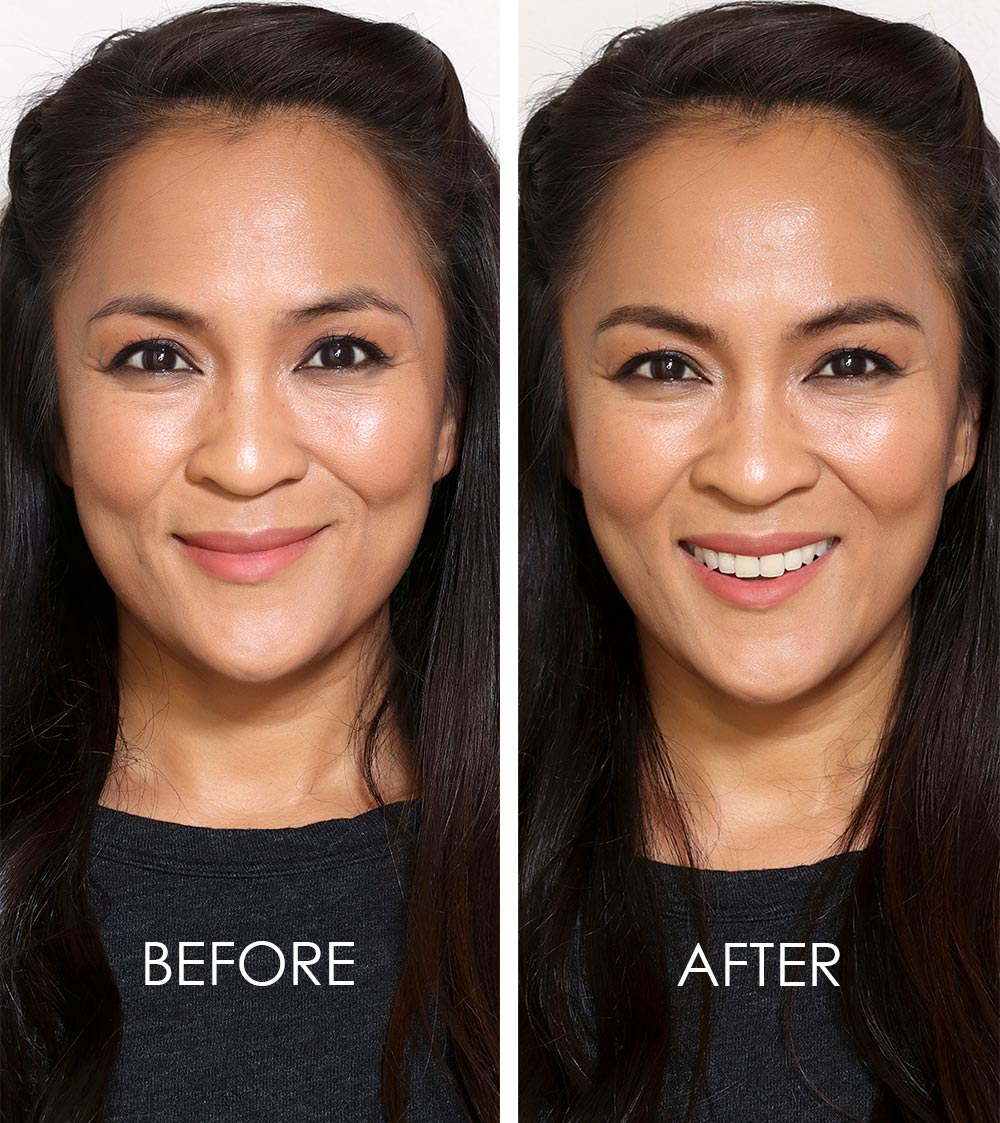
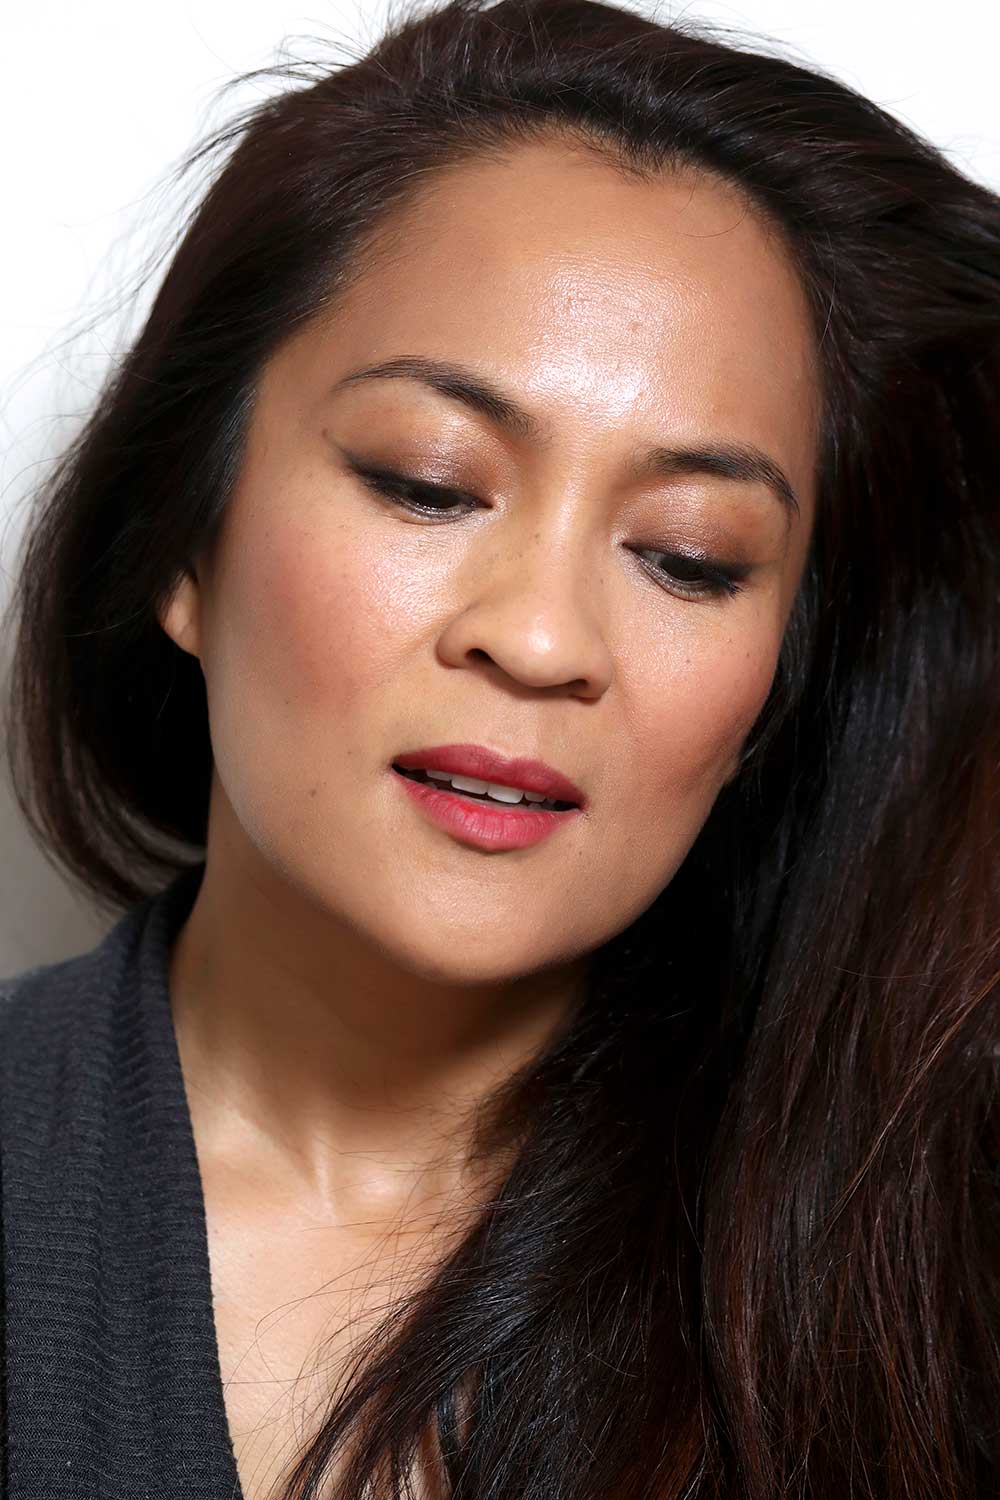
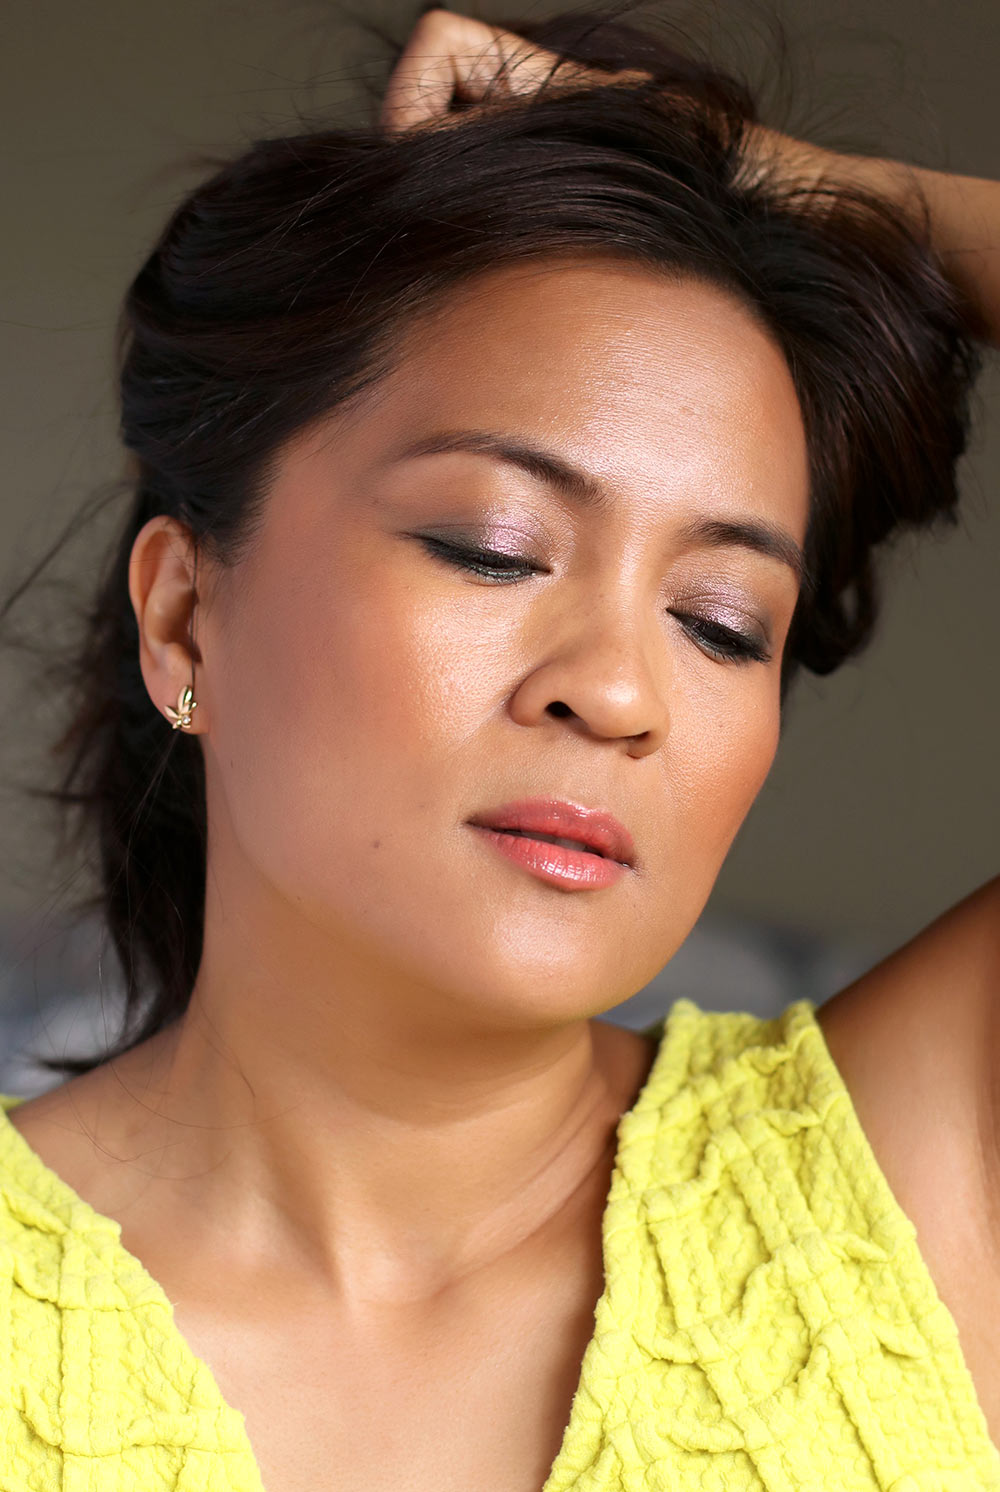
Like the subtle spring sparkle look I did for last weekend’s luncheon, this one also took about 10 minutes. The spring sparkle comes courtesy of glossy coral lips, khaki lids and lash lines with subtle shimmer, and glowing skin.

mac tangerine tropica spring sparkle

All of the primary face products I used — the tint, powder, bronzer, highlighter and even the setting spray — have subtle shimmer and create a dewy, glowing look that’s perfect for a sunny spring day.

spring sparkle 2 car
Ubiquitous car selfie!

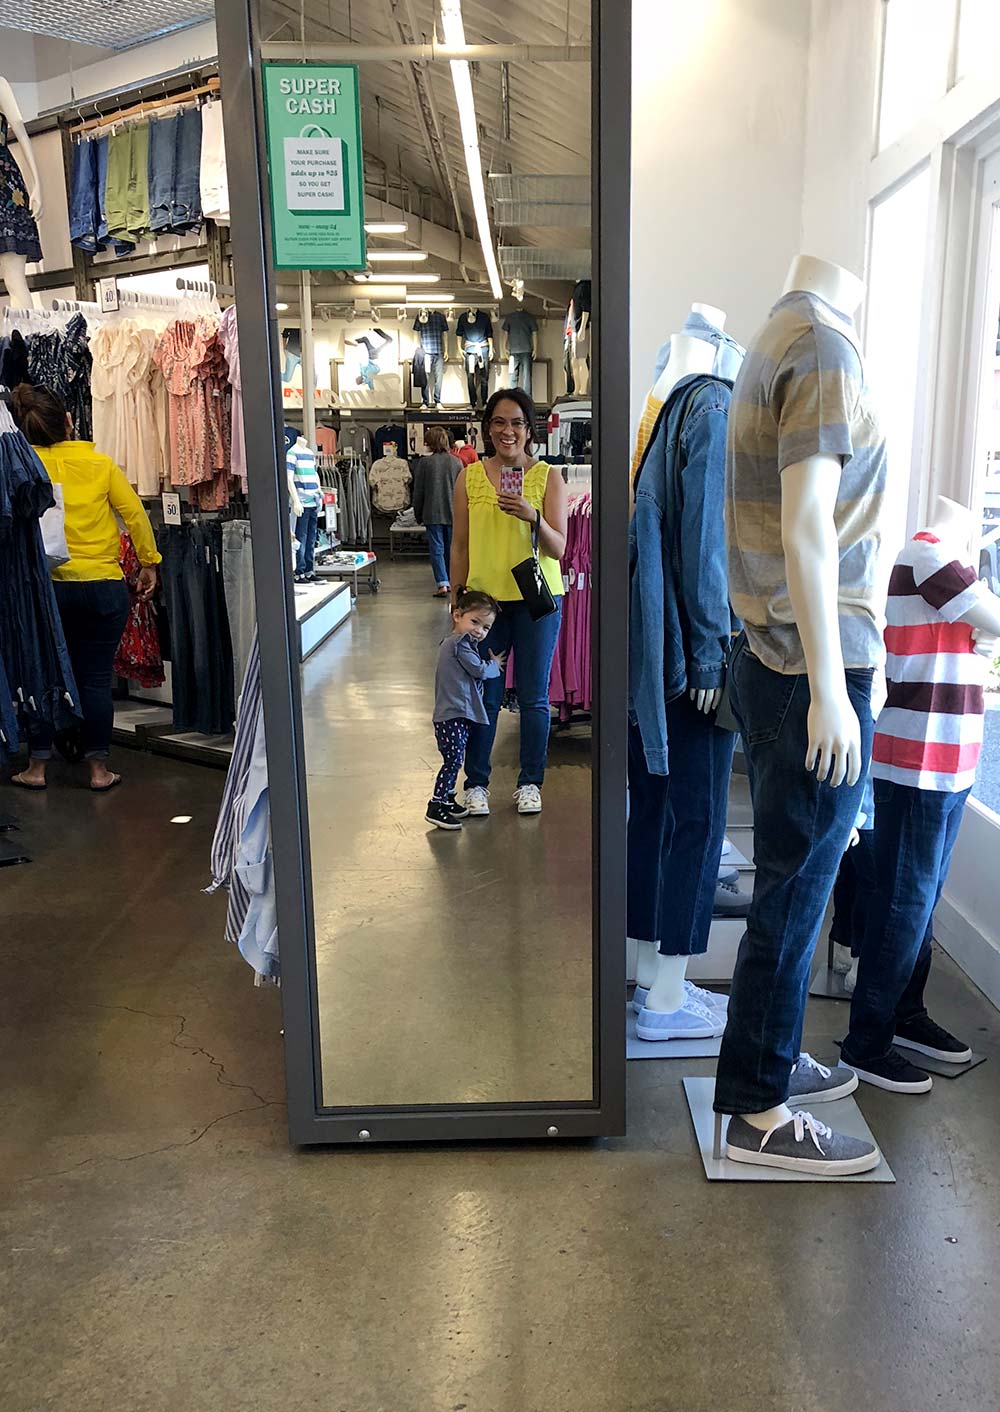
I hadn’t been to Old Navy in a while, and guuurl, sometimes when I go in there the store looks like the ninth wrinkled polyester circle of hell, but yesterday, not so much.

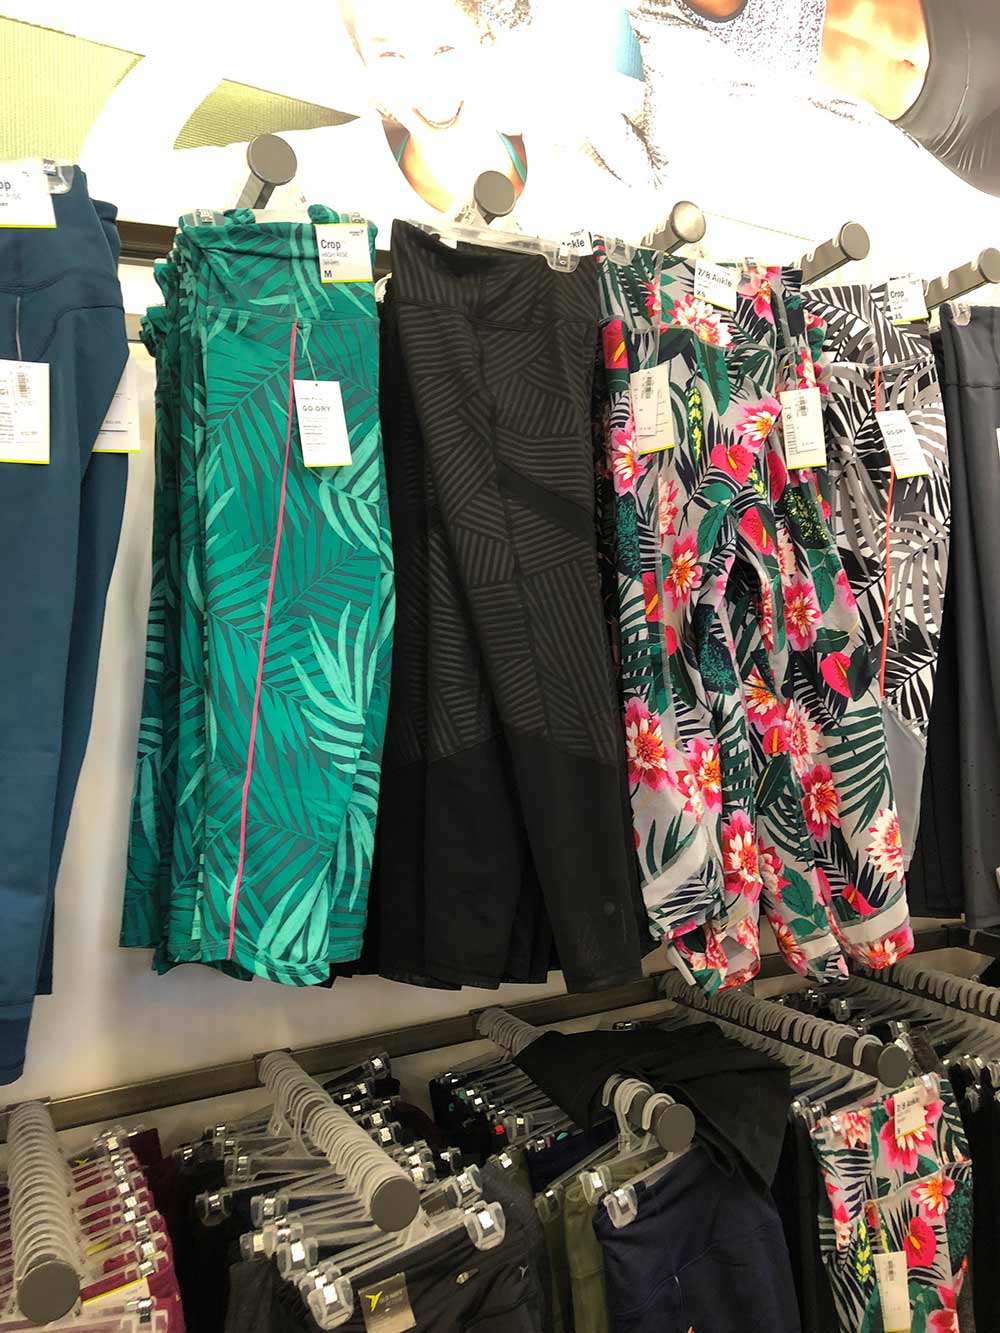
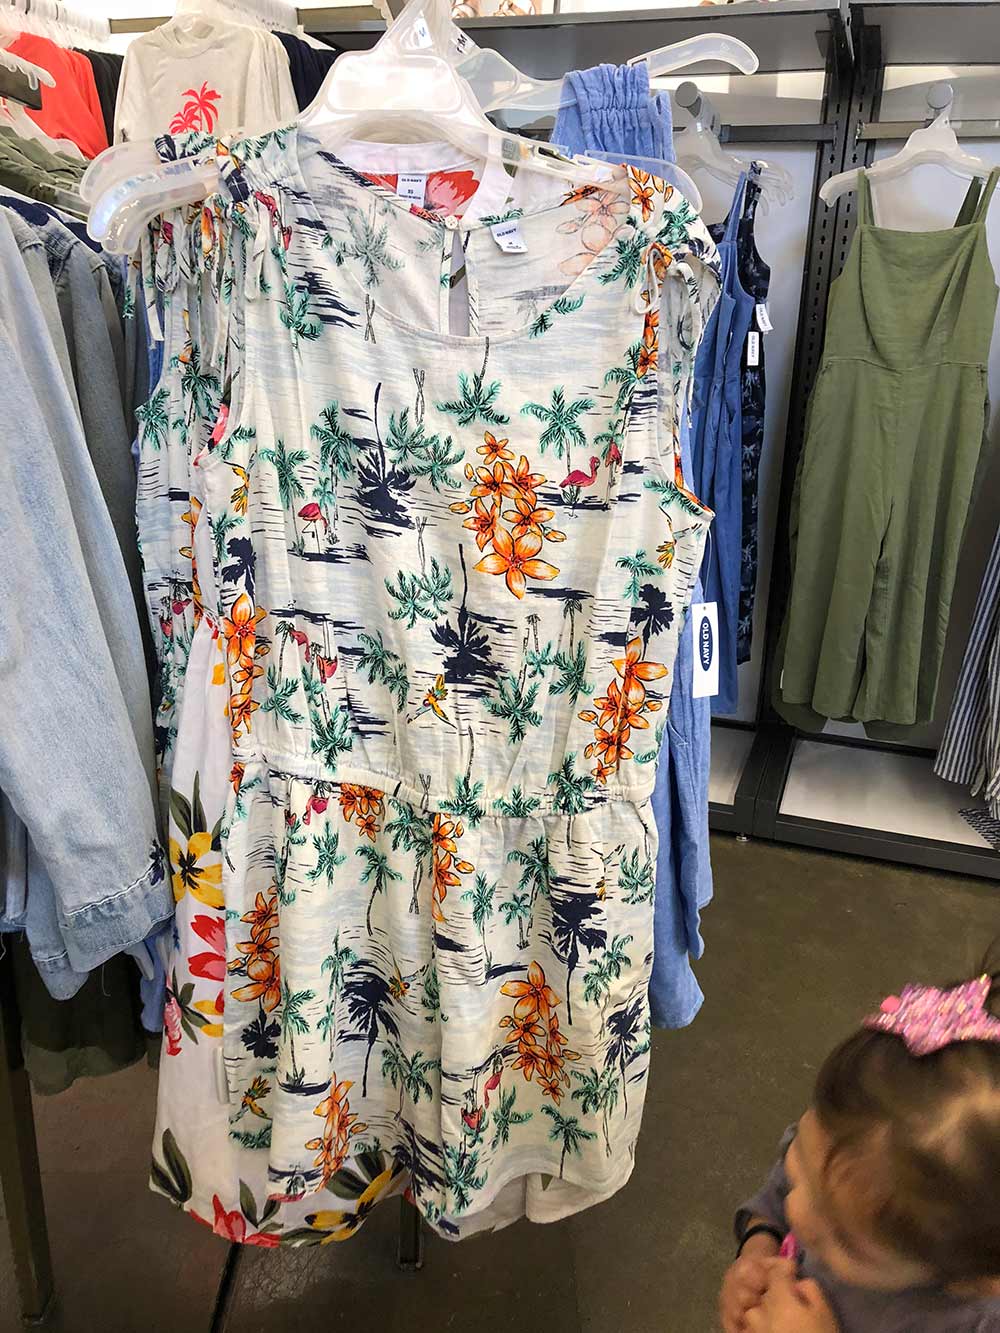
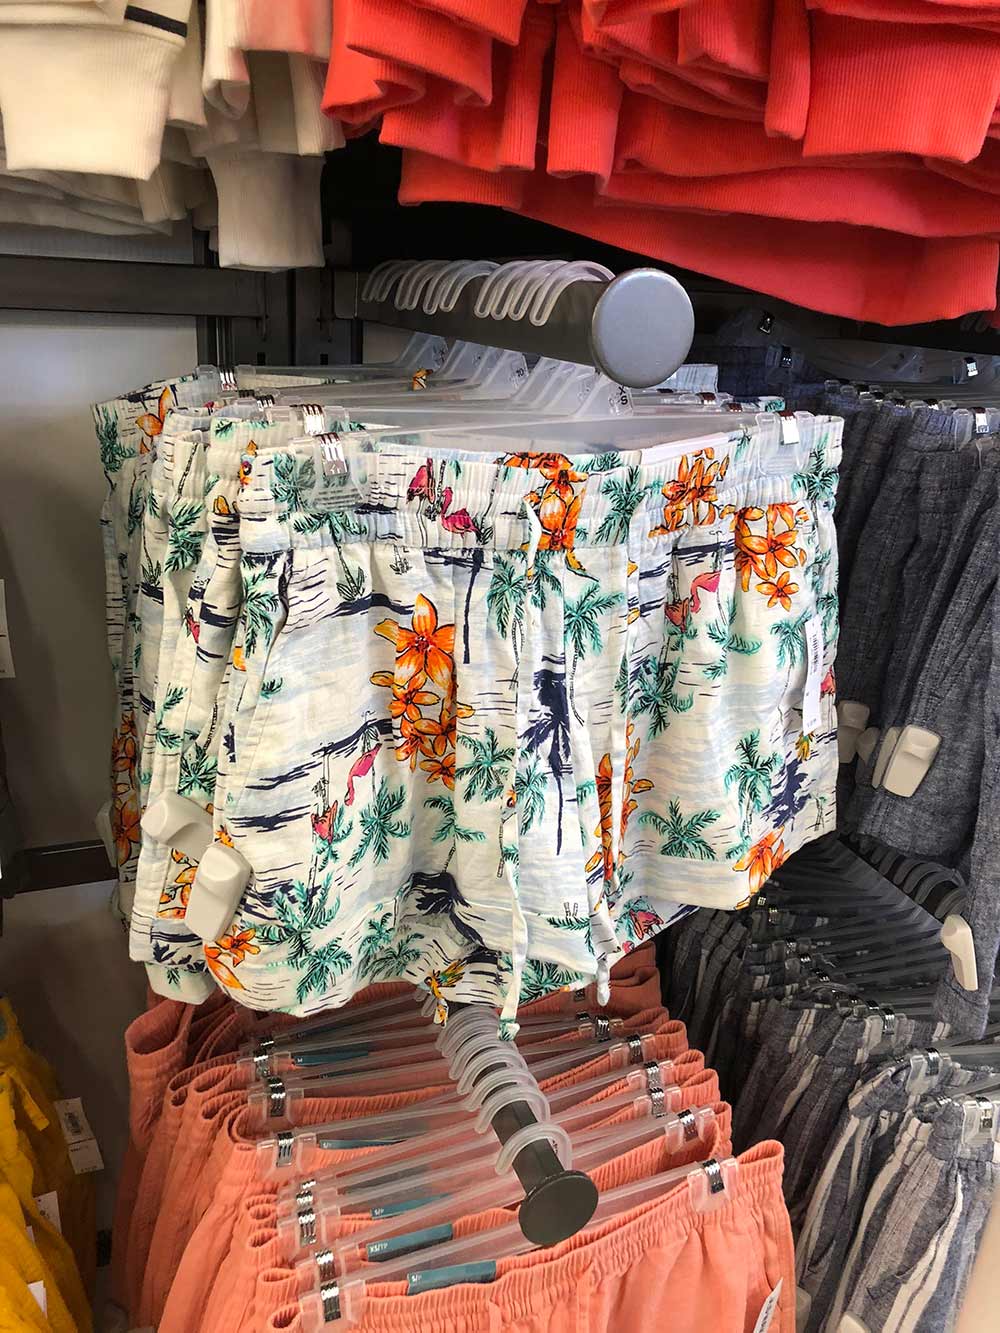
Ugh, SO MUCH CUTENESS! They’ve got this retro tropical vibe happening, and it speaks to my soul. Hibiscus, parrots, palm trees left and right. Good thing I had Connor with me and she was getting antsy for lunch because I would’ve been tempted to stay a lot longer and try everything on.

me and coco old navy

old navy tropical leggings
If these leggings had side pockets for a phone, I’d be all over them. SO CUTE!
old navy tropical print romper
Love this print!
old navy tropical print shorts
It comes in shorts, too.

[Continue reading…]

There are 27 comments on this post. Leave yours.

Categories: Hourglass, MAC Makeup, Makeup, Makeup Tips/How To, NARS, Urban Decay Keywords: makeup tutorial

A Glamorously Grungy Makeup Tutorial: Smoky Reddish Brown Eyes and Vampy Matte Lips

February 7th, 2018 by Karen 24 Comments

reddish brown smoky eye tutorial top pic 1

I’m warning you now — ONLY wear this makeup when you want to feel like a total bad-@ss capable of capturing, and then breaking, all of the hearts in a room within the span of 5 minutes.

This beauty buddy movie pairs two bold focal points together — a messy reddish brown smoky eye and a crisp blackened red matte lip — to create a jammin’ juxtaposition of grungy and glam, and you know I’m all about the contrasts in makeup.

To keep the overall look approachable and well out of Insta-glam territory, I paired the eyes and lips with moderately matte skin (there’s a semblance of a sheen), casual, messy brows and a warm bronzed mauve cheek.

red brown smoky eye tutorial top pic 2

red brown smoky eye tutorial top pic 3

Are you ready to rock?

What you’ll need

FACE PRODUCTS

  • Face Primer with pearly sheen (BECCCA Backlight)
  • Medium coverage liquid matte foundation (NARS Natural Longwear Radient Foundation in Stromboli and Valencia)
  • Concealer for your under eye area, if you want (MAC Matchmaster Concealer in 4)
  • Face Powder (MAC Mineralize Skinfinish Natural in Golden Tan)
  • Warm pinkish mauve powder blush (MAC Extra Dimension in Faux Sure!)
  • Peachy tan bronzer (MAC Mineralize Skinfinish Natural in Give Me Sun)
  • Matte blackened red lipstick (MAC Retro Matte Liquid Lipstick in Carnivorous)
  • Reddish brown lip liner (MAC Mahogany)

EYE MAKEUP

  • Brow gel, either clear or a color that matches your brows (Hourglass Arch Brow Volumizing Gel in Warm Brown)
  • Two powder eyeshadows: a warm reddish brown powder eyeshadow (MAC Swiss Chocolate) and a glittery bronzy peach (MAC Honey Lust)
  • A warm reddish brown eyeliner, ideally something creamy which you can buff out and blend (MAC Costa Riche)
  • Mascara (Benefit BAD Gal Bang!)

TOOLS

  • Smudge brush (MAC 219S)
  • Fluffy angled eyeshadow brush (MAC 275S)
  • Blush brush (MAC 127S)
  • Flat eyeshadow brush (or, you can just use a finger)
  • Something to blend your foundation (BeautyBlender)

red brown smoky eye tutorial products

[Continue reading…]

There are 24 comments on this post. Leave yours.

Categories: Becca, Benefit, Eyes, Hourglass, Lips, MAC Makeup, Makeup, Makeup Tips/How To, NARS, Top Posts

A 10-Minute Minimalist Makeup Tutorial: Gleaming Rose Gold Wings With Glossy Cheeks and Lips

February 1st, 2018 by Karen 21 Comments

nudestix golden rose top pic
You CAN do this in 10 minutes!

I’ve been wearing this look with gleaming rose gold wings and glossy cheeks and lips lately, most recently to brunch with my friend Cindy, and on the day I did this side-roll ponytail tutorial.

It’s borderline glam, which I like, but it’s still quick and easy. From start to finish, you can do this in 10 minutes.

There are three things about this look that help keep the time from spiraling out of control.

nudestix golden rose breakdown

1. The concealer is doing the heavy lifting.

I’m not wearing any foundation at all. There’s just a medium-coverage liquid concealer with a natural satin finish, which I’m using for spot treatments to even out specific places, and I’ve chosen a liquid concealer that can be built up in layers wherever I need the extra coverage (it’s nice to have that option).

2. Pressed powder gives you more control.

The concealer is set with a medium-coverage pressed powder, which is handy for 10-minute looks, whereas loose powder is usually messier… Pressed is just easier for me to grab and go.

Also, pressed powder tends to look sheerer than loose powder does for me, which provides a lot more control over how much powder actually ends up my skin.

Basically, I’d rather apply less product and have to build it up to the coverage I want than accidentally apply too much powder and have to remove the excess… It’s always easier to add makeup than take it away, IMO.

3. A creamy eyeshadow pencil corrects any mistakes with the liquid liner.

Running the cream shadow along the edge of the liquid liner helps to hide any dips and imperfections. There’s also a subtle transition of shine from the high beam gleam of the liquid liner to the softer shimmer of the pencil, which gives some subtle complexity to the liner.

Alright… Are you ready for the breakdown? I hope so, because here we go! 🙂

nudestix golden rose breakdown
Before and after

[Continue reading…]

There are 21 comments on this post. Leave yours.

Categories: Hourglass, MAC Makeup, Makeup, Makeup Tips/How To, NUDESTIX, Tarte

A Rainy Day Minimalist Makeup Tutorial: Cheerful Pink Cheeks, Rosy Lips and Doe Eyes

January 25th, 2018 by Karen 18 Comments

rainy day makeup tutorial
Y tho?!

For the record, it’s hard to look cute in a raincoat. (In case you were wondering.)

It’s rainy and gloomy here in NorCal today, but I’m not complaining, because the rain makes me feel alive! The world around me is thirsty, and it’s taking a much-needed shower and a big gulp of refreshing H2O. And when it’s done, the oak trees and the grass on the hill and the sidewalks and my car (haha) are all going to look fresh and new. 🙂

Or…maybe that’s just California Karen romanticizing the rain, since we haven’t had much of it this winter. I’m sure that if I lived someplace where it’s been pouring 24/7, I’d be like FRICKIN’ RAIN RUINING EVERY MINUTE AND EVERY SECOND OF MAH LIFE!!!

Weather like this calls for a dose of cheerful pink cheeks and bright rosy lips (it couldn’t hurt). Thanks to an illuminating primer, the skin is ever-so-dewy, and the dark blue liner plays off the pink. It’s strategically placed on the middle of the lower lash line for a doe-eyed effect, so you can give strangers a come-hither stare while you sashay by them in your raincoat.

Side note: #teamraincoat ALL THE WAY. Raincoats are the way to go (even if they are hard to look cute in), because they let you keep your hands free, and if there’s a kitten huddling in an rainy alley and you need to save her, you can carry her and comfort her with both hands.

See? Always looking ahead. ?????

When it’s raining, I like to keep my makeup on the minimal side, because you never know if you and your raincoat will get caught in a downpour, and I figure that if my face gets drenched in the rain, better for it to happen while I’m wearing minimal makeup than a full face of war paint… You know, less to clean up when I get wherever I need to go. *shrugs shoulders*

Here’s a breakdown of this look…

rainy day makeup tutorial 2

rainy day makeup tutorial 1

TOOLS (products I used are in italic):

  • Whatever you like to blend your foundation and cream with — a blending brush, BeautyBlender or your fingers
  • Q-tips
  • A brow gel (I used Hourglass Arch Brow Gel in Warm Brunette)
  • A waterproof Mascara (L’Oreal Voluminous Lash Paradise Waterproof)
  • A long-wearing dark blue pencil liner (Urban Decay 24/7 Glide-On Eye Pencil in Sabbath)
  • An under-eye concealer (I used MAC Studio Waterweight Concealer in a mix of NC20 and NW45)
  • A liquid foundation (Physicians Formula The Healthy Foundation in DW2)
  • An illuminating liquid primer (I like Physicians Formula Spotlight Illuminating Primer)
  • A creamy pink blush (Kosas Cosmetics Creme Blush in 8th Muse)
  • A matte rosy pink liquid lipstick (Physicians Formula The Healthy Lip Velvet Finish in Dose of Rose) — I chose a liquid matte lipstick because I didn’t want to wear anything that would stick to my hair

[Continue reading…]

There are 18 comments on this post. Leave yours.

Categories: Hourglass, Kosas Cosmetics, Loreal, Makeup, Makeup Tips/How To, Physicians Formula, Top Posts, Urban Decay

Fast and Flirty Valentine’s Day Makeup Tutorial: A Romantic Monochromatic Soft Peach Look for All Skill Levels

January 24th, 2018 by Karen 29 Comments

romantic makeup tutorial mac lunar new year 2

In the interest of fairness, seeing as how we have Valentine’s Day to celebrate lurve, and Galentine’s Day for your gal pals, shouldn’t there also be a holiday to commemorate V-Day for cat lovers and our cats? Like Feline-en-tine’s Day? Or Cat-en-tine’s Day?

Ooh! — I’ve got it. Meow-entine’s Day! ? ? Happy Meow-entine’s Day, fellow cat ladies, LOL!

Valentine’s Day is a few weeks away, a fact that occurred to me at 7:55 p.m. the other night at See’s Candy (5 minutes before closing), where I went on an emergency last-minute chocolate run.

They had their heart-shaped candy boxes on full display, and it was like a sudden cocoa-infused wake-up call that this is a perfect time for romantic, soft makeup looks. I think this monochromatic peach one would be great for a daytime date, or an evening date, or a date that goes from day to night, ooh-la-la!

Why I ? monochromatic makeup

Because it takes the aspect of color coordinating, and figuring out if this purple goes with that bronze, or if this pink goes with that teal, out of the picture and makes it easy to use multiple (but related) colors together (i.e., so you don’t have to think too hard).

But I really ? monochromatic makeup with a twist!

Instead of just being a peach-on-peach-on-peach party on the eyes, cheeks and lips, this look also relies on subtle transitions and different cream and powder textures, matte and satin finishes, and varying levels of coverage and intensity.

On the eyes, matte and satin powder eyeshadows are layered on top of a cream shadow, and the cheeks and lips are both sporting the same peach color and cream finish, except that the cheeks are sheer, and the lips are opaque. And the creaminess of the blush and lipstick also plays off the matte areas of the skin.

Sheer skin for balance

My foundation is purposefully sheer in this look because, with all of the drama happening on my eyes and the opaque lip, I feel like the face, cheeks and lips need to dial it back a bit to keep everything looking balanced.

A 15-minute look from start to finish

The choice to do sheer skin is also a timing thing, because I’m still really into makeup looks that I can finish in 15 minutes or less, and doing sheer skin saves lots of time and lets me spend most of it on my eyes.

What you’ll need

Here are the products I used…

FACE PRODUCTS

  • Face primer (Urban Decay Urban Defense Complexion Primer)
  • Sheer face tint, or a CC or BB cream (Neutrogena Hydro Boost Hydrating Tint in Honey)
  • Makeup setting spray (MAC Fix+)
  • Powder foundation (Sweat Cosmetics Mineral Foundation in 200)
  • Concealer for your under eye area, if you want (MAC Matchmaster Concealer in 4)
  • Cream peach lipstick (MAC Lunar New Year Lipstick in Good Health, an LE shade available now online and at select MAC counters)

EYE MAKEUP

  • Brow gel, either clear or a color that matches your brows (Hourglass Arch Brow Volumizing Gel in Warm Brown)
  • Cream stick shadow similar to your skin tone (MAC Pro Longwear Waterproof Colour Stick in Sand Bar)
  • Three powder eyeshadows: a matte peach eyeshadow, a matte taupe and satiny bronzy brown (MAC Lunar New Year Eye Shadow X9 in Luck and Fortune, an LE palette available now at select MAC counters)
  • Two pencil eyeliners: a black and a bronzy brown (Chanel 88 Noir Intense and MAC Costa Riche)
  • Mascara (Tarte Lights Camera Lashes)

mac lunar new year flat lay

Let’s get started

First, you’ll be bouncing back and forth between working on your face and working on your eyes, because when every minute/second counts, you gotta multitask. But it won’t be stressful or scary, I promise. 🙂

[Continue reading…]

There are 29 comments on this post. Leave yours.

Categories: Chanel, Hourglass, MAC Makeup, Makeup, Makeup Tips/How To, Neutrogena, Sweat Cosmetics, Urban Decay

Hourglass Arch Brow Volumizing Fiber Gel

January 19th, 2018 by Karen 19 Comments

hourglass arch brow volumizing fiber gel
T-minus 30 seconds to big, bushy brows…

Oh, beauty gods, how fickle are ye! One minute you make skinny, barely-there brows en vogue, and the next minute it’s wall-to-wall wild, bushy brows.

Speaking for myself, I hope the wild, untamed feather brow stays in style a little longer…

OK, a lot longer.

’cause I love the look, and because then I can use this new Hourglass Arch Brow Volumizing Fiber Gel to its fullest potential.

Hourglass just added this new line of long-wearing (10+ hours for me) tinted brow fillers to their permanent line. They’re $28 and available in six shades — Blonde, Warm Blonde, Auburn, Soft Brunette, Warm Brunette and Dark Brunette.

I bounce back and forth between preferring the lighter Warm Brunette and darker Dark Brunette shades, depending on how intense I want my brows at any given moment, although realistically I know that $28 for a brow filler is redonkulously expensive. Still, these little cherubs save me so much time.

They’re also really easy to use — even easier than similar ones I’ve used from Tarte and MAC.

Homegirl got NO time for fussy brow gels! Give me all teh tools! Every minute saved is another minute I can sleep in. 🙂

hourglass arch brow volumizing fiber gel before after
Before and after Dark Brunette

I’m usually a brow pencil-clear brow gel combo girl, and that combo usually takes me 2-3 minutes to use (yes, I’ve timed it), but Hourglass Arch is a one-stop shop where I can fill and set my brows in 30 seconds or less. And they don’t end up looking cray when I’m done, LOL!

[Continue reading…]

There are 19 comments on this post. Leave yours.

Categories: Eyes, Hourglass, Makeup, Product Reviews

10-Minute Work or Weekend Makeup With Red Blush, Red Lipstick and Smudgy Bronze-Black Cat Eyeliner

January 13th, 2018 by Karen 24 Comments

10 minute makeup
Today’s 10-minute makeup

A few things:

  1. It’s Saturday morning, and I’m wearing the same pajamas I put on Thursday night.
  2. My head feels like it’s being squished in a vice (yes, I’m still a walking germ factory).
  3. I haven’t washed my hair in three (four?) days.

But thanks to the healing power of makeup, I can pretend I briefly look like I’m a somewhat functioning adult, LOL!

This 10-minute makeup look was 1) to help myself feel better, and 2) for Sheena (yay for the Bay, girl, woo-hoo!), who liked the NUDESTIX Intense Lip + Cheek Pencil in Purity post earlier this week but wanted to see me use a darker color from the line.

This time I used warm red Stiletto, and I used it as both a blush and a sheer lip color. And then I also did a smudgy, bronze-y black cat eye.

Everything I used is listed below, and if you have any questions, you know where to find me (hints: it involves Netflix, a laptop and my couch).

nudestix stiletto
When you’re trying to not look like you’re a walking germ factory…
nudestix stiletto
Oh, this? I always look like this when I have a 101-degree fever…

One note about the skin. I used a very sheer liquid skin tint to even everything out just a touch, then boosted the coverage on my cheeks with a loose foundation. This is a very cool shortcut I like to do when I’m pressed for time/have very little patience.

Also, because I went into this look planning to only spend 10 minutes on it, and because the pencil was an opaque bright red, I opted for the sheer lip stain because I figured I’d be able to fudge the edge of the lip line (which I did).

[Continue reading…]

There are 24 comments on this post. Leave yours.

Categories: Hourglass, MAC Makeup, Makeup, Makeup Tips/How To, NARS, Neutrogena, NUDESTIX, Sweat Cosmetics, Tom Ford Beauty, Top Posts

Unsung Makeup Heroes: Hourglass Brilliant Nude Blush

December 6th, 2017 by Karen 40 Comments

hourglass brilliant nude
I’m wearing the awesome Hourglass Brilliant Nude blush on my cheeks!

When some people think of brilliant nudes, they might think of Venus de Milo or the statue of David… I think of a blush from Hourglass, LOL! Brilliant Nude Strobe Lighting Blush by Hourglass, you guys, is so, SO good, especially if you love a fresh-faced look where your cheeks glow without looking overdone.

Can’t-miss fresh-faced color that isn’t obnoxiously obvious

It’s the same effect you get from NARS Madly Blush or the Kevyn Aucoin Neo-Trio, you know, where you have a hint of color, a whisper of shine, and your face and skin look livelier and peppier, like you just took a brisk walk or somebody sneaked up and started tickling your ribs.

Your cheeks will have that beautiful flush! That’s what you get from Brilliant Nude.

What’s an unsung makeup hero? For me, it’s an oftentimes underrated makeup morsel, a permanent collection product that scoots under the radar screen of many makeup lovers but regularly rocks my world. The long-running Unsung Heroes series features some of my favorites.

hourglass brilliant nude
Each of the Hourglass Ambient Strobe Blushes has a unique marbled pattern, so no two are quite alike.

Peachy amber mixed with a shimmery highlighter

Brilliant Nude is a peachy amber blush mixed with a gorgeous golden shimmery highlighter. It’s one of the Ambient Strobe Lighting Blushes, which is the blush family in the Hourglass permanent collection that has a more obvious and visible highlight (there’s also the Ambient Lighting Blushes, like the shade Diffused Heat, which are great, too, but they have a quieter highlighting effect).

Not to say that the Ambient Strobe Blushes like Brilliant Nude have an obnoxious highlight. Ya know, it’s Hourglass, they handle their finishes with a very refined touch. It’s softly reflective and luminous, but it isn’t metallic or garish or harsh, so women of all ages (and pore sizes!) can wear it.

A healthy glow on all shades of skin

When you mix the highlighter and blush together you have that perfect combination of color and shine that’s just a little something but not too much. I’m a tan gal, an NC42 in MAC, but I’ve seen this on both lighter and darker ladies, and it’s beautiful across the board. On lighter skin, you get more of the blush effect. On darker skin, it functions more as a highlighter, but in either case cheeks have a healthy flush and glow.

[Continue reading…]

There are 40 comments on this post. Leave yours.

Categories: Hourglass, Makeup, Product Reviews, Unsung Heroes

  • « Go to Previous Page
  • Go to page 1
  • Go to page 2
  • Go to page 3
  • Go to page 4
  • Go to page 5
  • Go to page 6
  • Interim pages omitted …
  • Go to page 12
  • Go to Next Page »

Primary Sidebar

Welcome to Makeup and Beauty Blog

Welcome to Makeup and Beauty Blog! My name is Karen, and I’m a freelance writer obsessed with makeup.

Makeup and Beauty Blog features daily product reviews, makeup tips and beauty news — like an interactive version of a monthly print magazine, except with occasional pictures of my cat.

Recent Posts

Sundays With Tabs the Cat, Makeup and Beauty Blog Mascot, Vol. 878

Makeup and Beauty Blog Monday Poll, Vol. 894

Makeup and Beauty Blog Monday Poll, Vol. 893

Makeup and Beauty Blog Monday Poll, Vol. 892

Makeup and Beauty Blog Monday Poll, Vol. 891

/* real people should not fill this in and expect good things – do not remove this or risk form bot signups */

Social

  • Facebook
  • Instagram
  • Pinterest
  • Twitter
  • YouTube

Featured Posts

Sundays With Tabs the Cat, Makeup and Beauty Blog Mascot, Vol. 771

Lady Unicorn

Weird Things I Like to Do

brows fill out beforehand

Before You Pluck or Wax Your Brows, You Must Do This

current bare skin status

What’s One Thing That Drastically Changed Your Skin for the Better?

Copyright © 2025 Makeup and Beauty Blog. Get in touch.