• Skip to main content
  • Skip to primary sidebar

Makeup and Beauty Blog | Makeup Reviews, Swatches and How-To MakeupMakeup and Beauty Blog | Makeup Reviews, Swatches and How-To Makeup

A beauty blog blooming with fresh makeup reviews, swatches and beauty tips from your friendly neighborhood beauty addict

  • Home
  • About
    • About
    • Contact
    • FAQ (Frequently Asked Questions)
    • Advertising & Media
  • Categories
    • Product Reviews
    • Makeup
    • Skincare & Fragrance
    • Style & Fashion
    • Hair
    • Nails
    • Tips & Tutorials
    • Just for Fun
  • Brands
  • Store

Makeup

New Beauty Booty: Viseart, Smith & Cult, R+Co, Surratt Beauty, Shiseido and Rita Hazan

April 24th, 2017 by Karen 23 Comments

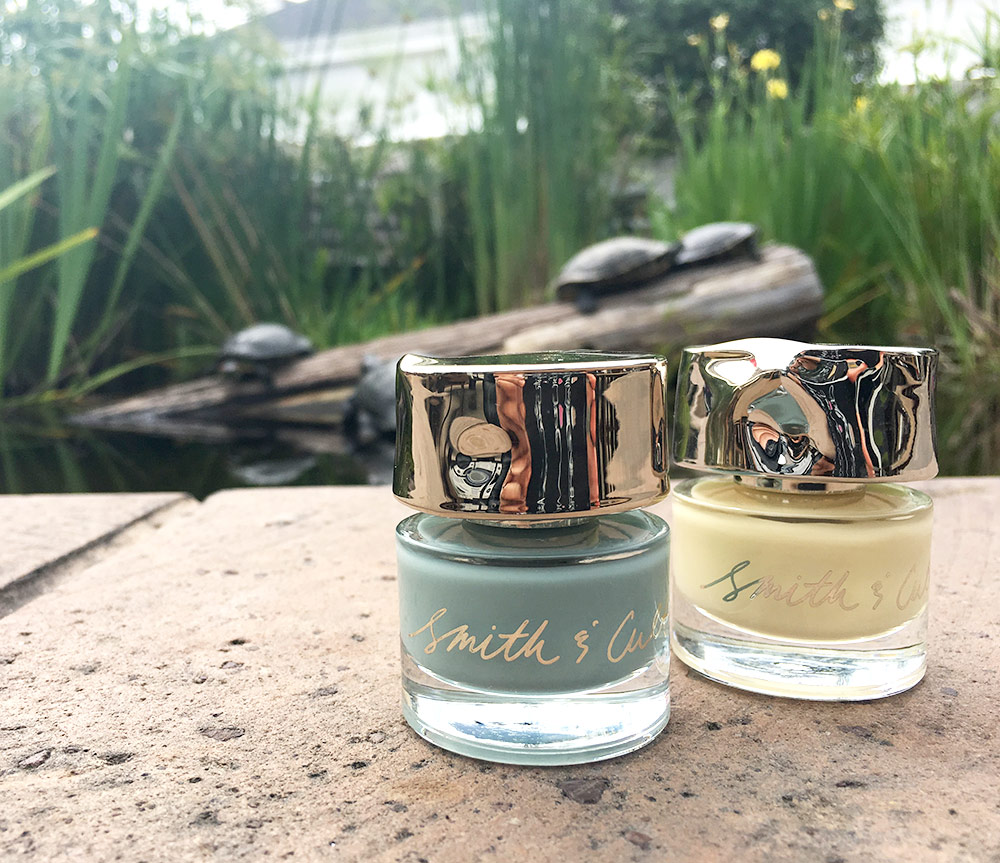
smith cult bitter buddhist bee side
Smith & Cult Nail Lacquers in Bitter Buddhist (left) and The Bee Side (right)

No, seriously, this is what beauty shopping feels like for me: I float outside of my body, when I’m, like, at Sephora (or any beauty store really), and next thing I know, I’ve got a bag filled with beauty booty in my hand, and I’m walking out the door, and I have no idea what just happened! It’s like I go into a fugue state or something.

So yeah. That’s more or less what went down when I grabbed a few beauty bits and bobs last weekend, including some things from the Sephora VIB sale.

It started with the Viseart Neutral Matte Eyeshadow Palette, OMG!
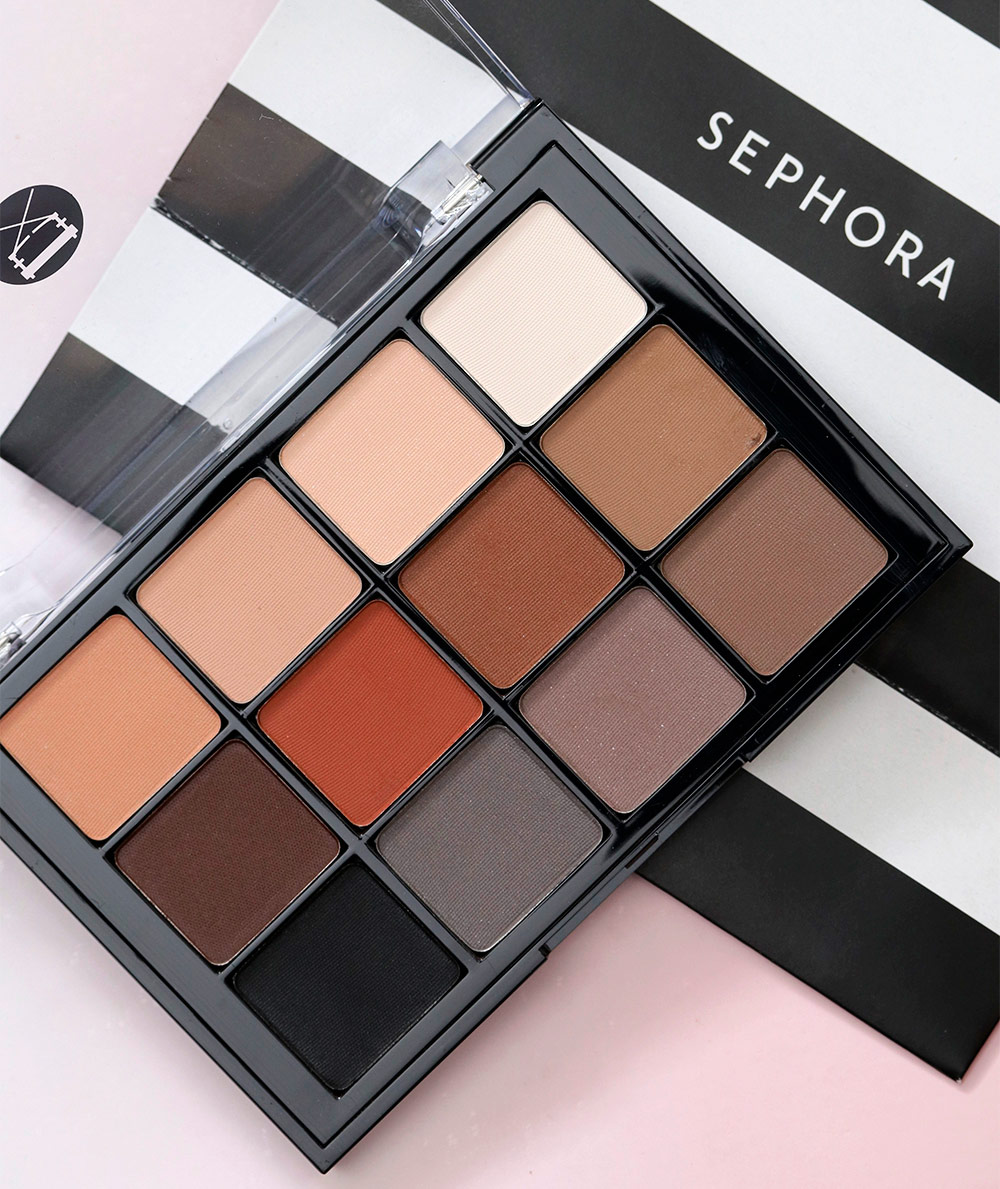
viseart neutral palette
The Viseart Neutral Matte Palette

I’ve been lusting after this thing for FOREVER. It was sold out online but the store had several palettes on the shelf, which I took as a fortuitous sign from the beauty gods.

I grabbed one, walked around with it for 45 minutes, and then next thing ya know, BAM. I’m strolling out of Sephora to get frozen yogurt with my friend Marisol, and the palette’s in my hot little hand.

troy surratt shiseido curler
Surratt Beauty Relevée Lash Curler (left) and Shiseido Eyelash Curler (right)

I also grabbed a couple lash curlers. After reading all the comments in last week’s Lust List, I couldn’t decide between the Shiseido or the Surratt, so I got them both. I figure if there’s one that I don’t love as much as the other, I can keep it around as a backup. #makeuphoarderissues

Until I can figure out how to successfully dye my own hair without completely mucking it up, I’ll always and forever keep a supply of Rita Hazan Root-Touch Up Concealer on hand.

Rita Hazan Root Concealer-Touch Up Spray

I couldn’t find it on the shelf at first and panicked, but then I asked one of the associates to please look in the little drawer underneath the display, and inside there were a few extras tucked away. Never hurts to ask, right?

Sephora VIB goodies

[Continue reading…]
There are 23 comments on this post. Leave yours.

Categories: Makeup

DRUGSTORE GEM ALERT! Revlon Colorstay 2 in 1 Angled Kajal Eyeliner

April 21st, 2017 by Karen 6 Comments

This new Revlon angled eyeliner pencil could totally pass for a brow pencil, amiright?

Observe the angled tip. If I hadn’t been paying attention (which happens sometimes often when I’m applying makeup early in the morning), I would’ve put the shade I’m wearing here (Fig) in my brows.

Purple brows. Hmm… Thinking about it now, that would’ve been kind of cool.

These Revlon ColorStay 2 in 1 Angled Kajal Eyeliners are so bomb! They’re smooth, pigmented, and the angled tip hugs my lid curves. The waterproof formula fabulously flows along my lash and water lines, too. Drawing neat lines is a snap.

Oh, and it absolutely does not move!

[Continue reading…]
There are 6 comments on this post. Leave yours.

Categories: Drugstore Beauty Finds, Eyes, Makeup, Product Reviews, Revlon

Fri-Yay Makeup Fun: Ombre Eyeliner

April 21st, 2017 by Karen 20 Comments

Yeah, you could line your lash lines with a basic black or brown liner and call it a day, but it’s Fri-YAY! Let’s wear two different colors. Two fun colors, woo-hoo! ?

I mean, you don’t have to go as crazy as I did here with, like, teal and purple, but I’m not going to discourage you if you’re in the mood to go bold.

So, let’s talk about ombre eyeliner, which is what I call it when one shade of liner merges into another shade to create an ombre effect.

I usually like to do the inner part of my lash lines in a lighter color than the outer part because I think it makes the most visual sense to me, but it’s just a preference. Anything goes.

For this look here, I’m doing my lighter liner on the inner part, and a darker liner on the outer part.

1. Choose your two liner colors

I think this is the hardest step — picking two colors that go well together, and also go well with your overall look.

Think about what you’re wearing on your lids, a.k.a. everything about your lash line and below the crease. I’m wearing a teal shade on my lids, so I went with a darker green shade for my inner liner, and a dark purple for the outer liner (the purple also echoes my purple lips, but I might try this again and use a dark blue).

Side note: when I do this kind of look with neutrals (you know I love me some browns!), I like to use gold, bronze or rose gold for the inner liner, and then, say, a dark plum, dark navy or a forest green for the outer section.

Some combos I like!

[Continue reading…]

There are 20 comments on this post. Leave yours.

Categories: Makeup, Makeup Tips/How To, Urban Decay

Makeup Shortcuts: Smoke Out Your Lids With Liner, and Avoid Having to Clean Up Fallout [Featuring Chanel Summer 2017]

April 20th, 2017 by Karen 8 Comments

Cleaning up fallout is one of my least favorite things in this universe, right up there with ill-fitting underwear. I LOATHE having to clean up powder under my eyes. I just have better things to do with my life, ya know?

I recently stumbled on this technique where you smoke out the outer corners using an eyeliner, and it’s the Best. Thing. Ever. Because no fallout. 🙂 Basically, all you need is a pencil liner, your favorite blending brush and your best resting b*tch face.

Ha! I kid, I kid! The RBF is totally optional.

Step 1: Start with your (nearly) completed makeup look

But seriously, what you will need is a nearly completed makeup look, so let’s start with that, OK?

Since you won’t have to worry about cleaning up any fallout (YAY!), you can already have your eyes, base, cheeks and lips done.

Here I’m wearing a few things from Chanel Summer 2017, and I’ll list everything down at the bottom of the post.

Step 2: Apply a dark liner to the outer corner

Grab a dark liner that will complement your look, and reach for something that’s either off-black, gray or dark brown — something that isn’t too dark but will still add that smokiness to the outer corners.

I mean, you could use a true black liner instead, but then you’d have to do more blending.

Also, you’ll want your liner to be somewhat smudgy in a formula that doesn’t set super quickly. That way you can easily push it around with a brush.

I’m using a greenish black to go with the warm bronze and pink tones I’m wearing.

[Continue reading…]

There are 8 comments on this post. Leave yours.

Categories: Chanel, Makeup, Makeup Tips/How To

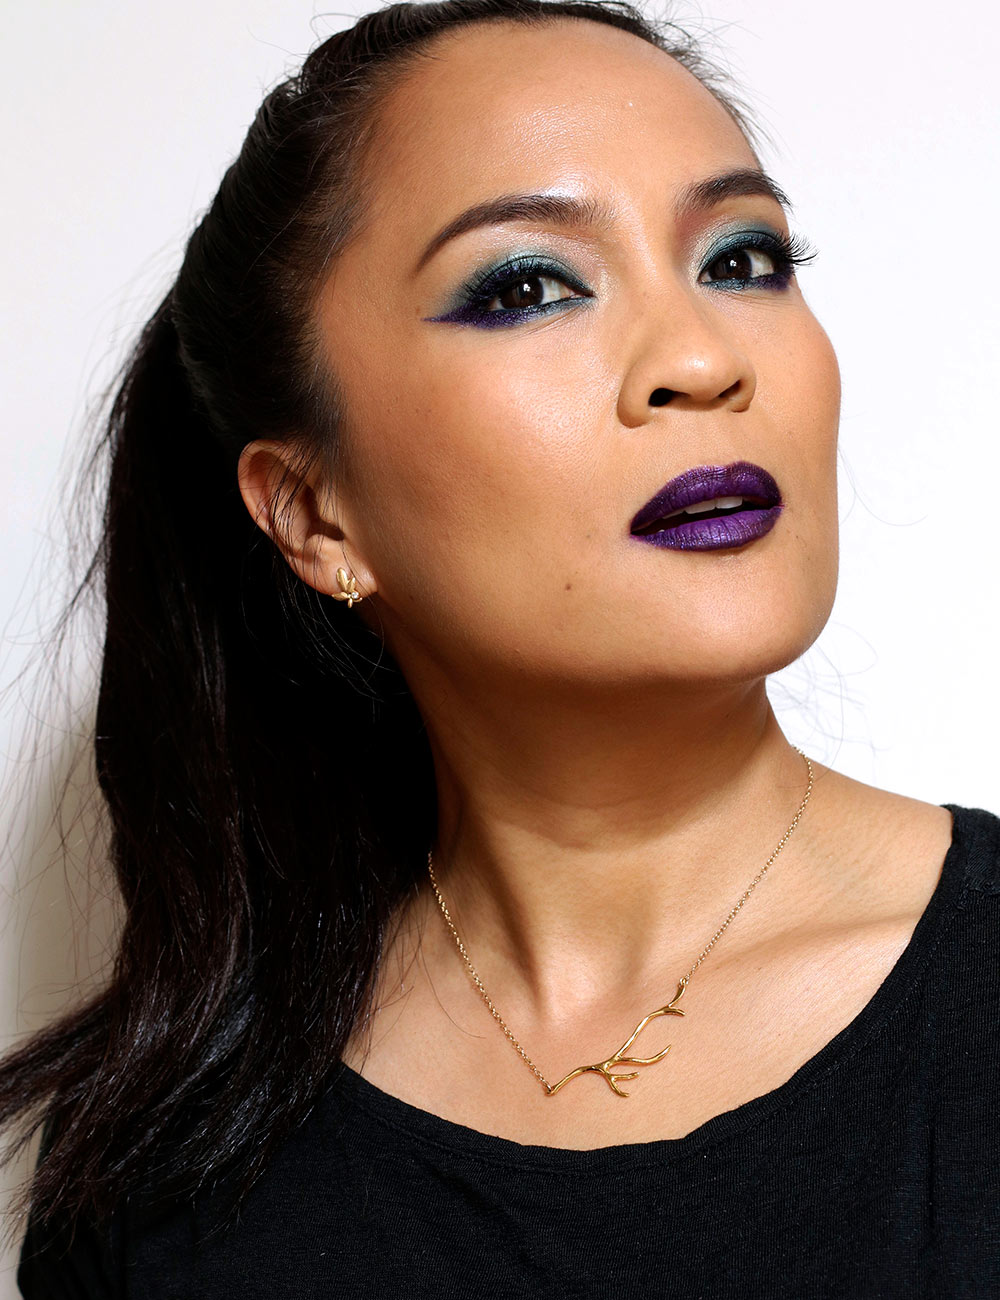
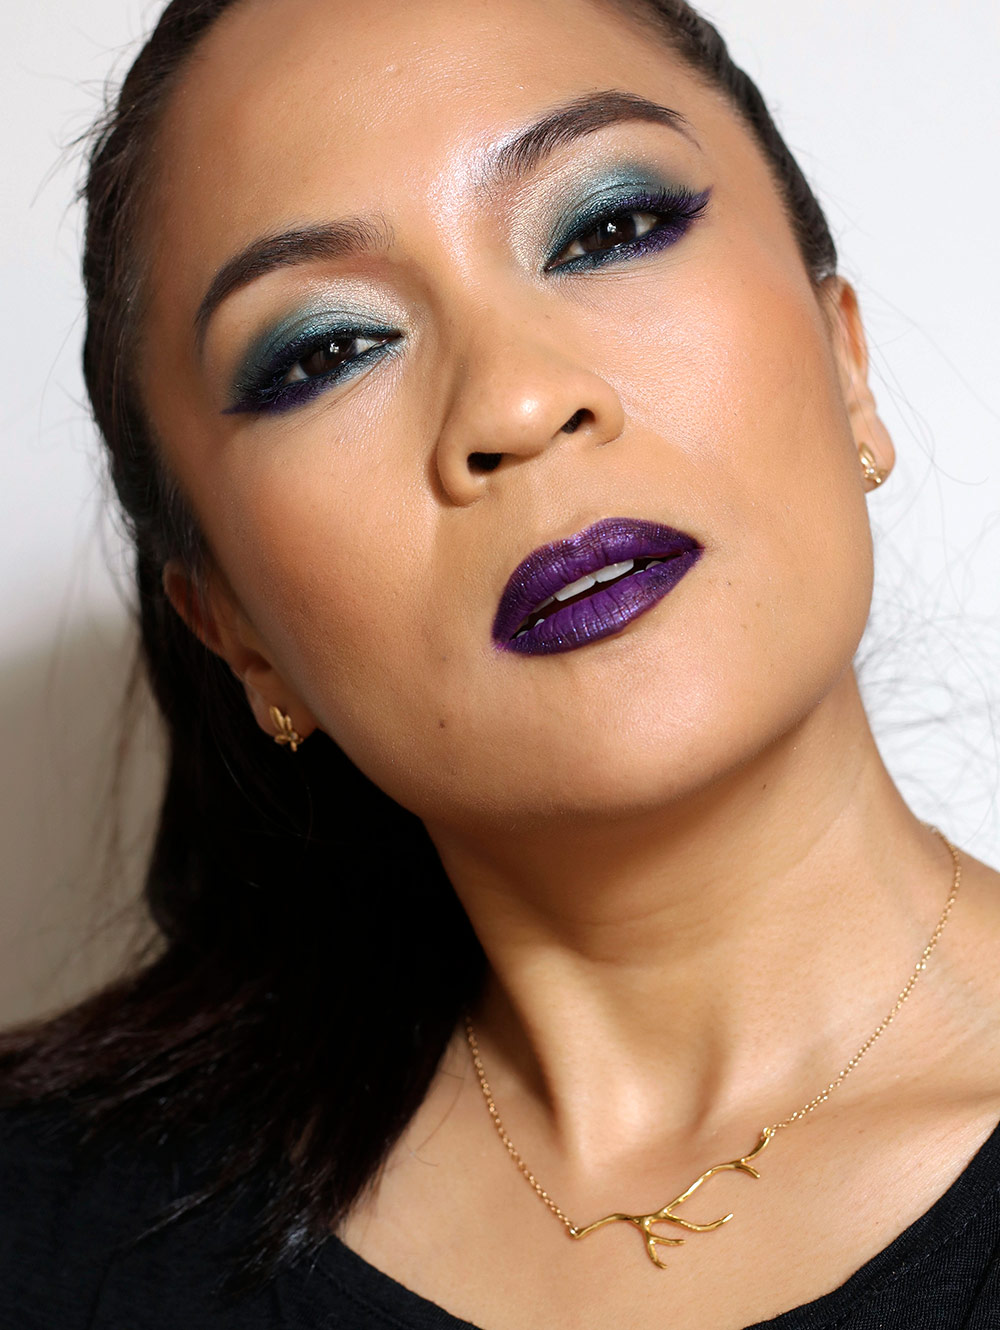
What I Wore Wednesday, Vol. 9: Purple Wings and Lips

April 19th, 2017 by Karen 41 Comments

urban decay afterdark

It’s been a minute since I’ve worn this much color! It felt SO good though. I was inspired by a picture I saw of model Ruby Rose on Urban Decay’s website wearing purple winged liner with matching sparkly purple lips.

So I took the idea and ran with it. I’m wearing a lot of Urban Decay in this look, including their Afterdark Eyeshadow Palette.

urban decay afterdark

[Continue reading…]

There are 41 comments on this post. Leave yours.

Categories: Face of the Day (FOTD), MAC Makeup, Makeup, Sephora, Urban Decay

New From Hourglass for Summer 2017: The Ambient Strobe Lighting Blushes and Two New Shades of Ambient Lighting Bronzer

April 19th, 2017 by Karen 18 Comments

hourglass ambient strobe lighting blush bronzer
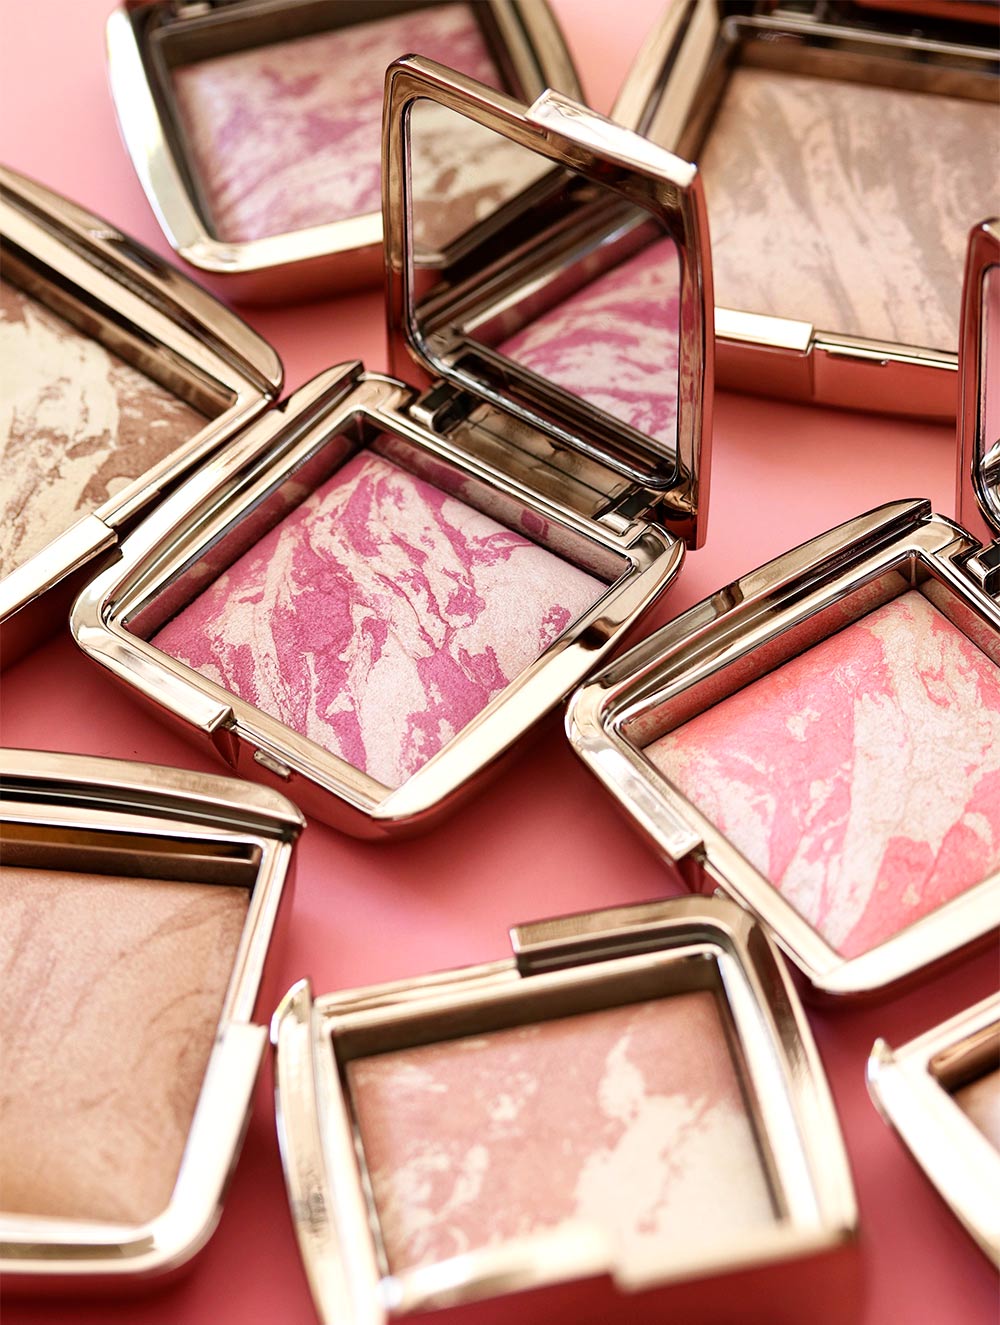
There’s a new line of Hourglass single pan blushes for summer and two new shades of Hourglass bronzer (available now online and coming soon to stores)

I think we should start a petition to promote ice cream ? as a legitimate dinner option. Because why not? It’s got protein and…calcium. It’s totally real food.

Thanks, Hourglass, for giving me an ice cream ? craving. All I can see when I look at these new bronzers and blushes from Hourglass is ribbons of caramel in rich chocolate. Mmm…

A new line of Hourglass blushes and two new shades of bronzer

Hourglass has some new things for summer, yay! This is epic news for me because they’re one of my all-time favorite high-end brands. Their products are pricey, but they work amazingly well, and they’re BEAUTIFUL. The brand carries things that you just can’t find anywhere else (like the Ambient Lighting Blushes and their Vanish Seamless Finish Foundation Sticks).

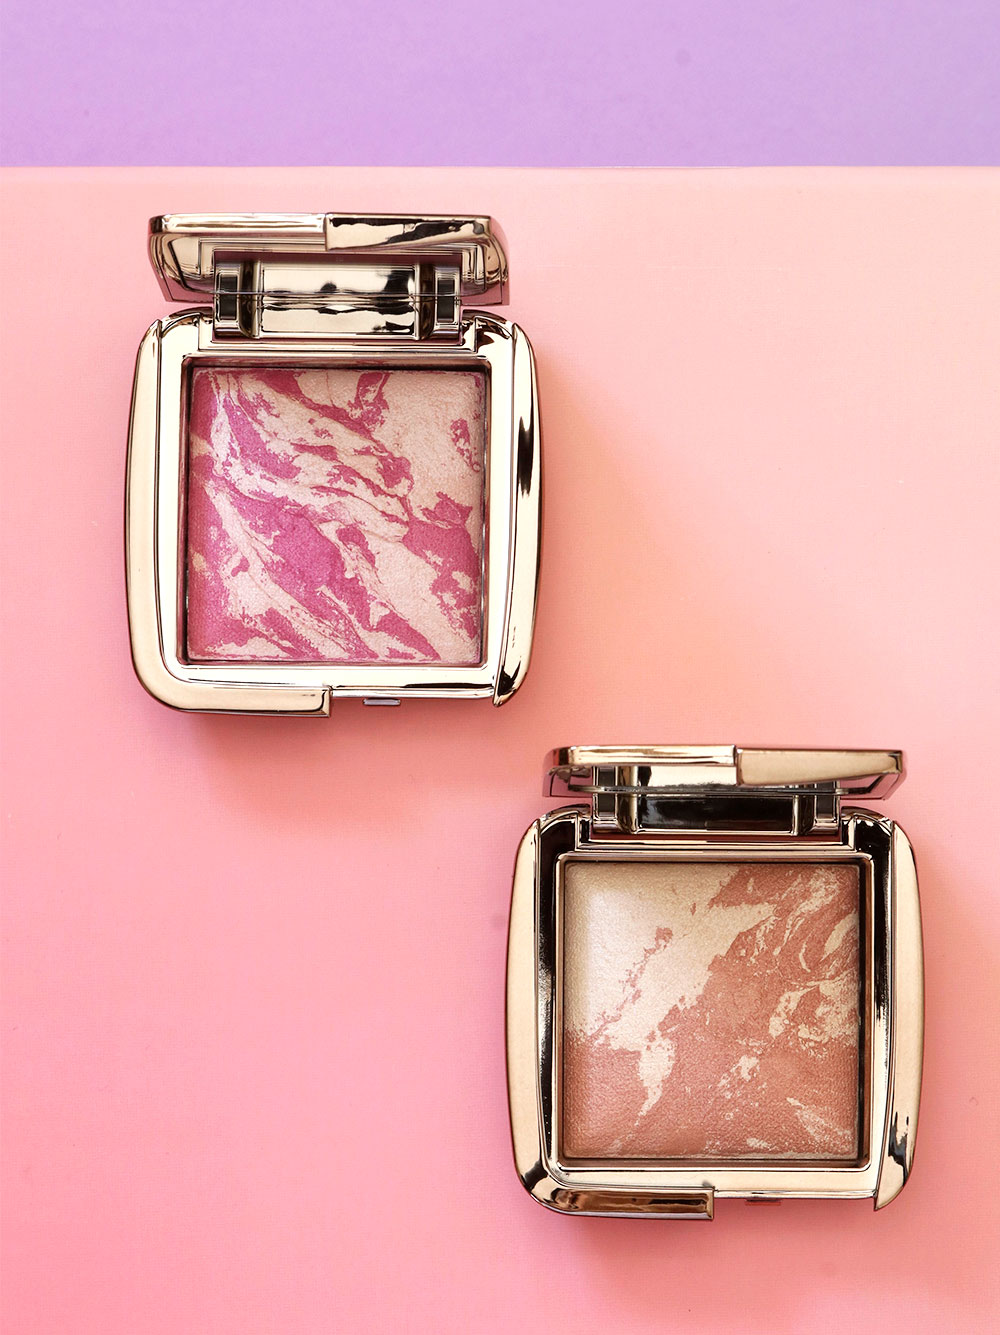
Now there’s a new line of super shimmery blushes (although we have seen them in a palette before) called the Ambient Strobe Lighting Blushes, which are $38 each and available in four shades, and two new $50 shades of Ambient Lighting Bronzer, bringing the new total up to four.

Hourglass Ambient Strobe Lighting Blush in Incandescent Electra (left) and Euphoric Fusion (right)
hourglass iridescent flash brilliant nude strobe lighting blush
Hourglass Ambient Strobe Lighting Blushes in Iridescent Flash (left) and Brilliant Nude (right)

[Continue reading…]

There are 18 comments on this post. Leave yours.

Categories: Face, Hourglass, Makeup, Product Reviews, Top Posts

Makeup Shortcuts: Save Time by Using Blush as Eyeshadow

April 19th, 2017 by Karen 12 Comments

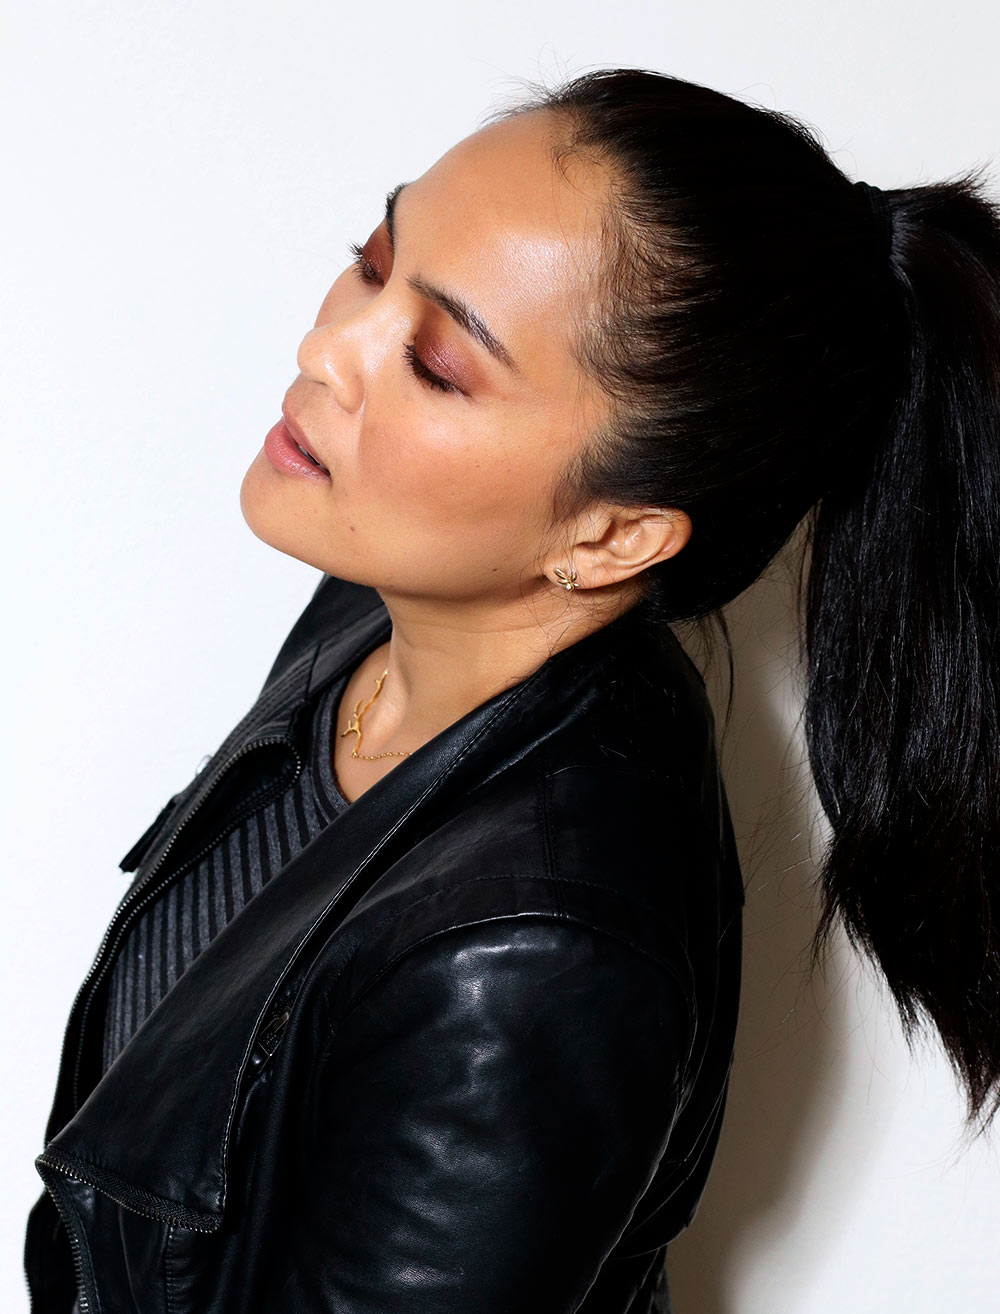
mac hard to get blush top
See the blush on my cheeks? I’m also wearing it on my lids!

Sometimes I don’t want to think too hard about what makeup colors I’m wearing, so I’ll wear my cheek color (the same color I’m wearing) on my lids as a shadow. It’s just one of those things that saves a little brain power, and here’s whatcha do…

It’s a lazy girl’s guide to using your blush as eyeshadow.

Step 1: Apply an eyeshadow base

You can use whatever you want — a potted cream shadow, stick shadow, what have you. I’m actually wearing an eyeliner here (MAC Costa Riche) as my base. You just want to make sure that whatever you choose will work in concert/harmony with the blush you plan to wear.

mac costa riche top

Step 2: Load an eye brush with your chosen blush

And after you load it, you have a choice to make. Do you keep the brush head dry and apply it like that? Or do you wet it with a makeup setting spray (like MAC Fix+) to intensify the color?

Up to you.

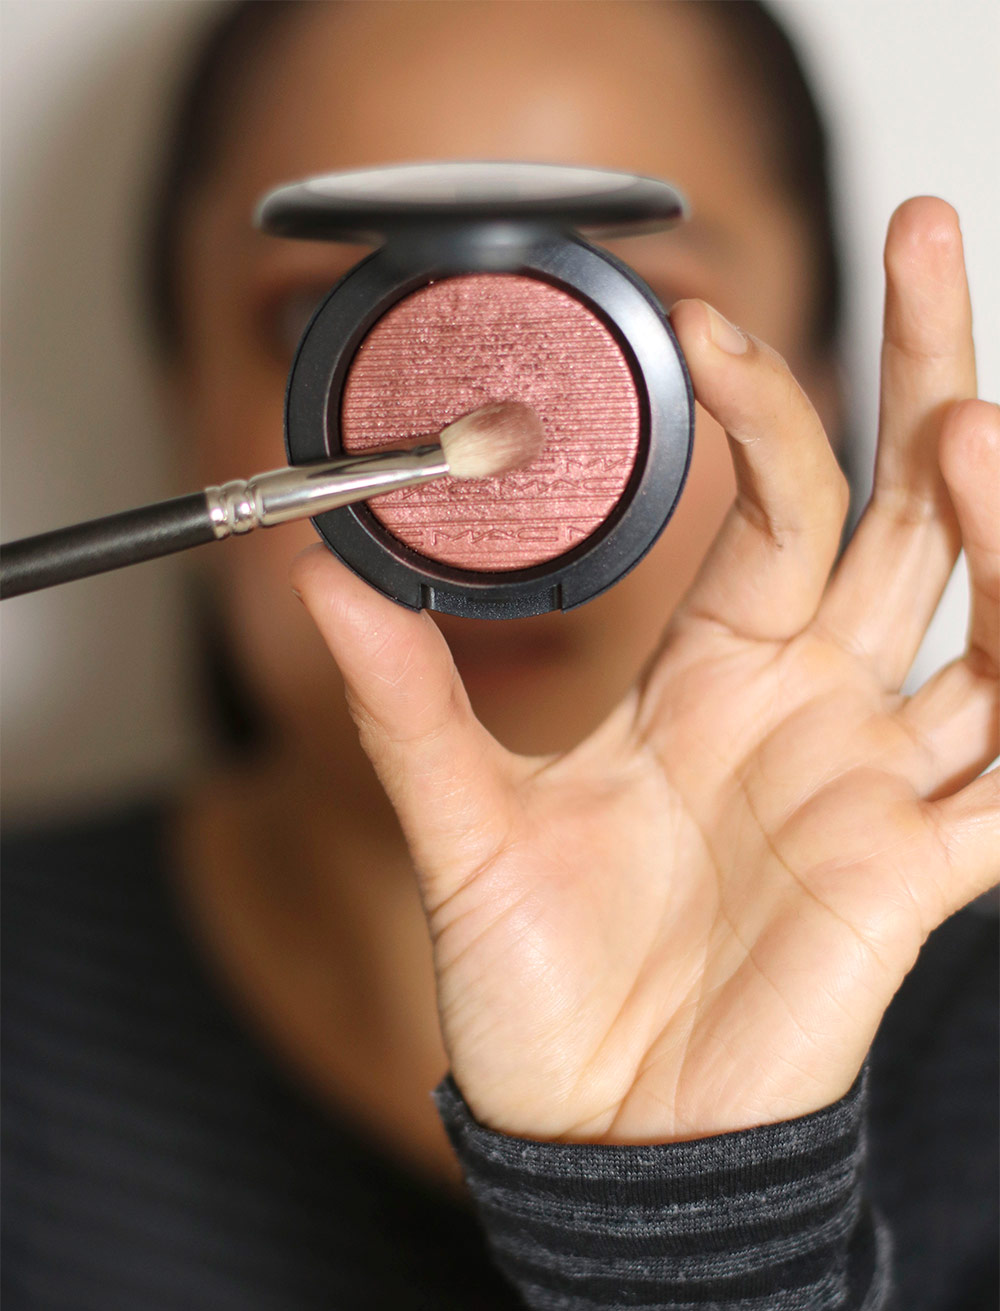
mac hard to get blush
MAC Extra Dimension Blush in Hard to Get with a MAC 217 Domed Eyeshadow Brush

Step 3: Blend that blush…on your lids

Sweep and pat to blend your blush on top of your eyeshadow base, and the higher up you take it, the more dramatic it’ll look.
[Continue reading…]

There are 12 comments on this post. Leave yours.

Categories: MAC Makeup, Makeup, Makeup Tips/How To

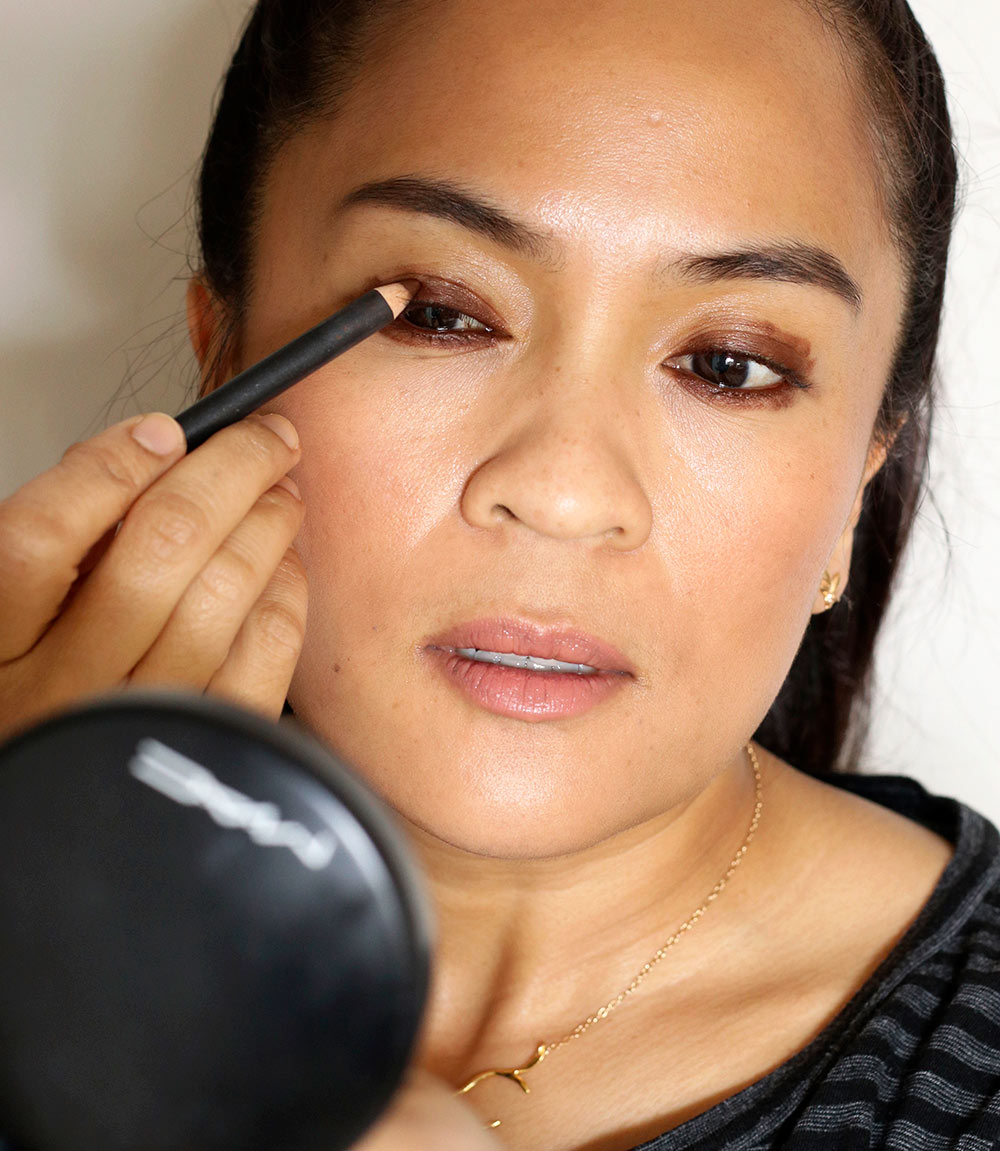
Makeup Shortcuts: Save Time by Using Eyeliner as Eyeshadow

April 18th, 2017 by Karen 15 Comments

mac costa riche top
Using eyeliner as eyeshadow

Sometimes you wanna get lost in the moment, forget your cares, and blend your eye makeup to your heart’s ? delight…and sometimes you don’t.

Next time you don’t, try using an eyeliner as eyeshadow. You can whip out a quick look in minutes.

It’s usually easier if you use a soft liner because you can scoot it around with a brush, and liners that don’t dry immediately and stay pliable longer will give you more time to blend them out. I’m wearing MAC Costa Riche Eye Kohl in these pics.

Step 1: Get to linin’

Start by lining your lash and water lines with the eyeliner, then apply it your lids and just barely into the crease.

Note: you don’t have to be neat here at all. In fact, if you look in the mirror and see a crazy person starting back at you, you’re doing it right, LOL! 🙂

mac costa riche

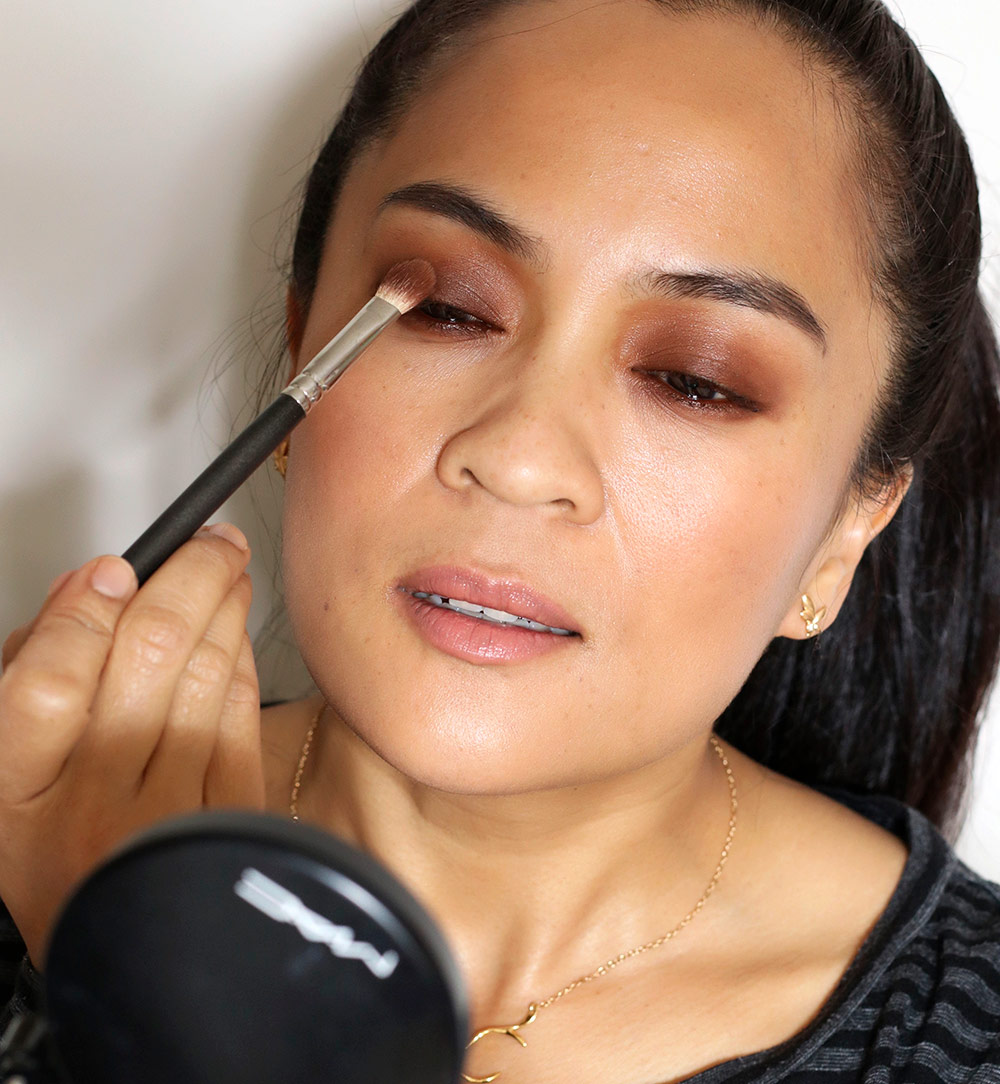
Step 2: Buff with a fluffy brush

Buff and smooth out the liner doing tight little circles and sweeping motions with your brush until it looks sufficiently buffed and even. FYI, you can coax it up and out as far as you’d like.

mac costa riche

[Continue reading…]

There are 15 comments on this post. Leave yours.

Categories: Eyes, MAC Makeup, Makeup, Makeup Tips/How To

  • « Go to Previous Page
  • Go to page 1
  • Interim pages omitted …
  • Go to page 114
  • Go to page 115
  • Go to page 116
  • Go to page 117
  • Go to page 118
  • Interim pages omitted …
  • Go to page 502
  • Go to Next Page »

Primary Sidebar

Welcome to Makeup and Beauty Blog

Welcome to Makeup and Beauty Blog! My name is Karen, and I’m a freelance writer obsessed with makeup.

Makeup and Beauty Blog features daily product reviews, makeup tips and beauty news — like an interactive version of a monthly print magazine, except with occasional pictures of my cat.

Recent Posts

Sundays With Tabs the Cat, Makeup and Beauty Blog Mascot, Vol. 878

Makeup and Beauty Blog Monday Poll, Vol. 894

Makeup and Beauty Blog Monday Poll, Vol. 893

Makeup and Beauty Blog Monday Poll, Vol. 892

Makeup and Beauty Blog Monday Poll, Vol. 891

/* real people should not fill this in and expect good things – do not remove this or risk form bot signups */

Social

  • Facebook
  • Instagram
  • Pinterest
  • Twitter
  • YouTube

Featured Posts

Sundays With Tabs the Cat, Makeup and Beauty Blog Mascot, Vol. 771

Lady Unicorn

Weird Things I Like to Do

brows fill out beforehand

Before You Pluck or Wax Your Brows, You Must Do This

current bare skin status

What’s One Thing That Drastically Changed Your Skin for the Better?

Copyright © 2025 Makeup and Beauty Blog. Get in touch.