• Skip to main content
  • Skip to primary sidebar

Makeup and Beauty Blog | Makeup Reviews, Swatches and How-To MakeupMakeup and Beauty Blog | Makeup Reviews, Swatches and How-To Makeup

A beauty blog blooming with fresh makeup reviews, swatches and beauty tips from your friendly neighborhood beauty addict

  • Home
  • About
    • About
    • Contact
    • FAQ (Frequently Asked Questions)
    • Advertising & Media
  • Categories
    • Product Reviews
    • Makeup
    • Skincare & Fragrance
    • Style & Fashion
    • Hair
    • Nails
    • Tips & Tutorials
    • Just for Fun
  • Brands
  • Store

Makeup Tips/How To

CONCEALER TIP: Put a Little On, Take a Little Off, Repeat

September 1st, 2015 by Karen 19 Comments

NARS Radiant Creamy Concealer Pictures
My current concealer love, NARS Radiant Creamy Concealer

Guess who found a college graduation picture of herself at her parents’ house last weekend from 1998 (!).

k 1998

OK, there’s sooooo much to talk about here, between the hand on the hip pose (why?), to the wanna-be Rachel haircut, to the brows (OMG, I just can’t!) and the lip, around which, if you look closely, you’ll see a carefully unblended darker lip liner (believe it or not, that was totally on purpose).

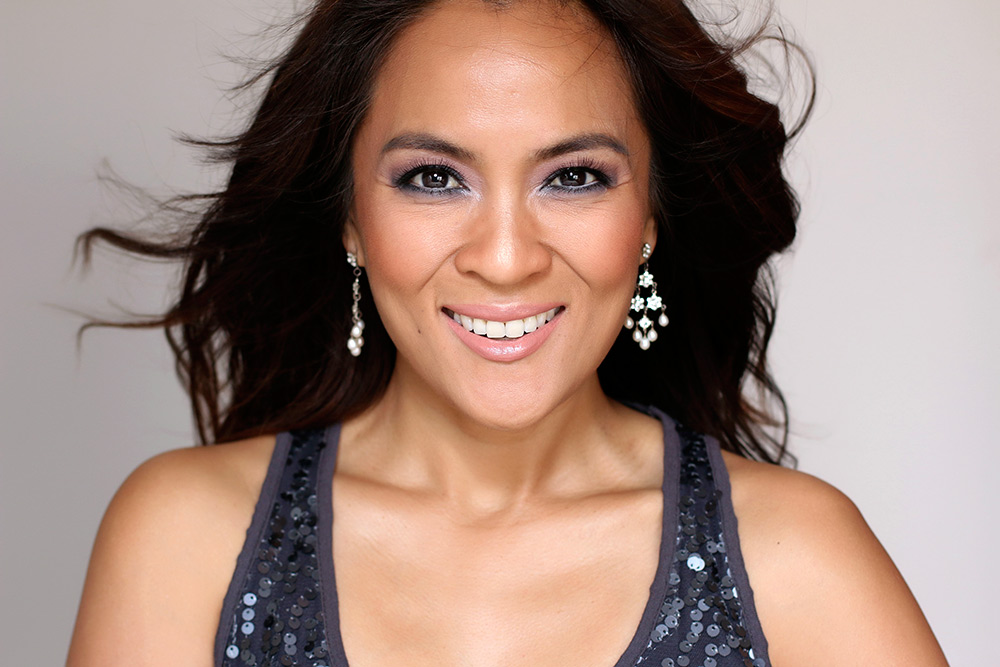
But I’d really like to direct your attention to the under-eye situation, namely 1) the lack of dark circles, and 2) the lack of concealer.

I WAS LIKE WEARING ABSOLUTELY NO CONCEALER.

I mean, it blows my mind! Seriously, though, you don’t know what you’ve got ’til it’s gone.

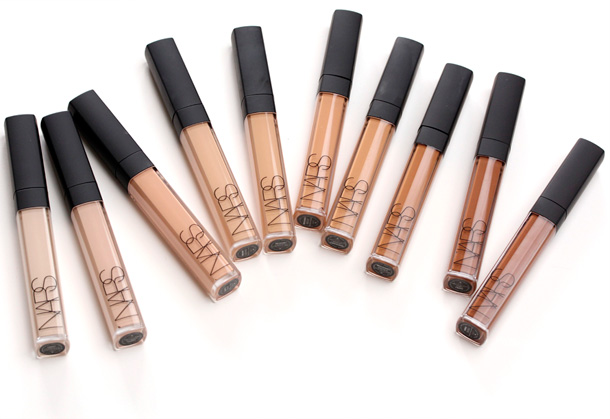
Fast-forward to today, and you’d literally have to pry the concealer out of my T. rex claws. Ain’t nobody taking away my concealer without a fight, but getting full coverage that doesn’t look heavy is a pain. All I want is to cover my dark circles without it looking like I’m wearing a 10-layer cake.
[Continue reading…]

There are 19 comments on this post. Leave yours.

Categories: Eyes, Makeup Tips/How To

A Cocktail Party Makeup Look

August 31st, 2015 by Karen 26 Comments

cocktail party makeup tutorial 1

pink-cocktailI can tell you the last time I had a cocktail, because it was last June at a jazzy lounge on Frenchman St. in New Orleans, and when in NOLA, you must drink fruity, froo-froo drinks with silly names like Champagne Supernova, but I can’t tell you the last time I went to an actual cocktail party.

Because I can’t remember.

It may have been 2005. Or 2006? Possibly in Toronto? I’m not sure. My memory gets progressively fuzzier in my advanced age. If I could only take the places in there that store the lyrics to Chris Brown songs and reallocate them to more important things, like dates involving cocktail parties…

Anyway, I’d very much like to go to more cocktail parties, but not for the cocktails or the convo (although they’re usually pretty great too). More for the fun of just getting dressed up and putting on fancy makeup (two of my favorite things to do!).

Dear El Hub,

If you’re reading this, let’s go to more cocktail parties.

Love,

Your darling wife.

P.S. Please make tacos for dinner tonight. 🙂

cocktail party makeup tutorial 2

cocktail party makeup tutorial 3

cocktail party makeup tutorial 4

So, this look here. We’re coming up on holiday party season (it’s really not that far away), so I thought it would be good practice to turn it into a tutorial.

I wanted to do something a little different than standard-issue black winged liner and a bright red lip (although that’s a good look, too, and it never goes outta style), because parties are the perfect excuse to try something new, am I right?

I went for a slightly smoky taupe and navy eye with a hint of light blue iridescent sparkle, but I think the special sauce is the bright white on the lower water line and the shimmery white highlight on the lower tear duct. They give the look a bit of a subtle edge and elongate the eye. A warm nude lip and peachy cheeks complete the ensemble.

There’s a little color in the look, which might be intimidating if you’re unaccustomed to wearing anything other than browns and beiges, but I think it’s very wearable.

You could couple something like this with a little black dress, of course, or maybe a gray or white dress (a body con one would be cute if you’ve got the figure to pull it off). Basically, anything neutral would allow the color on your eyes to really pop.

Now, take a dainty chug from that cocktail glass, and let’s get started!

1. Apply primer and powder

cocktail party makeup tutorial 5
[Continue reading…]

There are 26 comments on this post. Leave yours.

Categories: Makeup Tips/How To

End of Summer Shimmery Mermaid Makeup Tutorial

August 27th, 2015 by Karen 40 Comments

1 mermaid tutorial

There is absolutely no freakin’ way that matte-heavy eyeshadow looks are even remotely acceptable among members of the makeup-loving mermaid community, and I know this for a fact.

Actually, I don’t really know that for a fact, since I haven’t kicked it with any of my mermaid friends lately, but if I had, they would DEFINITELY be rollin’ with shimmer.

So…why am I talking about mermaids??

Excellent question.

Well, because it’s late August, and even though I’m excited about fall, I’m still sad to see summer go. *sad tabby face* 🙁

I was thinking about the beach this morning (I haven’t been once this year!), and that led me to think about mermaids, and about mermaid water babies basking on the rocks with their shimmery tails swishing in the crystal clear waters and their subtle blue and green eye makeup sparkling in the sun…

So that’s what I was going for here.

2 mermaid tutorial

For the record, this look is also appropriate for landlubbers, so you don’t need to have a mermaid tail to wear it, although that would be pretty rad.

mermaid tutorial eye closeup

I think this is a good look for late summer parties and barbecues, or maybe a back-to-school party where everyone gets kinda dressed up. Or, if you’re heading someplace fabulous that just so happens to have lively nightlife and be located near a warm body of water. Or, if you just want something shimmery to wear while you walk your cat around your neighborhood.

It’s a good look for multiple occasions. 🙂

mermaid tutorial eye closeup

Now, honey, if you just scrolled down, I know this look might seem impossible based on the number of steps, but you can do it! — even if you’re a straight-up beginner.

If you’ve never attempted anything like this before, though, cut yourself some slack. It’s OK and perfectly normal if it looks like shimmery poo the first few times, and it probably will, unless you’re a makeup wunderkind. But so what? Rome wasn’t built in a day.

OK, enough gabbing… Let’s do this.

1. Apply foundation, concealer and powder

3 mermaid tutorial foundation

Get yo’ base on that face, because we’re not about to leave the house without a little something-something. For this shimmery mermaid look, I like a full-coverage base because I think it balances out the bold eyes and false lashes.

Go with your fullest coverage foundation, concealer and powder, if you need to. Doing a goofy face while you do this is completely optional but highly encouraged. 🙂
[Continue reading…]

There are 40 comments on this post. Leave yours.

Categories: Benefit, Chanel, Dior, Essie, Eylure, LORAC, Makeup Tips/How To, Tom Ford Beauty, Urban Decay

When You’re Applying Liquid Foundation, Always Give It Enough Time to Set Before Applying Powder

August 27th, 2015 by Karen 17 Comments

foundation with iphone

Here’s something that helps when I apply liquid foundation: ya gotta give it time. Always give it enough time to set before you jump in with powder, so like four or five minutes, because if your foundation is still wet when you apply your powder, all sorts of terrible, horrible, frightening things happen…

OK, not really. But sort of. 🙂 The powder won’t apply evenly, because the wet areas will collect more of it, and that’s not great.

Another happy side effect of waiting until your foundation sets is that it’s easier to gauge your coverage. If I just layer all willy-nilly, and just keep building my foundation up in layers while each layer is still kind of wet, I can’t gauge how much coverage I actually have, and I end up in Cake Face Town.

Because nine times out of 10 I like to wear as little foundation as possible, I’ll apply my first layer, and then wait for it to set. Then it’s easy to tell if (and where) I need to add more.

Just another hopefully heartache-saving tip I learned the hard way.

Your friendly neighborhood beauty addict,

Karen

P.S. North & South! Where the heck was I when this show came out? I’m marathoning it on Netflix tonight. Episode 3 is about to start. 🙂

So. Much. Drama! I love it, but those 19th century British dudes didn’t have a lot of game. How would you feel if someone rolled up to you and said, “Marry me, miss,” seemingly out of the blue? You do one little thing like push your hair behind your ear, and they think you want to marry them.

There are 17 comments on this post. Leave yours.

Categories: Makeup Tips/How To

For Better Blending, Try Holding Your Brush at the End

August 26th, 2015 by Karen 9 Comments

tapered blending brush mac 224

Instead of holding your blending brush like a pen or pencil on the ferrule (the metal part on the end with the brush head), try holding it waaay back on the other end instead.

Just to try it.

You might find yourself naturally applying less pressure on the brush head and making nice, soft circles with the bristles.

Sometimes when I hold the brush up near the ferrule, aka the standard way, I press really hard without even realizing it, like, I dunno…I’m trying to literally force the eyeshadow particles into my skin. Holding the brush from the other end, though, encourages lighter pressure, which makes for nicely diffused eyeshadows and gorgeous gradients.

tapered blending brush mac 224

tapered blending brush mac 224

It’s one of those tips I picked up somewhere along the way but promptly forgot about (whoops!), but I’ve started doing it again, and now (again!) blending is a completely different world. I feel like the brush is doing the work now, instead of my fingers and wrist, if that makes any sense. Try it sometime! And let me know how it goes. 🙂

Your friendly neighborhood beauty addict,

Karen

There are 9 comments on this post. Leave yours.

Categories: Eyes, Makeup Tips/How To

For More Precise Eyeshadow Placement, Try Applying Your Crease Color With a Flat Brush

August 26th, 2015 by Karen 12 Comments

flat eyeshadow brushes

Oh, my gosh! So helpful. Give this a try one of these days when you’re doing your eye makeup: use a flat brush, instead of a domed or fluffy tapered brush, to apply your crease color.

I’m serious, MIND BLOWN. I watched a makeup artist do this recently, and to put it mildly, it was a freakin’ revelation, like with the clouds parting and the choir of chubby cherubs singing in five-part harmony, aaaaaah!

It’s just a tool thing, but it’s been incredibly helpful, and I think it could really help with your application if you have limited lid real estate on which to work, and/or you have a shallow crease (I have both of these issues).

It seems like most people apply their crease colors with fluffy tapered brushes or domed brushes, and that’s what I always did, too, because…well, it’s pretty much what most people do, ya know?

fluffy tapered brushes and domed shadow brushes

Whenever I’d see someone doing their makeup, fluffy tapered brushes and domed brushes were standard operating procedure for crease work.

And they still are.

But whenever I use a fluffy brush to do my crease makeup, I almost always end up getting color where I don’t want it. The fluffy brushes work great for generally placing color in the crease and quickly diffusing edges, but I have a hard time using them when I want to be precise. Whenever I use one, I end up taking my shadow too high up into the crease or too far into the outer corner.
[Continue reading…]

There are 12 comments on this post. Leave yours.

Categories: Eyes, Makeup Tips/How To

Back to School Picture Day Makeup Tutorial

August 25th, 2015 by Karen 29 Comments

back to school picture day makeup tutorial

If you’re heading back to school this fall, chances are you’ll have to make some timely decisions before you start. Some will be important, like what classes you’re going to take, whether you’ll join band again (all I have to say is BAND GEEKS 4 LIFE!) or whether you can finagle a ride home from a car-owning friend because you don’t have the wherewithal to brave the school bus. (The buses at my school were exactly like Thunderdome! Freshman year in high school, a mean girl almost poured a can of soda on my hair; thankfully, my friend stopped her.)

Other decisions, like figuring out what makeup to wear on picture day, seem like small potatoes by comparison, and yeah, in the grand scheme of your entire school experience, picking a lip color (bold or neutral?) seems pretty lame, but do you really want to look back at your picture in the yearbook and cringe? GIRL, I’ve done this, and trust me, it’ll be hilarious in about 20 years, but for the timebeing, it kind of sucks.

So! Here are some things to help you take your most brilliant pic on picture day. This step-by-step tutorial will walk you through a back-to-school picture day look that everyone, even makeup beginners, can handle. When you’re done, you’ll still look like yourself, just a little more polished, and the results should look great on camera.

back to school picture day makeup tutorial

And even if you aren’t heading back to school this month, you can still do this look. It’s a good one for all kinds of picture occasions, like I.D. pics, or perhaps if you’re doing a headshot, or if you’re going to an event and you want to look sharp but not completely over the top.

If you’re ready, let’s start!

1. Find a window

When you’re putting on makeup for pictures, it’s really, REALLY important to have good light, and natural light, like from a large window, is fantastic for this. It’s big, bright and diffused, so find a window, and set up shop next to it (but sit in the shade, not direct sunlight).

2. Apply primer

back to school picture day makeup tutorial

You’ll want your skin to look smooth and your foundation to appear even, so start by applying a primer all over your face and on your lids.

If you haven’t used makeup primer before, it works a little like paint primer by filling in the tiny gaps and lines on the surface of your skin so that products layered on top of it look smooth and even.

It also has the added bonus of helping your makeup last longer, and since you’ll probably also be doing a number of other things on picture day, like picking up your schedule or getting books, you’ll want your makeup to stick around.

Don’t worry if you usually skip primer in your regular makeup routine. If you don’t want to buy one just for picture day, head to a beauty store or counter, and ask for a sample. 🙂
[Continue reading…]

There are 29 comments on this post. Leave yours.

Categories: Makeup Tips/How To

Dressing Room Makeup Hack: Use Your Shirt As a Protective Barrier When You’re Trying on Clothes

August 18th, 2015 by Karen 10 Comments

Anthropologie white and yellow striped top
Things I do inside dressing rooms…

Have you ever accidentally gotten makeup on the clothes you were trying on in a dressing room?

(Uh…I am totally guilty of doing this, and yes, I’m a little ashamed.)

Even though I always do my best to keep it from happening, sometimes it’s darned near impossible! — like if it’s a shirt or a dress that’s really hard to take on or off.

It almost happened to me a while back when I was trying on a white dress at Ann Taylor. I was wearing a full face of makeup, and the dress I wanted to try on had a very narrow opening at the neck.

Standing in the dressing room, I realized that there was no way I was going to get in or out of the dress without getting makeup on it…and that’s when I had an aha moment! I draped the shirt I was wearing that day, which happened to be black, over my face like a veil, where it could work as a protective barrier between my makeup and the dress. Then I slipped the dress over my head without leaving a mark on it.
[Continue reading…]

There are 10 comments on this post. Leave yours.

Categories: Makeup Tips/How To

  • « Go to Previous Page
  • Go to page 1
  • Interim pages omitted …
  • Go to page 30
  • Go to page 31
  • Go to page 32
  • Go to page 33
  • Go to page 34
  • Interim pages omitted …
  • Go to page 93
  • Go to Next Page »

Primary Sidebar

Welcome to Makeup and Beauty Blog

Welcome to Makeup and Beauty Blog! My name is Karen, and I’m a freelance writer obsessed with makeup.

Makeup and Beauty Blog features daily product reviews, makeup tips and beauty news — like an interactive version of a monthly print magazine, except with occasional pictures of my cat.

Recent Posts

Sundays With Tabs the Cat, Makeup and Beauty Blog Mascot, Vol. 878

Makeup and Beauty Blog Monday Poll, Vol. 894

Makeup and Beauty Blog Monday Poll, Vol. 893

Makeup and Beauty Blog Monday Poll, Vol. 892

Makeup and Beauty Blog Monday Poll, Vol. 891

/* real people should not fill this in and expect good things – do not remove this or risk form bot signups */

Social

  • Facebook
  • Instagram
  • Pinterest
  • Twitter
  • YouTube

Featured Posts

Sundays With Tabs the Cat, Makeup and Beauty Blog Mascot, Vol. 771

Lady Unicorn

Weird Things I Like to Do

brows fill out beforehand

Before You Pluck or Wax Your Brows, You Must Do This

current bare skin status

What’s One Thing That Drastically Changed Your Skin for the Better?

Copyright © 2025 Makeup and Beauty Blog. Get in touch.