• Skip to main content
  • Skip to primary sidebar

Makeup and Beauty Blog | Makeup Reviews, Swatches and How-To MakeupMakeup and Beauty Blog | Makeup Reviews, Swatches and How-To Makeup

A beauty blog blooming with fresh makeup reviews, swatches and beauty tips from your friendly neighborhood beauty addict

  • Home
  • About
    • About
    • Contact
    • FAQ (Frequently Asked Questions)
    • Advertising & Media
  • Categories
    • Product Reviews
    • Makeup
    • Skincare & Fragrance
    • Style & Fashion
    • Hair
    • Nails
    • Tips & Tutorials
    • Just for Fun
  • Brands
  • Store

Makeup Tips/How To

Shelter in Place / Social Distancing / Homeschooling Activity: Adventures in Makeup Artistry

March 17th, 2020 by Karen 22 Comments

If you’re sheltering in place over the next couple weeks and looking for things to do with someone in the house, let them unleash their inner artist by doing a makeover…ON YOU!

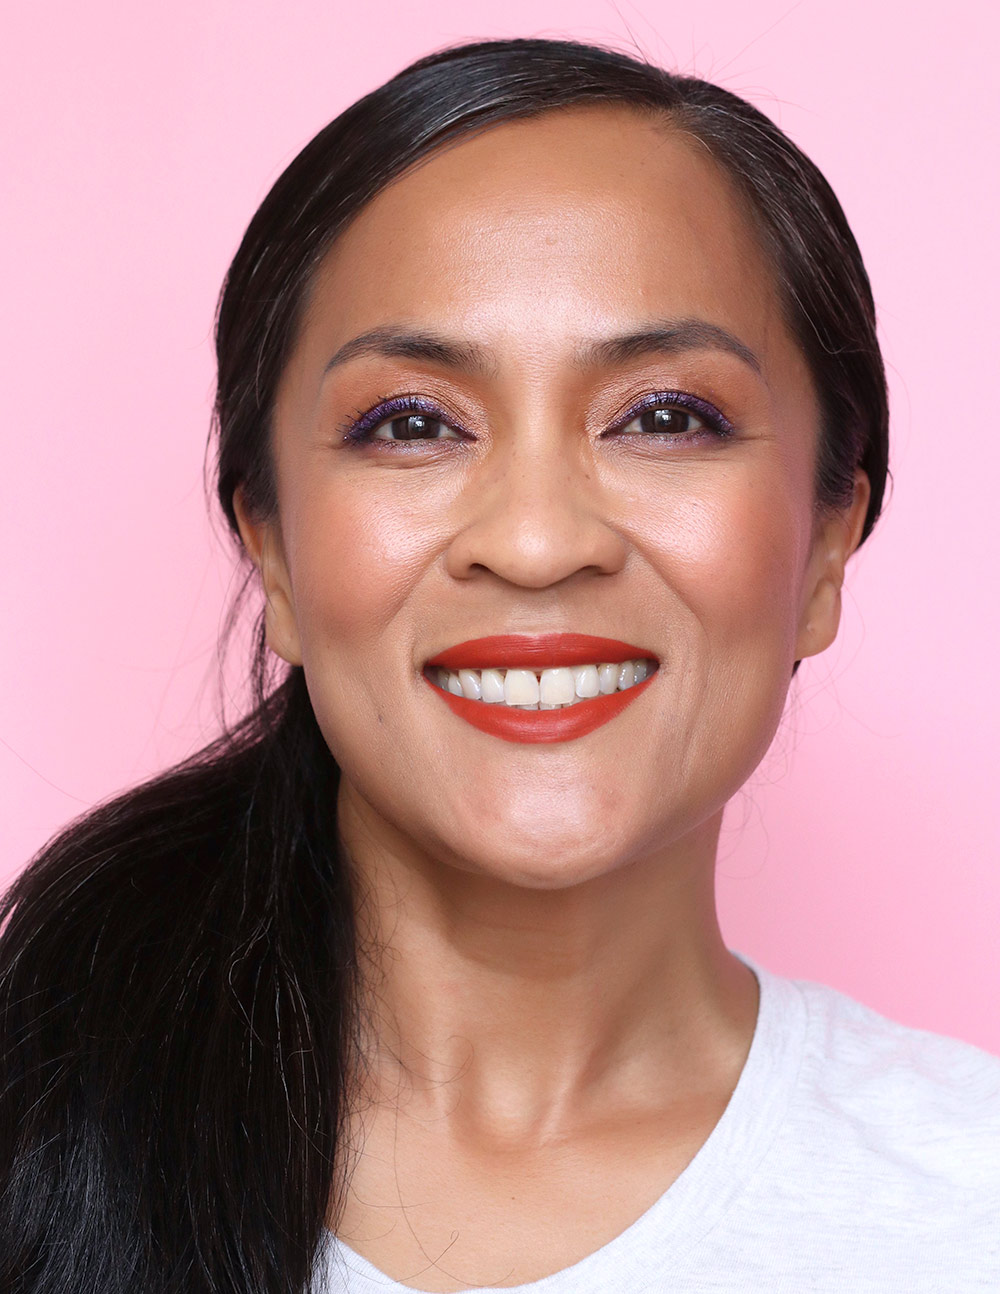
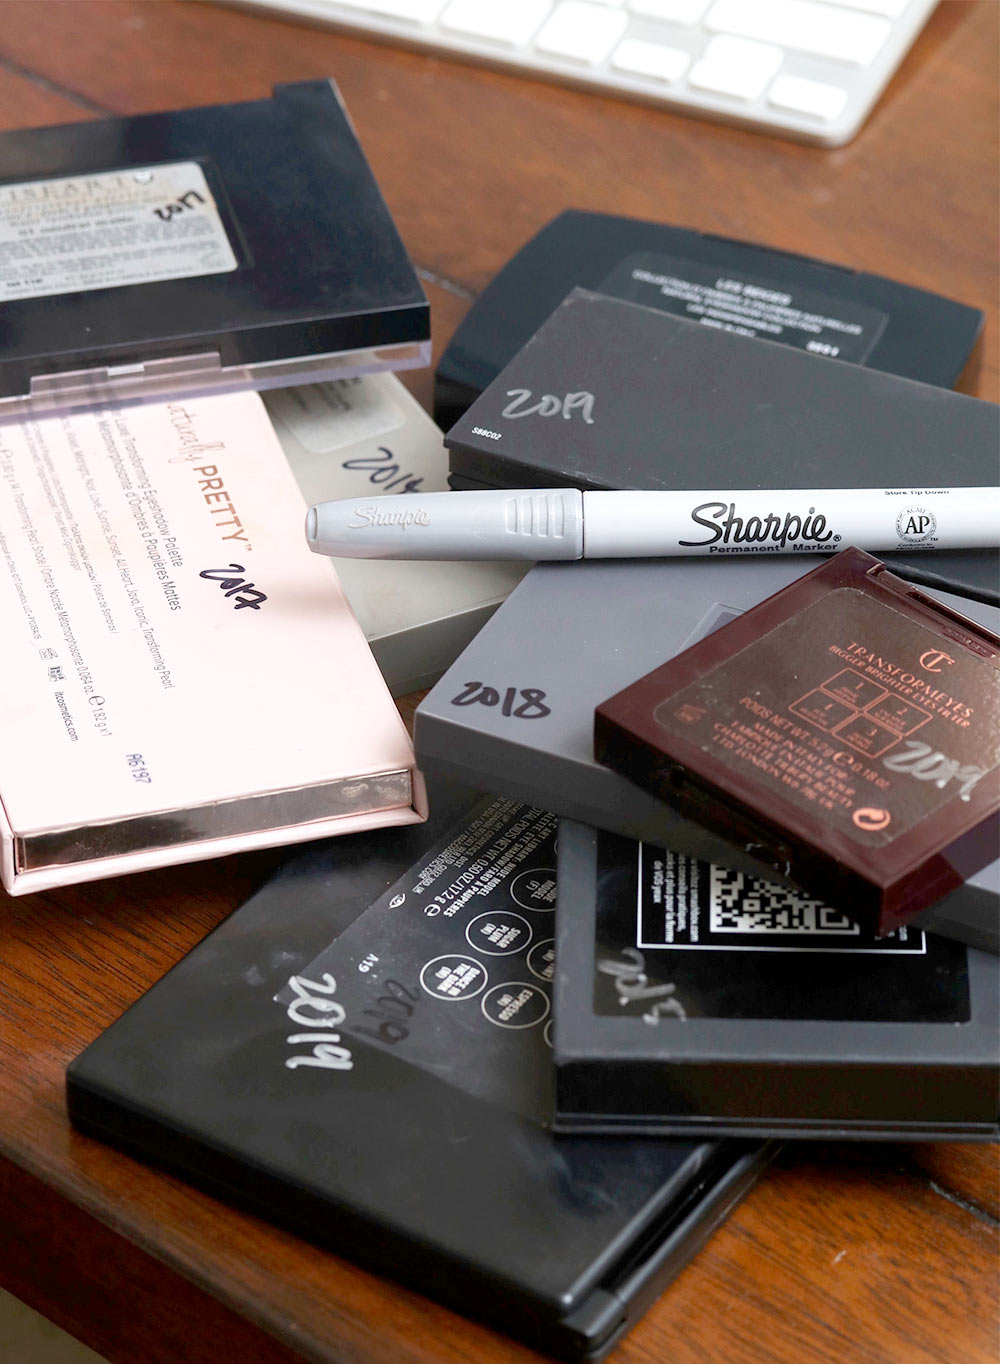
I busted out an old LE Tarte palette I’ve had for ages but haven’t used, a few matching bright eye pencils, a handful of brushes and a bright lipstick (which I let Connor Claire choose…so of course she picked the brightest reddish orange!).

Then we parked ourselves in her room, played some tunes, and I let her have at it.

On, in case you’re wondering, the lipstick is MAC Retro Matte in Dangerous.

I’m pretty impressed with her application, LOL!

Your friendly neighborhood beauty addict,

Karen

There are 22 comments on this post. Leave yours.

Categories: Just For Fun, MAC Makeup, Makeup, Makeup Tips/How To

3 Easy Tips for Elegant Everyday Winged Liner

March 13th, 2020 by Karen 5 Comments

nars alhambra
Classic winged liner is always in style.

Contrary to what Instagram or YouTube might’ve told ya over the past five years, winged liner…otherwise known as “cat eye” liner or “kitten flicks”, otherwise known as “one of the rare eye makeup trends that stands the test of time,” doesn’t have to soar across your face like an ominous pair of extra large bat wings.

There are still makeup lovers out there (me!) who still love a dainty, classic flick. It’s timeless, always looks great, and, best of all, it’s pretty easy to do.

REALLY!

I’ve been winging it out a lot lately, albeit not on days when I only have five minutes or less to put on my face paint, because DAYUM! — I can work *fast* but not that fast. But if I have a time budget of, say, 10 minutes (which is what it took to do the look I’m wearing here), that really is enough to do my entire face, along with some classic, elegant everyday winged liner.

Here are three things that help me. I hope they give you some inspiration to try winged liner this week!

Tip one: A pencil liner with a super sharp point is key.

There are lots of ways to go about winged liner (liquid, gel, eyeshadow, I’m sure there’s more), but the easiest way, especially if you’re usually pressed for time, is using a super sharp pencil eyeliner, so definitely keep your pencil sharpener handy and use it to keep that tip sharp.

makeup pencil sharpener
I use and love this sharpener from Sephora.

Why? Pencil is easier to control — and correct! — because all you’re doing is drawing lines on your face, as there’s no brush in the mix to wrestle with. And having a pencil with a super sharp tip allows you to draw the thinnest and most precise lines possible.

I became a true believer in this watching this life-changing how-to video by the goddess of glam herself, Charlotte Tilbury.

No, really, this video is life-changing! Charlotte applies liner on a model in real-time, thoroughly breaking down her method step-by-step, and along the way, she emphasizes over and over again the importance of working with a sharp pencil. Her method is easy, too. LOVE YOU TO MARS AND BACK, CHAR. You have forever changed my winged liner life.

Tip two: Use a mix of brown and black pencils.

If you find black liner looks too harsh, try layering a brown directly on top of your black. It reduces the contrast of the black liner against skin and softens the look. I do this allllll the time now in my 40s. Wearing black liner alone is too jarring, and I find that it makes me look older than I am, so I’m all about layering brown on top. You still get the impact of black, but with the brown on top it’s less harsh.
[Continue reading…]

There are 5 comments on this post. Leave yours.

Categories: Eyes, Makeup Tips/How To

Dreaming of Vacay With Wander Beauty, Charlotte Tilbury, MAC and More

March 11th, 2020 by Karen 15 Comments

urban decay tryst

I woke up wishing I was on vacation this morning. There weren’t any viruses to worry about, no freaky headlines on the news, or piles laundry to fold, no meals to plan. Ah…

When I dream of vacation, it usually involves a beach, ‘cause I’m a sand, surf and sun girl.

I LIKE ALL THE TROPICAL PLACES, and I’m equally happy at remote, out-of-the-way secret beaches that are only accessible by rickety rope ladders as I am at Disneyland-like resorty beaches with all the accoutrements, including a big umbrella, a comfy chair, a clean bathroom and a snack shack. (Gimme all the snacks!)

Walking down to Hideaways beach on Kauai

A play on sheen, shimmer and shine

You know how when you’re at the beach on a hot day, you’re always kinda sweaty, even if you’re just sipping on strawberry shave ice? Well, that’s what I was aiming for with the base in this look. I wasn’t going for “sweaty” necessarily, but rather glistening. There’s an all-over subtle sheen on the skin (thanks, Charlotte Tilbury Flawless Filter), paired with bright, shimmery spots beaming from specific areas — the inner corners of the eyes, in particular, and the bridge of the nose. Then, there’s just the faintest amount of shine on the lips, thanks to a bright reddish coral lippie with a creamy finish.

I know I talk about “Char’s” Flawless Filter all the time, but really, it’s that good. I like it just as much as I ever have, and I still routinely say, WHAT THE HELL KIND OF MAGIC IS IN HERE? when I blend it in and look in a mirror.

If you’ve tried it and didn’t like it because you felt like the opalescent finish made you look sweaty, try setting it with a face powder that has a matte or demi-matte finish. For this, I’m a massive fan of MAC Mineralize Skinfinish Natural. And Chanel’s loose powder is good with Flawless Filter, too. Both temper the sheen a tad for a purrfect glow.

Cue the contrast

Did ya notice the matte lids and lash lines? Yup, that’s on purpose. I wanted a flatter finish on those areas to play against the intense inner corner highlight, and I’m wearing shadows from the new Wander Beauty Wanderess Escape Palette, which has a mix of matte, shimmer and glitter shadows in warm, summery shades of brown, bronze, gold and peach (there’s also a pop of teal in there). If you’ve ever fallen in love with any of the Estee Lauder Bronze Goddess palettes, I think you’ll like it.

urban decay tryst
[Continue reading…]

There are 15 comments on this post. Leave yours.

Categories: Charlotte Tilbury, Eyes, Lips, MAC Makeup, Makeup, Makeup Tips/How To, NARS, Urban Decay, Wander Beauty

NARS Alhambra Eyeshadow Duo -> Love!

March 10th, 2020 by Karen 19 Comments

nars alhambra fotd

I’m still playing my way through that custom NARS palette, and I’m still rediscovering classics that keep speaking to me (because, obviously, my makeup talks to me), saying nuggets of wisdom like, “Karen, you seriously need to consider wearing us every day for THE REST OF YOUR LIFE.”

nars alhambra products
Key makeup in this look (lots of NARS)

Case in point: the magic combo of Madrague and Alhambra. If these two duos sang a duet, it would go a little something like this…


The sound of disco perfection

Madrague is a matte combo with a creamy brown caramel and a warm beige… Think elevated basics for your crease and brow bone.

Alhambra has a glowing rose gold on one side and a shimmery champagne on the other, and I’ll wear either one, or a mix of both on the inner lids for a wide, doe-eyed effect.

Draw some dainty winged liner, add a couple layers of mascara, and you’re set.

I think this eye look is neutral enough to go with most blushes, but it looks extra pretty when you wear it with warm golden pink. I’m wearing it here with NARS Deep Throat blush, which I’ve always thought was the better, more wearable version of Orgasm…

I know Orgasm gets all the love, but Deep Throat is more pink and less coral, so I think it’s closer to the actual color of flushed cheeks. Plus, Deep Throat’s shimmer is more opalescent and less frosty than Orgasm’s, so it’s more forgiving when skin has visible pores and texture.

Swatch it next time you’re at the counter. I think you’ll like it.

nars alhambra swatches
Yeah, man, still an NC42!

Key makeup for this look

  • Eyes: Cargo Black Pencil and MAC Coffee (winged liner), NARS Alhambra (inner lids), NARS Madrague (brown side in the crease, and the beige side on brow bone), Laura Mercier Caviar Mascara
  • Cheeks: NARS Deep Throat (blush)
  • Lips: NARS Viebke lipstick and NARS Tasmania gloss

Your friendly neighborhood beauty addict,

Karen

There are 19 comments on this post. Leave yours.

Categories: Eyes, Lips, MAC Makeup, Makeup, Makeup Tips/How To, NARS

A Springy Purple and Orange Makeup Look Inspired By Purple Rain

March 3rd, 2020 by Karen 19 Comments

prince purple rain
When the Purple One inspires your look

The first time I saw Purple Rain I was eight, and it was at my friend Peachy’s slumber party.

Peachy’s mom let us pick out whatever movie we wanted at the video store (this was right after she took us to Chuck E. Cheese, of course, where I killed it at ski ball), and I’m 100% positive she had no idea what the movie was about when she rented it.

Even though none of us understood what was going on when we watched it, we knew that Prince was in it, and that’s all we really needed to know. To this day, the soundtrack from the movie is one of my favorite albums of all time.


I don’t care pretty baby, just take me with you.

To take it a step further, the colors on my Purple Rain tee (thanks, Target) inspired this orange and purple makeup look…

One of my favorite tees

[Continue reading…]

There are 19 comments on this post. Leave yours.

Categories: Estee Lauder, Face of the Day (FOTD), MAC Makeup, Makeup, Makeup Tips/How To, NARS, Urban Decay

A Fab Friday With Rosy Brown Lids and Lips + Mauve Cheeks

February 28th, 2020 by Karen 11 Comments

mac keep stijl

I swear, in real life this eye makeup is not as orange as it looks in these pics…

I think the bright top (J. Crew, found at The Rack last fall) is throwing a monkey wrench in the mix.

Hmm… I should probably just be grateful I’m dressed in something that makes me appear to be a real, live grownup. It’s all about the little victories, you know? ?

I was going for a springy pinkish brown for this look but ended up more summery orange… Oh, well! I like it.

mac keep stijl

I’m wearing several pieces from the new MAC Loud and Clear, and Glow Play, collections, which I’m still (clearly, ha ha ha) into. If you run across something you love, I’d suggest picking it up sooner rather than later because things are either selling out quickly or have already sold out.

One of my coworkers from the bakery is also a MAC gal, and she barely was able to get her hands on one of the lipsticks (Baroque the Internet), so don’t hesitate, MAC-aholics!

One more item of note about this look: I blended the blush I was wearing on my cheeks into my into my crease, an old trick to tie your lids and cheeks together in a neat little bow!
[Continue reading…]

There are 11 comments on this post. Leave yours.

Categories: Eyes, Face of the Day (FOTD), It Cosmetics, Lips, MAC Makeup, Makeup, Makeup Tips/How To, ZOEVA

NARS Kalahari Love

February 27th, 2020 by Karen 10 Comments

nars kalahari
Love ya, NARS Kalahari!

They say, if you love something, set it free, which I guess makes sense if you love butterflies or toucans, but in the case of makeup, if you love something, I say you should talk about it ALL THE TIME, which is why I’ve been raving about NARS Kalahari for years!

Kalahari eyeshadow duo is perfect for lightly defining your lids. One side is a shimmery rosy bronze, and the other side is a shimmery taupe — two colors, granted, that you can find in almost any line, but here’s the kicker: NARS found a way to avoid all of the typically problematic side effects that befall so many shimmery shadows.

For instance, Kalahari is reflective, but it isn’t frosty, so fine lines aren’t even a thing. When you sweep and swirl it on your skin, a sweet, bronzed glow remains. It’s very “J. Lo running errands in her velour track suit.” Casual, but still noticeable. (This is a good thing in my book.)

Here’s one of my favorite ways to wear it:
Mix the two shades together with a domed shadow brush, then apply from lash line to crease (or just above the crease if your eyes are hooded like mine). Build it up if you want more color intensity, but don’t worry — this is eyeshadow that won’t look heavy, since the powder is very delicate and fine.

Next, wet that same brush, and apply more of the mix on the mobile part of your lid, which is the part of your eye that “blinks.” Leave it a few minutes to dry, and work on the rest of your face. Once you’ve almost gotten to the end — I usually wait until I’m done with almost everything, including blush and lipstick — take a clean tapered blending brush, and gently rock it back and forth in your crease and along the outer corners to blend.

nars kalahari

If you want, you can also rim your lash or water lines with chocolate brown eyeliner, which I did for these pics. I also smudged a cooler taupe liner (Urban Decay’s Mushroom) on the bottom lash line ’cause I like the subtle contrast of tones.

Makeup worn in this look

  • Eyes: Nars Kalahari (lids), MAC Coffee (water line, upper lash line, smudged between lashes and layered beneath Kalahari), Urban Decay Mushroom (lower lash line smudged with the darker side of Kalahari), It Cosmetics Superhero Mascara (lashes)
  • Blush: MAC Glow Play Blush in No Shame
  • Lips: BECCA Lush Lip Colour Balm in Almond Fraise (on sale now!) topped with BECCA Glow Gloss in Snap Dragon
  • Base: Estee Lauder in Honey Bronze, Estee Lauder 24H Hydra Prep concealer, MAC Mineralize Skinfinish Natural in Golden Tan

[Continue reading…]

There are 10 comments on this post. Leave yours.

Categories: Becca, Estee Lauder, Eyes, Face of the Day (FOTD), Lips, MAC Makeup, Makeup, Makeup Tips/How To, NARS

How a Sharpie and 5 Seconds Can Completely Change Your Perspective on Your Makeup Collection

February 26th, 2020 by Karen 9 Comments

neutral palettes sharpie
It’s a whole new world.

A couple weekends ago, I reorganized the drawer where I keep all of my neutral eyeshadow palettes. (Honestly, would ya expect anything else from me? A neutral eyeshadow closet perhaps?)

In the process, I discovered something surprisingly simple but deliciously helpful. With a Sharpie, on the back of each palette, I wrote the year the palette entered my collection.

Doesn’t sound revolutionary, right? Well, what a difference five seconds and a Sharpie can make!

SHARPIE DATE: WHY I STARTED DOING THIS

Short of carbon dating, I have no idea how old a lot of the makeup in my collection is… Some things could be in the decades (I know!), because I’m usually not a stickler for adhering to suggested expiration dates and guidelines.

And since I like to hoard makeup collect makeup and keep it for posterity, I don’t always know what’s fairly new or ridiculously old.

While reorganizing my neutral palettes, I was having a darned-near impossible time discerning between what could realistically stay and what absolutely needed to go, but seeing the dates on the palettes — and realizing just how long I’ve been holding on to some of them — made it crystal clear.

BORROWED FROM THE BAKERY

This idea to write dates directly on my makeup with a Sharpie came from my part-time gig at the bakery.

When we store food, everything and anything that enters any of the storage areas — dry storage, the fridge, the freezer — always, always has an expiration date written on it with a Sharpie, if it doesn’t have an expiration date on it already.

Also, whenever food gets stored, the newest items go in the back, and the oldest ones go up front, which ensures that the older items get used first.

I borrowed these ideas and implemented them for makeup.

“EXPIRES ON THIS DATE”

Now, if you’re super strict with the expiration dates for beauty products, you could do a version of this where you write “Expires on this date” on back of your compacts, on the bottom of your lipstick tubes or foundation etc., and if you want to “next level” it, you could even use the dates to sort your makeup by putting the oldest items in front to make sure you use them up first.
[Continue reading…]

There are 9 comments on this post. Leave yours.

Categories: Makeup, Makeup Tips/How To

  • « Go to Previous Page
  • Go to page 1
  • Interim pages omitted …
  • Go to page 6
  • Go to page 7
  • Go to page 8
  • Go to page 9
  • Go to page 10
  • Interim pages omitted …
  • Go to page 93
  • Go to Next Page »

Primary Sidebar

Welcome to Makeup and Beauty Blog

Welcome to Makeup and Beauty Blog! My name is Karen, and I’m a freelance writer obsessed with makeup.

Makeup and Beauty Blog features daily product reviews, makeup tips and beauty news — like an interactive version of a monthly print magazine, except with occasional pictures of my cat.

Recent Posts

Sundays With Tabs the Cat, Makeup and Beauty Blog Mascot, Vol. 878

Makeup and Beauty Blog Monday Poll, Vol. 894

Makeup and Beauty Blog Monday Poll, Vol. 893

Makeup and Beauty Blog Monday Poll, Vol. 892

Makeup and Beauty Blog Monday Poll, Vol. 891

/* real people should not fill this in and expect good things – do not remove this or risk form bot signups */

Social

  • Facebook
  • Instagram
  • Pinterest
  • Twitter
  • YouTube

Featured Posts

Sundays With Tabs the Cat, Makeup and Beauty Blog Mascot, Vol. 771

Lady Unicorn

Weird Things I Like to Do

brows fill out beforehand

Before You Pluck or Wax Your Brows, You Must Do This

current bare skin status

What’s One Thing That Drastically Changed Your Skin for the Better?

Copyright © 2025 Makeup and Beauty Blog. Get in touch.