• Skip to main content
  • Skip to primary sidebar

Makeup and Beauty Blog | Makeup Reviews, Swatches and How-To MakeupMakeup and Beauty Blog | Makeup Reviews, Swatches and How-To Makeup

A beauty blog blooming with fresh makeup reviews, swatches and beauty tips from your friendly neighborhood beauty addict

  • Home
  • About
    • About
    • Contact
    • FAQ (Frequently Asked Questions)
    • Advertising & Media
  • Categories
    • Product Reviews
    • Makeup
    • Skincare & Fragrance
    • Style & Fashion
    • Hair
    • Nails
    • Tips & Tutorials
    • Just for Fun
  • Brands
  • Store

Makeup Tips/How To

Keep Your Eyeliner and Lip Liner Pencils in the Fridge to Make Them Less Likely to Break When You Sharpen Them

December 23rd, 2016 by Karen 7 Comments

There’s a method to the madness

My poor husband.

You know what the new normal has been in his life since we got together and I ended his bachelorhood? It’s that now when he opens the fridge, instead of seeing his old Big Gulp-sized Simpsons cup filled with premixed protein powder and Tupperwares upon Tupperwares filled with leftover chili and rice (one of his bachelorhood staples), he gets to see cute lipstick mugs filled with chilled eyeliners and lip liners. 🙂

Because that’s where I keep mine! I keep them in the fridge because it makes them less apt to break when I sharpen them, and I really hate it when my pencils break when I sharpen them.

DRIVES. ME. BANANAS. ? I can’t even tell you…

I don’t keep them all in there, though, because that would be weird (whereas one mug is not, haha), and our fridge would be FILLED with makeup…although that would also be kinda cool.

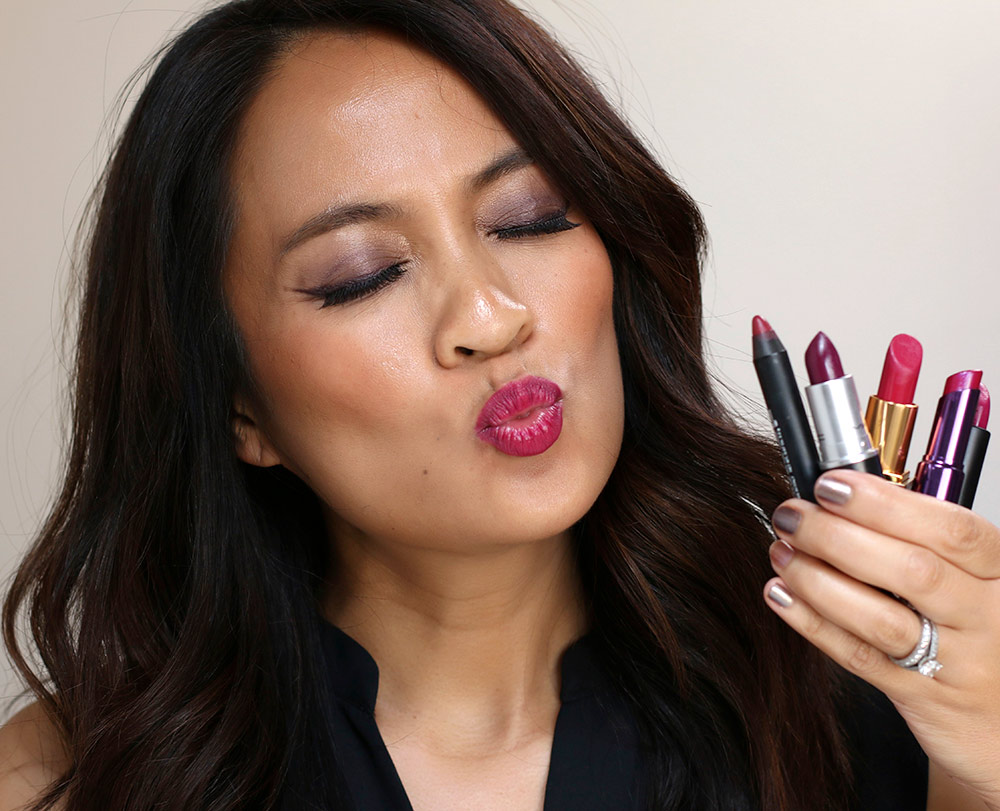
So I just keep the main lip liners and eyeliners in there that I’m using at moment, which is usually my favorite UD lip liners and MAC Teddy, MAC Powersurge and MAC Costa Riche Eye Kohl.

The fridge keeps the tips hard, because most makeup pencils have a pretty low melting point, and sometimes, even at room temperature, they just break so easily.

Before I use them on my face, though, I warm and soften them up a little by rubbing them against the back of my hand for 5-10 seconds. And then they glide across my lids and lips, ahhh. 🙂

Your friendly neighborhood beauty addict,

Karen

P.S. TGIF! (For reals this time.)

There are 7 comments on this post. Leave yours.

Categories: Makeup Tips/How To

Draw the Focus Upward, and Create a Lifted Effect by Using the Makeup on Your Lids as a Guide

December 22nd, 2016 by Karen 10 Comments

draw attention to your eyes

I think it’s a combination of getting older and not getting as much sleep as I need/like, but my lids seem to be getting more and more hooded every day. And one of the things I notice now is that whenever I do anything that sort of lifts my eyes, it gives a whole lift to my look.

Some people call this next tip a makeup rule, but if you want to give your eyes an instant, easy lift, wear more makeup on your upper lids and lash lines than you wear on your lower lash lines. It’ll draw the focus upward, instead of downward, and give a lift to your eye.

Also, if you do your eye makeup on your lids and lash lines first, you can use them as a guide to help you decide how much makeup to apply on your lower lash lines.

To be honest, I break this rule all the time. Sometimes I’ll do a bright or glittery lower lash line with a barely there color on my lids, or I’ll wear the same amount of color on my upper and lower lash lines. It just depends on the day. It’s all good. 🙂

With tricks like this, though, I think you have to give them a try, because you never know how they’ll work for you until you do.

Your friendly neighborhood beauty addict,

Karen

There are 10 comments on this post. Leave yours.

Categories: Makeup Tips/How To

How to Get Your Lipstick to Last Longer

December 22nd, 2016 by Karen 17 Comments

k with lipsticks
MMMWAH!

Hey, man, I’m not about to get up in the middle of The OA just to touch up my lipstick, because Netflix marathoning is serious business.

LOL! #forrealtho

Follow these three steps to longer-lasting lipstick, and you may never have to hit “pause” again.

1. Prep those lips!

Prepping and priming your lips will turn your pout into a perfect canvas. Use a lip primer and/or a lip-prepping product, and I know that MAC makes one. I used it a long time ago and thought it was OK, but you know…you can also prep your lips with something you might already have in your makeup bag — liquid foundation or liquid concealer.

Just dab a tiny amount of either one on your lips, and spread it all over for an impromptu lip primer.

2. Grab that lip liner

After outlining your lips, fill them in with the same liner (Because why would you use two different lip liners? Dude, it isn’t 1995 anymore.) to give your lipstick a smooth, waxy base coat (here’s how I do it).

Lastly…

3. Apply your lipstick

You can do it straight from the bullet (hello, lazy lady), or you can use a lip brush, but I think a brush does help my lipstick last a little longer.

There’s something about a lip brush that really gets the product in there as close as possible to the skin, and for whatever reason, my lipstick lasts longer.

But it’s not a huge difference… You definitely don’t have to do it.

Either way, apply your first layer, then blot it with a tissue, and then add a second layer.

By following these steps, you’ll help your lipstick last up to its potential, instead of just having one product on your bare lips clinging to them for dear life.

And for EXTRA wear time

[Continue reading…]

There are 17 comments on this post. Leave yours.

Categories: Makeup Tips/How To

Graphic Liner + Strong Brows = Balance

December 21st, 2016 by Karen 12 Comments

graphic liner and strong brows
Graphic Liner + Strong Brows = Balance

When you’re doing a very strong, graphic liner like the one I’m wearing here, pair it with equally strong, but neat, bold brows.

That way, your brows go with, or echo, the thematic “oomph” of your graphic liner, which gives your overall makeup look a sense of balance.

I’ve definitely noticed that when I do a bold or graphic liner and keep my brows mellow or messy, there’s something about the whole look that seems off, unbalanced and almost bottom heavy, like there’s something missing above the liner.

I mean, if there’s ever a perfect time to do a full-on dramatic brow, that time is when you’re doing graphic liner.

What do I mean by “bold brows”?

Well, I don’t think it necessarily has to mean Instagram brows. It just depends on what you like, but for me, bold brows mean filling in the sparse spots in the tail end a little bit heavier than I normally would, then using a brow gel to push all of the little brow hairs exactly where I want them.

And when I do a strong brow, I layer different products, like a brow pencil, an eyeshadow and a brow gel. I do a combo.

The shadow deepens and intensifies the color beyond what I’d be able to get with a brow pencil alone, while the brow pencil helps me draw in all the individual brow hairs, helping my brows to look extra full and lush. Then, I guide my existing brow hairs with the brow gels to get them where they need to go. 🙂

The brow pencil I’m using now, MAC Brow Sculpt, has an angled tip, which I like. I also like Urban Decay Brow Beater, which has a thin, fine tip that’s fantastic for defining individual hairs.

As for brow powders, I’m a MAC eyeshadow girl. I’ve been using Brun for years with my brown hair, and Benefit’s clear brow gel is my ride-or-die brow gel.

Graphic liner + strong brows = balance! And good balance is great.

Your friendly neighborhood beauty addict,

Karen

There are 12 comments on this post. Leave yours.

Categories: Makeup Tips/How To

5 Everyday Items That Make Applying False Lashes So Much Easier

November 29th, 2016 by Karen 14 Comments

mac mariah carey 05 lashes
I wish these were my real lashes! — but they’re actually the MAC Mariah Carey 05 falsies. And they’re amazeballs.

Beyond the obvious items it takes to rock false lashes, there are definitely some everyday accoutrements and doo-dads that can make the process easier.

Before that, though, you have to start with the basics, like a great pair of lashes, and I love the Ardell 120s, because they’re only $4 each and look pretty natural, as far as falsies go.

I also love, love, LOVE the MAC Mariah Carey 05s. In fact, I’m thinking about stockpiling them when the Mariah collection comes out.

You also need a good lash glue (I’ve been using the one that comes with the Urban Decay lashes because it isn’t stinky), a healthy dose of patience and a mirror.

It’s weird… On the surface, it doesn’t seem like false lashes would be that hard to apply, right? I mean, how hard could it be? You take one, put a little glue on it, and stick it on your eye…but it is sooo much harder than that.

Like, seriously, when I first started wearing false lashes, I had to block out at least 20 minutes to get it right, but I’ve figured some things out since then. It’s a little easier now, and here are five everyday items/hacks that help.

1. A broken Q-tip (yes, break it in half)

Here’s the deal: When you put too much glue on the lash band, your gonna end up with a hot mess. Glue gets all over your lids, your lashes, and you also run the risk of having so much glue on there that your eyes stick shut every time you blink (see: things I learned the hard way).

To avoid all that, break a Q-tip in half, and use one of the broken ends (so not the cotton end) like a glue spatula. Put a little glue on there, and then apply it to your lash band.

It’s a lot easier to control where you put the glue with the Q-tip than if you try to apply it straight from the tube, at least in my experience.

2. A makeup brush…handle (yup, just the handle)

Sometimes when I apply falsies I end up with a gap between the false lashes and my natural lashes, so I’ll grab a makeup brush, flip it around in my hand so that I’m holding it backwards, close my eyes, and then I’ll line the handle up horizontally on top of the false lashes and gently press on them to get them to stick my natural lashes.

3. Tweezers

OMG! OK, now, you can probably remove your lashes from their tray with your fingers, but uh…I have butterfingers, and sometimes (read: always) I accidentally smoosh part of them when I grab them with my fingers.

They just don’t look right after that, so now I carefully lift them out of the tray with tweezers. That way they retain their shape.

[Continue reading…]

There are 14 comments on this post. Leave yours.

Categories: MAC Makeup, Makeup Tips/How To

Get Ready With Me: A Chanel Winter Makeup Look

November 23rd, 2016 by Karen 9 Comments

Hello, is this thing on? Yes? No? Yes? I think I see the red dot…

It was a little weird filming this video because…I haven’t put my makeup on in front of the camera in a long time, and I had to re-remember all of the little technical/secret squirrel details like to check your nostrils before you turn on the camera because of renegade boogers…

Hey, just keeping it real! 🙂

So, this is a Chanel winter makeup look — nothing too fancy, but a little fancier than I’d wear to just chill on the couch. I did silvery blue eyes with a soft dainty wing, pink cheeks and nude lips.

The video is totally informal, and I glossed over some parts. It’s not a tutorial, but if you have any questions about anything I did, hit me up in the comments.

Makeup I’m wearing in the video

  • NARS Pro-Prime Smudge Proof Eyeshadow Base
  • Benefit Browvo Conditioning Eyebrow Primer
  • Chanel Architectronic Eyeshadow Palette
  • Guerlain Terracotta 4 Seasons Bronzer in Brunettes
  • Chanel Stylo Yeux Waterproof Eyeliner in 88 Noir Intense
  • Chanel Calligraphie de Chanel Longwear Intense Cream Eyeliner
  • Hourglass Vanish Seamless Finish Foundation Stick in Beige
  • NARS Soft Matte Complete Concealers in Macadamia (under eye) and Ginger (cheeks and chin)
  • NARS Light Reflecting Pressed Setting Powder
  • MAC Mineralize Skinfinish Natural in Medium Golden
  • Chanel Rouge Allure Gloss in Super Nude
  • Chanel Joues Contraste Powder Blush in Hyperfresh
  • On my nails I’m wearing Le Vernis Velvet Nail Colour in Pink Rubber

I used to feel that, especially if I’m going to sit in front of the camera for a video, I had to do everything in my makeup perfectly, but you know what? Life happens. This isn’t a perfect makeup look, but it’s realstic for me and what I wear now. I don’t have the patience anymore to layer three different shades of brown in the crease just to run errands around town. This is just a simple look that represents what I like right now, which is slightly polished makeup that isn’t too involved.

As always, thank you for watching, my friend! Talk to you soon. 🙂

Your friendly neighborhood beauty addict,

Karen

There are 9 comments on this post. Leave yours.

Categories: Chanel, Makeup Tips/How To, Video

Give Your Summer Bronzer a Fall/Winter Job as a Crease Color

November 22nd, 2016 by Karen 13 Comments

keep summer bronzer out
Bronzer!!!

Last week was our first big storm of the season, so I reluctantly gave my winter gear top billing — my winter boots, sweaters, my winter coats and, yes, my winter bronzers.

Yup, I have winter bronzers, because even though I have my natural tan, my skin color still changes with the seasons. When I don’t get as much sun in fall and winter, I get a little lighter, and it gets to where my summer bronzers look jarring and too dark — like I contoured but didn’t bother to blend.

So I usually put them aside for the season when something like a big storm happens, and it reminds me that summer is long gone, but this year I’m keeping them out because I’m gonna use them as eyeshadows.

You’ve probably seen someone do this before — use a bronzer as eyeshadow. I’ve definitely seen it on YouTube a few times, but it might be a different way to look at it if you use different bronzers in different seasons.

A summer bronzer can be a terrific transition color because…you already know that it’s a brown that works well for your skin. Sure, it might be a little too dark for your cheeks in the middle of winter, but that makes it an even better crease color to wear with darker winter and fall eyeshadows. Because it’s not covering a large area, it won’t look jarring. 😉

The final countdown…

Man, I read so many countdown articles last month about how to prepare for Thanksgiving and all of the things you should do in week four, week three, week two and week one, but none of it actually happened. I’m still scrambling at the last minute.

I know this is all unimportant stuff in the greater scheme of things, but my dining room table has a computer on it, and the room is like a forest of photography light stands. There’s hardly any food in the house (I’m drinking coffee with just a little sugar in it because I ran out of milk), and my guests arrive tomorrow.

*big sigh*

At some point today, I’m gonna need to get at least a few groceries, and I also want to go to Marshall’s to get a serving platter…

I don’t even know how I made it this far without a serving platter. This is the exact same feeling I had when I realized that I didn’t have a potato peeler.

Oh, yeah, and I also need to clean the bathroom.

YAY! FUN!

Chances are you’re more organized than I am and have all of your stuff together, right? Like your meals prepped and your house clean? If you have any wisdom to share in terms of getting a lot of cleaning done in very little time, please let me know. I need help.

Your friendly neighborhood beauty addict,

Karen

There are 13 comments on this post. Leave yours.

Categories: Makeup Tips/How To

For an Easy, Elegant Eyeliner Look, Use an Eyeshadow and an Angled Brush Instead of a Pencil

November 4th, 2016 by Karen 12 Comments

angled brush eyeliner

I spent an inordinate amount of time this week in stinky workout pants and t-shirts covered in baby food. Or, I dunno…sometimes it’s been my food, to be honest.

No reason in particular. It’s just been one of those weeks.

But, ya know, at least I’ve had elegant eye makeup. 🙂 I’ve been doing this thing where I use eyeshadow and an angled brush instead of pencil liner to line my upper lash lines, and I’ve been doing it because I haven’t been sleeping well, which means Dark Circle City.

When my dark circles are darker than usual, I’ll skip lining my lower lash lines, even though I usually love a little smoke or even a pop of color down there, because man! — when I look tired, if I add anything to that lower lash line area, it just looks worse.

But I will line my upper lash line, and I like doing it with an angled brush and an eyeshadow for a few different reasons.

First, because I love that slightly diffused look, which is easier for me to do with an eyeshadow and a brush than a pencil eyeliner all by itself.

Second, and I don’t know if this is just me, but there’s a process when I use a pencil. It isn’t just grab and go. Most of the time, the one I want to use is dull from the day before, so I have to sharpen it.

Then, I have to really carefully draw a thin line along my upper lash lines with it, because I like those nice, thin liner lines. But then I have to diffuse the edges of the lines with a brush, so…it still involves using a brush, even when I’m using a pencil.

Instead, with an angled brush and an eyeshadow, all I have to do is dip my brush into the shadow, give it a spritz with MAC Fix+, and sort of tap it along my lash lines.

It’s easier to get the kind of look I usually like, and I think it’s even faster than using a pencil.

Plus, you know, with makeup, it’s all about the fine details, like the subtlety of your gradients and the values and colors moving from dark to light, and I think that when you have gradients in subtle places, like in the edge along your lash line, it can really make your overall look more elegant.

Your friendly neighborhood beauty addict,

Karen

P.S. TGIF!!!!!!

There are 12 comments on this post. Leave yours.

Categories: Just For Fun, Makeup Tips/How To, Makeup Tools

  • « Go to Previous Page
  • Go to page 1
  • Interim pages omitted …
  • Go to page 19
  • Go to page 20
  • Go to page 21
  • Go to page 22
  • Go to page 23
  • Interim pages omitted …
  • Go to page 93
  • Go to Next Page »

Primary Sidebar

Welcome to Makeup and Beauty Blog

Welcome to Makeup and Beauty Blog! My name is Karen, and I’m a freelance writer obsessed with makeup.

Makeup and Beauty Blog features daily product reviews, makeup tips and beauty news — like an interactive version of a monthly print magazine, except with occasional pictures of my cat.

Recent Posts

Sundays With Tabs the Cat, Makeup and Beauty Blog Mascot, Vol. 878

Makeup and Beauty Blog Monday Poll, Vol. 894

Makeup and Beauty Blog Monday Poll, Vol. 893

Makeup and Beauty Blog Monday Poll, Vol. 892

Makeup and Beauty Blog Monday Poll, Vol. 891

/* real people should not fill this in and expect good things – do not remove this or risk form bot signups */

Social

  • Facebook
  • Instagram
  • Pinterest
  • Twitter
  • YouTube

Featured Posts

Sundays With Tabs the Cat, Makeup and Beauty Blog Mascot, Vol. 771

Lady Unicorn

Weird Things I Like to Do

brows fill out beforehand

Before You Pluck or Wax Your Brows, You Must Do This

current bare skin status

What’s One Thing That Drastically Changed Your Skin for the Better?

Copyright © 2025 Makeup and Beauty Blog. Get in touch.