• Skip to main content
  • Skip to primary sidebar

Makeup and Beauty Blog | Makeup Reviews, Swatches and How-To MakeupMakeup and Beauty Blog | Makeup Reviews, Swatches and How-To Makeup

A beauty blog blooming with fresh makeup reviews, swatches and beauty tips from your friendly neighborhood beauty addict

  • Home
  • About
    • About
    • Contact
    • FAQ (Frequently Asked Questions)
    • Advertising & Media
  • Categories
    • Product Reviews
    • Makeup
    • Skincare & Fragrance
    • Style & Fashion
    • Hair
    • Nails
    • Tips & Tutorials
    • Just for Fun
  • Brands
  • Store

Makeup Tips/How To

Get Fresh-Looking Skin in a Flash With Three Products

April 17th, 2017 by Karen 28 Comments

fresh skin in a flash top pic
Keepin’ it simple

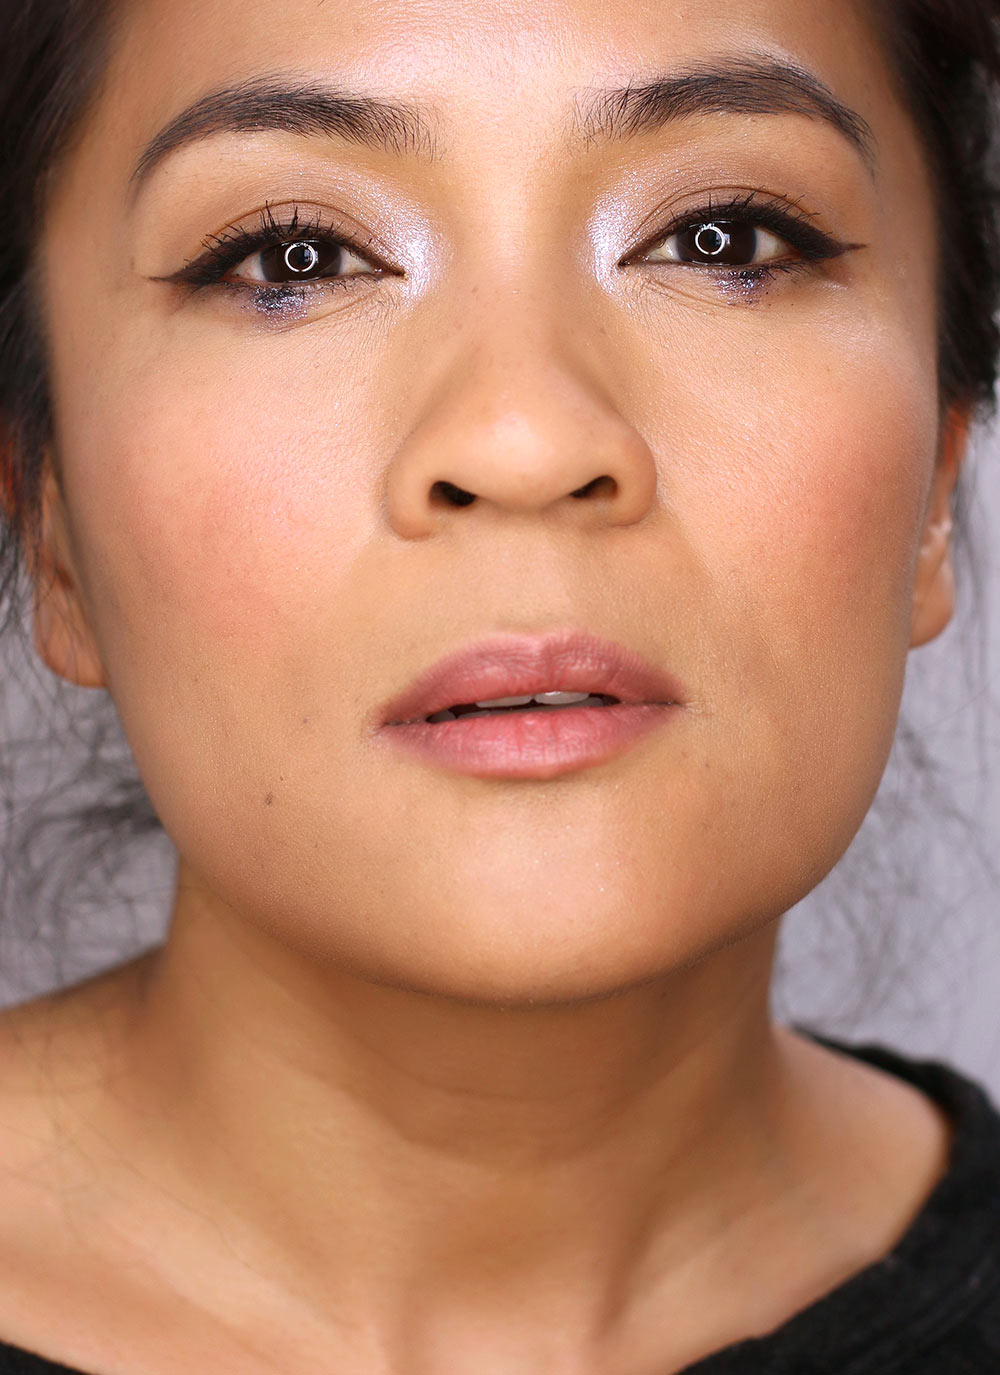
Holy, mackerel! I’m amazed (and sometimes intimidated, to be honest) by how complicated some YouTube makeup tutorials are, even when it comes to foundation and under-eye concealer.

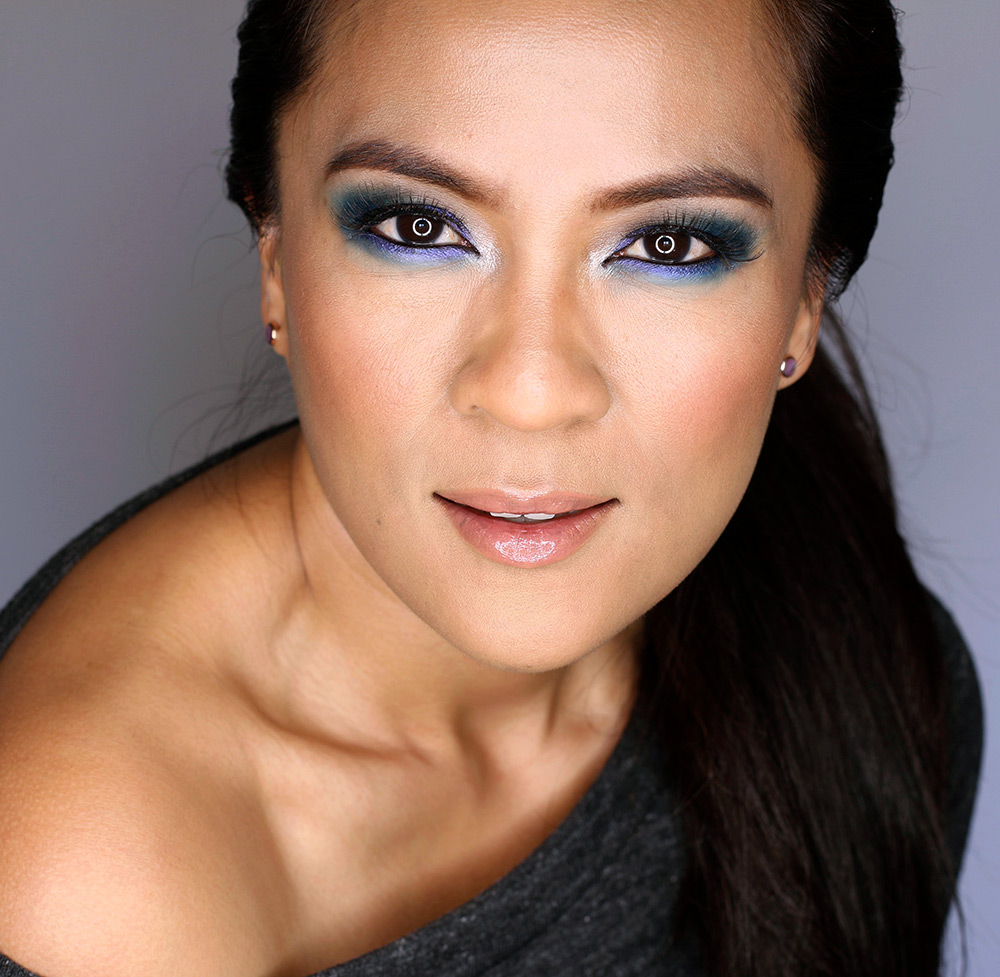
Sometimes I don’t mind following a lot of steps, but it depends on whether I’m just having fun, or whether I’m watching the clock. When it comes to my basic face makeup aesthetic, though, which is effortless (looking) and natural, I don’t necessarily think that your face makeup routine needs to be complicated.

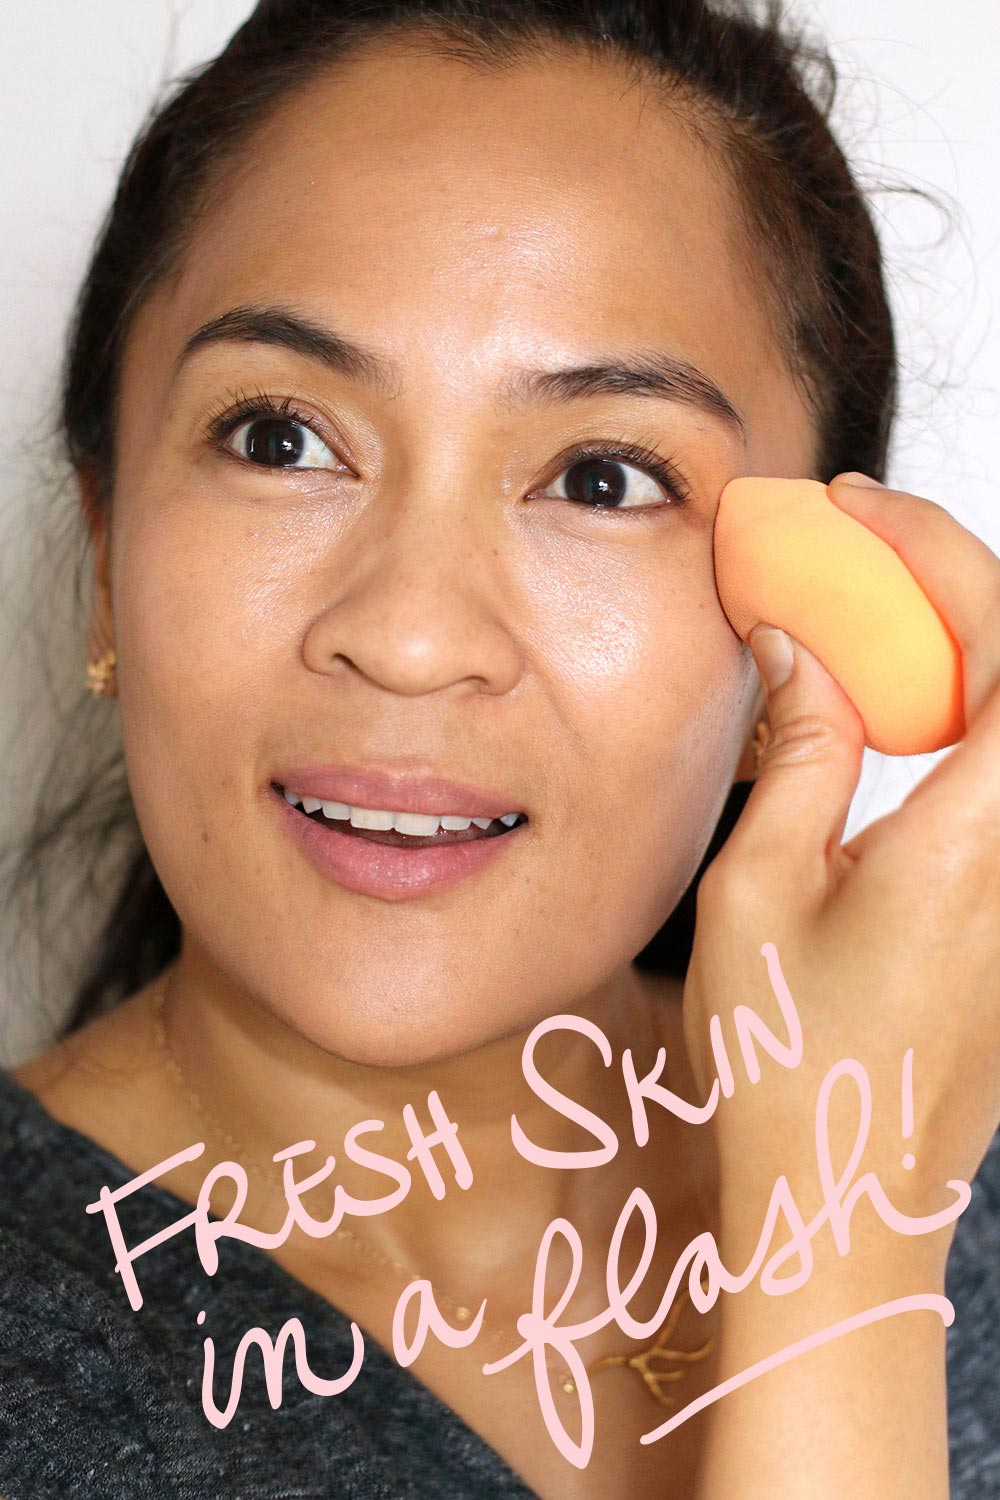
You can get fresh-looking skin in a flash with three products — a sheer foundation (or a BB cream, CC cream or tinted moisturizer), a full-coverage concealer and a face powder. You can even out your skin tone, keep the coverage looking light, and it doesn’t have to take forever.

Step 1: Prep

Start by applying moisturizer and/or primer to your skin to prep it and smooth your canvas for foundation.

Or…you can skip this step and just make funny faces ? in the mirror. Totally up to you. Your foundation might not look quite as smooth, but it’ll still look fine.

Oh, hai!

Step 2: Grab your favorite sheer foundation and a full-coverage concealer

Put one or two pumps of your favorite sheer foundation (or BB cream, CC cream or tinted moisturizer) on the back of your hand, then add one or two dots of full-coverage concealer, and mix them all together with a finger.

Adding the full-coverage concealer dots boosts the coverage of your sheer foundation to even out your skin a bit more, and it also saves you from having to apply and blend concealer on top of your foundation.

Make Up For Ever HD Invisible Cover Concealer in Y41 and MAC Next to Nothing Foundation in Medium Plus

[Continue reading…]

There are 28 comments on this post. Leave yours.

Categories: Face, MAC Makeup, Make Up For Ever, Makeup, Makeup Tips/How To, Top Posts

Fri-Yay Makeup Fun: Playing With Liner and Mascara Placement for Big Ol’ Bambi Doe Eyes

April 7th, 2017 by Karen 6 Comments

nars rue allent velvet duo eyeshadow

You know, I’ve been thinking a lot about eyeliner placement lately…because that’s what you do when you’re obsessed with makeup, haha!

No, but seriously, I’ve thinking about other ways to wear it than my usual black tightline/smudgy lower lash line combo.

Here’s something I’ve been experimenting with: placing my liner right along the middle of my lower lash line. It creates an optical illusion that draws attention to that concentration of liner and lashes, and “I think” it makes my eyes look more striking and bigger…which is always a great thing in my book!

And yup, the illusion seems to work regardless of what may or may not be going on along your top lash line. You can leave it unlined, line it — whatever strikes your fancy.

First, start by lining the center portion of your lower lash line, and I sort of use the widest part of my iris as a guide to figure out where to start and stop the lining. Just make it long enough to mostly cover that center portion of your lower lash line.

You can use a pencil liner, or you can load a thin eyeliner brush (like an angled brush) with gel liner, cream liner or powder eyeshadow.

Tip! If you’re using a powder shadow to line and want more intensity, load your brush head with eyeshadow first, then wet it with a makeup setting spray (I’m currently lurving Make Up For Ever Mist + Fix, but MAC Prep + Prime Fix+ also works great) before applying your eyeshadow to your lash line.

Some people like to wet their brush first, then run it across the powder eyeshadow pan, but in my experience that can make the shadow feel harder after it dries.

Next, after you place your liner, use a finger or a Q-tip to smudge the edge.

After that, apply some mascara on your lower lashes, just directly above the liner, being careful to keep your outer and inner lashes mascara-free, and that should put the focus on that center portion of your lower lash line, and make your peepers really pop! 🙂

nars rue allent velvet duo eyeshadow

nars rue allent velvet duo eyeshadow

[Continue reading…]

There are 6 comments on this post. Leave yours.

Categories: Makeup, Makeup Tips/How To

Why You Need to Try Curling Your Lashes and Applying a Thin Coat of Mascara BEFORE Doing Your Eyeshadow, ASAP

April 7th, 2017 by Karen 11 Comments

Here’s an eye makeup tip to try! Before applying your eyeshadow, curl your eyelashes first, then apply the thinnest layer of your favorite mascara. Now, with your eyes wide open, look straight into a mirror, and notice where the tips of your upper lashes are.

Now here’s the tip: Take your eyeshadow up that far, up to the tips of your lashes.

Voila!

I’ve been doing this the whole week, and it’s been a game changer for me because I tend to take my eyeshadow up really high (like, seriously, almost to my brows!), but when I use my curled lashes as a guide, it’s easy to tell how far up to take my crease colors.

And this tip helps even more if you have hooded eyes or otherwise don’t have a lot of lid space (like moi).

Lastly, when you’re finished applying your eyeshadow, apply a second coat of mascara to cover up any eyeshadow that may have gotten on your lashes.

Your friendly neighborhood beauty addict,

Karen

P.S. TGIF!!!!!! 🙂

There are 11 comments on this post. Leave yours.

Categories: Makeup, Makeup Tips/How To

15-Minute Makeup: Colorful Springy Green and Purple Eyes With the Clinique Chubby Stick Shadow Tints in Mighty Moss and Portly Plum

March 31st, 2017 by Karen 4 Comments

clinique mighty moss

I looked outside my window this morning and noticed that the oak trees on my street have their leaves again! When you look up, all you see is green. It’s gorgeous!

So, I wanted to wear green today.

It is possible to wear color and still finish your makeup in 15 minutes or less

You know, I also wanted to attempt a 15-minute look that wasn’t 100% neutrals.

It’s easier to do quickie makeup with smoky browns and beige (which you know I love), but sometimes I like to challenge myself (but not too much), so I paired a green lid with a purple lower lash line, pink cheeks and pink lips today.

It reminds me that you CAN wear color while doing speedy makeup. It IS possible. You just have to be careful how you go about it, and I think that it also helps to focus on either your eyes or your lips.

Pick one — eyes or lips

If you go with bright lips, you get a lot of bang for your buck. With a bright red, coral, purple, pink or something else, you can dial back everything else, and don’t have to try as hard with your eyes and your skin, etc.

And when you’re in a major rush, bright lips are usually easier to do than bright eyes. There’s more room for error, and you don’t have to worry as much about perfect symmetry.

I mean, do you want to be moving like a makeup maniac at 100 miles per hour for your 15 minutes, or would you rather take a leisurely lip stroll?

I’m just sayin’.

clinique mighty moss 2
Wearing Hourglass Ambient Lighting Blush in Radiant Magenta on my cheeks and Bite Beauty Lip Liner in 008 topped with MAC Fulfilled Plushglass on my lips

[Continue reading…]

There are 4 comments on this post. Leave yours.

Categories: Clinique, MAC Makeup, Makeup, Makeup Tips/How To

What I’ve Been Wearing Lately – NARS Velvet Matte Skin Tint + BECCA Backlight – It’s All About That Base!

March 24th, 2017 by Karen 9 Comments

nars velvet matte skin tint becca backlight final

Been getting a lot of questions about the foundation I’ve been wearing (isn’t that always nice?). I wish I could say, “Oh, it’s the latest thing! Honey, this is gonna change your life!”

But it’s not revolutionary. The products have been out a while. It was a former favorite combo of mine about a year ago, and I’ve gotten back into it. I mix NARS Velvet Matte Skin Tint with BECCA Backlight Primer, about 75% NARS, 25% BECCA.

I put them on the back of my hand first, mix with my finger, apply, then blend with a wet beautyblender.

Oh, boy, mystical stuff happens when these two get together — velvety NARS Skin Tint and peach-alescent (yes, I’m inventing that word), pearly BECCA Backlight. They turn into THE MOST natural-looking, medium-coverage foundation.

Where do I start? It blurs pores and makes your skin look smoother, and it feels and looks fresh and light.

Always a good look, amirite?

The NARS shade I wear is St. Moritz (a.k.a. “my winter color”), but as I get more sun, I’ll add a few drops of Cuba, because I’m overly complicated like that. 🙂

Really, though, if you aren’t turned off by the idea of getting two shades of the same foundation for your skin in different seasons, I highly recommend it.

I’ve never tried this combo with BECCA First Light, which is their new purple version of Backlight. First Light doesn’t really do anything for my skin tone, but lots of ladies love it. It’s worth a try.

If you live near a Sephora that carries BECCA and NARS, maybe you can take this combo for a spin if you ask an associate for samples, and you never know, they might even hook you up with other samples, too! 🙂 I’ve had that happen, and it always makes my day.

Anywho, that’s the skinny on what I’ve been wearing.

Isn’t it funny how you forget sometimes things that you find and love so much? Why did I ever stop using it?? Something must have distracted me…

Your friendly neighborhood beauty addict,

Karen

There are 9 comments on this post. Leave yours.

Categories: Becca, Makeup, Makeup Tips/How To, NARS

Why Paper Towels Are a Blending-Challenged Girl’s Best Friend

March 21st, 2017 by Karen 6 Comments

I’m writing this in part because this is something that I always forget, but then I remember, but then I forget, and I want to remember it because whenever I do remember it, I’m like, “Dang, girl! You have to keep doing that!”

It’s just this: whenever you’re blending multiple colors on your lids — like more than three — it helps A TON to have a couple of clean paper towels handy that you can use to remove product from your brushes along the way while you blend your eyeshadow.

This is my big issue with blending: sometimes when I blend multiple colors, they start to get muddy, so instead of seeing a gorgeous gradient that transitions from one color to the next, and the next, I end up with a single mixed, muddy shade that’s made up of a combination of all of the colors from my lash line up.

If you want to look completely insane, take a picture of yourself holding a roll of paper towels…

I think that my blending brushes end up with too much product on them. With all the swiping and the tiny little circles, the bristles on my brush get overloaded, so instead of lifting and pushing each eyeshadow along the skin, the bristles end up just depositing more product, instead of moving it around.

Bottom line, everything muddles together.

To prevent this, I’ll gently run my brush back and forth across a clean paper towel a few times, and I’ll do it several times along the way while I do my eye makeup, to clean the brush as much as possible without actually cleansing it.

It’s a little thing, nothing fancy, but it keeps the muddiness away.

Try it sometime! I know it’s super simple, but I think it’ll help. It sure helps me. 🙂

Your friendly neighborhood beauty addict,

Karen

There are 6 comments on this post. Leave yours.

Categories: Makeup Tips/How To

MAC Make-Up Art Cosmetics Collection James Kaliardos Spring/Summer 2017: Easy, Edgy, Low-Key Eye Tutorial With Strategic Shimmer and Shine

January 25th, 2017 by Karen 12 Comments

mac make up art cosmetics james kaliardos k top
Decked out in makeup from the MAC Make-Up Art Cosmetics collection James Kaliardos Spring/Summer 2017 (one of three sub-collections in a 50-piece launch)

Ever since I started doing different makeup looks for the #MBBInstachallenge, I dunno… Something cool happened. My mind has been opened to different ways to wear makeup, and not just in the traditional sense — like whether I’m going to wear a smoky eye or light color on the lid/darker color in the crease. I feel like I’m thinking outside the box a little more than I used to.

I love looks that are “traditionally pretty” (air quotes), and I have for years, but I feel like I’m more open to trying edgier looks now and wearing them in, like, everyday life.

I did a look today using products from the new MAC Make-Up Art Cosmetics Collection: James Kaliardos Spring/Summer 2017 (there’s some info about the launch, swatches and pics of some of the products down below if you’re interested), and, basically, this look is very much my current style. There are classical elements to it, but it also has an edgy twist.

I feel like I’m entering a new phase in my makeup life where I still like classic makeup or “traditionally pretty” (there are those air quotes again) makeup, but there’s also something unexpected or surprising about it.

Let me walk you through how I did the eyes because, really, that’s what this look is all about.

Start with your basic winged liner

I didn’t do anything fancy with the liner. It’s just a thin line along the top of my lashes with a flick at the end.

My lids, I kept simple and clean, but you could skip eyeshadow altogether. I used MAC Soba Eye Shadow (a MUST HAVE from the permanent line), my favorite satiny golden brown in the whole wide world, and applied that as a wash all over my entire lid, concentrating the color near the lash line.

mac make up art cosmetics james kaliardos k1
It starts with a kitten flick and nude lips

Then, I took the Jumbo Rapidblack Penultimate Liner from MAC Make-Up Art Cosmetics James Kaliardos and dotted it between my lashes to create an illusion of a thicker lash line before drawing my wing using MAC Into the Well Eye Shadow in Midnight Tryst (a dark matte burgundy brown). It’s a powder eyeliner that you apply with a wet brush, and it’s really good when you want liner with a soft, diffused edge.

Incidentally, I’m wearing the MAC Full Face Kit: Moons of Saturn on my cheeks and MAC Lustre Lipstick in Almondine on my lips, both of which are also from the James Kaliardos sub-collection (there are also two other sub-collections in the MAC Make-Up Art Cosmetics collection. Together the three sub-collections comprise the 50-piece release, and each one is a collab with a different MAC makeup artist. In addition to this one by James Kaliardos, there’s one by Diane Kendal and one by Kabuki.

At this step, this is a look you could wear every day, right? It would be fab for running errands, going to school or going to work.

But let’s kick it up a notch! 🙂

Time to strategically place some sparkle and shine

I used two of the Pressed Pigments from the James Kaliardos collection to do this. First, I applied Light Touch, the light pinkish beige, and packed it into the inner corners of my eyes with a wet flat eyeshadow brush.

I wet the brush because I wanted to intensify the shine and make it VERY reflective.

Once that dried, I buffed out the edges with a tapered blending brush so that the pigment looked like it was concentrated in the inner corner. I wanted it to fade out as it moved up toward the inner part of my brow (I did my best to keep it out of the lid area).

Next, I dotted the darker pigment, deep shimmery grayish purple Black Grape, along the center of my lower lashes and purposefully left it messy, because I wanted it to look grungy and imperfect.

mac make up art cosmetics james kaliardos k2
Add sparkle in strategic places

[Continue reading…]

There are 12 comments on this post. Leave yours.

Categories: MAC Makeup, Makeup, Makeup Tips/How To

A Tip for Going Bold: Pair Bold Eyeshadow With Sharp Brows

January 24th, 2017 by Karen 14 Comments

Bold eye colors love sharp brows

Any time I wear bold colors on my lids, I like to pair them with sharp brows…but by “sharp,” I don’t necessarily mean hyper sculpted, super chiseled, pointy Insta-brows. I just mean a neat, filled-in, well-groomed pair of eyebrows to balance out your look.

When you wear brights on your lids and leave your brows messy or untamed, it can look like something’s amiss at the top…like something isn’t quite right, or like your eye look is bottom-heavy.

If you’re going to go to the effort to wear bold eye colors — be it a simple wash of pink or blue, or a magnificent Mardi Gras of multicolored makeup — going the extra mile to fill in your brows and run a brow gel through them can really tie your look together.

And the bold shadow/sharp brows pairing seems to go well with all kinds of different bold eye looks, too. Basically, when my brows aren’t part of the equation, something definitely looks off…

Next time you wear bold eyeshadow (and I hope you do soon!), keep this tip in mind to take your eyes to the next level. 🙂

Your friendly neighborhood beauty addict,

Karen

P.S. Happy Tuesday.

There are 14 comments on this post. Leave yours.

Categories: Makeup Tips/How To

  • « Go to Previous Page
  • Go to page 1
  • Interim pages omitted …
  • Go to page 17
  • Go to page 18
  • Go to page 19
  • Go to page 20
  • Go to page 21
  • Interim pages omitted …
  • Go to page 93
  • Go to Next Page »

Primary Sidebar

Welcome to Makeup and Beauty Blog

Welcome to Makeup and Beauty Blog! My name is Karen, and I’m a freelance writer obsessed with makeup.

Makeup and Beauty Blog features daily product reviews, makeup tips and beauty news — like an interactive version of a monthly print magazine, except with occasional pictures of my cat.

Recent Posts

Sundays With Tabs the Cat, Makeup and Beauty Blog Mascot, Vol. 878

Makeup and Beauty Blog Monday Poll, Vol. 894

Makeup and Beauty Blog Monday Poll, Vol. 893

Makeup and Beauty Blog Monday Poll, Vol. 892

Makeup and Beauty Blog Monday Poll, Vol. 891

/* real people should not fill this in and expect good things – do not remove this or risk form bot signups */

Social

  • Facebook
  • Instagram
  • Pinterest
  • Twitter
  • YouTube

Featured Posts

Sundays With Tabs the Cat, Makeup and Beauty Blog Mascot, Vol. 771

Lady Unicorn

Weird Things I Like to Do

brows fill out beforehand

Before You Pluck or Wax Your Brows, You Must Do This

current bare skin status

What’s One Thing That Drastically Changed Your Skin for the Better?

Copyright © 2025 Makeup and Beauty Blog. Get in touch.