• Skip to main content
  • Skip to primary sidebar

Makeup and Beauty Blog | Makeup Reviews, Swatches and How-To MakeupMakeup and Beauty Blog | Makeup Reviews, Swatches and How-To Makeup

A beauty blog blooming with fresh makeup reviews, swatches and beauty tips from your friendly neighborhood beauty addict

  • Home
  • About
    • About
    • Contact
    • FAQ (Frequently Asked Questions)
    • Advertising & Media
  • Categories
    • Product Reviews
    • Makeup
    • Skincare & Fragrance
    • Style & Fashion
    • Hair
    • Nails
    • Tips & Tutorials
    • Just for Fun
  • Brands
  • Store

Makeup Tips/How To

Try This Tip for Bangin’ Brows: Use Your Brow Gel BEFORE Your Brow Pencil (or Brow Powder)

November 12th, 2015 by Karen 20 Comments

brow-gel-first-brow-pencil-second-final

Are you ready to have your brow-loving mind blown?

Because it’s about to happen. I am about to blow your mind right now.

OK, are you ready?

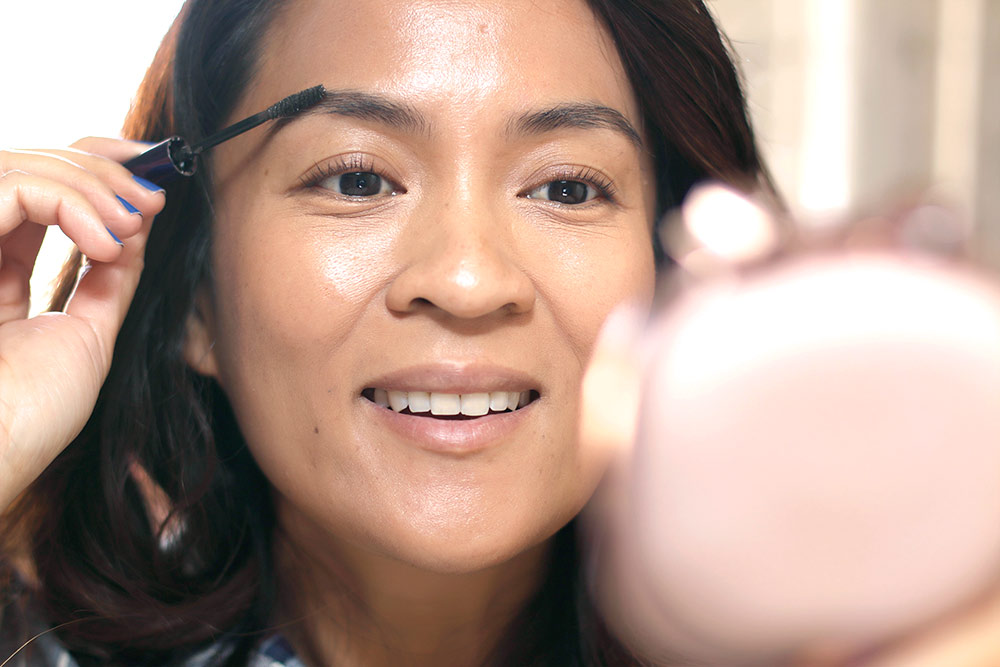
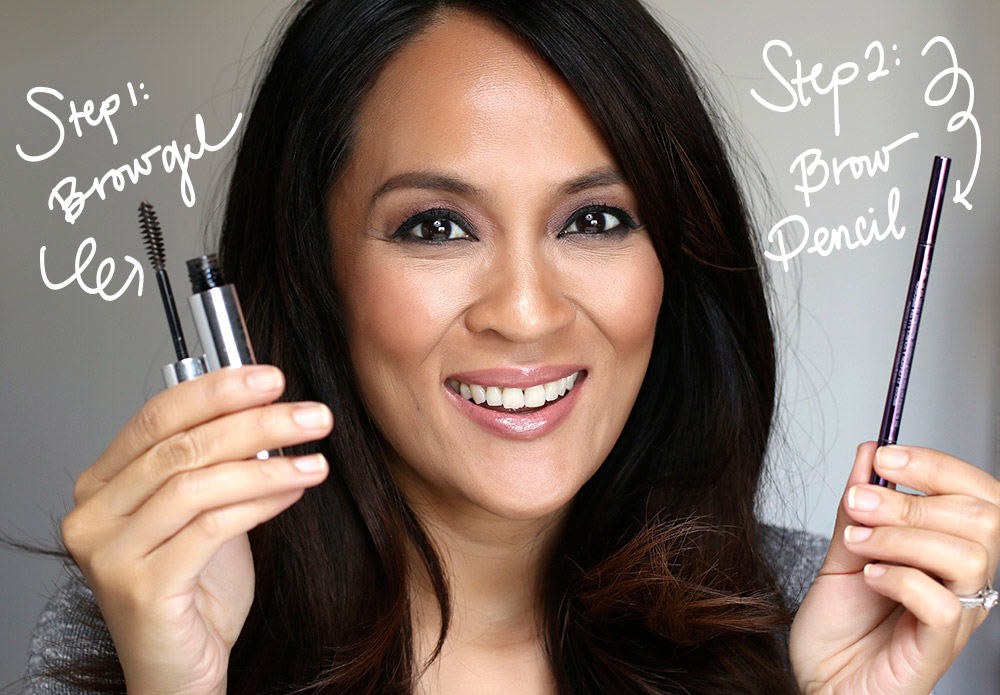
Here we go… I want you to give this a try: when you get a chance, try applying a brow gel to your brows BEFORE you use your brow pencil or brow powder, instead of doing it after.

I know it sounds cray, but hear me out. Yes, it’s unconventional, but I’ve been doing it this way this month, and I swear it works better for me than doing it the other way around, where you start with your brow pencil and follow that up with your brow gel.

And here’s why: when I apply the brow gel before using a brow pencil, the gel thickens my little brow hairs and makes them slightly stickier, so that when I then use my brow pencil (or whichever other filler I choose), the product has something more substantial than bare skin and hair to adhere to. The pencil product clings to the hairs and skin better and even lasts longer.

Plus, when I do go the conventional route and start by filling in my brows with a pencil before setting them with a gel, I inevitably end up with bare patches that I end up having to re-fill with pencil again, as the gel inevitably disturbs what I previously did with the pencil, gah!

I don’t know if this is just because of me and the way I do it, but the re-filling doesn’t happen when I start with the gel, so it also ends up saving time and product.

The key is to wait for your brow gel to be almost completely dry (about 80%) before you use the pencil, because if you go in with your pencil while your gel is sopping wet, it’ll just look messy.

I’ll usually apply the gel, then brush my brow hairs into place and wait until the gel is about 80% dry before using the pencil to fill in the sparse spots. Then when I’m done with that, I’ll do a light brush through once more to mellow out any overly dark areas.

By the way, my go-to holy grail brow combo has been Anastasia Beverly Hills Clear Gel and Urban Decay Brow Beater (I wear the shade called Neutral Brown) for the past six months, and I think it’s a great combo to use with this method.

Give it a try sometime! I hope you like how it works. 🙂

Your friendly neighborhood beauty addict,

Karen

There are 20 comments on this post. Leave yours.

Categories: Makeup Tips/How To

Quick Makeup Tip: Fill In Your Brows First

November 10th, 2015 by Karen 15 Comments

fill in brows first final

Here’s a quick cosmetics contractor tip to help with your look construction: try filling in your brows before you start applying your eye makeup, instead of filling them in after you’ve finished with your eyeshadow, liner, mascara, etc.

The reason? Well, you may have heard the phrase, “Brows frame the face,” which they do by creating a strong reference point around which to build the rest of your look. When my brows are filled in, it’s easier to tell how far out I need to take my eyeshadow, or how far up I can bring my transition colors, or how long I can make the wing for my winged liner.

Since my face and my brows aren’t perfectly symmetrical (seriously, most aren’t), filling in my brows first and getting them to look symmetrical sets me up for a more polished, symmetrical finished makeup look.

Mastering Cat Eyes, by Jeremy Renner and Tabs the Cat
I know you wish this book was real!!

[Continue reading…]

There are 15 comments on this post. Leave yours.

Categories: Makeup Tips/How To

Don’t Be Afraid to Use Multiple Primers to Address Different Issues Around Your Face

November 4th, 2015 by Karen 32 Comments

make up for ever primers
Mix and match your primers!

One of the beautiful (but sometimes frustrating when you can’t control yourself) truths about makeup is that you can make it as easy or as complicated as you want.

Case in point: primer. Most of the time, either because I’m inherently lazy or because I’m almost always running behind, I’ll use a single un-tinted pore-minimizing primer all over my face, except for on my lids, where I’ll use a separate eye primer, but sometimes I’ll feel like going the extra mile, so I’ll use a combination of multiple face primers, and sometimes I’ll even incorporate an additional color-correcting primer.

Make Up For Ever’s Step 1 Skin Equalizers are good for things like this.

make up for ever primers
Make Up For Ever Radiant Primer (left) and Smoothing Primer (right)

When I feel like going that extra mile, before applying my main face primer, I’ll use a separate orange-tinted color-correcting primer first, and I like $36 Make Up For Ever Radiant Primer Peach for this, to neutralize any purple, blue and gray tones on my skin, which for me is usually under my eyes, around my mouth and along my jawline.

make up for ever redness correcting primer
Make Up For Ever Redness Correcting Primer ($36)

[Continue reading…]

There are 32 comments on this post. Leave yours.

Categories: Face, Make Up For Ever, Makeup Tips/How To

How to Line Your Lips

October 29th, 2015 by Karen 25 Comments

I swear, sometimes lip liner makes me feel like the most uncoordinated person to have ever lived. On the one hand, it should be easy, right? I mean, if a kindergartner can trace a picture of a unicorn in a coloring book, a grown woman should be able to outline her lips, but nooo! Try it sometime with a dark plummy black or red. Not easy. Drawing a symmetrical, even outline can be a lot harder than it looks, especially with really bright or dark shades.

Breaking the whole process down into baby steps helps, like using short strokes with the pencil and drawing the lines on my upper lip in an upward direction.

This video is a little different than my usual review videos. It’s more on the instructional side. I hope you find it helpful, and I hope it inspires you to rock a good lip liner soon. Now’s a great time for deep plums, reds and browns. 🙂

Products mentioned

  • Nuxe Reve de Miel Lip Balm ($19)
  • Hourglass Panoramic Lip Pencil in Raven ($28)
  • MAC Matte Lipstick in Lady Danger ($17)

As always, thank you for watching.

Your friendly neighborhood beauty addict,

Karen

There are 25 comments on this post. Leave yours.

Categories: Lips, Makeup Tips/How To, Video

Quick Makeup Tip: Fight Glitter Eyeshadow Fallout by Shielding Your Under-Eye Area With a Tissue

October 27th, 2015 by Karen 23 Comments

quick glitter tip

This is what I like to call “the tissue trick,” even though I’m doing it here with a paper towel.

To avoid getting glittery fallout all over the freakin’ place, I like to shield my under-eye area by tucking a tissue under my lower lash line and using it as a protective glitter-catching barrier.

Ah, the joys of glittery fallout!

It comes with the territory when you’re working with glitter eyeshadow. The stuff gets everywhere! — under my eyes, on my cheeks, on my nose, on my chin, in my brows, in my hair, on my cat, the counters, my clothes — and it isn’t always easy to remove, especially on my face when I’ve already done my concealer and face makeup.

But the tissue trick works great, and not just with glitter fallout. You can also use it with dark eyeshadows or bold blues, greens, etc., and loose eye pigments, too. It’s like Captain America’s fallout-fighting makeup shield.

Try it sometime. 🙂

Your friendly neighborhood beauty addict,

Karen

There are 23 comments on this post. Leave yours.

Categories: Makeup Tips/How To

Try This Makeup Tip: Do Your Highlighting Before Contouring or Bronzing

October 19th, 2015 by Karen 24 Comments

Clarins Splendours Summer Bronzing Compact K air quotes
T-rex Karen says, “Gaaar! Do your highlighting first, and then do your contouring and/or bronzing.” Actually…I was supposed to be doing air quotes in this picture, but I think it looks more like I have T-rex claws.

For starters, there’s going to be a lot of “and/or” in this post, so I apologize in advance.

Buuut, the next time you don your war paint, try this: if you do any highlighting and/or contouring and/or bronzing (see?) try doing your highlighting before your contouring and/or bronzing, because the order matters! It make a difference.

This is probably a good time to mention that I don’t go gaga over contouring, but I will do it every once in a great while. Bronzing, on the other hand, is an everyday thing for me. I am completely non-functional without a little bit of bronzer, LOL!

Anywho, for the longest time, I did my bronzing before my highlighting. I’m not sure why though… I guess it was just force of habit.

my five best highlighters
Speaking of highlighters, here are five I really like

[Continue reading…]

There are 24 comments on this post. Leave yours.

Categories: Face, Makeup, Makeup Tips/How To

How to Do a Smudgy Liner Daytime Smoky Eye | Tutorial

October 16th, 2015 by Karen 28 Comments

smudgy liner daytime smoky eye

Ah, smoky eyes… How I love, love, LOVE thee.

I love you for your telenovela-style drama, of course, but more than that — I love your gymnastic-caliber flexibility. There are so many ways to creatively interpret smoky eyes, and one of my favorites is this daytime eye look with smudgy liner.

It’s easier than it looks.

No, really! You won’t need a quadrillion brushes or eyeshadows. Just four brushes — a flat eyeshadow brush, a domed blending brush, a tapered blending brush and an angled eyeliner brush — and four eyeshadows, and for the shadows I suggest choosing a progression of colors from darkest to lightest in any finishes that move you from matte, to shimmer, to satin, etc.

smudgy liner daytime smoky eye closeup

For daytime smoky eyes, I do prefer mattes, though, more than shimmers, because the flatter finish says to me, “Let’s set a meeting to work on the fourth-quarter TPS reports,” as opposed to, “Let’s meet at da club to freak on some hot dudes.”

As for your colors, you’ll need a light shade to highlight your brown bone, a slightly darker crease color around your skin tone or one or two shade darker, a color slightly darker than that for the “smoke” on your lids, and then another even darker shade to smudge the eyeliner we’ll be using.

For this look, I went with four shades from the Urban Decay Naked Smoky Palette, namely light beige Thirteen, which I’m using as my highlight shade; peachy taupe Combust, which I’m using as my crease shade; dark brown Whiskey, which I’m using as my lid shade; and dark gray Password to smudge the liner.

urban decay naked smoky
Urban Decay Naked Smoky Palette, $54

[Continue reading…]

There are 28 comments on this post. Leave yours.

Categories: Eyes, Makeup, Makeup Tips/How To, Urban Decay

5 Reasons to Use a Lip Brush

September 28th, 2015 by Karen 12 Comments

5 reasons to use a lip brush

1. Lip Brushes Are More Precise Than Lipstick Bullets

Lip brushes, with their little, compact brush heads, are usually a lot more precise than your average lipstick bullet, so you can place your lipstick exactly where you want it, every time. Plus, they don’t smooth and dull like a lipstick bullet after you’ve used it a few times and the tip gets all smushed and the edges melt away… Not a problem when you’re working with a lip brush.

2. Lip Brushes Waste Less Product

To get the most moolah out of your lipsticks, apply ’em with a lip brush, because when you apply a lipstick directly from the tube, little bits tend to pool and glob in and around your lip lines and other textured areas. Also, once you wear a tube of lipstick down to the nub, don’t throw it away yet! You can reach down into the bullet to get the hard-to-reach stuff with a lip brush.

3. It’s Easier to Apply Your Lipstick Evenly With a Lip Brush

Ever have trubs evenly applying your lipstick? If you do, instead of going back and forth over the same patchy places (and wasting even more product!), even everything out by brushing over your entire lip with a lip brush.
[Continue reading…]

There are 12 comments on this post. Leave yours.

Categories: Makeup Tips/How To

  • « Go to Previous Page
  • Go to page 1
  • Interim pages omitted …
  • Go to page 27
  • Go to page 28
  • Go to page 29
  • Go to page 30
  • Go to page 31
  • Interim pages omitted …
  • Go to page 93
  • Go to Next Page »

Primary Sidebar

Welcome to Makeup and Beauty Blog

Welcome to Makeup and Beauty Blog! My name is Karen, and I’m a freelance writer obsessed with makeup.

Makeup and Beauty Blog features daily product reviews, makeup tips and beauty news — like an interactive version of a monthly print magazine, except with occasional pictures of my cat.

Recent Posts

Sundays With Tabs the Cat, Makeup and Beauty Blog Mascot, Vol. 878

Makeup and Beauty Blog Monday Poll, Vol. 894

Makeup and Beauty Blog Monday Poll, Vol. 893

Makeup and Beauty Blog Monday Poll, Vol. 892

Makeup and Beauty Blog Monday Poll, Vol. 891

/* real people should not fill this in and expect good things – do not remove this or risk form bot signups */

Social

  • Facebook
  • Instagram
  • Pinterest
  • Twitter
  • YouTube

Featured Posts

Sundays With Tabs the Cat, Makeup and Beauty Blog Mascot, Vol. 771

Lady Unicorn

Weird Things I Like to Do

brows fill out beforehand

Before You Pluck or Wax Your Brows, You Must Do This

current bare skin status

What’s One Thing That Drastically Changed Your Skin for the Better?

Copyright © 2025 Makeup and Beauty Blog. Get in touch.