• Skip to main content
  • Skip to primary sidebar

Makeup and Beauty Blog | Makeup Reviews, Swatches and How-To MakeupMakeup and Beauty Blog | Makeup Reviews, Swatches and How-To Makeup

A beauty blog blooming with fresh makeup reviews, swatches and beauty tips from your friendly neighborhood beauty addict

  • Home
  • About
    • About
    • Contact
    • FAQ (Frequently Asked Questions)
    • Advertising & Media
  • Categories
    • Product Reviews
    • Makeup
    • Skincare & Fragrance
    • Style & Fashion
    • Hair
    • Nails
    • Tips & Tutorials
    • Just for Fun
  • Brands
  • Store

Makeup Tips/How To

Layer Your Liner for Flickering Feline Flicks in a Flash

November 15th, 2019 by Karen 8 Comments

urban decay starfire
Kitten flicks with a little flash of glitter give you a lot of bang for your buck.

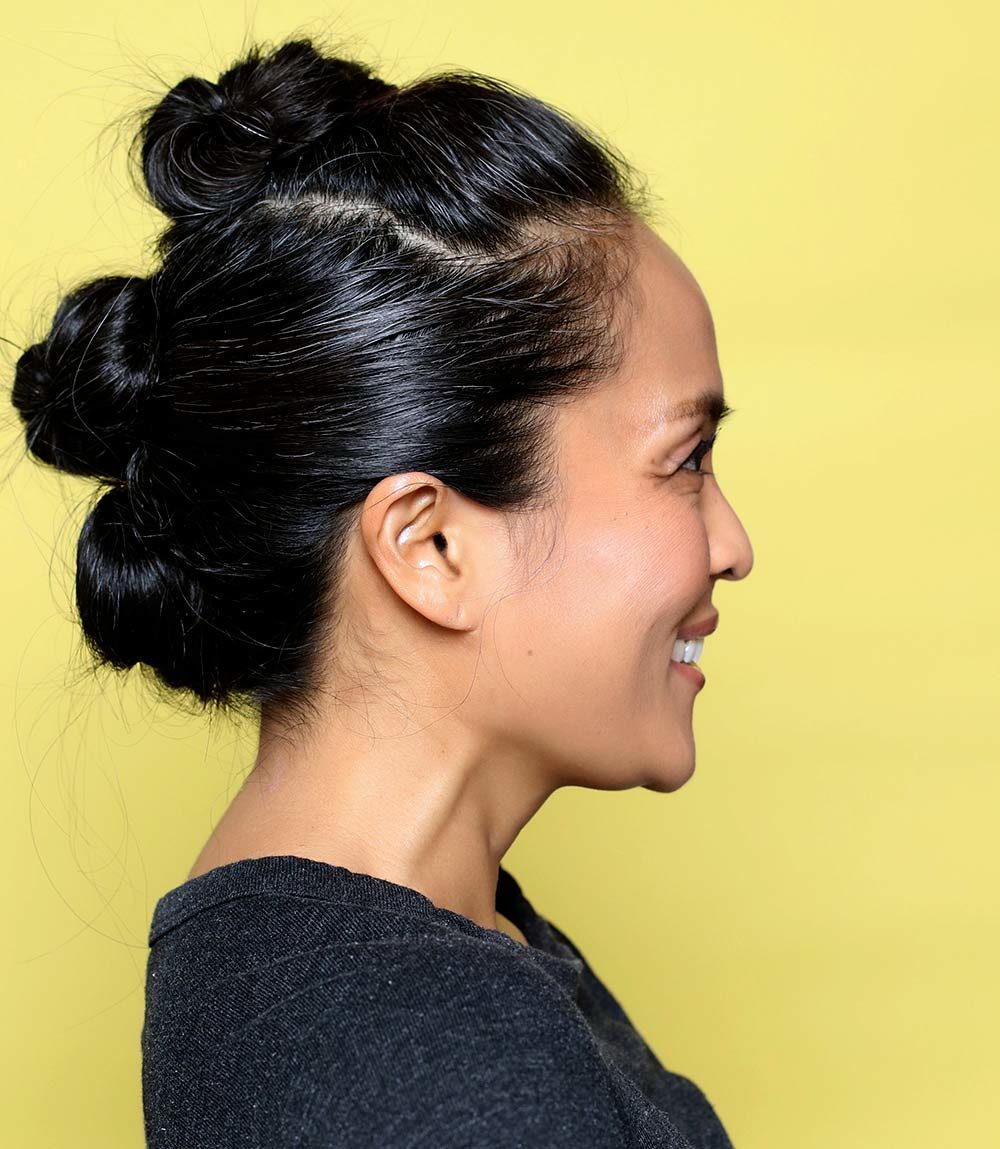
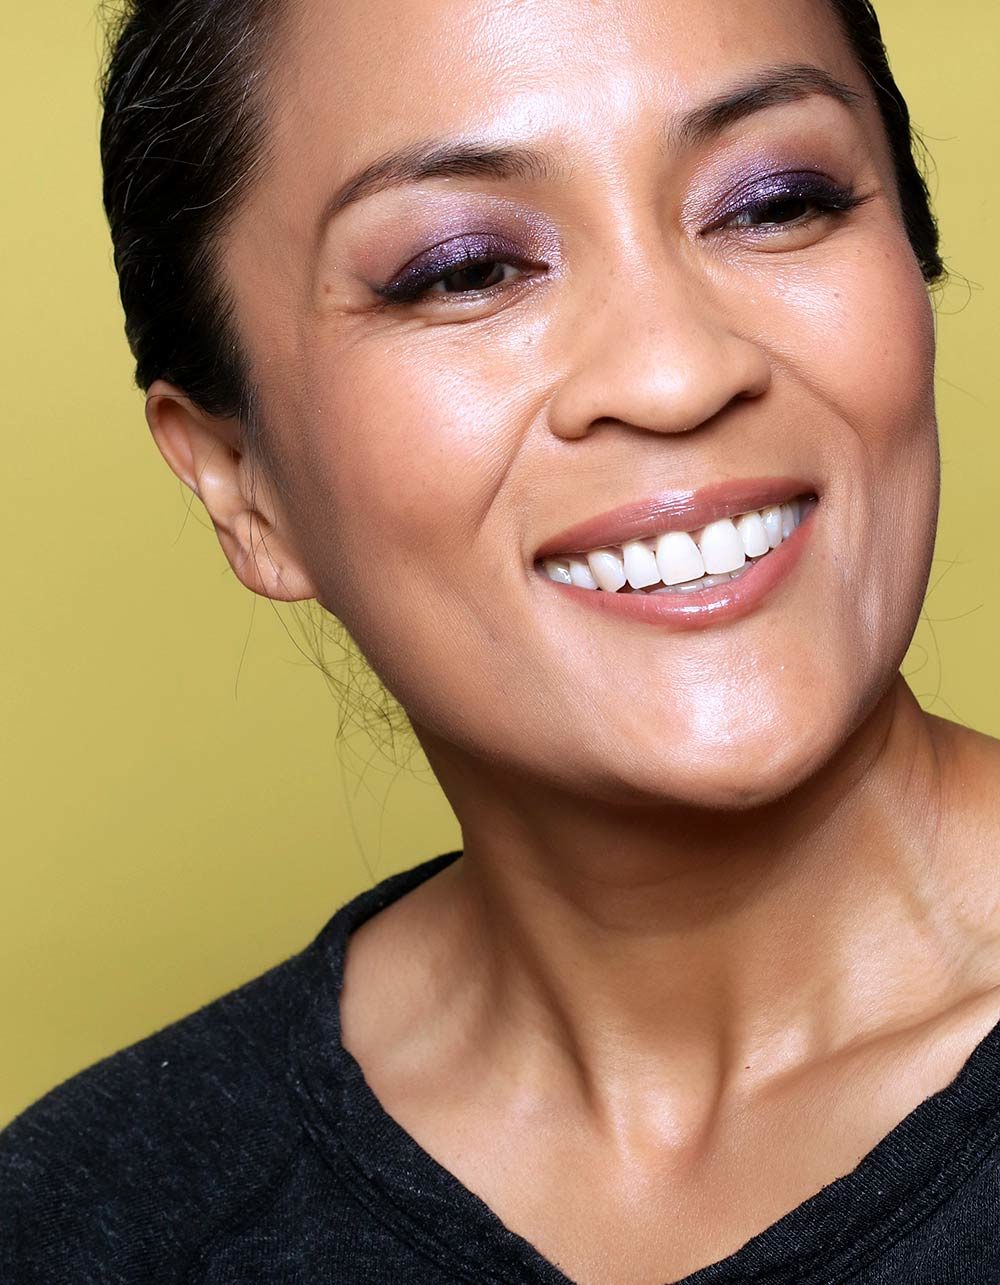
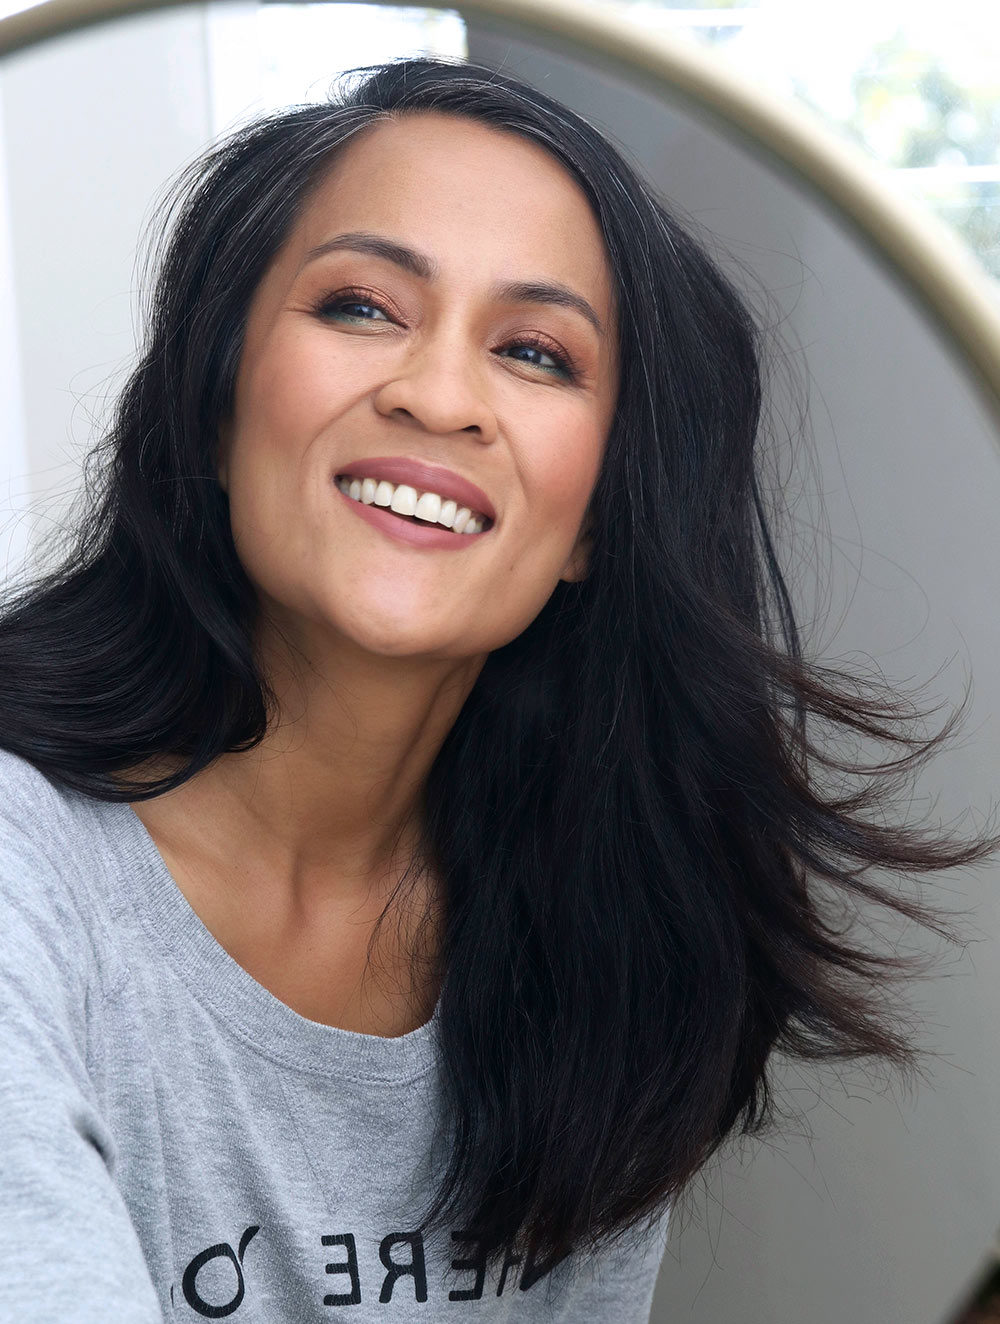
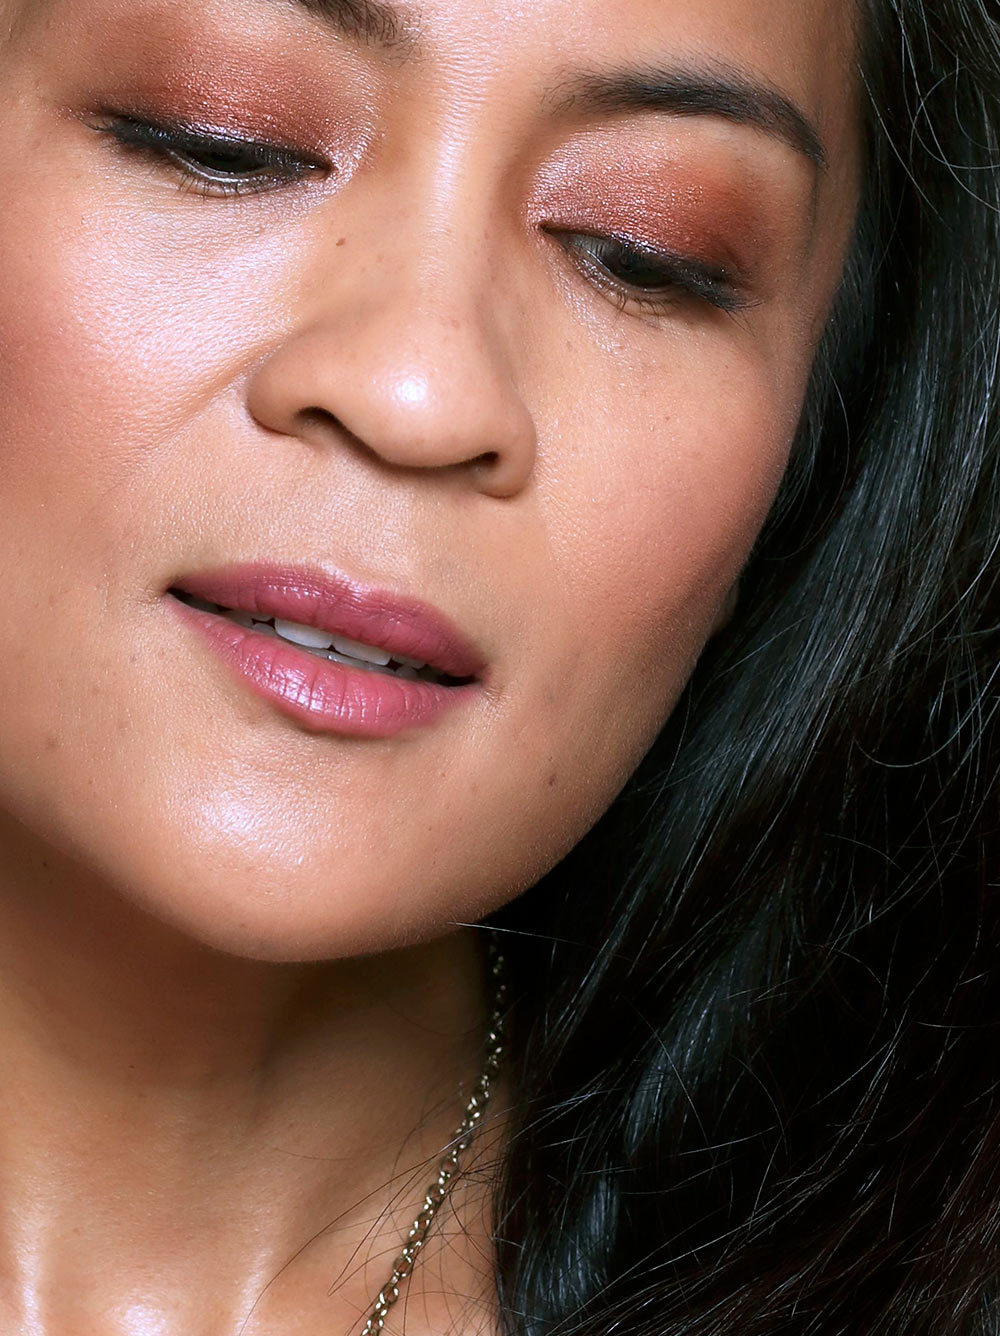
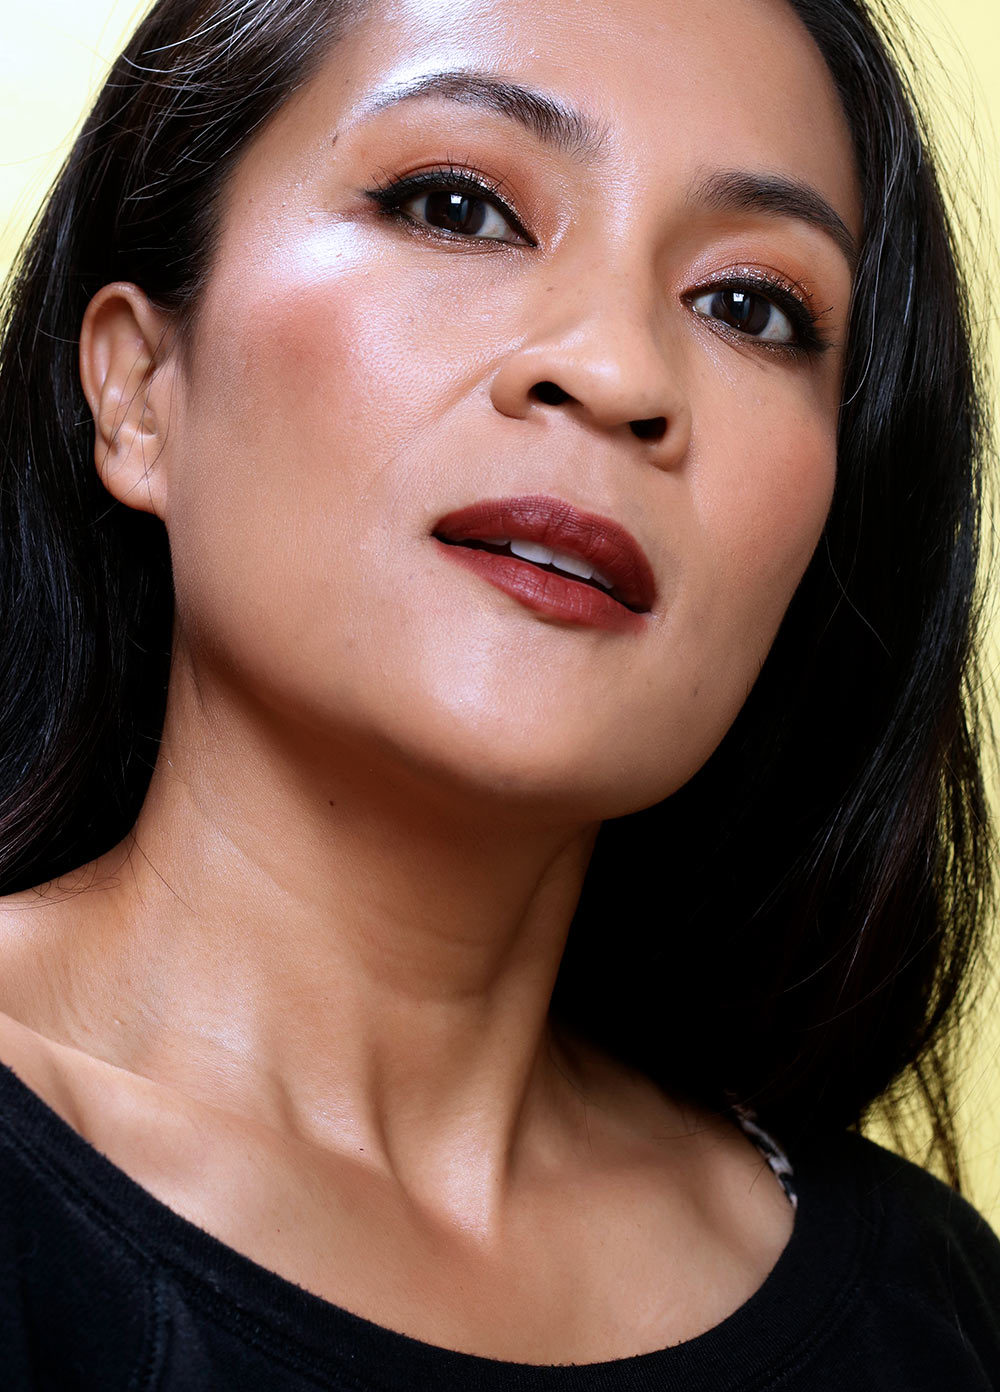
Layering liners. I’ve been doing this a lot lately because 1) it’s fast (since you don’t have to be terribly precise or do any razzle-dazzle complicated eyeshadow blending) and 2) because it lets you unleash the full fury of your creative side by conjuring up all sorts of fun finishes.

For this look, I drew a baby cat eye flick on my upper lash lines with a black felt tip pen liner, then ran a glittery bronze liner right along the edge for sparkle.

Next, I lined my lower lash lines with a pearly bronze pencil liner, smudged the edges, and topped it off with the same glittery bronze liner I used on the upper lash line.

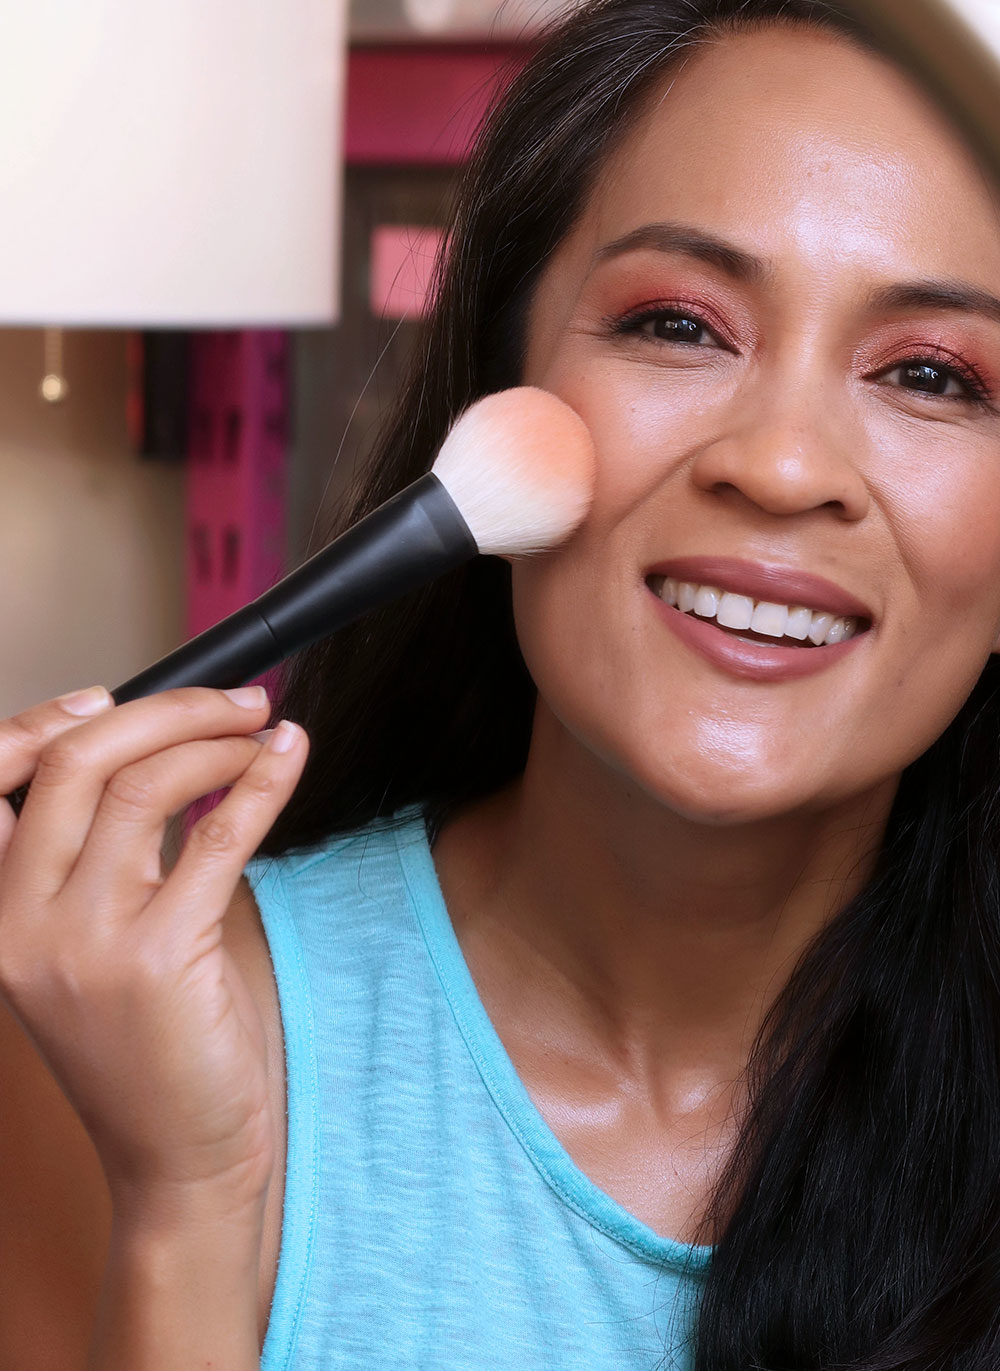
I also defined my lids with a quick sweep of orange-brown eyeshadow, but that was totally optional. You could skip it and just wear liner, and do your brows and mascara, for a complete eye look.

One last thing: my feline flicks are pretty subtle here because I wore this to work, but if you’re going to a par-tay or other to-do, you could go bigger and bolder with your cat eye flicks. Or, you could pat EVEN MOAR GLITTER on your lids.

urban decay starfire
See the glitter peeking through?

Makeup worn in this look

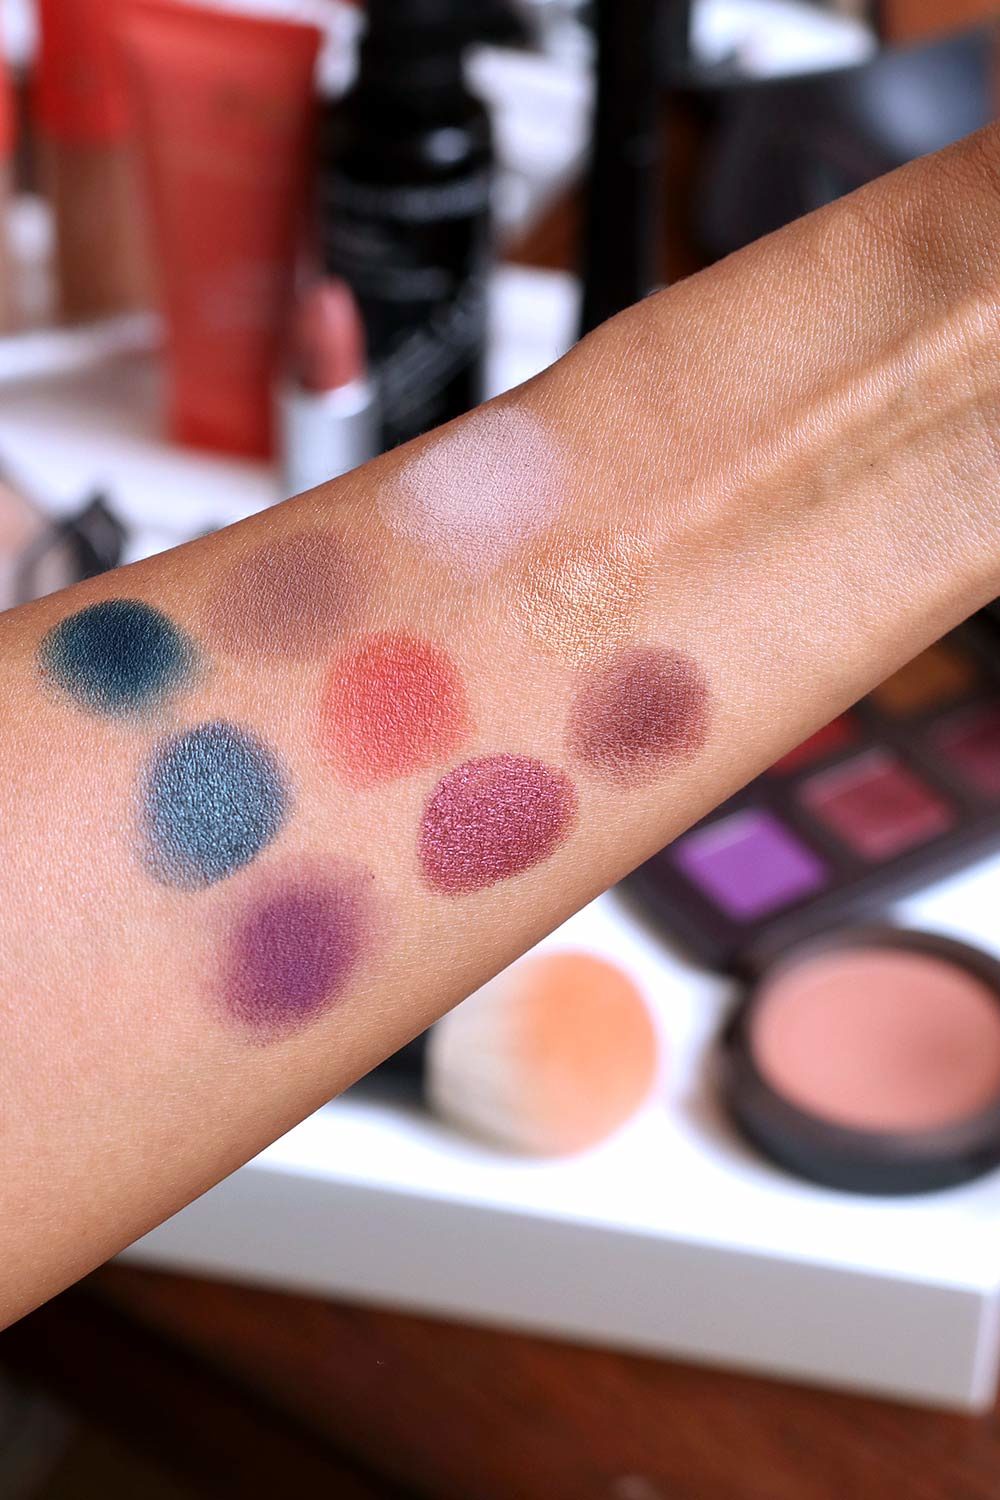
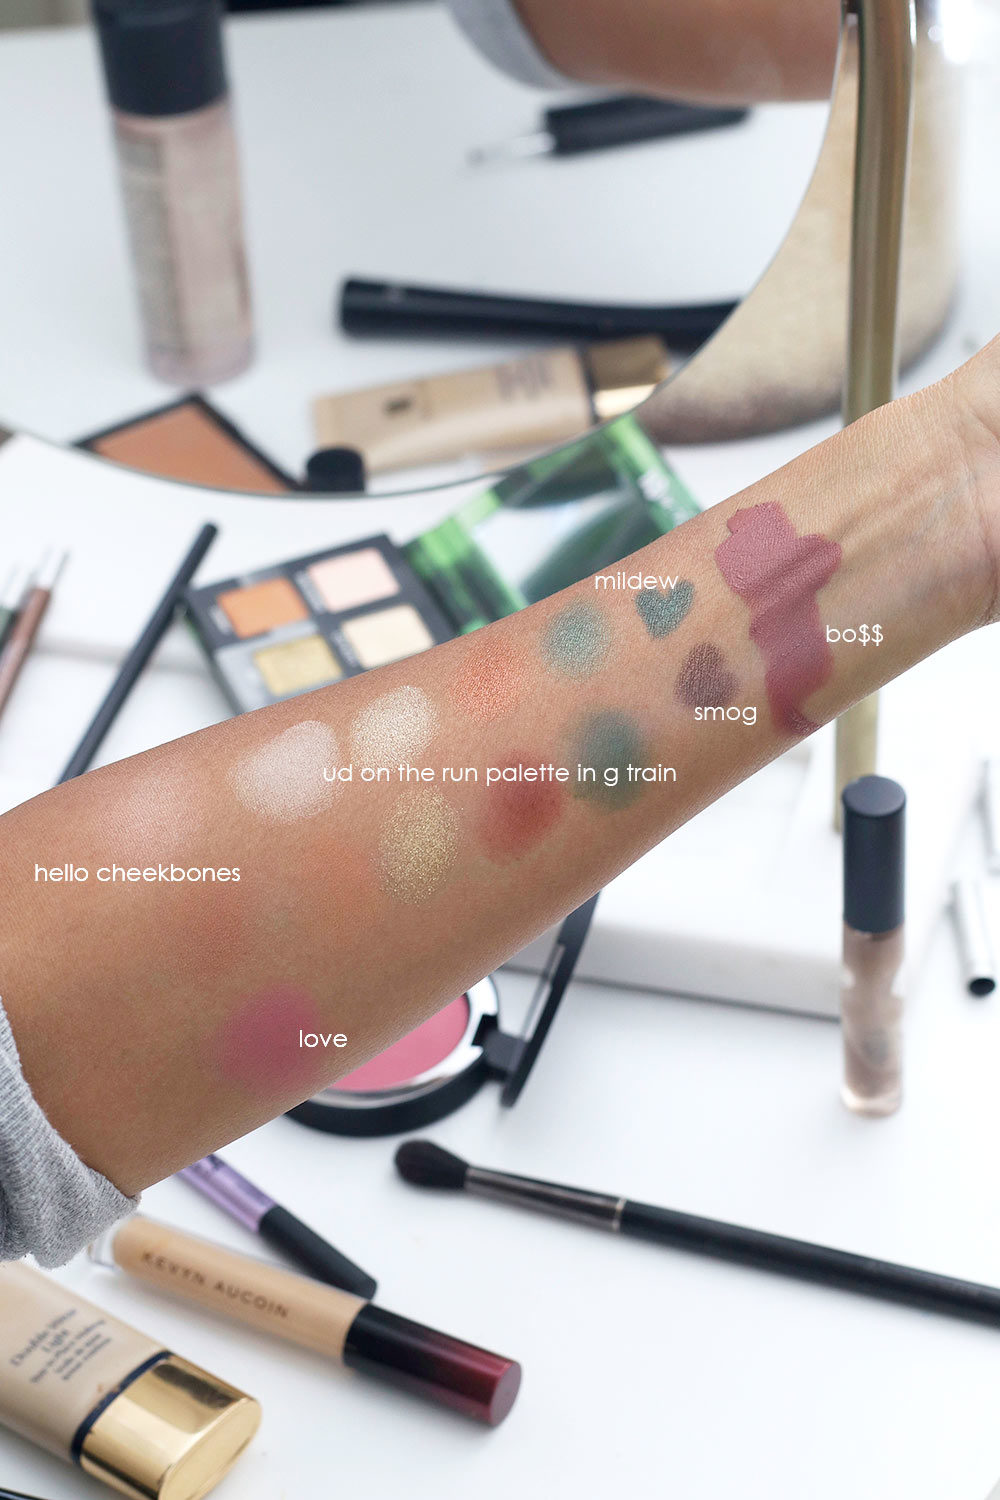
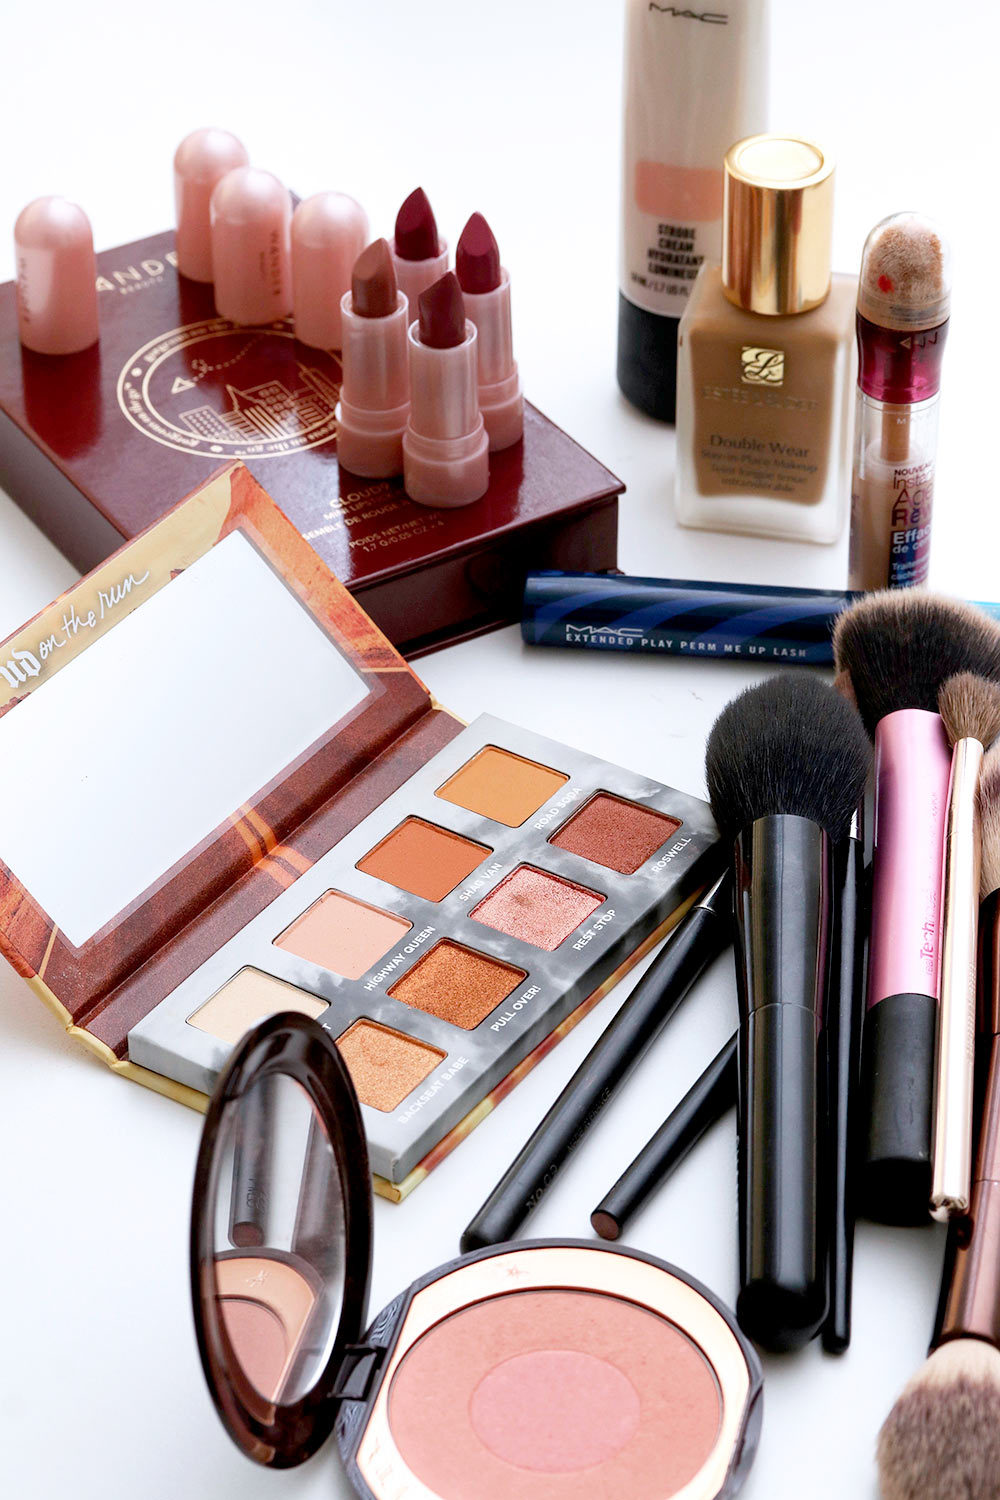
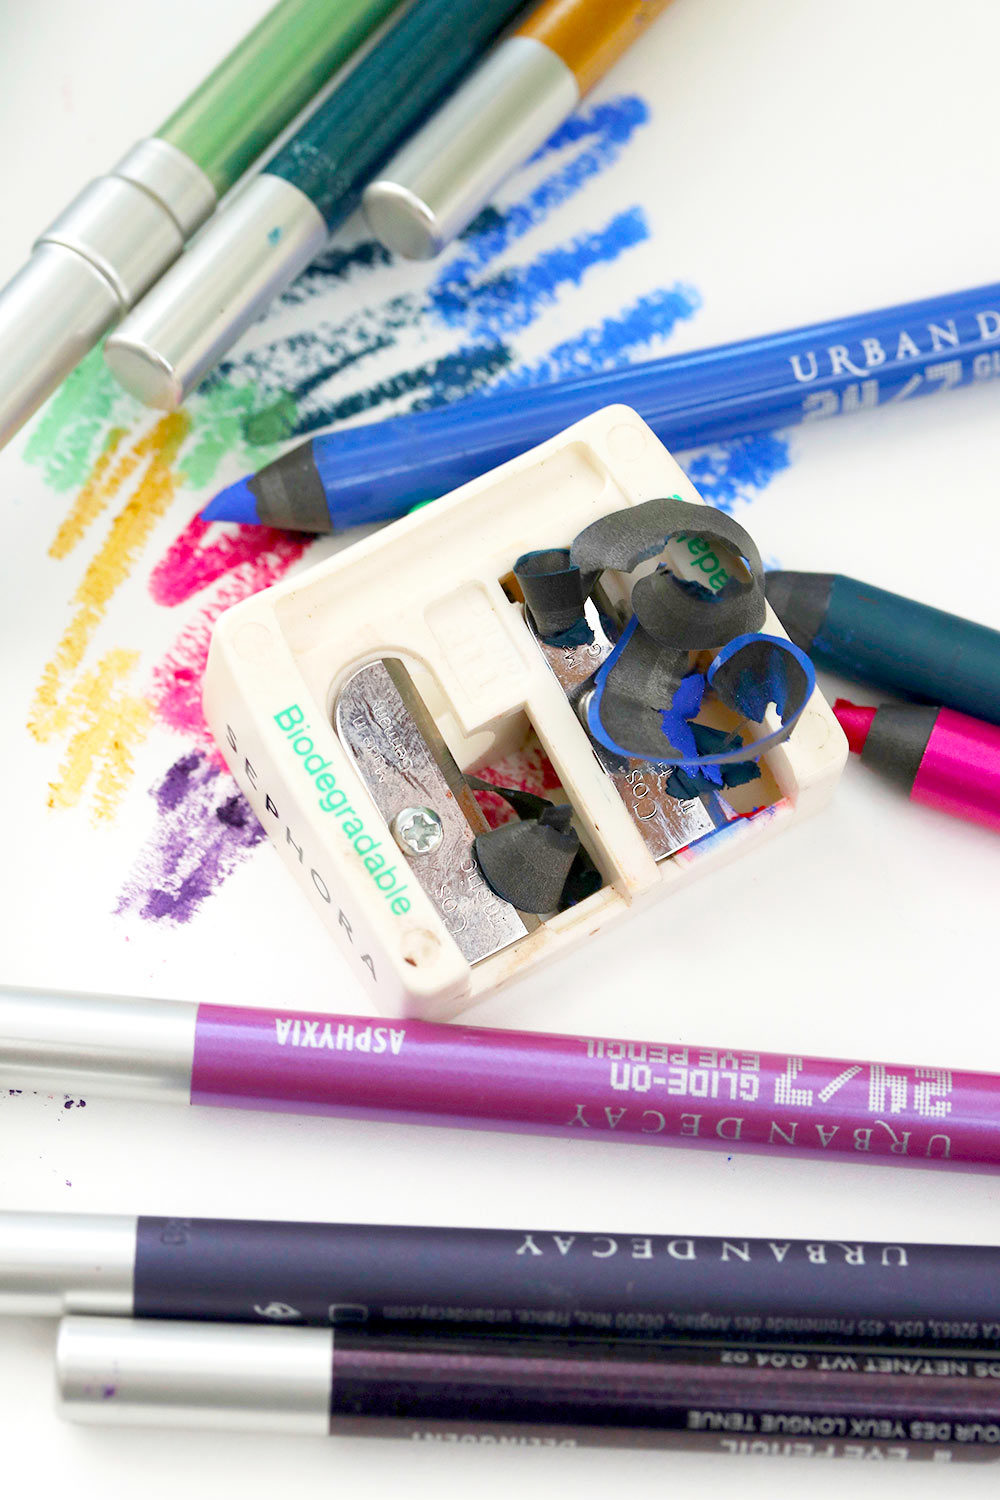
Eyes: MAC Texture (lids), Charlotte Tilbury Feline Flick Liquid Eyeliner (upper lash line), Urban Decay Heavy Metal Glitter Eyeliner in Starfire (upper and lower lash lines), Urban Decay 24/7 Glide-On Eye Pencil in Smog (lower lash line), It Cosmetics Superhero Mascara (lashes), Covergirl Ultrafine Brow Pencil in Soft Brown (brows)

Cheeks: MAC Sunbasque blush

Base: MAC Studio Fix Fluid in NC42 mixed with MAC Strobe Cream in Pinklite set with Mineralize Skinfinish Natural in Medium Golden (this is my go-to base combo)

Lips: MAC Mahogany lip liner all over with a little bit of MAC Paramount lipstick blended on top

Your friendly neighborhood beauty addict,

Karen

P.S. TGIF! ?

There are 8 comments on this post. Leave yours.

Categories: Eyes, Face of the Day (FOTD), Makeup, Makeup Tips/How To

Space Buns and Sparkly Purple Lids

November 12th, 2019 by Karen 11 Comments

triple hair buns
I may or may not have about a billion bobby pins in my hair at the moment.

I’m sure this tri-bun hairstyle has an official/formal name, but I intend to call it “space buns,” because there’s something undeniably Star Wars about it…

If I were hurtling through space on a rocket bound for Mars, and I was required to wear my hair up (to protect the sensitive electronic equipment from static discharge, you see), you better believe I would NOT be rocking a basic low pony.

SPACE BUNS ALL THE WAY, GIRLFRIEND.

Side note: Connor calls this a “pony hairstyle” because she’s into horses at the moment.

Maybe it’s the stars twinkling in the firmament…but sparkles and space buns just seem *right* to me, hence the purple glitter in this look.

mac wishful thinking
Wearing some newness from the MAC Holiday collection

I got a few compliments from my coworkers when I wore this to the bakery the other day. 🙂 It was nice. I think it was because this is one of those looks that isn’t too over the top in terms of base and lips (I kept the foundation super sheer and the lips glossy and subtly sparkly, which boosts the wearability for daytime), but I think the glitter is punchy and fun enough to catch your eye.

If you like this type of makeup, you need to follow Katie Jane Hughes on Instagram ASAP. She’s a celeb makeup artist known for her sheer base, the wings she does, and her penchant for sparkle. It’s very inspiring!

mac wishful thinking
I’m wearing MAC Spellbinder Shadow in Wishful Thinking on my lids.

I’m using some new MAC products from the very sparkly Staring You holiday collection, by the way. This collection, which is out now, has new Spellbinder Shadows in glittery holiday shades (you might remember these ionized eyeshadows from 2016).

mac starring you holiday 2019
The new, limited edition MAC Starring You holiday 2019 collection, available now

Two things if you plan on picking up one of these loose shadows: 1) most definitely DO NOT skip wearing an eyeshadow base; and 2) apply it using a stiff, flat eyeshadow brush, or your fingers.

If you’d like to chat more about the Spellbinders, drop me a comment. I’m happy to help!
[Continue reading…]

There are 11 comments on this post. Leave yours.

Categories: Collections, Face of the Day (FOTD), Hair, MAC Makeup, Makeup, Makeup Tips/How To

3 Tips for Wearing Red Eyeshadow (and a 20-Minute Makeup Look)

November 6th, 2019 by Karen 18 Comments

viseart libertine
I may or may not be in my pajamas, FYI.

Fall-inspired look, TAKE TWO.

I think this one’s a little closer in terms of vibe to the Thanksgiving baking accouterments I found at Michael’s the other day… More fall, and less summer, with shimmery reddish copper lids, bronze cheeks and nude-beige lips.

I wore it to the bakery the other day… The bakery in my kitchen, THAT IS! Had this on while trying to work out the pumpkin/pecan cupcake situation (yes, this is a thing I’m working on). In a nutshell, I think I found a good balance between a spicy pumpkin cupcake, and brown sugar pecans, but that’s a story for another time…

As for this look, here are some things you may find helpful when wearing reddish copper eyeshadow, or really any shadows with red tones:

1. Full-coverage foundations make a HUGE difference

You know me; I like to wear as little as possible in terms of base products, but whenever I try to do minimal foundation/concealer that incorporates any sort of copper, coppery red or red eyeshadow, I look tired, messy and juuuuust not right. Babe, if you’ve got anything remotely red happening on your lids, then go for full-coverage foundation. A full-coverage base balances with the red eyeshadow’s POW! very nicely, methinks.

2. Tightline with a black liner

You need something like a black liner to add a visible “break” or barrier between your red eyeshadow and the whites of your eyes; otherwise, it can look kinda “off.” If black seems too harsh for you, try a dark brown.

3. Do your eye makeup first

Why? Because you want absolutely NO red underneath your lower lash line, and you’ll want to completely remove it before doing your base. Then, after you clean up, apply a concealer. I’m usually team “Skip the Under-Eye Concealer,” but in this case, I’m thoroughly on board, because, again, it can look weird if you skip it.

viseart libertine
Oh, hai, fall makeup!
viseart libertine
Spending time with one of my blush faves, MAC Gingerly
viseart libertine
Makeup I’m wearing in this look!

viseart libertine
I’m wearing the coppery red (in the middle) mixed with the golden bronze.

[Continue reading…]

There are 18 comments on this post. Leave yours.

Categories: Eyes, Face of the Day (FOTD), Juvia's Place, Kahina, Lips, MAC Makeup, Makeup, Makeup Tips/How To

3 Powerful Tips for Doing Quick, Colorful Makeup (And a 20-Minute Bronze/Green/Gold Eye Look With Pink Cheeks and Nude Matte Lips!)

October 31st, 2019 by Karen 17 Comments

urban decay on the run g train
Today’s 20-minute makeup look

Working at the bakery has been such a blessing in so many ways, makeup and otherwise. I’ve been learning so many new things, and the loneliness I’ve felt for a long time is finally starting to leave.

In terms of makeup, though, my goodness! — the 15-minute window I typically have now to don my face paint in the mornings has been the catalyst for all manner of shortcuts.

Like these three powerful tricks you can use when you want to do quick, colorful makeup (but don’t have a lot of time). I used them for to do bronze, green and gold eye look (paired with pink cheeks and a matte nude-pink lip), which I wore to the bakery yesterday…

urban decay on the run g train
The color palette!
urban decay on the run g train
YER SO CLOSE.

Tip No. 1: Intensify and extend the wear time of your eyeshadow by using a long-wearing pencil liner as a base

This is one of the speediest ways I know to 1) get your eyeshadow to last longer, and 2) to amplify the intensity of your shadows to make them look brighter and richer.

For this, you want to use a liner that sets relatively quickly…like in less than 30 seconds. I love the Urban Decay 24/7 Glide-Ons because they come in tons of colors and finishes. And, because they dry very quickly, I’m forced to work fast!

Note: When you’re using a quick-drying pencil liner as a base, your best friend is a stiff (but still soft) synthetic brush, ideally something with a slightly domed tip, like the Real Techniques Domed Shadow Brush.

Synthetic bristles tend to be more rigid than natural bristles, so you can push and blend that liner and tell it where to go, LIKE RIGHT MEOW!

In the look I wore yesterday, I wore Urban Decay 24/7 Glide-On Eye Pencil in Smog as a base. I roughly drew a few fatty-bo-batty messy lines all over my lids, and then I took the Real Techniques brush and buffed the liner into a thin, even layer.

Then, I applied warm browns and bronzes from the new Urban Decay On the Run Palette in G Train.

Tip No. 2: Use an angled brush to line your eyes with the darkest shade from your favorite eyeshadow palette

Not only is lining with an eyeshadow and angled brush super speedy, but it’s also forgiving, so you can make mistakes and nobody will even realize it!

Note: If you want the most room for error, keep the brush head dry for a soft and diffused line.

You can also wet your brush head with a setting spray to dial up the richness of the color, but FYI, it’s not as forgiving as a dry application.
[Continue reading…]

There are 17 comments on this post. Leave yours.

Categories: Face of the Day (FOTD), Makeup, Makeup Tips/How To

Long Lasting Makeup for Hot Kitchens (A 15-Minute Look)

October 25th, 2019 by Karen 41 Comments

What’s baking?

No, I am not trying to tease your sweet tooth…but yes, you are staring at cupcakes for a reason. ??

That reason would be this: I started a new job this week! At a bakery!

I know, it’s out of my lane, but with Connor going to preschool five days a week now, and me having been working at home for eons, I’ve been going a little stir crazy. Then one day a couple weeks ago, an opportunity arose to bake for a local bakery, and I took it.

If you’ve followed MBB for a while, then you probably know that I love to bake at home, and I’d love to get better at it. I want to learn to make all teh things! And I want to be surrounded by sugar and gluten and chocolate and frosting ALL. DAY. LONG.

k baking
Look who’s baking now.

I’ll try to temper/limit the amount of baking-related pics and info I share on MBB (unless you REALLY want to see more, in which case lemme know), but I’ve been doing MBB for almost 13 (!) years now. I love it too much to stop, but mama needs some other interests too. Way I see it, I’ll still be wearing makeup to work at the bakery, so I’ll still have plenty of makeup and skincare to test and talk about. So…you won’t be getting rid of me yet. LOL!

The new new gig is “back of the house,” which means that my primary responsibilities will be the actual baking…of all the delicious things.

Mmm…

First thing I noticed this week in the kitchen for training was that it gets REALLY hot when the ovens are cranking, and even HOTTER when it’s also hot outside, like it has been the past few days.

I wore the littlest amount of stick foundation on my first day (and I also happened to skip powder), so my base had all but slid off my face by the end of my shift.

So, for my second day at work, I busted out the long-wearing guns…

urban decay highway queen palette
When you’ve only got 15 minutes…

Base

Estée Lauder Double Wear Stay-in-Place Foundation (my shade is Honey Bronze) and Maybelline Instant Age Rewind Concealer (I wear Golden). Both of these base products last a long while, and neither one looks or feels heavy. I set them with a light dusting of Chanel loose powder, which has a lovely natural finish.

Eyes

A liquid bronze eyeshadow base (Wander Beauty Amber Wave! Layer it under your bronze eyeshadows for added intensity and staying power) with a dusting of a shimmery warm bronze from the new Urban Decay On the Run Mini Palette in Highway Queen. I also went with a long-wearing purple liner on the upper lash line (UD Ether, which pairs well with bronze shades and doesn’t look *too* obviously purple. Unfortunately, it’s discontinued.). Next, I used a long-lasting curling mascara on my lashes (MAC Extended Play Perm Me Up Lashes).

Eyebrows

I was blown away by how well my brows made it through the second day, because — no joke — it was hot ? in the kitchen. I’d assumed they would disappear, BUT THEY DIDN’T! Anyway, I wore NARS Komo brow pencil and MAC Clear Brow Set.

Note to self: this combo frickin’ lasts.

Cheeks and lips

Charlotte Tilbury Ecstasy blush on my cheeks, along with a couple of shades from the Wander Beauty Cloud9 Mini Lipstick Kit (the lipsticks are super creamy, so they don’t really last more than two hours) mixed together.

urban decay highway k closeup
My hair is crazy, I know.
urban decay highway k closeup
Isn’t that purple liner all kinds of amazing?

It took me 15 minutes to do this look, which I put on at 6:45 in the morning.

I’m writing this post a full 12 hours later, and after five hours in a hot kitchen, all of the makeup I used in the morning still looks pretty good, if I do say so myself…with the exception of the creamy lipstick.

Oh, and just in case you’re wondering, I don’t eat cupcakes all day long now, HA HA HA!

I certainly want to though. ?

Your friendly neighborhood beauty addict,

Karen

There are 41 comments on this post. Leave yours.

Categories: Food, Makeup, Makeup Tips/How To

Do “The Double Purple”

October 1st, 2019 by Karen 12 Comments

double purple top pic

I’m 100% on board for coffee and gunmetal eyeliners (they’re workhorses, for sure), but sometimes you want — no, you NEED! — to wear something besides the usual, and that’s when something I like to call “The Double Purple” comes into play.

By adding a gorgeous violet gradient to your lower lash lines, you can incorporate a colorful complexity in your eye makeup while exerting minimal effort.

double purple eye closeup

This tip is great for smaller lids and hooded eye shapes, as the focus is on the lower lash lines.

Here’s what you’ll need

Grab two of your favorite purple pencil liners — one lighter, one darker.

They should be close enough in color that when you see them side by side on your skin, you like how they look. That is to say, they should be harmonious to you.

The darker shade should be one you can wear on your waterline without it smearing off, but it should also be creamy enough to blend. The lighter shade should also be creamy enough to smudge.

Here’s what you do

  1. Start by lining your lower waterline with the darker color, but —-> it doesn’t have to be super neat. You’re totally fine if you end up with a little smudge here and there between your lashes or along your lower lash line.
  2. After your waterline is drawn in, dot a few circles between your lashes with same dark pencil. Then, smudge with your finger, a makeup sponge, the edge of a flat eyeshadow brush or the tip of a pencil brush.
  3. Next, grab your lighter purple, and place a few dots on top of the darker smudged liner. Blend until the two colors on the lower lash line look seamless.
  4. I like to keep liners nice and tight up against my lashes/lower lash line. Basically, I don’t want them to stray too far down because the lower I take that color, the crazier I think the eye makeup looks. By all means, though, if you’re going for edgy, feel free to draw it down as much as you want!
  5. When you’re done, you’ll have a subtle gradient that transitions from dark (on the water line) to light (on your lower lash line).

double purple eye closeup

A few tips

[Continue reading…]

There are 12 comments on this post. Leave yours.

Categories: Makeup, Makeup Tips/How To

3 Tips to Keep Your Manicure Chip-Free and Fabulous

September 30th, 2019 by Karen 8 Comments

essie blue nail polish
Just say no to chips.

Back in 2008, The New York Times tried to make chipped nails a thing.

Yeah…I’m not about that life. I’m all for purposefully messy hair (fun buns 4 life!), but a messy mani gets a HARD PASS. I’ll take my manicures neat and tidy, thank you very much, with a side of “no chips on tips, please.”

There are a couple things that make it easier to live a chip-free nail life, like 1) finding a base and top coat that can withstand everyday life (for me, those are currently the Smith & Cult Base Coat and Essie Gel Couture Topcoat) and 2) taking a few preventative measures to lessen the likelihood of chips at the tips of my nails, which is where I always get them first.

Here are three things that help keep my nails looking freshly painted all week long:

1. Don’t forget to tip

First, before you paint a layer of polish, paint underneath the tips of your nails, and then run the brush along the tip (holding your nail horizontally, brush the polish on the vertical part of the tip).

Wait about 30 seconds before applying your first legit coat.

Why do this, you might ask? Well, because doing it this way covers your tips in an extra protective layer, so as your nails bang about throughout the week, your tips have an extra layer of armor on them.

Taking this tiny extra step makes all the difference in the world for me. I see fewer chips when I paint my nails.

2. Do a three-day refresh

“Siri, remind me to do another layer of topcoat in three days.”

I usually keep the same polish on my nails for a week, and three days is usually the perfect time to freshen up my manis with another topcoat layer.

I mean, you could do one daily, or every other day (I have friends who do that), but if I do too many topcoat layers, it becomes counterproductive because my polish starts to get thick, and then I’m tempted to peel it off when I get out of the shower.

Note: using a good quick-drying topcoat makes you more likely to actually sit down and do this! Sally Hansen has one called the Insta-Dri Top Coat that’s only five bucks and sets in a minute, but right now I’m really into Essie Gel Couture Top Coat overall. It’s super shiny, and it takes about 10 minutes to dry.
[Continue reading…]

There are 8 comments on this post. Leave yours.

Categories: Essie, Makeup Tips/How To, Nails, Sally Hansen, Smith & Cult

Unsung Heroes: The $6 Sephora Collection Eco Biodegradable Sharpener

August 20th, 2019 by Karen 5 Comments

makeup pencil sharpener
All that and a bag of chips!

What’s an unsung makeup hero? For me, it’s an oftentimes underrated makeup morsel, a permanent collection product that scoots under the radar screen of many makeup lovers but regularly rocks my world. The long-running Unsung Heroes series features some of my favorites.

Y’all…with the 15% off VIB sale happening now, I know you’re busy playing chicken with your Sephora cart, but please take a moment to consider one of the most underrated (and best!) tools the mother ship has to offer — the $6 Biodegradable Pencil Sharpener, otherwise known as “the pencil sharpener that elevated my winged liner and saved me from a lifetime of makeup misery.”

It’s the only makeup pencil sharpener I’ve ever owned that I haven’t wanted to hurl across the room.

From sephora.com:

What it is:
A professional-grade, two-in-one pencil sharpener made of an innovative, biodegradable, and sustainable bio-polymer.

What it does:
The Eco Biodegradable Sharpener is a perfect accessory to your cosmetic collection. This sharpener not only accomodates a multitude of pencil sizes, but you can feel confident knowing that you are also helping the environment when you dispose of it. The corn-based PLA body of this sharpener is biologically degradable, while the blade is recyclable. Made in Germany, the carbon steel blades give your pencils the perfect pointed tips for flawless application.

What else you need to know:
This sharpener can be used with a multitude of pencils, sized from 8mm to 12mm. It includes a removable pick tucked neatly into the body to help dislodge the toughest pieces of shavings and lead from the blade.

Sharpest tips EVRRRR

Every successful kitten flick I wore this summer, I totally owe to this sharpener. You know how sometimes you’ll sharpen a pencil, and the end will get nice and pointy but then immediately when you run it across your skin the tip breaks off? That happens to me all the time…but never with this sharpener. The blades whittle dull tips into sharp points with just a few twists and turns, yet they still hold back juuuuuust enough from going past the point of no return.
[Continue reading…]

There are 5 comments on this post. Leave yours.

Categories: Eyes, Lips, Makeup, Makeup Tips/How To, Makeup Tools, Product Reviews, Sephora

  • « Go to Previous Page
  • Go to page 1
  • Interim pages omitted …
  • Go to page 10
  • Go to page 11
  • Go to page 12
  • Go to page 13
  • Go to page 14
  • Interim pages omitted …
  • Go to page 93
  • Go to Next Page »

Primary Sidebar

Welcome to Makeup and Beauty Blog

Welcome to Makeup and Beauty Blog! My name is Karen, and I’m a freelance writer obsessed with makeup.

Makeup and Beauty Blog features daily product reviews, makeup tips and beauty news — like an interactive version of a monthly print magazine, except with occasional pictures of my cat.

Recent Posts

Sundays With Tabs the Cat, Makeup and Beauty Blog Mascot, Vol. 878

Makeup and Beauty Blog Monday Poll, Vol. 894

Makeup and Beauty Blog Monday Poll, Vol. 893

Makeup and Beauty Blog Monday Poll, Vol. 892

Makeup and Beauty Blog Monday Poll, Vol. 891

/* real people should not fill this in and expect good things – do not remove this or risk form bot signups */

Social

  • Facebook
  • Instagram
  • Pinterest
  • Twitter
  • YouTube

Featured Posts

Sundays With Tabs the Cat, Makeup and Beauty Blog Mascot, Vol. 771

Lady Unicorn

Weird Things I Like to Do

brows fill out beforehand

Before You Pluck or Wax Your Brows, You Must Do This

current bare skin status

What’s One Thing That Drastically Changed Your Skin for the Better?

Copyright © 2025 Makeup and Beauty Blog. Get in touch.